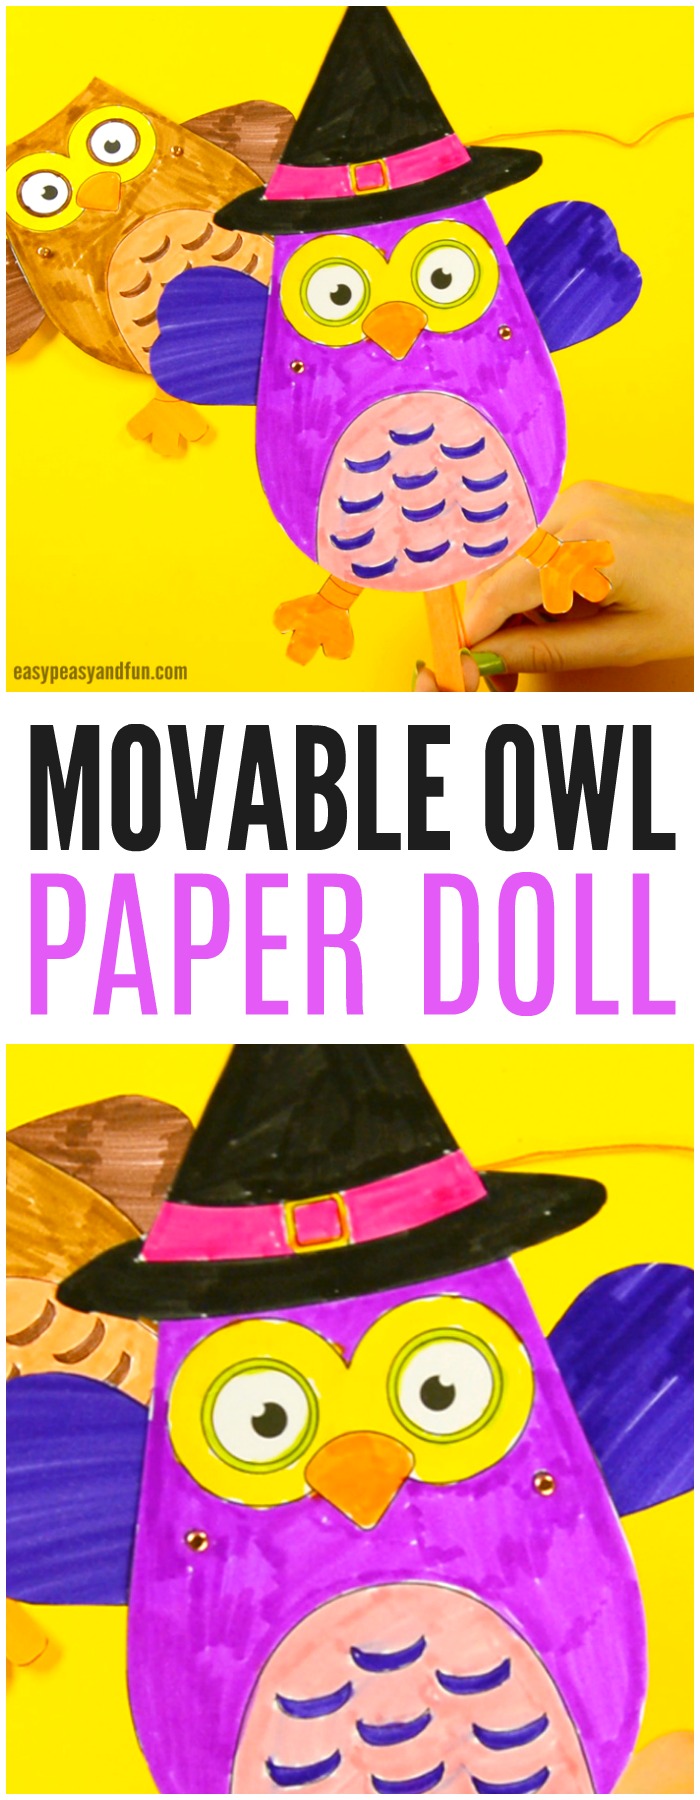
Print our template and make your very own movable owl paper doll. What a hoot!
Glue it onto a craft stick, add some string (we’ll show you exactly how it’s done) and you’ll be flapping those wings in no time.
*this post contains affiliate links*
50 paper crafts your kids can actually do themselves

No fancy supplies — just paper, scissors, and a little imagination.
Be the first to get it on release day — and lock in the lowest price guaranteed.
Owls sure are wonderful creatures, and a great crafting theme for fall and Halloween. This simple movable paper doll is perfect to get into the whole art of articulated dolls as it’s insanely easy to make and really fun to play with.
It can be done using brads or with some “alternative” materials you probably already have at home. I do think using brads is the best, but as I’ve grew up making these kinds of dolls without them, there certainly are many workarounds to brads, but we will get to them later on.
Now it’s time to grab your crayons, coloring pens or other coloring medium and make your very own movable owl paper doll.
Time to get crafty!
How to Make a Movable Owl Paper Doll
What you need:
- our movable owl paper doll template (you can grab it at the end of this tutorial)
- printer
- paper (heavier print paper)
- coloring supplies
- scissors
- string/twine/yarn
- brads
- craft stick
- clear tape
- skewer (or another pointy object for hole poking)
Brads can be replaced small buttons, when I was a kid, I used two buttons and a bit of string instead of one brad. Place one button on each side of the holes and “sew” them together. The string needs to go through one hole, not two or 4. Another alternative is to just make a large knot on each side of the holes.
Watch the Video Tutorial
Or Follow the Step by Step Instructions
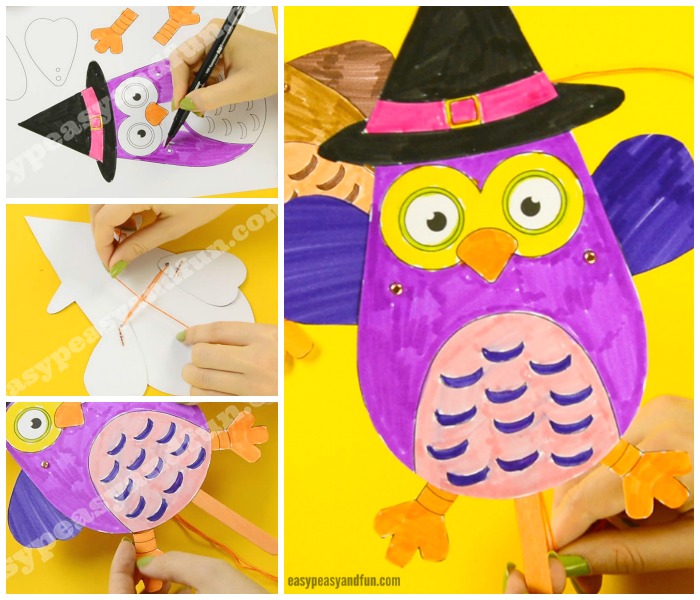
Print out the template. We recommend using heavier print paper (160gsm), the heavier the better.
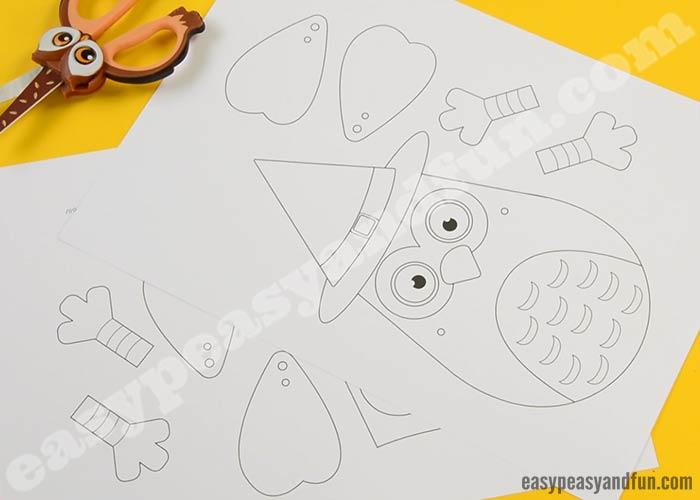
Once you have your template printed out, colour in all the parts of it. We used markers as we love the bright colors.
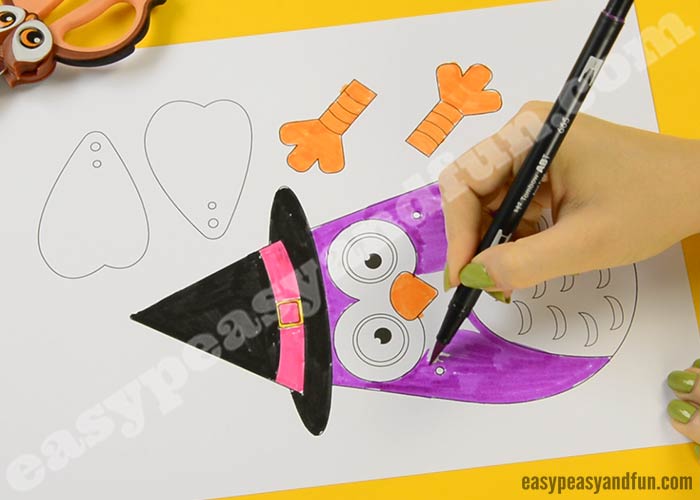
All colored in? Time to cut out all the pieces of your movable doll.
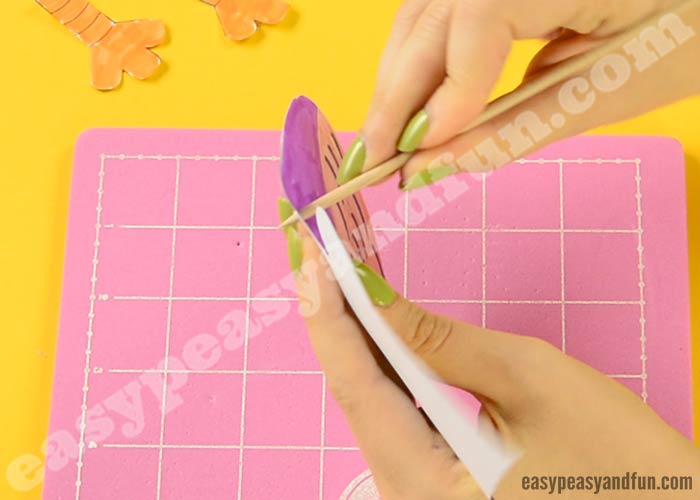
Punch holes with a skewer on the body of the owl – all spots are marked with a small circle. It’s best to place a crafting mat or cardboard under the template as you punch the holes. Now it’s time to punch the holes on the wings too. Nice and easy.
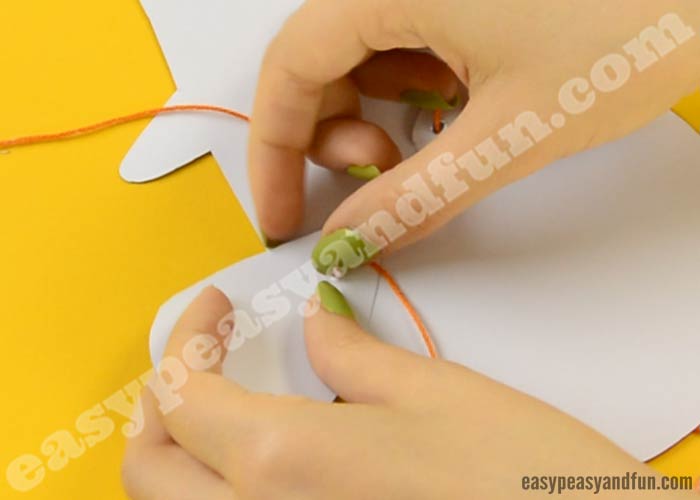
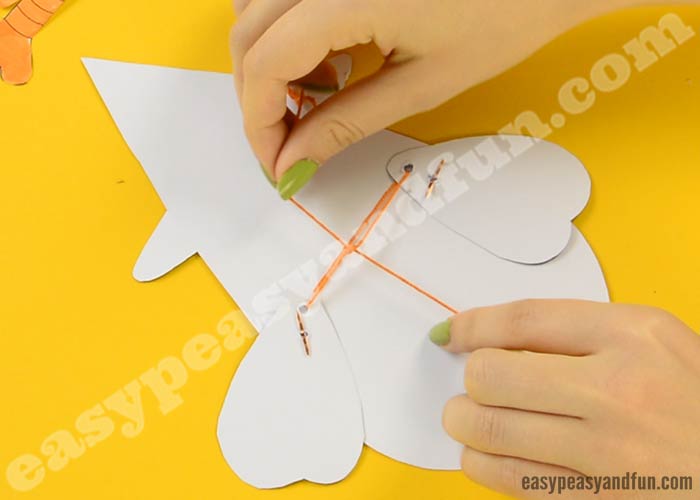
Now take the thread/yarn/twine/(…) and string it through the hole on the outside of the wings. String through the other wing, again through the outer hole (see video).

Set aside.
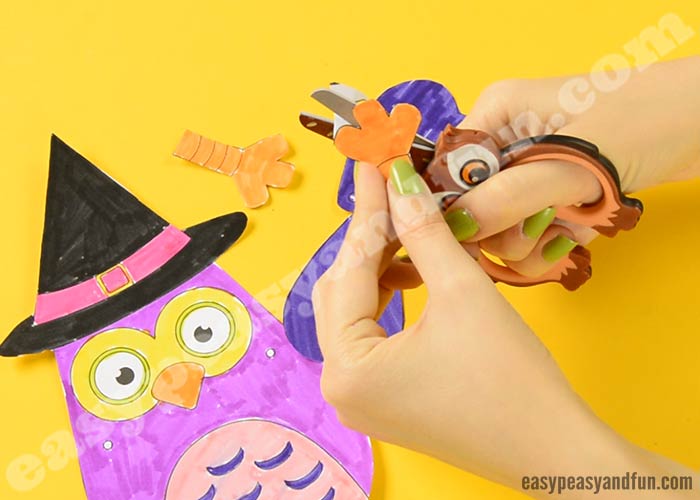
Push the brad through the hole one the owl.

Turn around, take one wing and push the same brad through the hole on the owl wing.
Spread the brad ends to secure it. Do the same with the other hole.
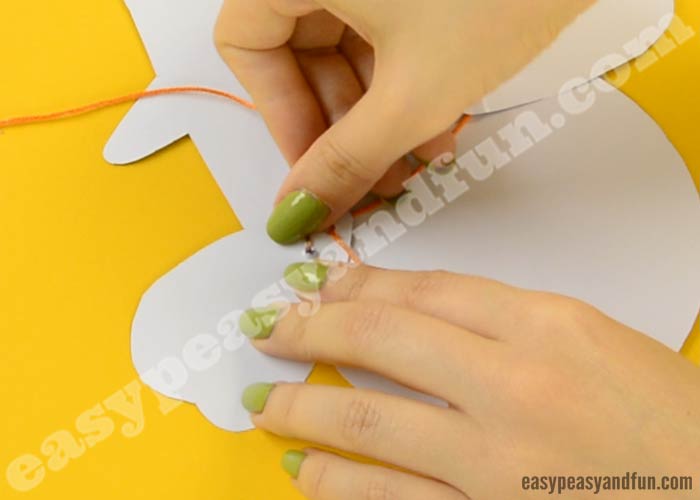
Back to the string… Tie it together – the string connecting the two wings should be somewhat loose, if you hold the doll upright, the wings should fall down when no tension is applied to the string. You will need to have a bit of sting “hanging” for you to pull and to make your puppet move.
Glue the craft stick on the body of the owl. We used white school glue. You can also reinforce it with clear tape.

If you haven’t already, glue the owl legs onto the body.

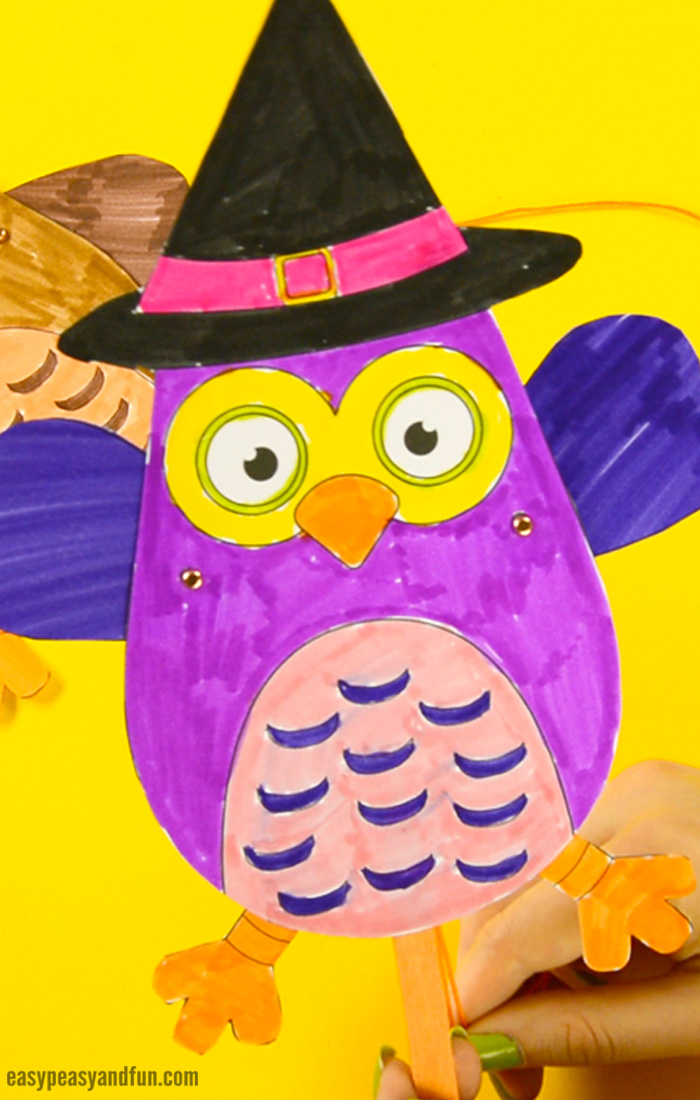
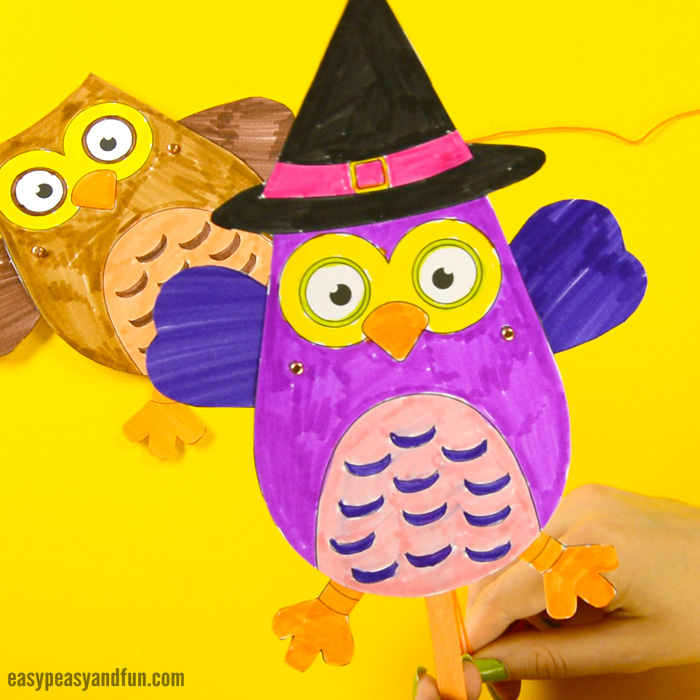
Your Movable Owl Paper Doll craft is complete!
We hope you enjoyed this tutorial and that your kids will be making many movable dolls of their own!
Get the Movable Paper Owl Doll Template Here
Click to open the Owl Movable Dolls
Want instant access to all of our printable crafts, activities, and resources?

With thousands of crafts, activities, worksheets, coloring pages, and drawing tutorials to print, you will always have just the resource you need at your disposal. Perfect for parents and teachers alike!