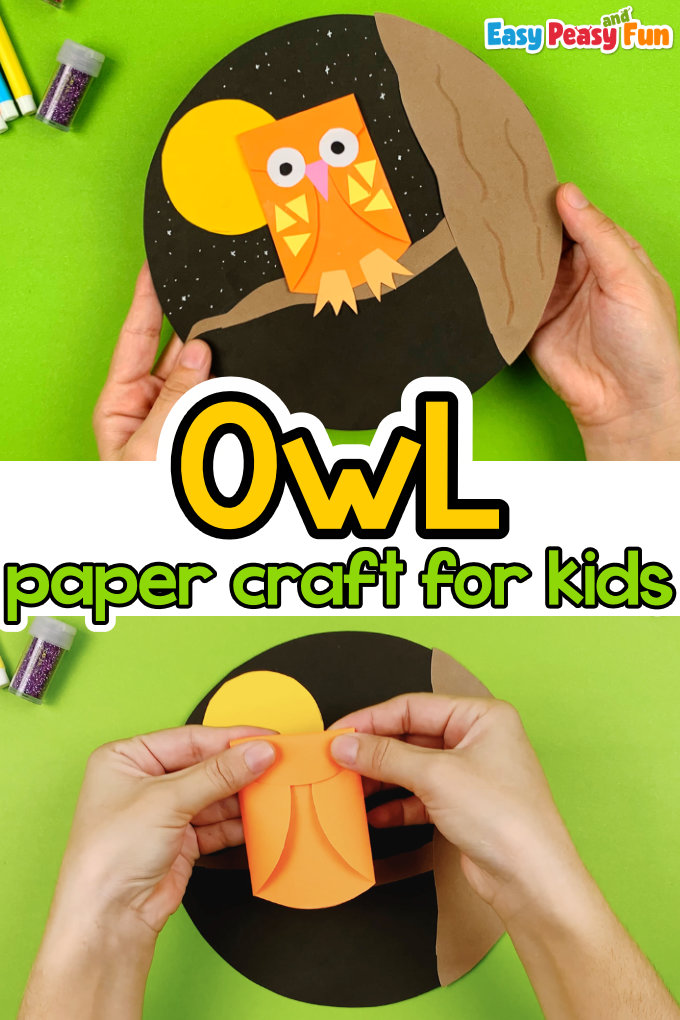
Whoo, whoo wants to learn how to make an owl craft? This little fall-themed project is a wonderful paper craft that will turn a couple of circles into a wonderful night scene. It’s insanely easy and kids of all ages will enjoy this one.
*This post contains affiliate links*
50 paper crafts your kids can actually do themselves

No fancy supplies — just paper, scissors, and a little imagination.
Be the first to get it on release day — and lock in the lowest price guaranteed.
This project was inspired by the Young School’s Art owl idea.
When it comes to fall crafts for kids, there are so many subjects to explore – from apples and making paper apple cards to crafting with leaves and making crafts with animals such as owls.
Do your kids want to learn how to draw an owl? We got an easy-to-follow tutorial showing them how to draw two different owls. After they finish, they can color a set of owl coloring pages to make the season even more fun! But let’s get back to making this one.
How to Make an Owl Craft for Kids
What you need:
- pencil
- scissors
- glue
- black construction paper
- white paper
- color paper (brown, yellow, orange, pale orange, and pink)
- markers (brown, white, and black)
Step by Step Tutorial
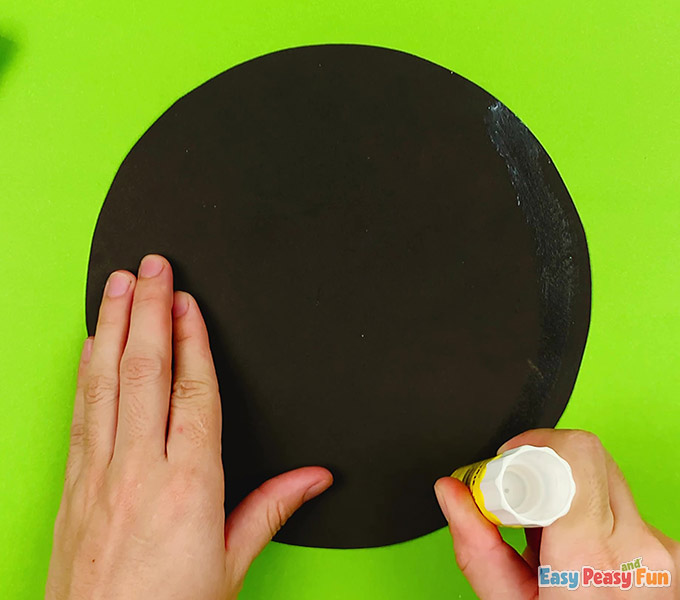
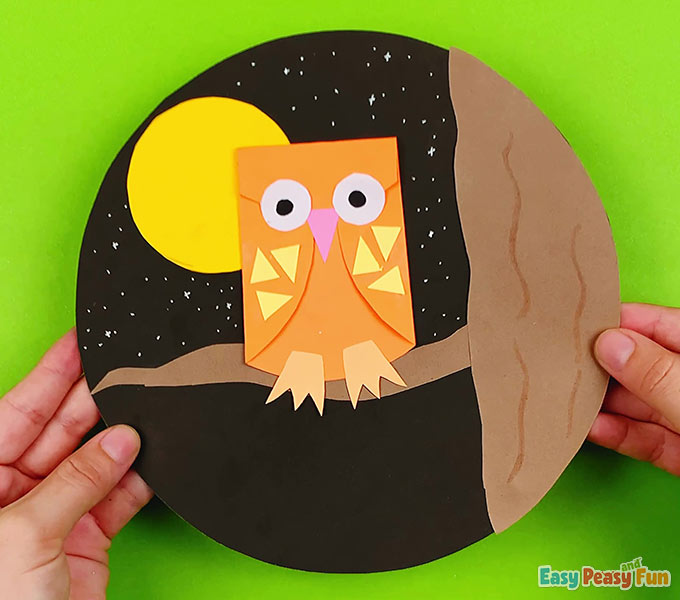
The Background
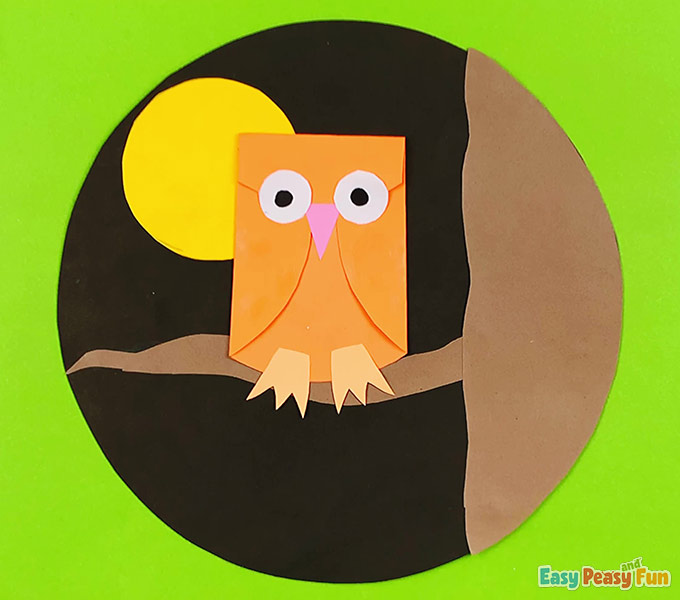
Cut out a big circle from black construction paper. If you don’t have construction paper, you can use regular black paper and glue it on cardboard or you can paint the cardboard with black paint. Dark blue color works well for this owl craft as well.
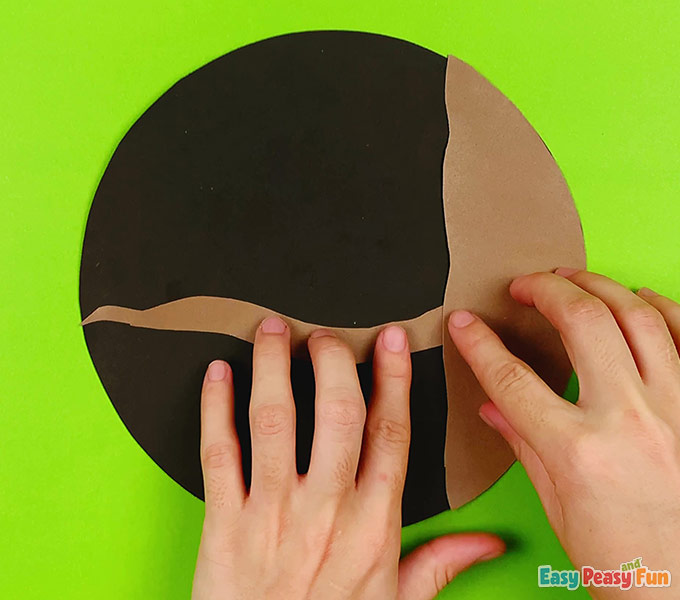
The Tree
Place a sheet of brown paper on the circle edge and use the circle as a template to trace on brown paper. Cut out the trunk shape and stick it on the black circle.

Cut a branch-like shape from brown paper and glue it on the tree trunk. The branch should be positioned on the lower half of the circle.
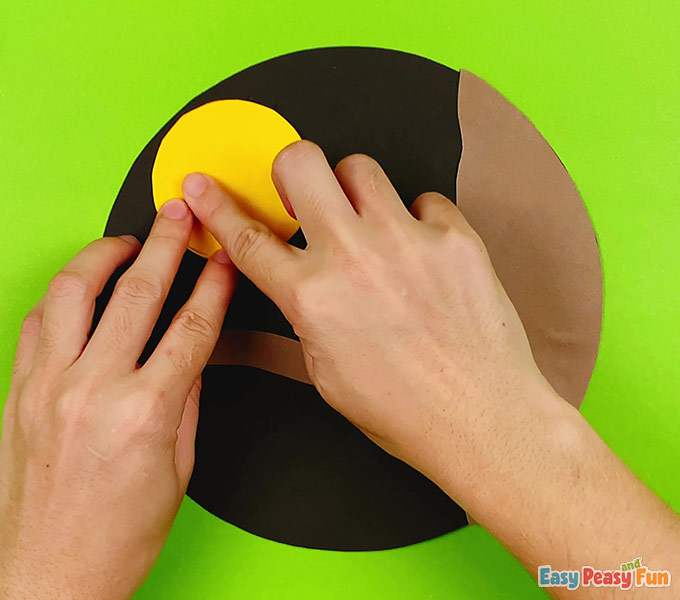
The Moon
Cut a smaller yellow or white circle and glue it above the branch. This will make the moon on the night’s sky.
The Owl
We’ll make an owl out of an orange circle. This circle should be larger than the moon.
Fold the circle on the right side, making one wing of the owl. Do the same with the right side.

Now, fold the upper part of the circle, just like you did the right and the left side.
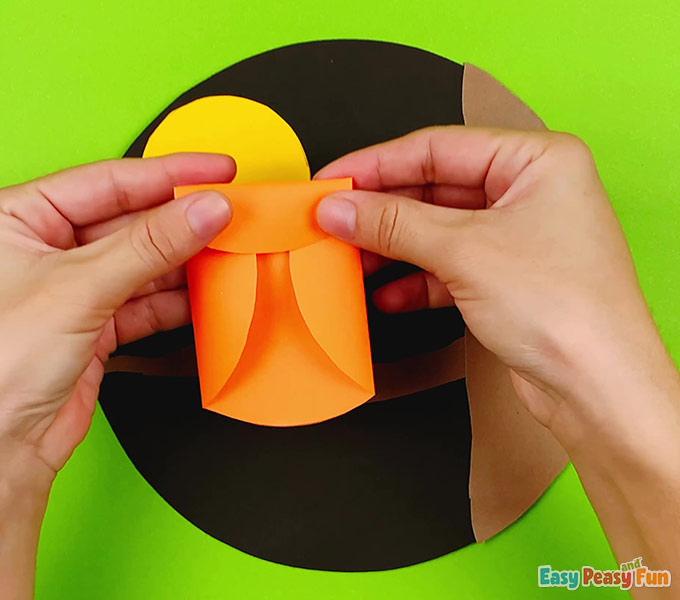
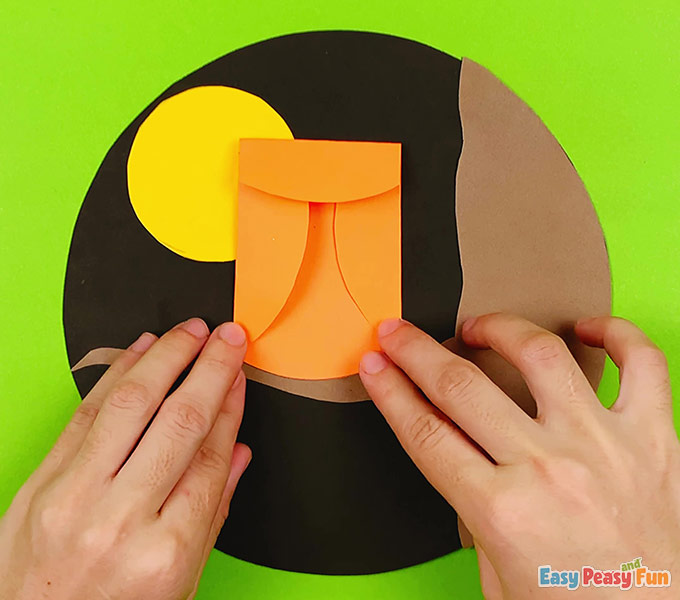
Apply glue on the back of the owl’s body (or on the black paper) and stick it onto the branch.
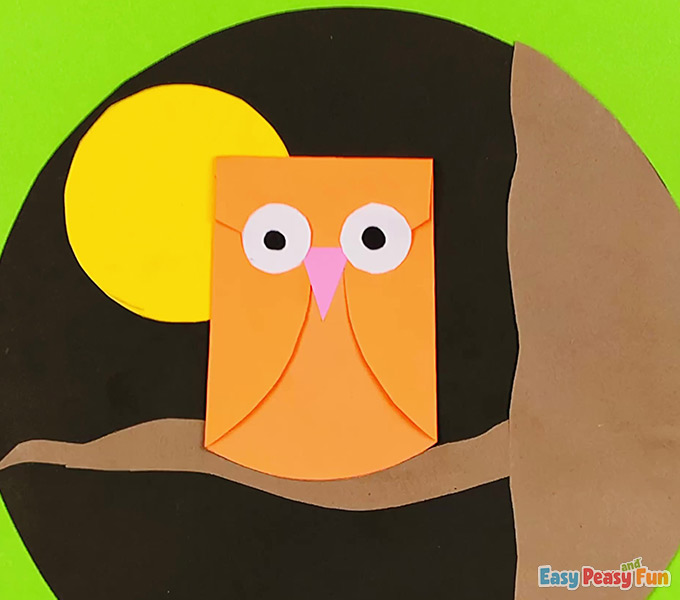
The Head
Cut out two circles from white paper and a triangle out of pink paper. Glue them on the owl’s head.
Use a black marker and draw two dots as eyes.
The Feet
Grab a smaller beige rectangle and fold it in half.

Draw one leg on the folded part and cut out the outline, this way you will get two same-looking owl feet.
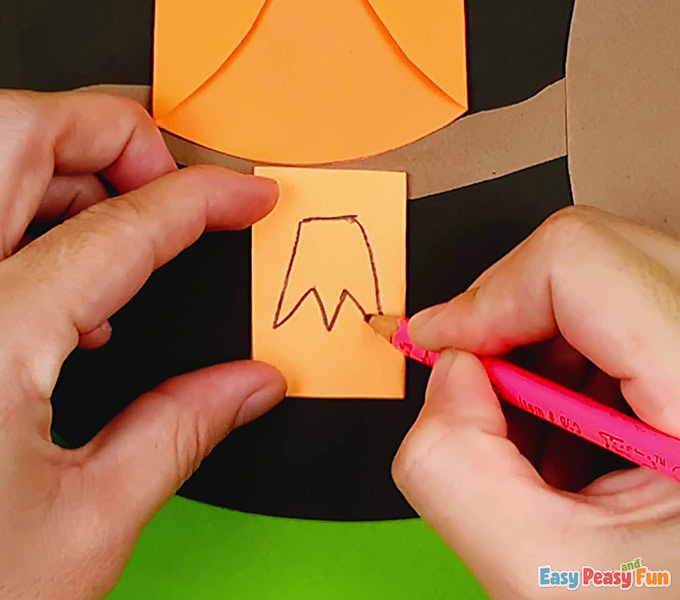
Glue the feet onto your scene.
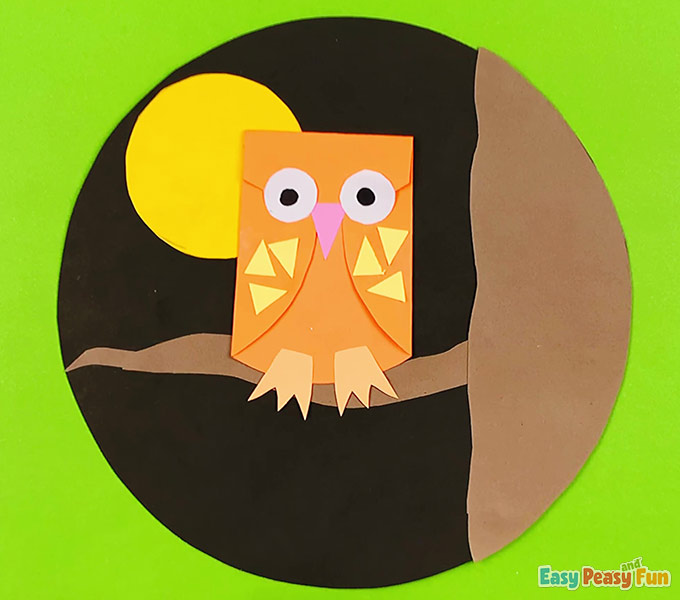
The Feathers
Let’s make this owl even more fun. Cut out triangles out of paper and stick them on or use a marker and draw any sort of shapes on the wings.
The Finishing Touches
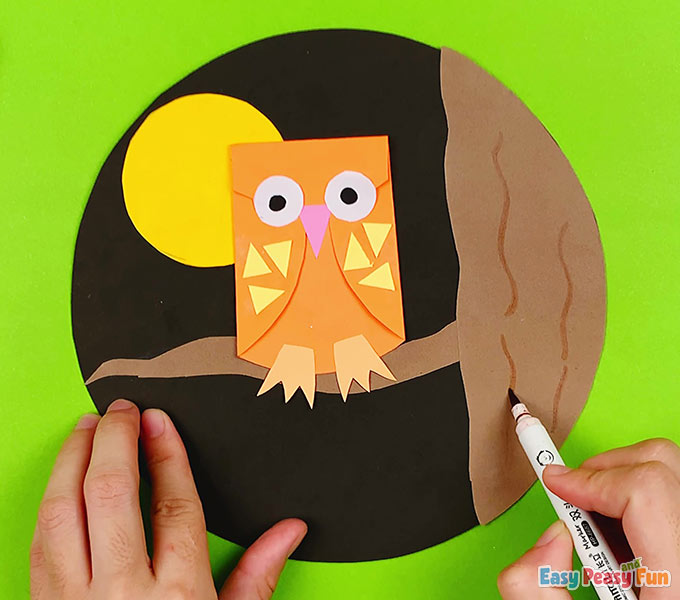
Use a brown marker to give a tree some texture.
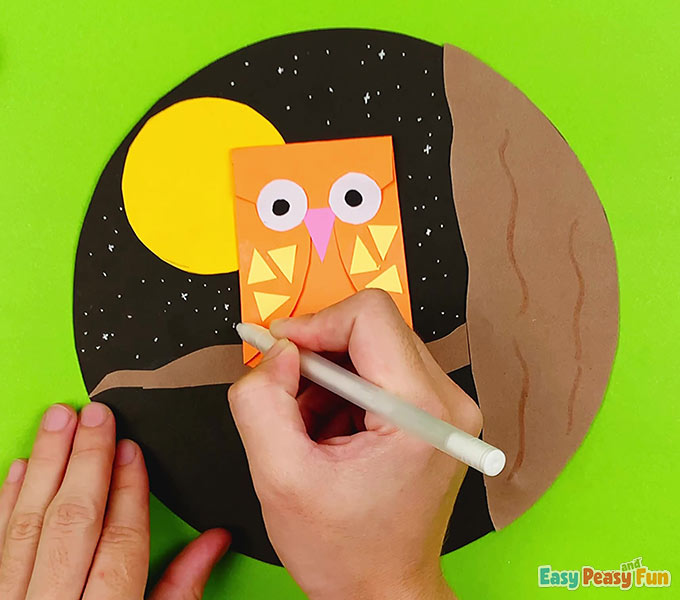
With a white marker, draw tiny dots to create stars in the night sky.
You have now learned how to make an owl craft.
Have fun crafting!
Want instant access to all of our printable crafts, activities, and resources?

With thousands of crafts, activities, worksheets, coloring pages, and drawing tutorials to print, you will always have just the resource you need at your disposal. Perfect for parents and teachers alike!