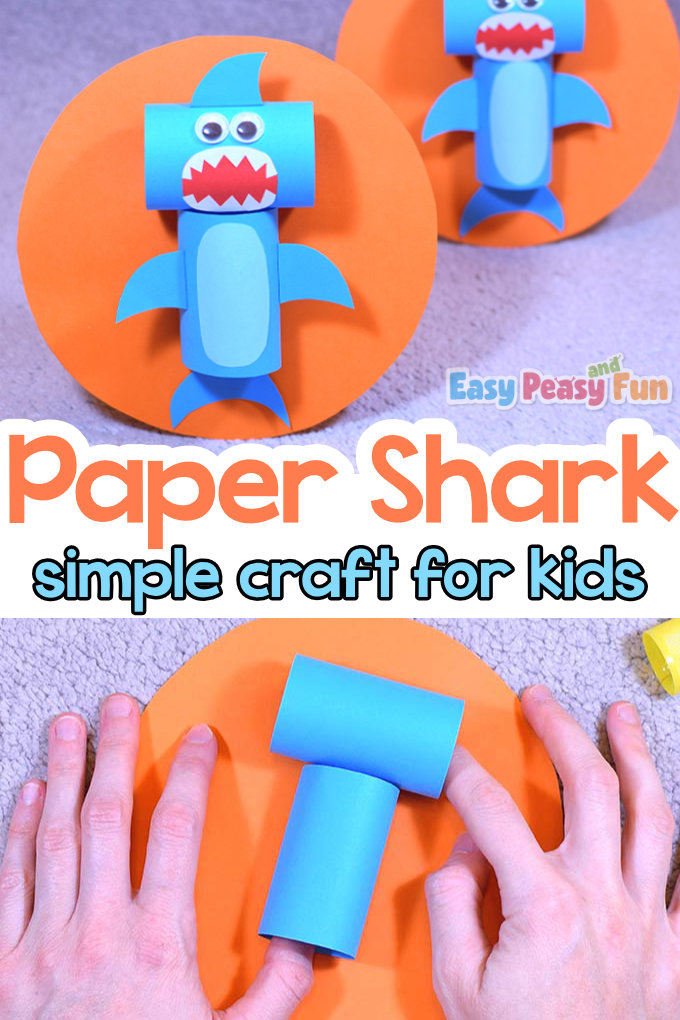
Are you ready for shark week? Give this hammerhead shark craft a go, and let your kids learn more about this amazing sea dweller.
These are pretty easy to make and will make a great display art on the wall.
*This post contains affiliate links*
50 paper crafts your kids can actually do themselves

No fancy supplies — just paper, scissors, and a little imagination.
Be the first to get it on release day — and lock in the lowest price guaranteed.
We love to create all kinds of Summer Crafts for Kids – have you already seen our Shark Pop-Up Card or colored the Summer Agamograph Template?
After your kids are done crafting, offer them a set of 30 Shark Coloring Pages – we’re sure they’ll love these.
The craft we made today is easy to assemble, and it won’t take much time to complete.
We like how our shark turned out – it gives us extra giggles every time we look at it.
So guys, if you want sharks, grab the materials needed and come craft with us!
How to Make the Shark Paper Craft
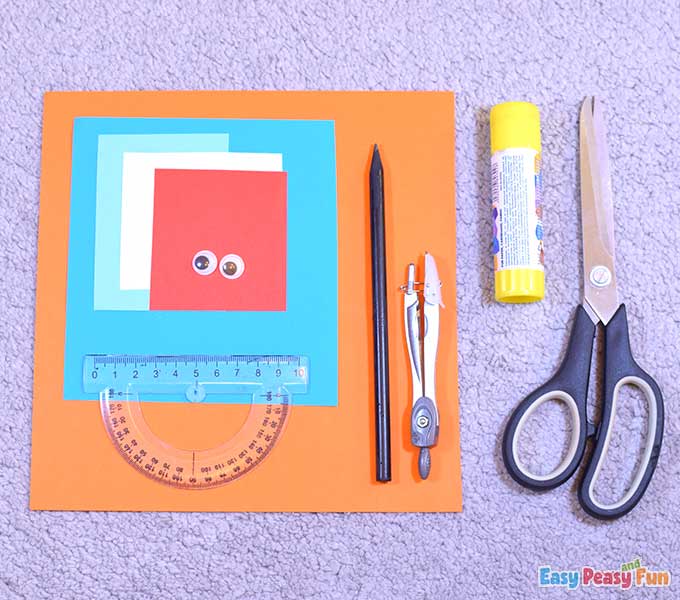
What you need:
- printable template (optional)
- pencil
- scissors
- glue
- white paper
- color paper (light blue, blue, and red)
- orange cardstock
- ruler
- two big googly eyes
- compass
Let’s start!
Step by Step Tutorial
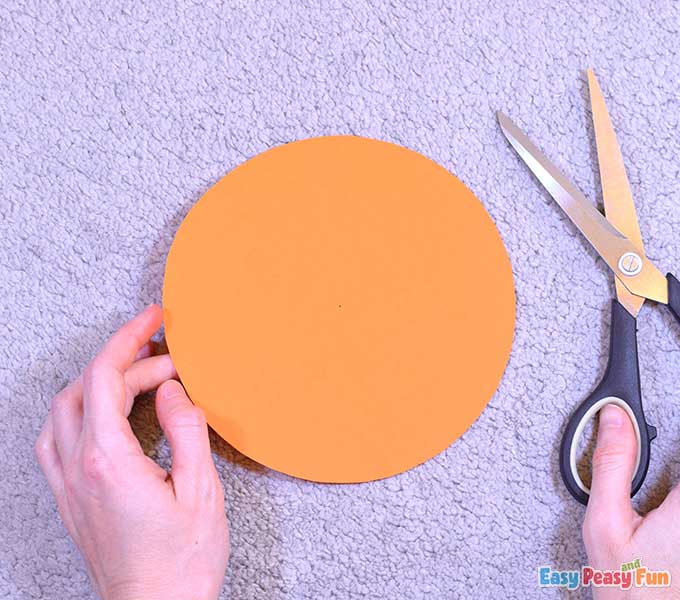
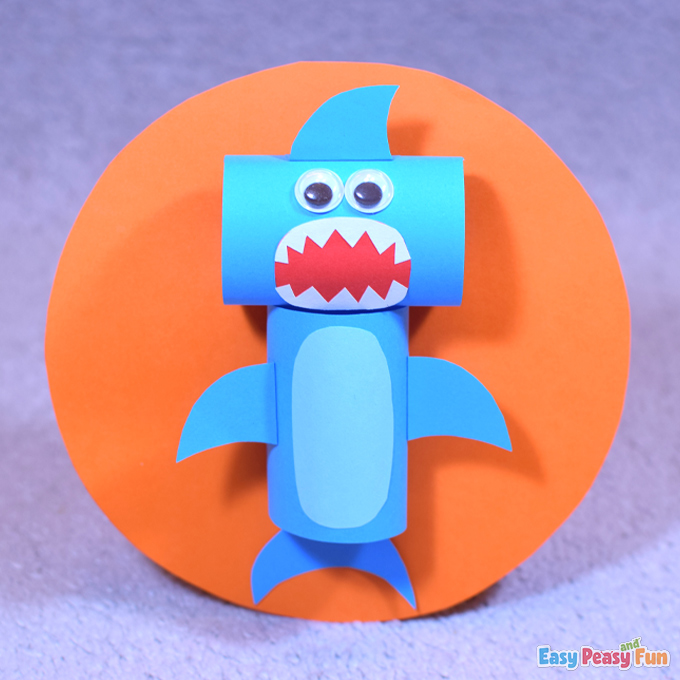
Draw a circle with a 16 cm diameter on the orange cardstock.
Cut out the circle with your scissors.
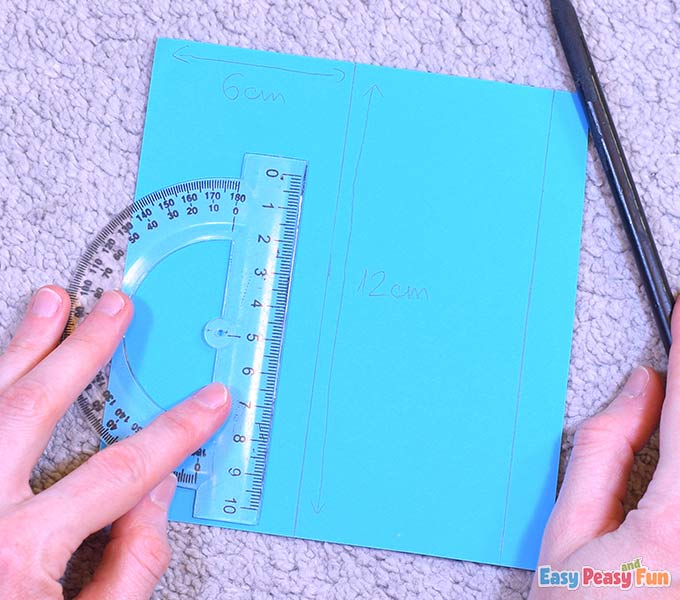
Draw two rectangles with dimensions 6 x 12 cm on the blue paper.
Cut them out.
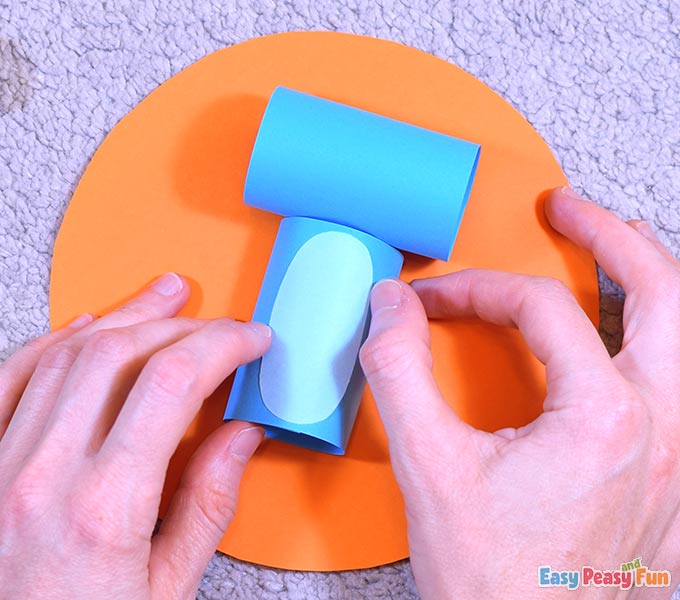
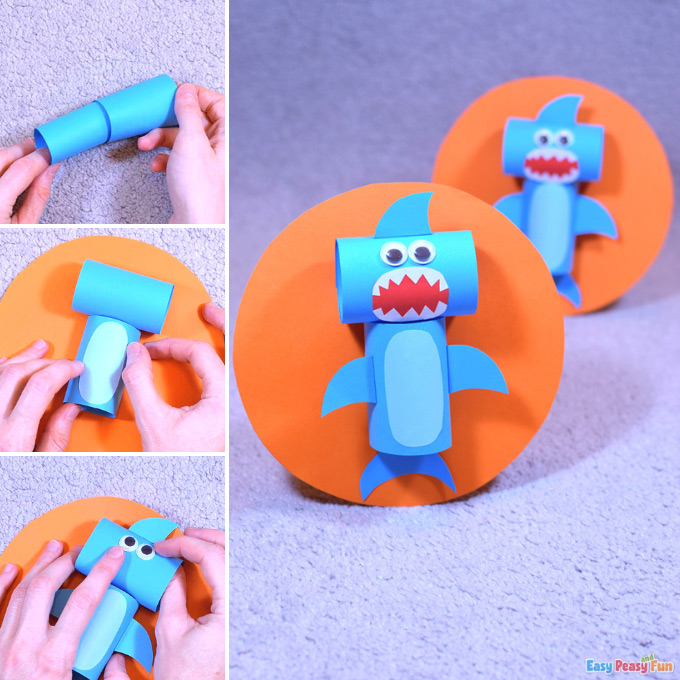
Form two rolls (one a bit wider than the other) and seal their ends with glue.
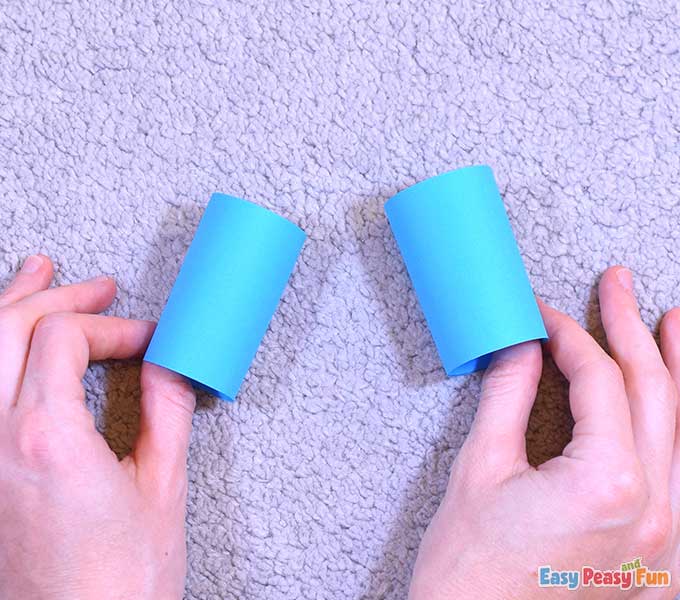
See how one roll is wider than the other?

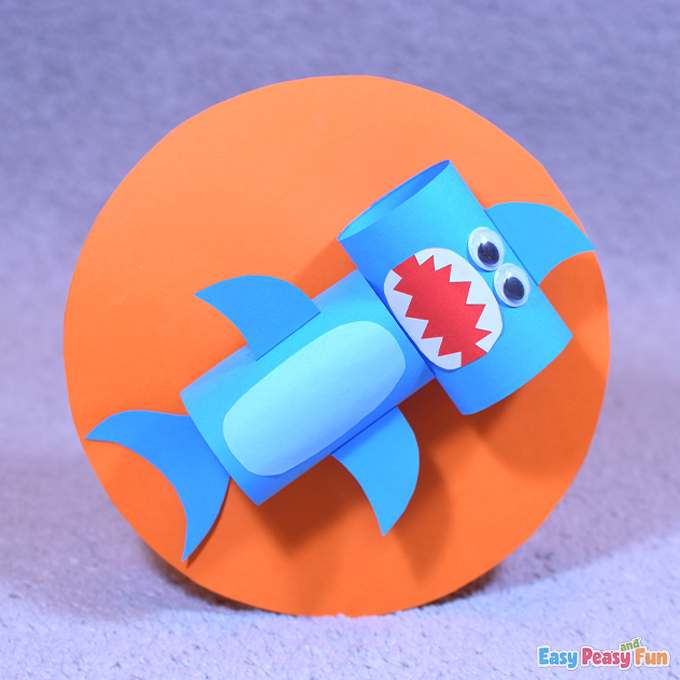
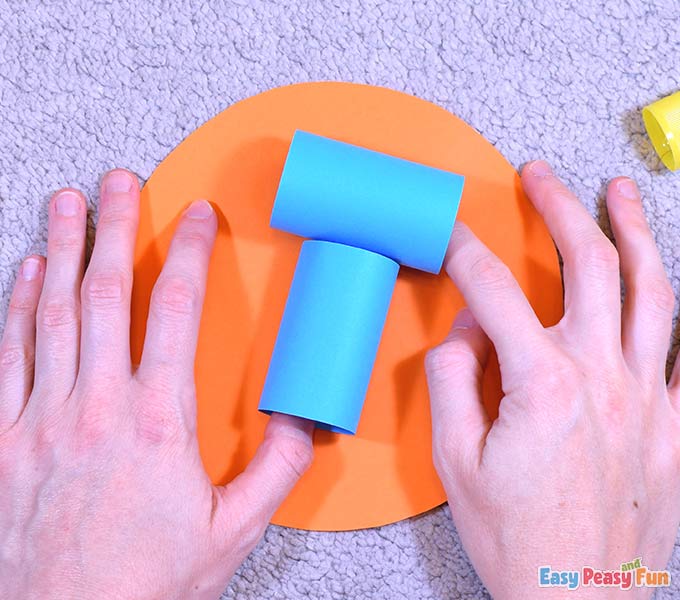
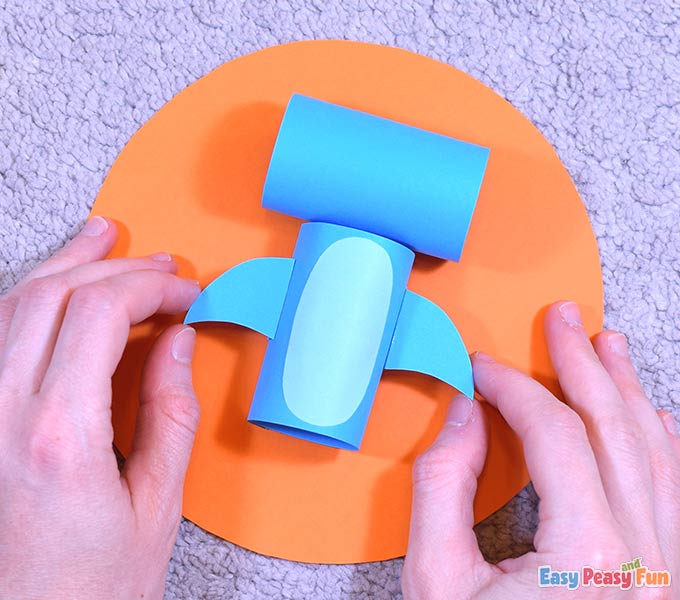
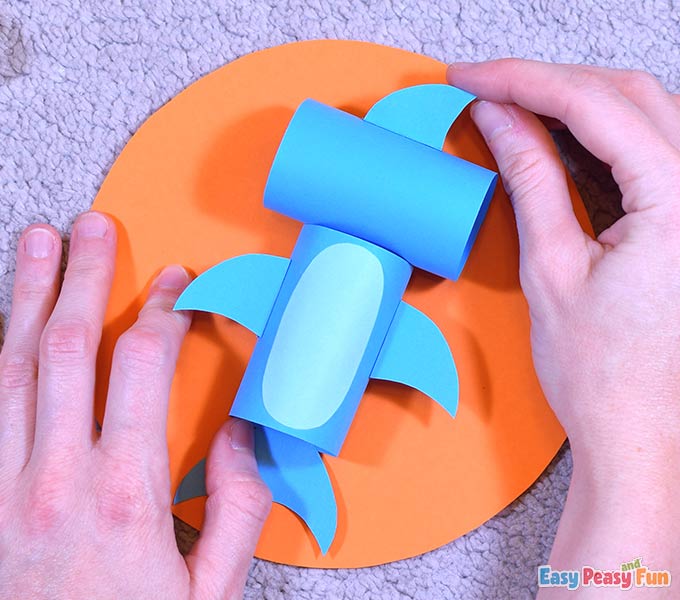
Glue the blue rolls on the orange circle in a “T” shape.
The horizontal blue roll is the wider one, which is our shark’s head.
Draw an ellipse shape on the light blue paper and cut it out.
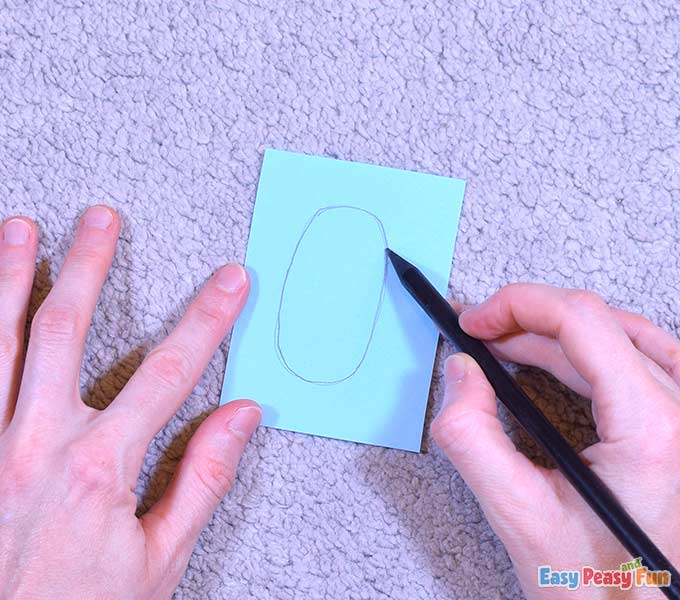
Glue it on the shark’s body.
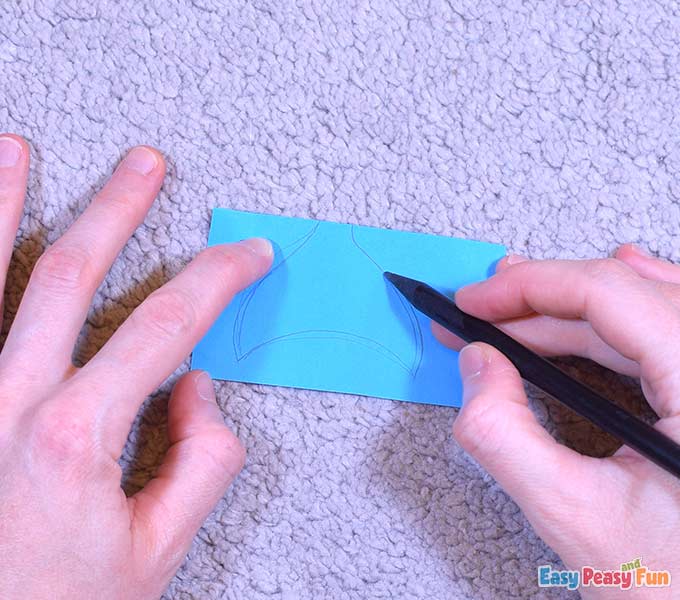
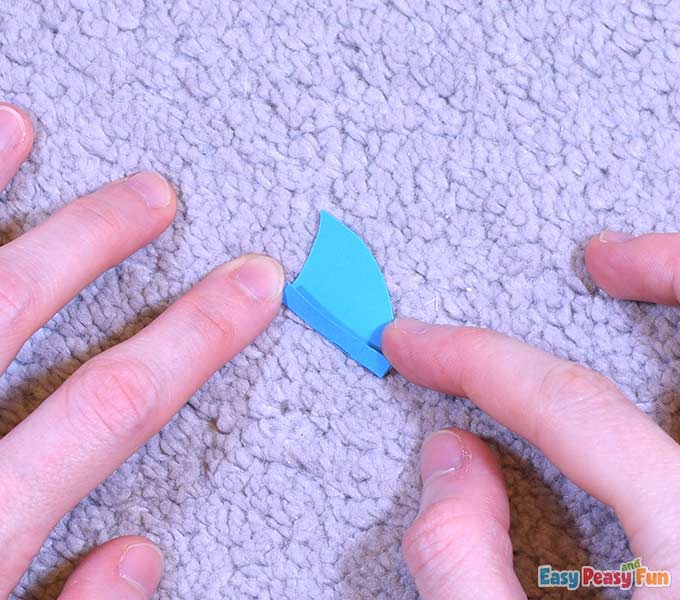
Fold a piece of blue paper in half and draw a fin on it.
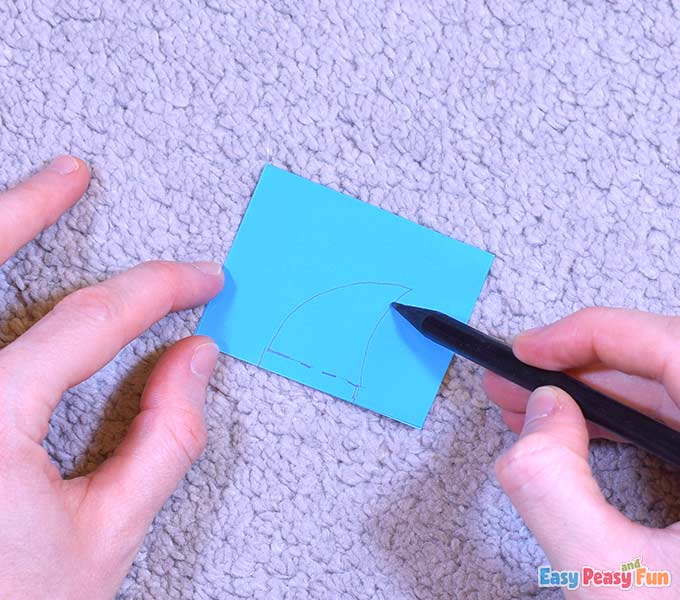
Cut out the fins and make a fold on their bottom parts.
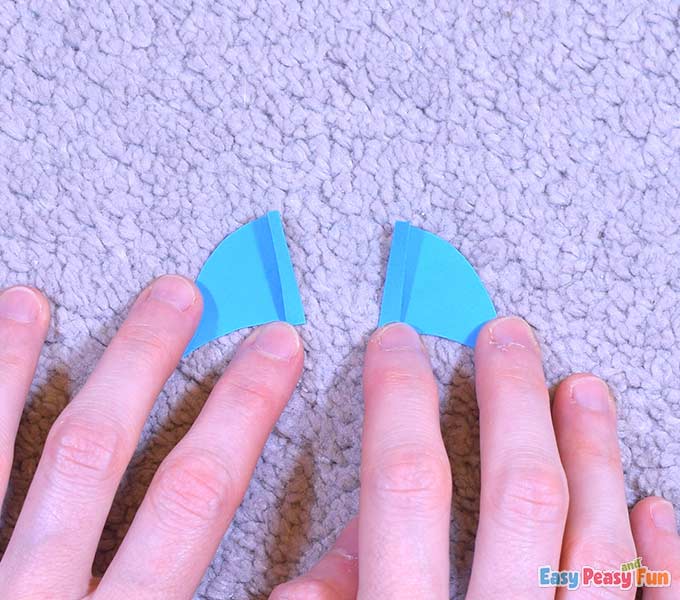
Apply some glue on the folded parts and glue the fins on the shark’s body – to the sides.
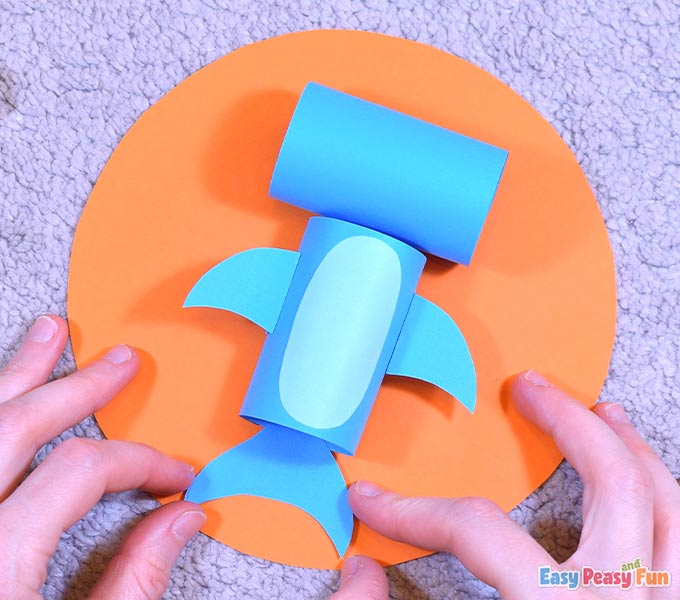
Draw a tail on another piece of blue paper and cut it out.
Glue it on the bottom part of the shark’s body.
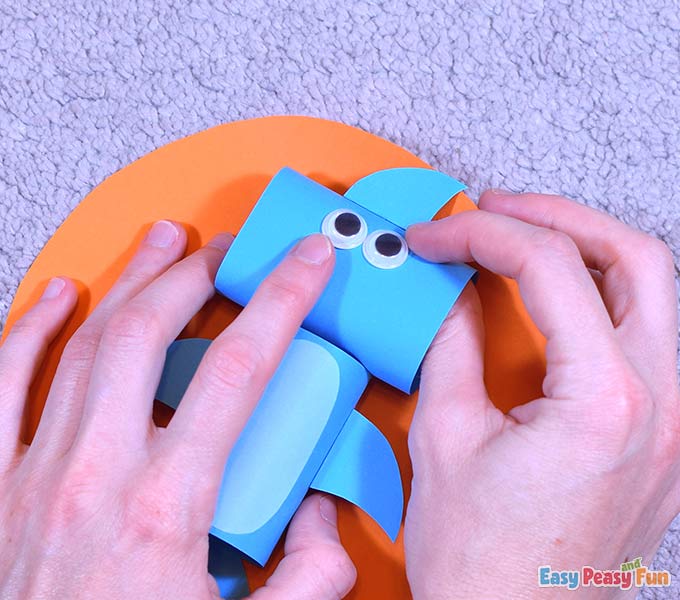
Draw another fin on blue color paper.
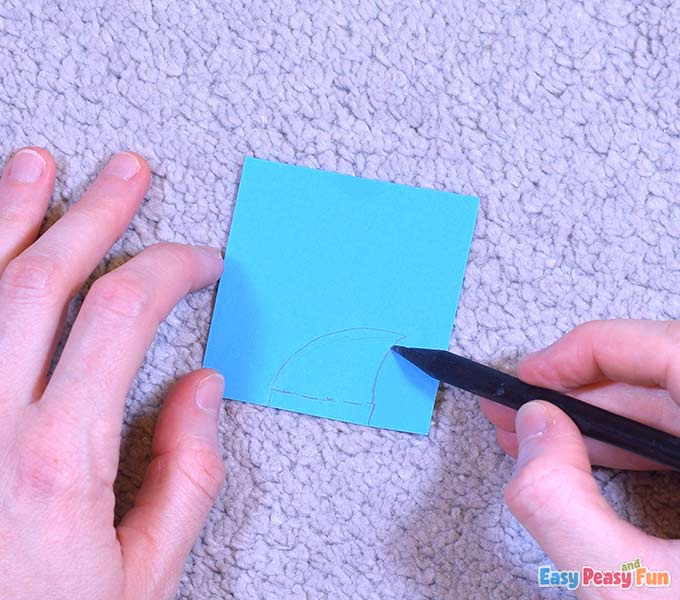
Cut it out with scissors and make a small fold at the bottom.
Apply some glue on the folded part and glue this fin on the shark’s head.
Glue the googly eyes on the head too.
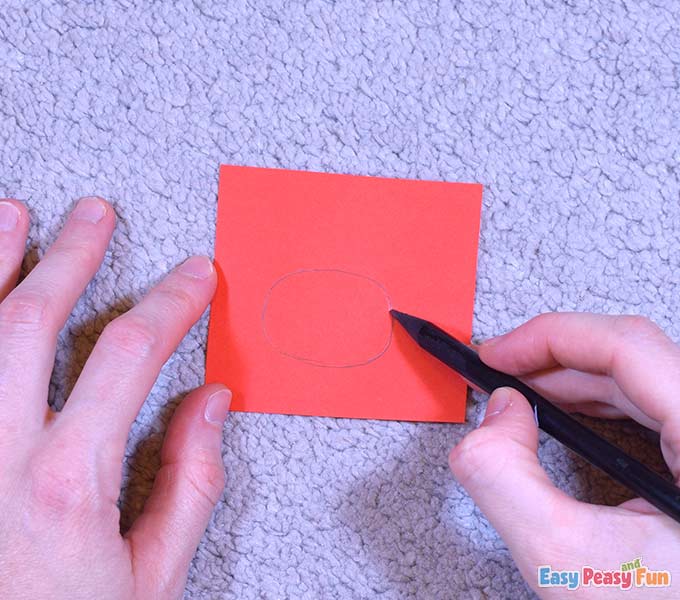
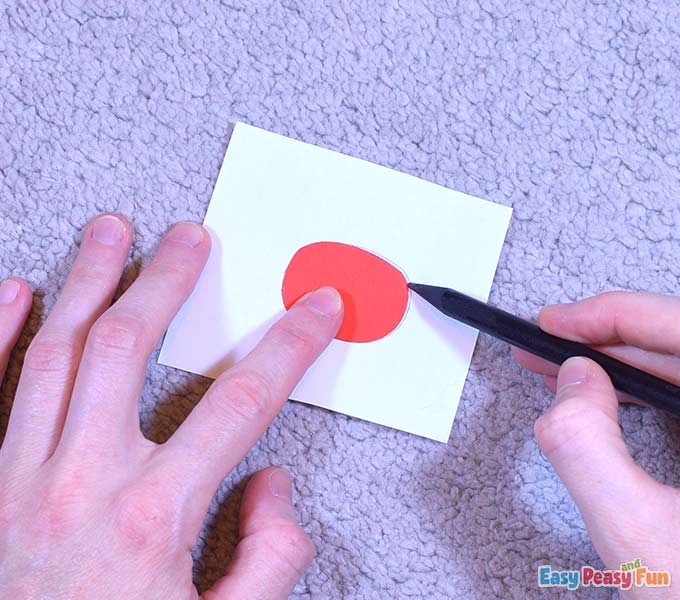
Draw a freehand rectangle with rounded edges on a piece of red paper.
Cut it out. This will be the shark’s mouth.
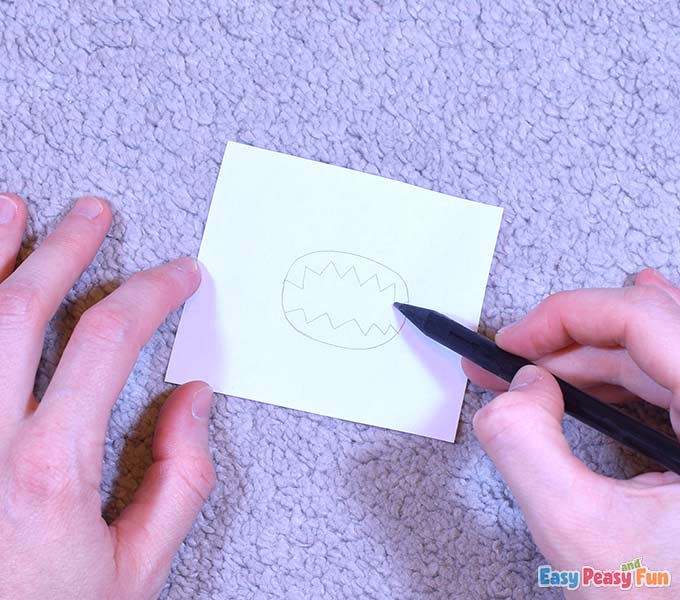
Trace the mouth on a piece of white paper.
Draw two rows of shark teeth on the white paper – inside the freehand rectangle with rounded edges.
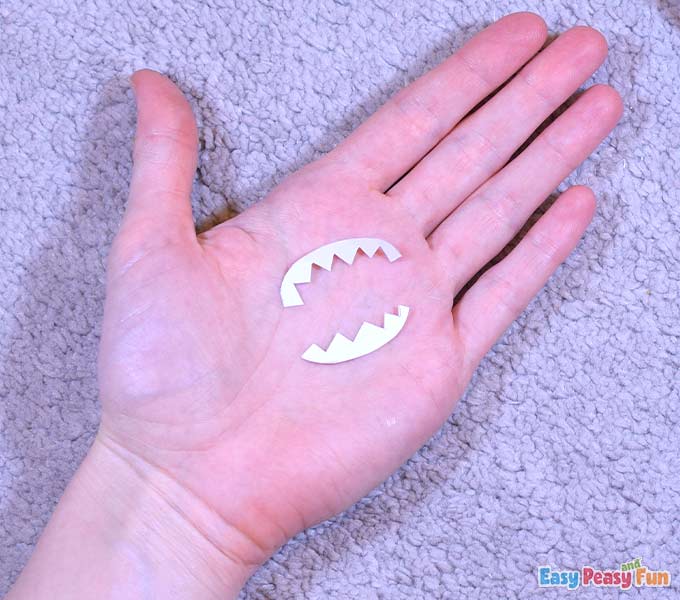
Cut the teeth out.
Glue them inside the red mouth, then glue the mouth with teeth on the shark’s head.
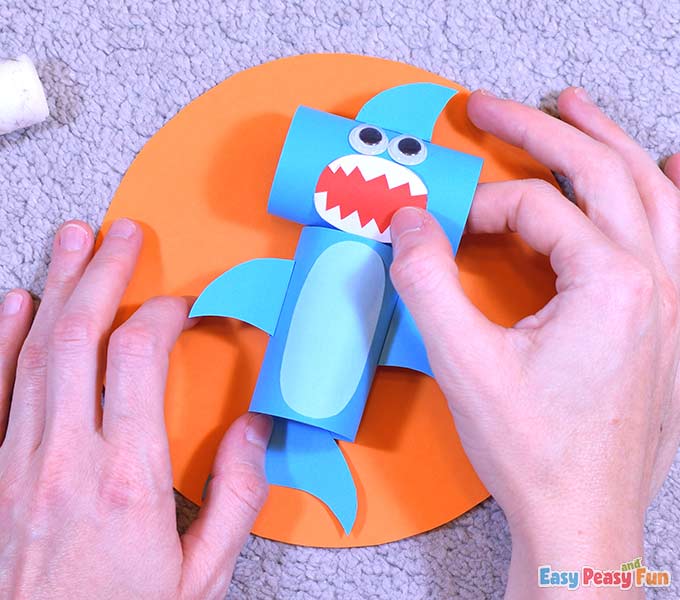
All done!
How do you like yours?
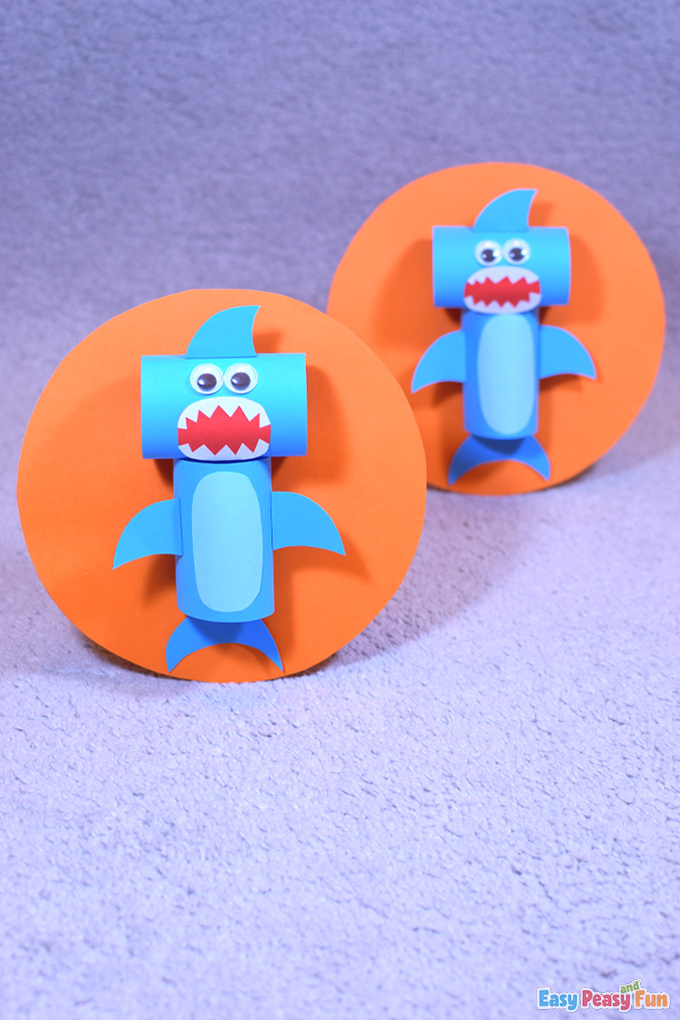
We think these sharks look fantastic!
Get Your Shark Paper Craft Template Here

Want instant access to all of our printable crafts, activities, and resources?

With thousands of crafts, activities, worksheets, coloring pages, and drawing tutorials to print, you will always have just the resource you need at your disposal. Perfect for parents and teachers alike!