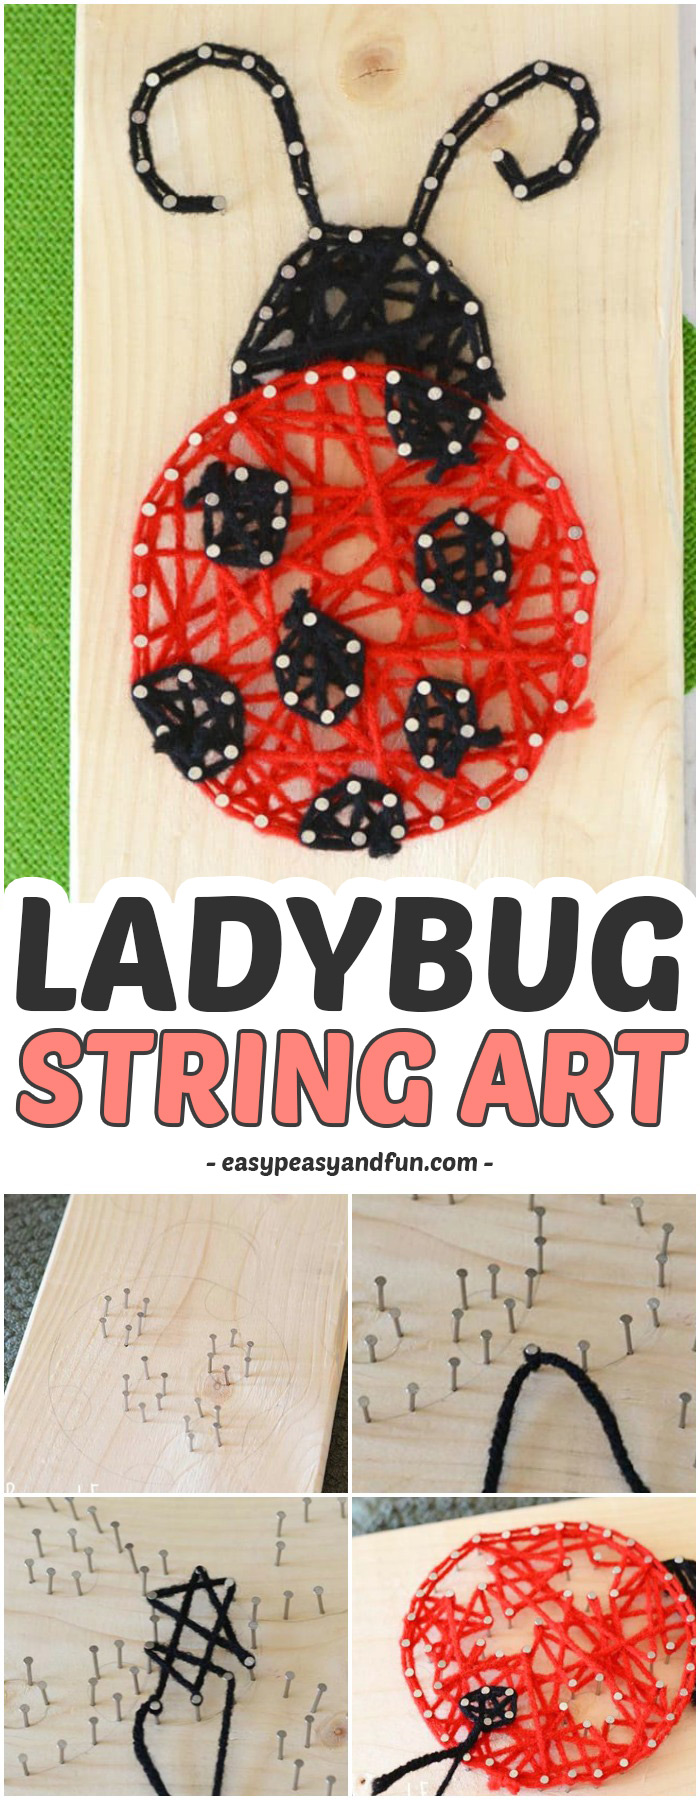
We’ve got another super simple string art for kids, this time we’ll be making a ladybug string art.
String art doesn’t need to be for older kids only, if you use yarn (or something similar), small hands will have no issues making gorgeous projects.
*this post contains affiliate links*
50 paper crafts your kids can actually do themselves

No fancy supplies — just paper, scissors, and a little imagination.
Be the first to get it on release day — and lock in the lowest price guaranteed.
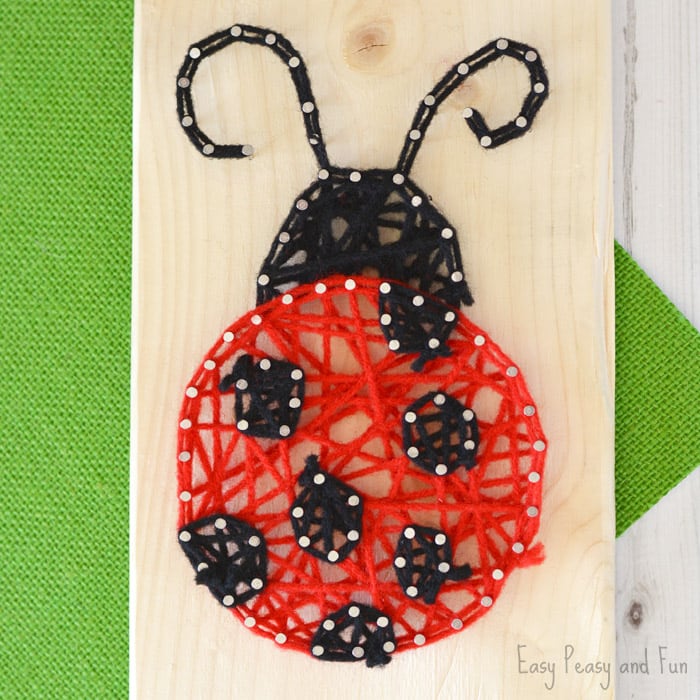
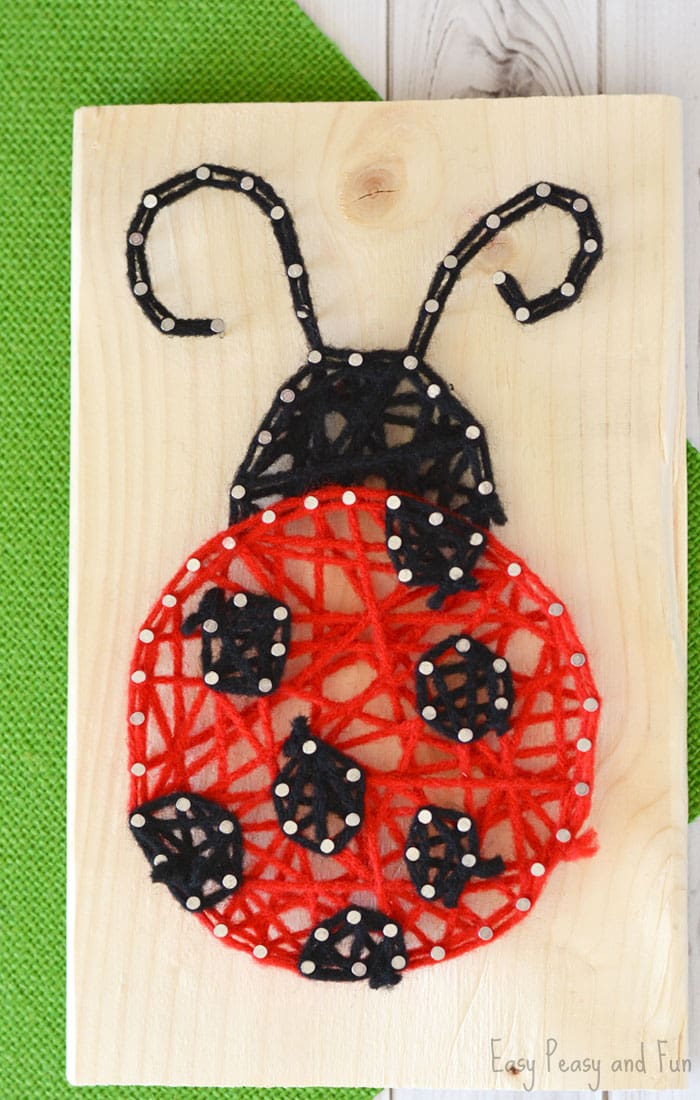
I do love ladybugs, one of the rare bugs I like to be honest. This string art ladybug will make a nice decor all year round.
Ladybug String Art
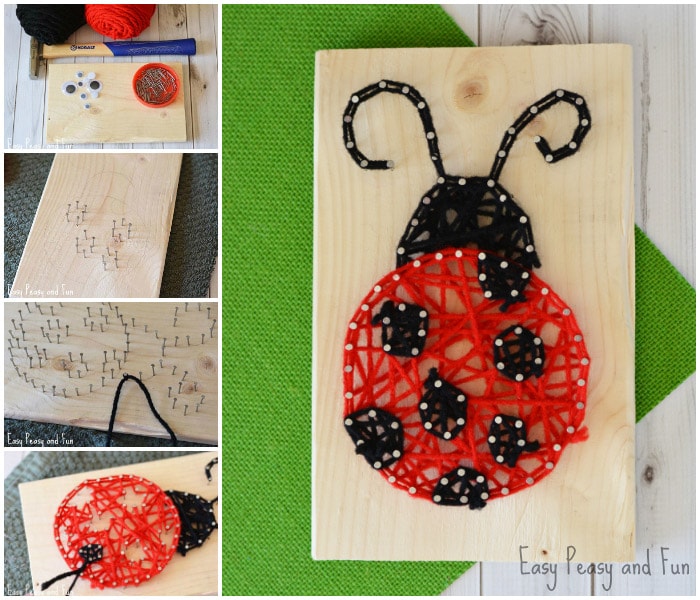
What you need:
- red yarn (used red heart yarn in cherry red)
- black yarn (used red heart yarn in black)
- wood board or plaque (measures 8.5 x 5.5)
- tack hammer
- wire nails (used 18×3/4″)
- scissors
- pencil
- 4″ circle template such as s lid
- optional wiggly eyes

Use a pencil and a circle template to draw a large circle for the body of the lady bug. The circle we drew was 4″.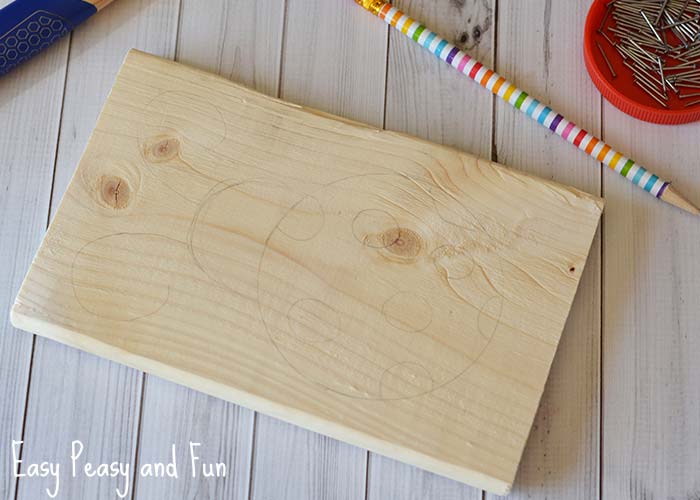
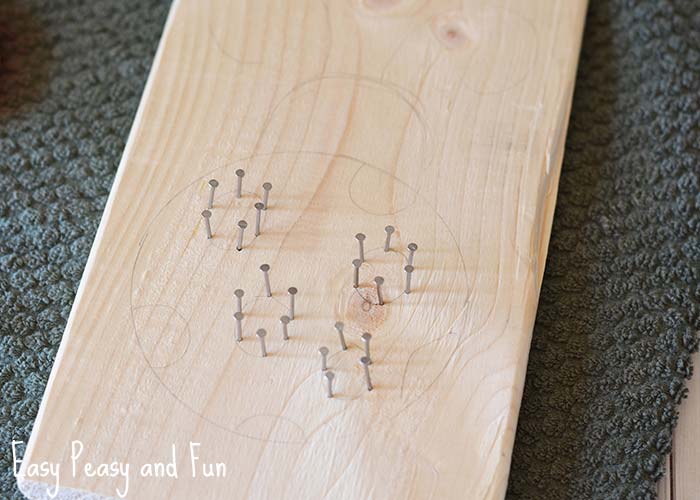
Add a head, antenna, and spots on the wood board with a pencil.
Pound your nails into the board. Begin with the spots on the body, followed by the body and then the head and antennae. Pound the nails about half way into the board and keep them about 1/2″ or so apart.
Begin to string your board. Begin with the head and antennae. 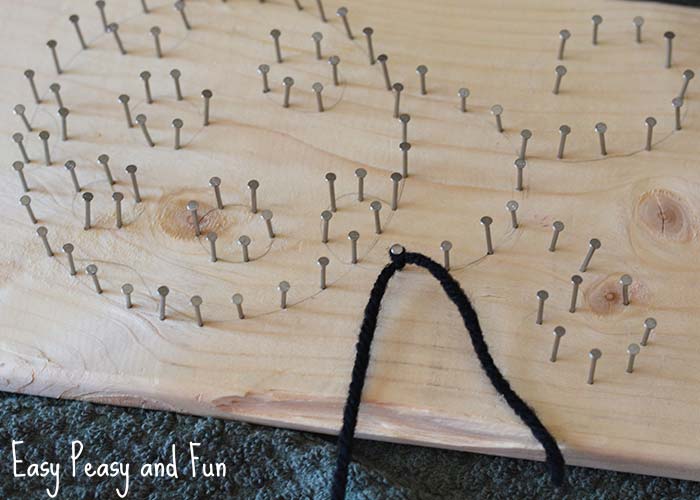 Tie black yarn around one nail head and double knot. Leave tail long.
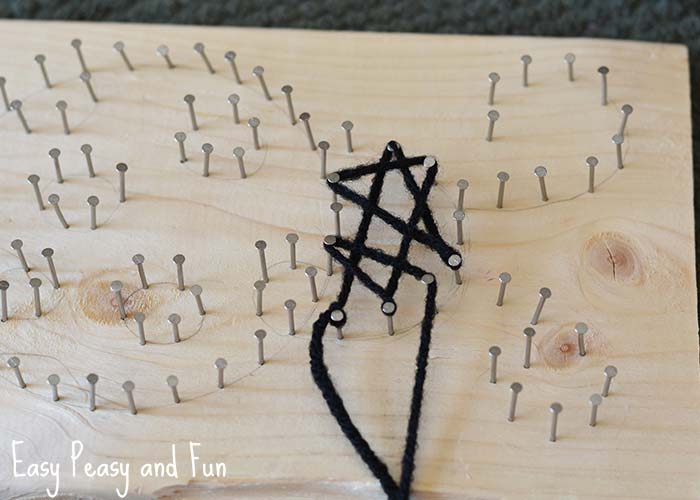
Begin to zig zag back and forth until you’ve covered the entire head. Carry your yarn to the antennae and wrap the yarn around the entire nail head, then carry it to the next, wrapping the yarn all the way around that nail head and so on. When you reached the end, reverse direction to outline the antennae on the opposite of the nails. Repeat for the other antennae.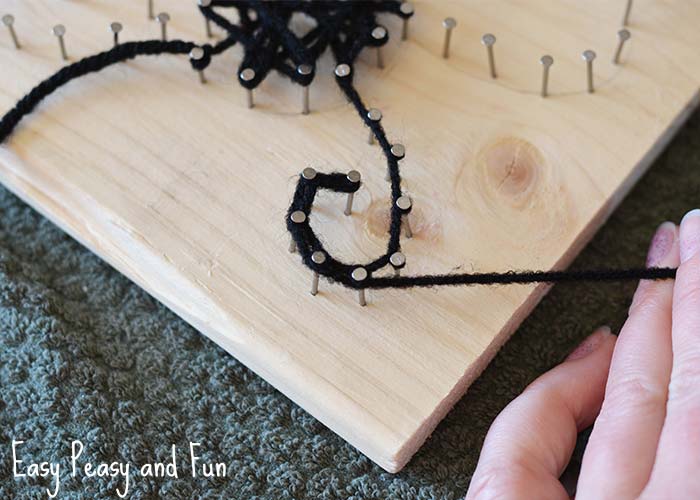
You’ll also want to outline the head shape by doing the same thing as the antennae. When finished, carry your yarn back to the starting point and double knot the starting tail and the ending piece of yarn. Trim tails.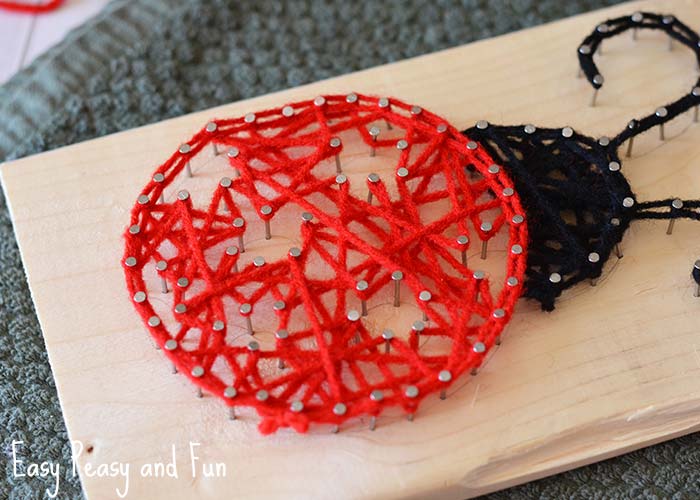
Next, you will follow with the red body yarn. Zig zag all around and then add the outline to the outer circle of the body. Trim yarn when finished.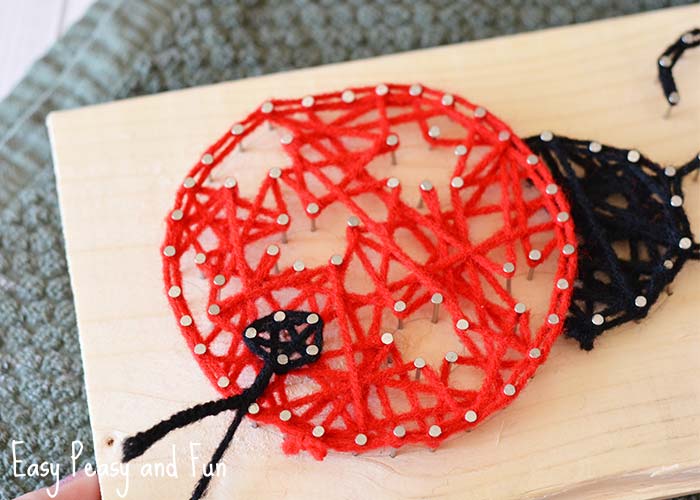
The last part are the body circles. Begin with black yarn and zig zag and outline each circle, trimming the yarn after each one and beginning a new one.
Your ladybug string art is all done!
More fun string art for kids
We’ve got a few other string art projects your kids can have a go at, like this flower string art, perfect to go along with the ladybug craft we just did or the star string art project.
More ladybug crafts for kids to make
If your kids love making ladybugs, we’ve got a few lovely projects for them to try out
Fun Paper Ladybug Craft for Kids
Another cute ladybug paper craft
Want instant access to all of our printable crafts, activities, and resources?

With thousands of crafts, activities, worksheets, coloring pages, and drawing tutorials to print, you will always have just the resource you need at your disposal. Perfect for parents and teachers alike!