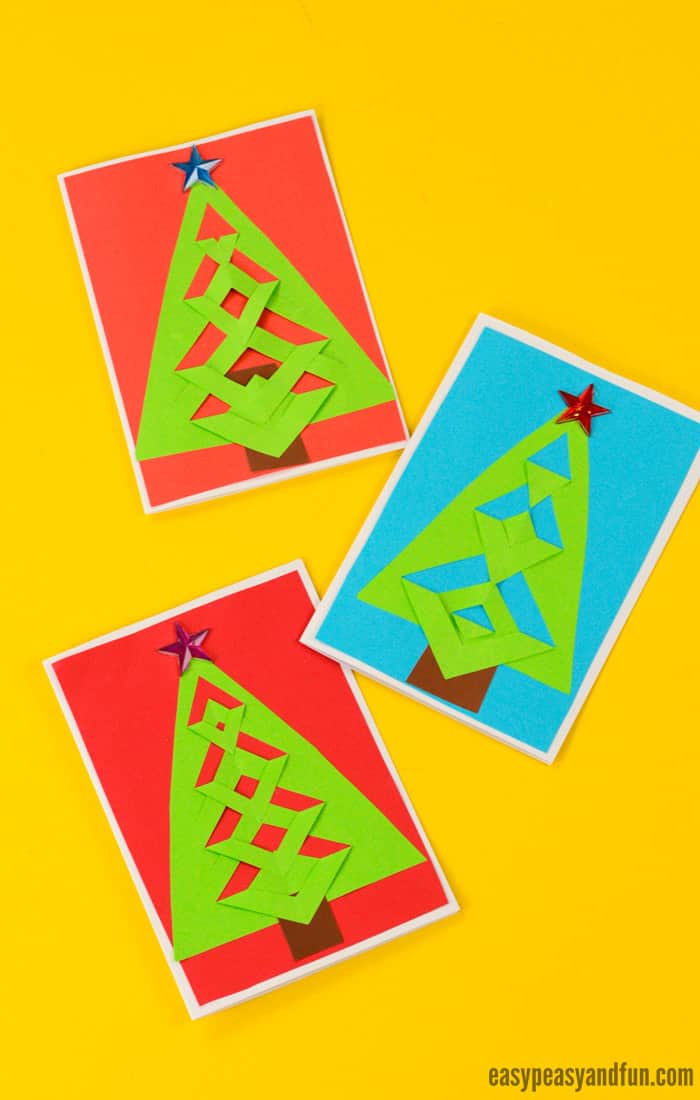
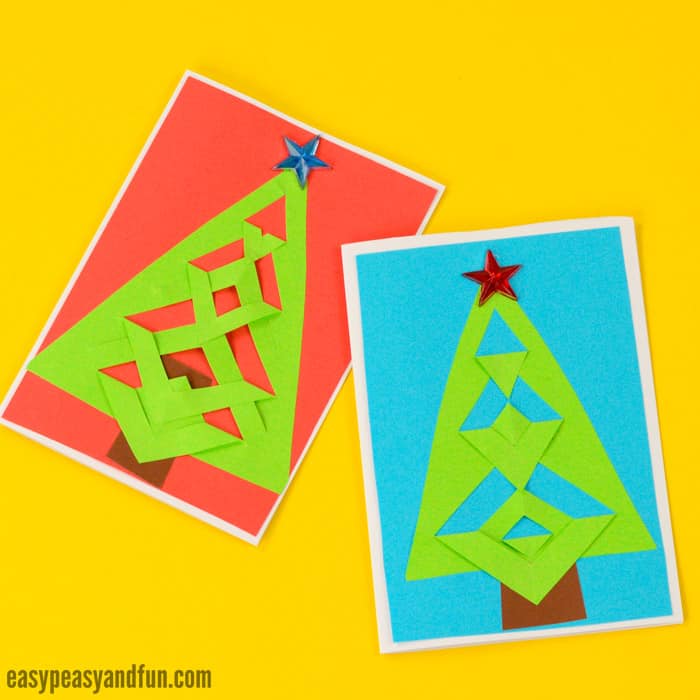
We have the most wonderful and simple (even though it does not look like) festive tree Christmas card idea to share with you.
Follow our easy step by step tutorial and you will be making these in no time (and impressing the people receiving them). These are a great kid made cards, with a huge wow factor.
*this post contains affiliate links*
We do love a good kid made Christmas card, and this particular one looks amazing! What’s great about this design is that you can modify it to fit any age group – you can make a simplified version even preschoolers will manage or you can make an advanced one with many “cuts” that will make a great project with no age limit for kids at heart.
Nothing really beats homemade Christmas cards, I am always excited to make them, and even more excited to receive them (we have quite a collection from my nephew and friends).

How to Make a DIY Easy Festive Tree Christmas Card
What you need:
- white construction paper for card (any other color works too, you can also get blank cards)
- red or blue construction paper for base (any other color or pattern works too)
- green paper (regular or construction) – again other colors are fine too
- a little bit of brown paper
- gemstone star for decorating (optional)
- scissors
- glue
If you feel your Christmas cards needs to be even more festive – glitter glue is the way to go.
Watch the Video Tutorial
Follow the Step by Step Instructions
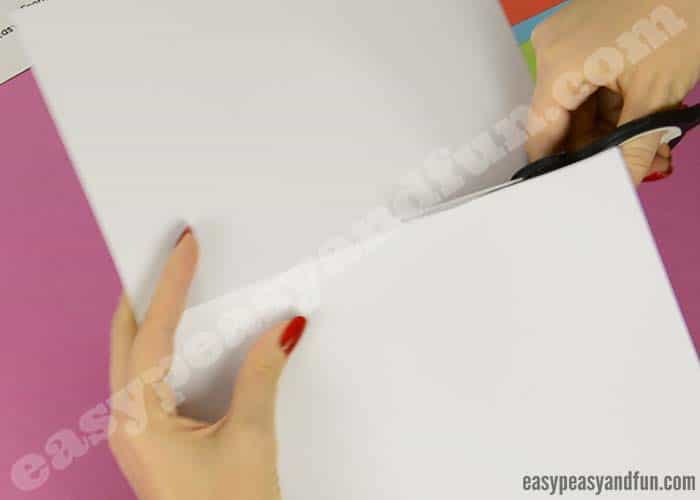
First let’s make a card base. We are using letter/A4 sized heavier print paper or construction paper to make ours. First we fold it in half.
 Then we cut along that fold to get two smaller pieces of paper (making two card bases). Younger kids can make a super large card, just folding the sheet of paper once.
 Next we fold the smaller piece of paper in half again.
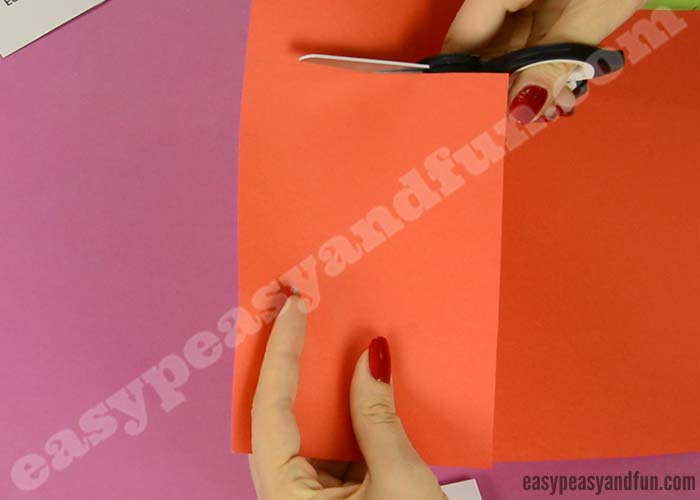
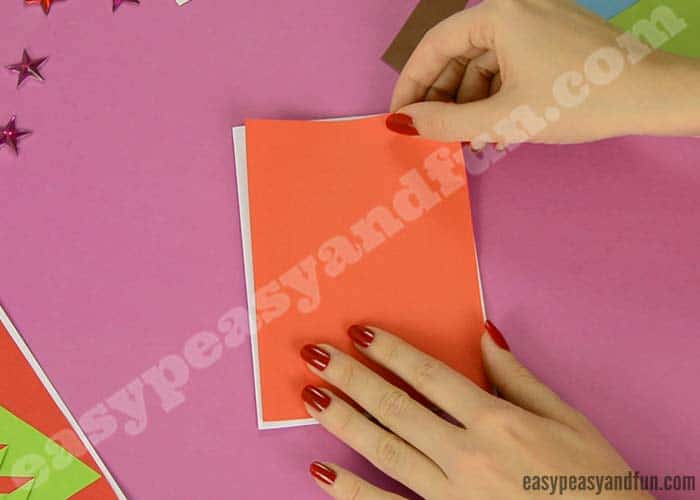
 Take the card base, place it on top of the colored construction or scrapbook paper and trace around it.
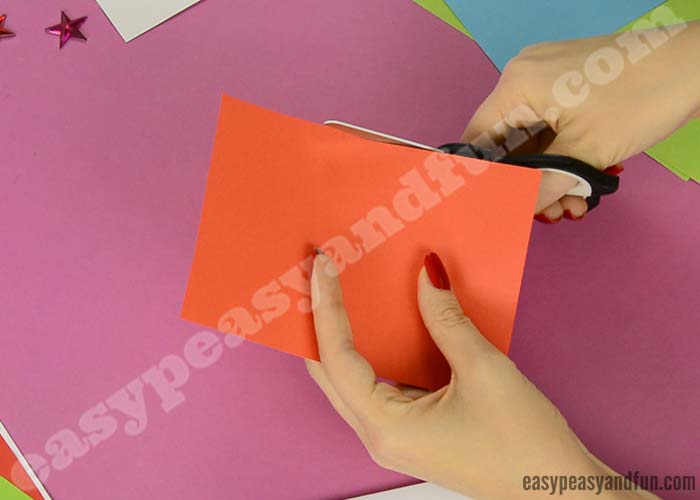
 Cut out the rectangle.
 Trim it a little bit, so that it is smaller than the card base – this will make the paper pop out, as the card base will show on the edges of the rectangle.
 If working with smaller kids, have them trace this smaller rectangle on a sheet of green paper.
This will make it easier for them to fold make their Christmas tree fit on the card, while older kids (and kids at heart) can just go straight to cutting the tree measured by “eye”.
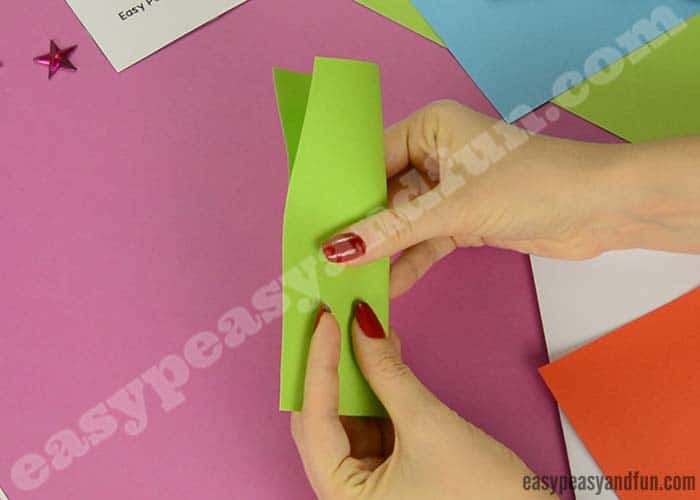
 Cut out the green rectangle and fold it in half along it’s length.
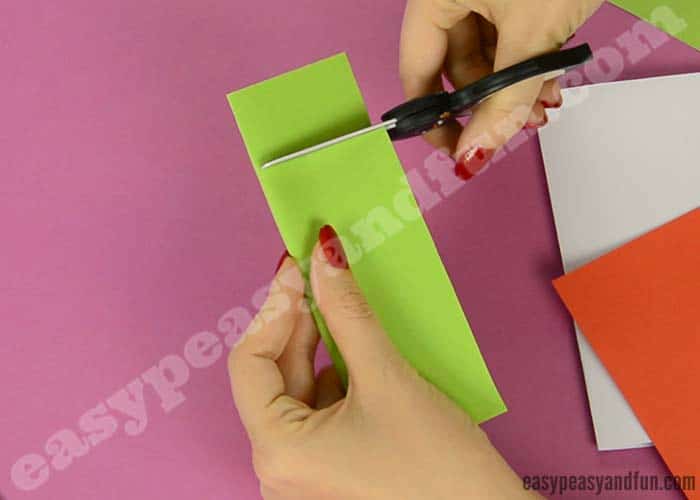
 Cut of a chunk, to make the tree smaller than the card.
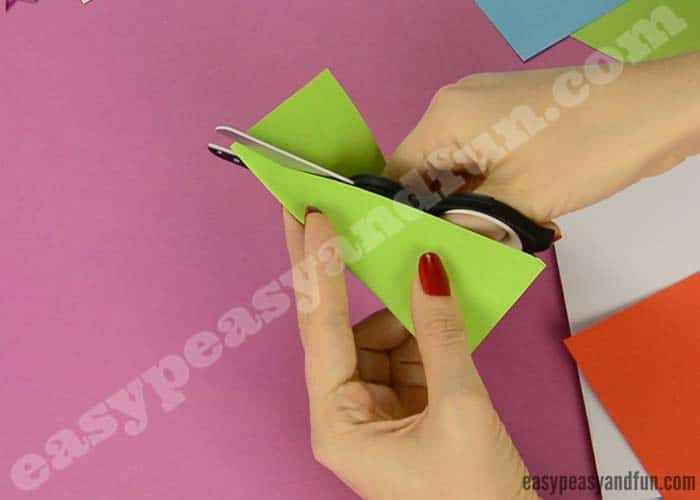
 While still folded, cut a diagonal, from bottom to top to make a triangle shape – a tree shape once you unfold it.
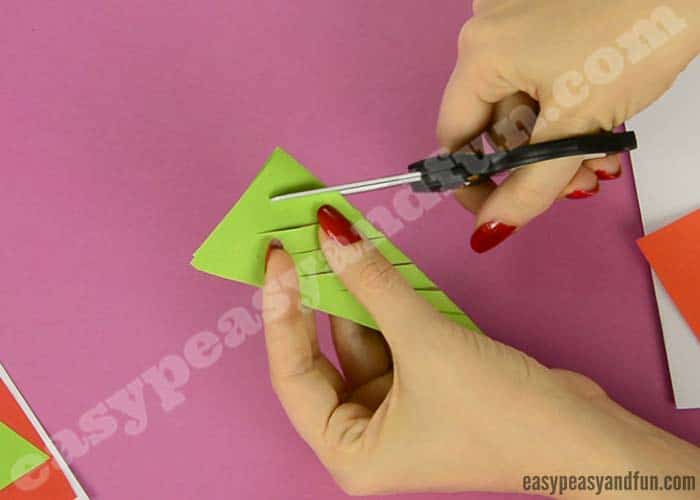
 Now comes the somewhat tricky, but still super easy part.
You will need to cut diagonal slits (starting on the folded end).
 Let’s make the magic happen!
Glue the red (or any other color) rectangle on the base card.
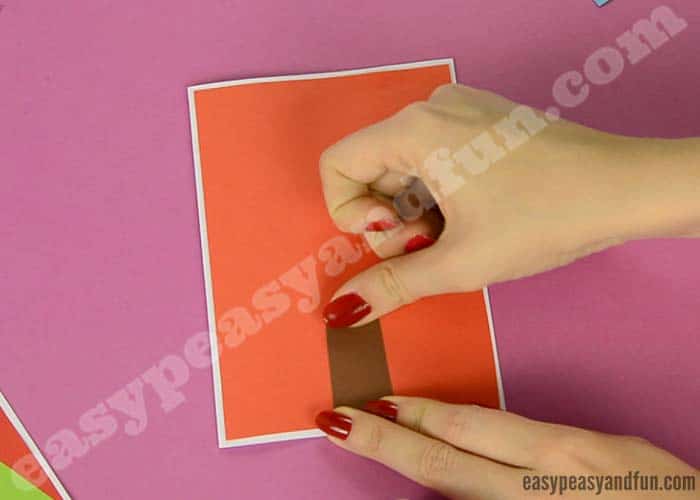
 Glue on a small brown rectangle to make the tree trunk.
 Unfold the Christmas tree triangle and apply glue on the outer edges (all 3 lines).
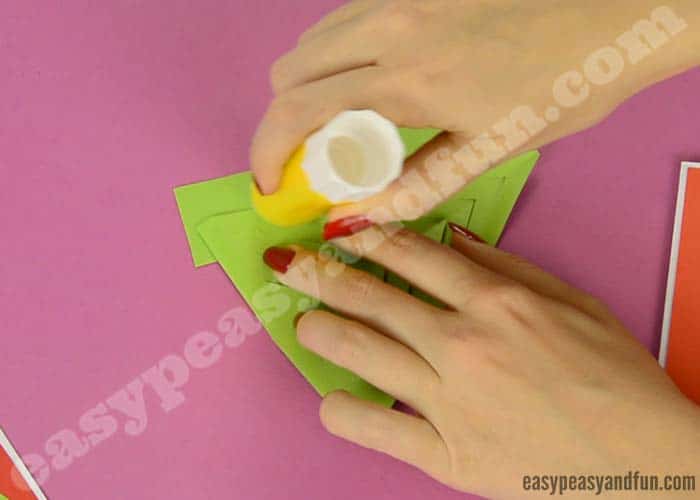 Press down and glue the tree on the base. At this time it won’t really look impressive yet.
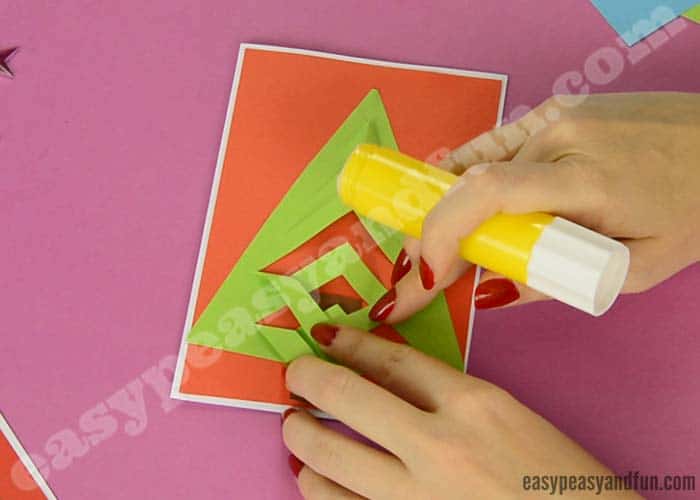
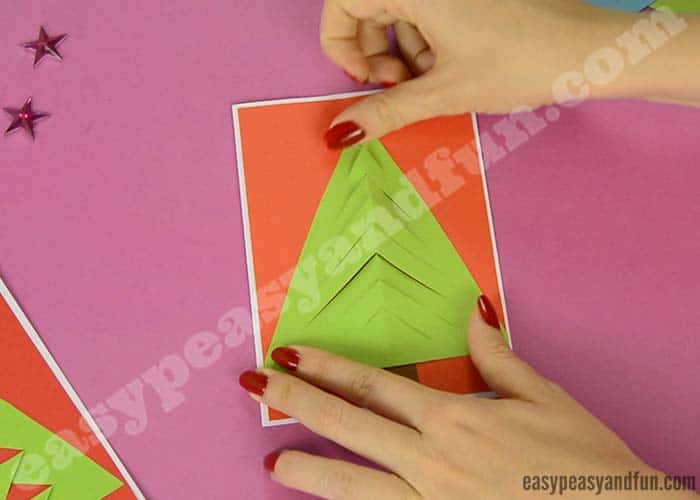 Now lets make the magic happen!
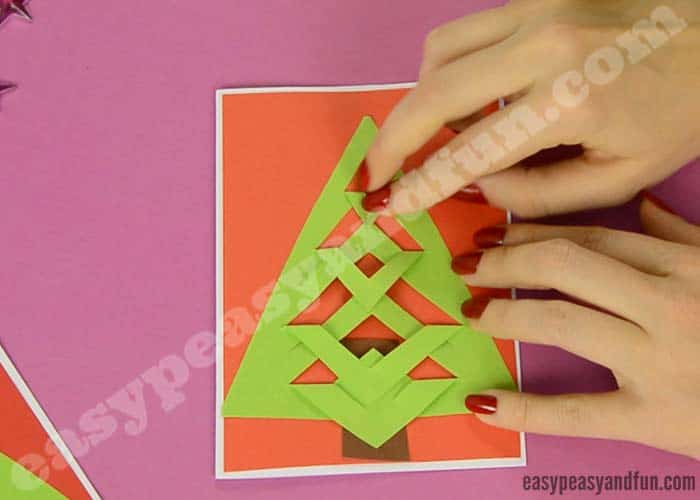
Starting from the bottom, fold down every other “triangle”, gluing the tips to the base (this is best seen on the video tutorial you can find at the end of this tutorial).
 Work your way to the top.
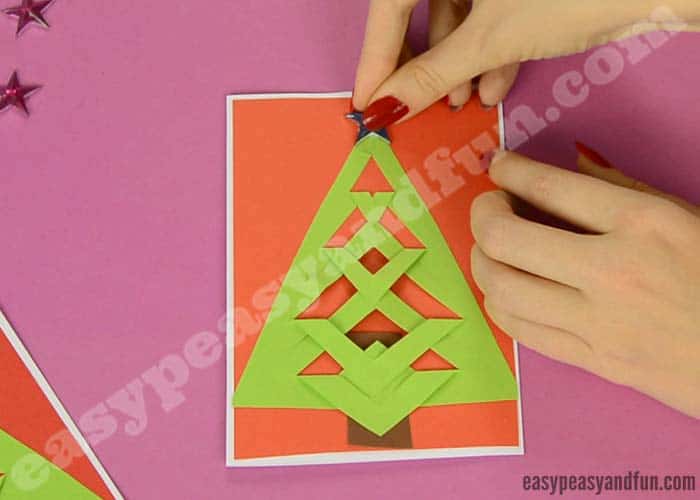
 Add a little gemstone star at the top and you have got yourself a wonderful looking DIY Easy Festive Tree Christmas Card.
Want instant access to all of our printable crafts, activities, and resources?

With thousands of crafts, activities, worksheets, coloring pages, and drawing tutorials to print, you will always have just the resource you need at your disposal. Perfect for parents and teachers alike!