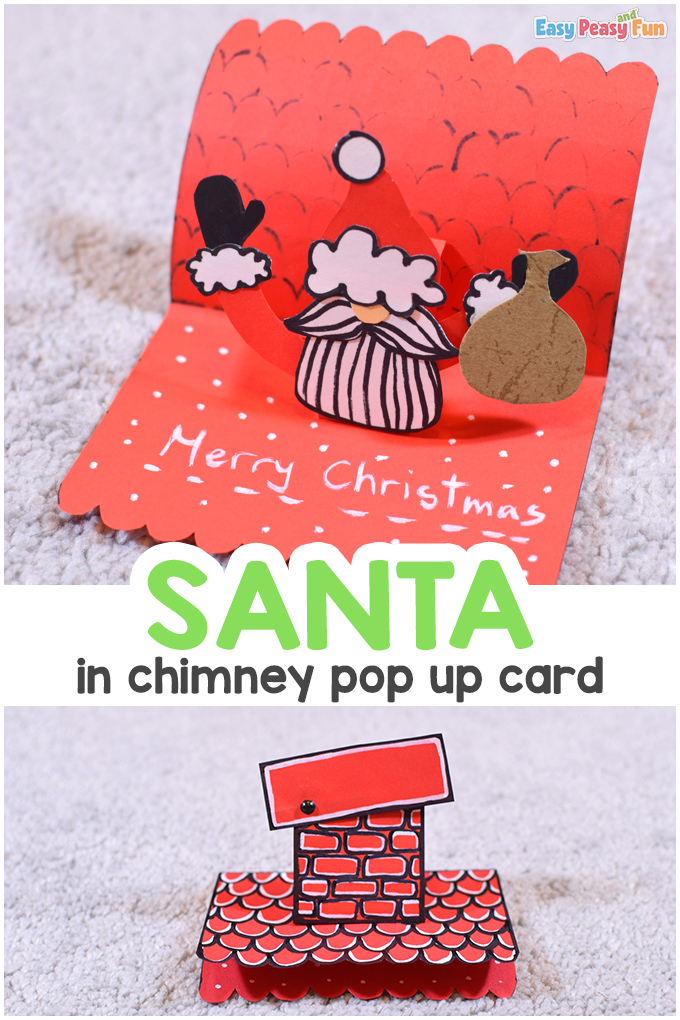
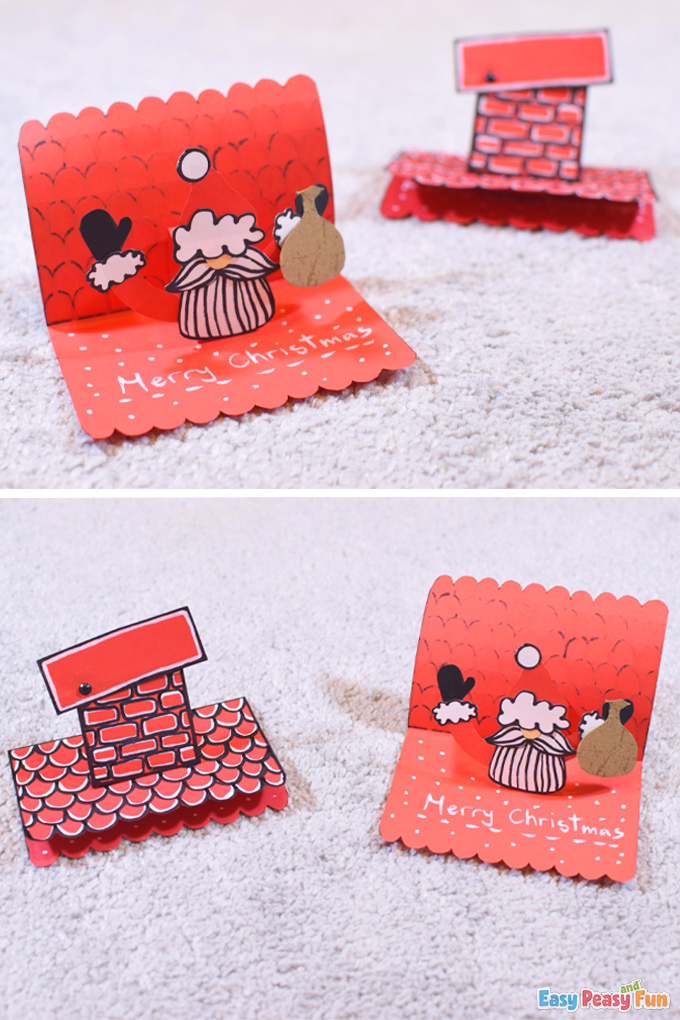
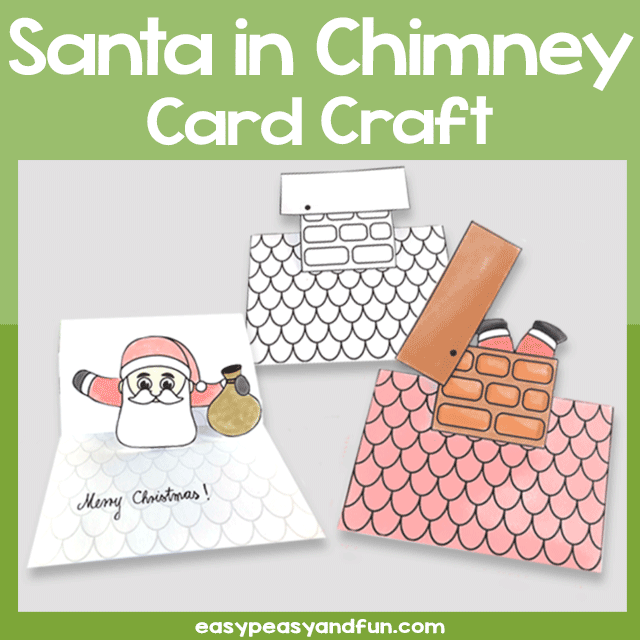
How about we make our greeting cards for the Christmas holidays? We prepared a neat Santa in Chimney Pop Up Card Craft for you and your kids to make.
*This post contains affiliate links*
We love making all kinds of Christmas Crafts for Kids (check out our Christmas Pop Up Card Templates or create your own Elf Christmas Craft).
If your kids love to color, we bet these Christmas Coloring Pages will come in handy.
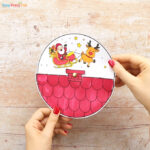
Ho, ho, ho! Someone got stuck in a chimney today! Guess who?
Santa! Santa!
Cough-oh, cough-oh, cough-oh! Not a very clean chimney, huh?
He better finds a way out of there somehow!
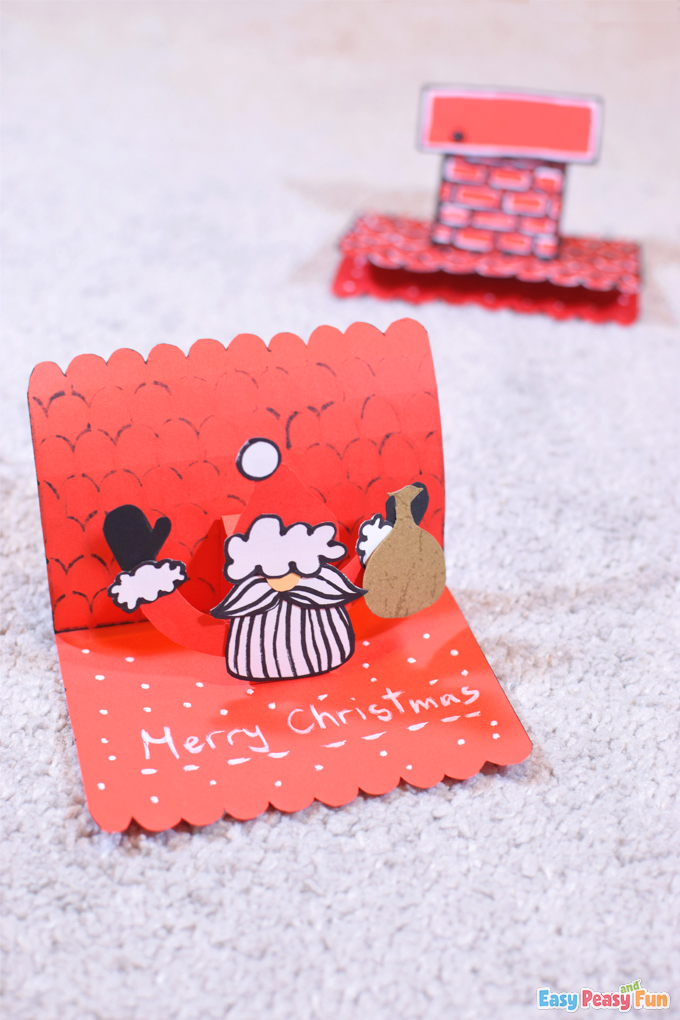
We hope he finds a way out of there somehow, guys, and we hope he brings Christmas presents to everyone just in time.
Anyway, it is a silly situation, plus it is a super fun craft to make for Christmas, and it is memorable, won’t you agree?
Let’s go!
How to Make a Santa in Chimney Pop Up Card Craft
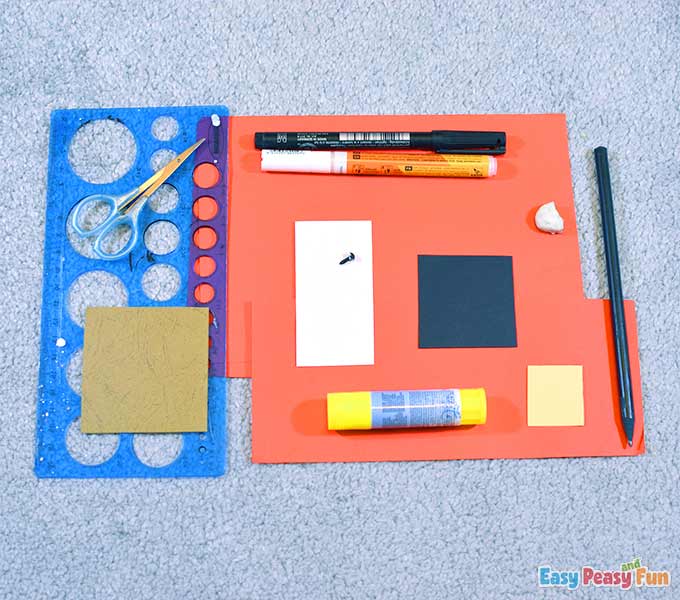
What you need:
- red cardstock
- red color paper
- white color paper
- scissors
- glue
- split pin
- black marker
- white marker
- pale orange color paper
- black color paper
- pencil
- eraser
- ruler
- brown color paper
Step by Step Tutorial
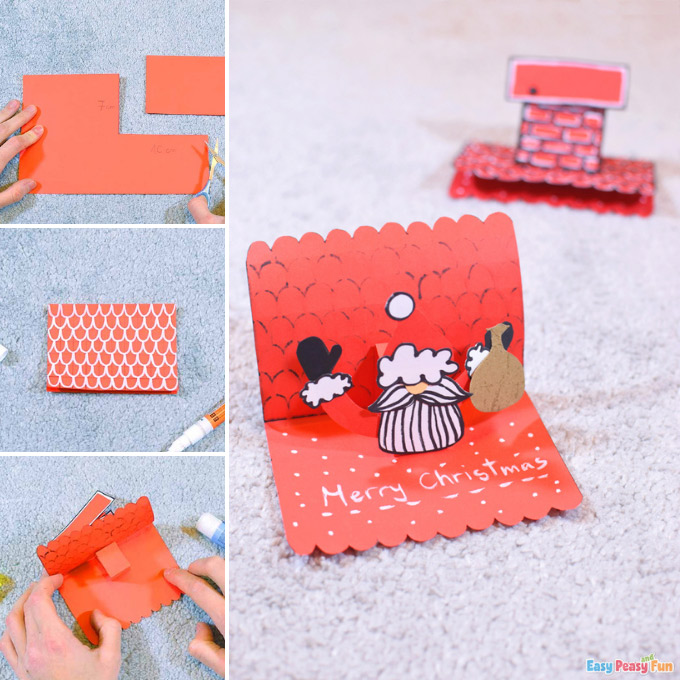
The Card
Fold the red cardstock in half.
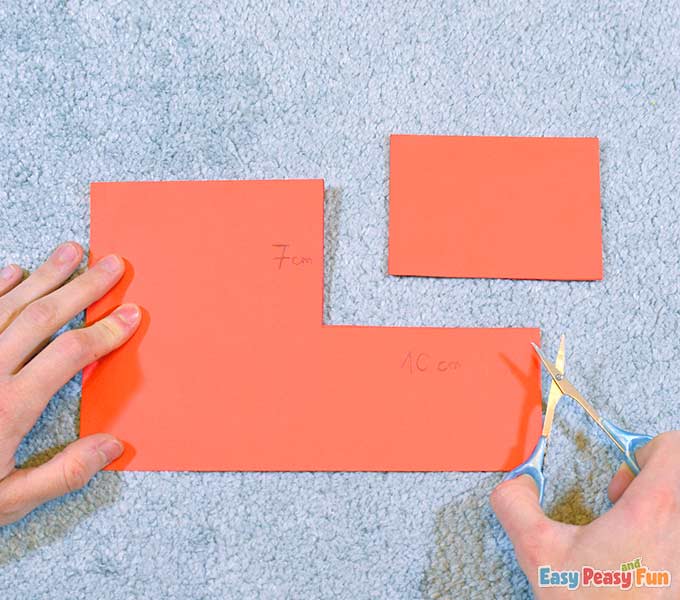
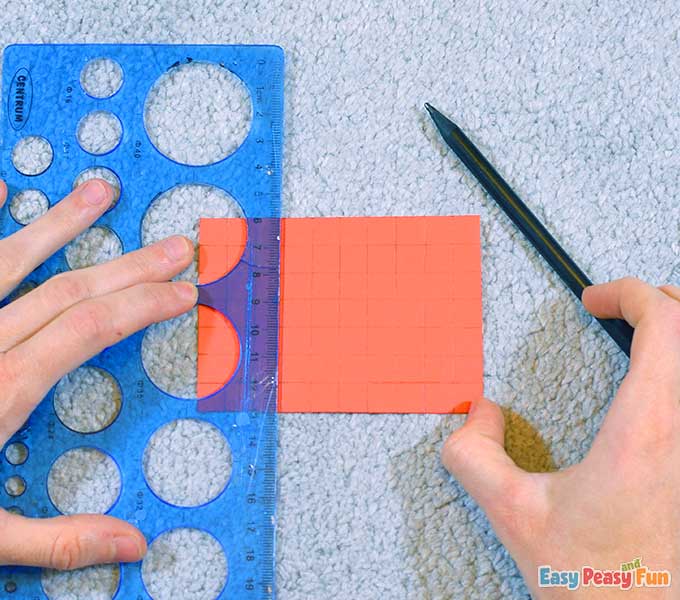
Draw a rectangle with dimensions 7 cm x 10 cm.
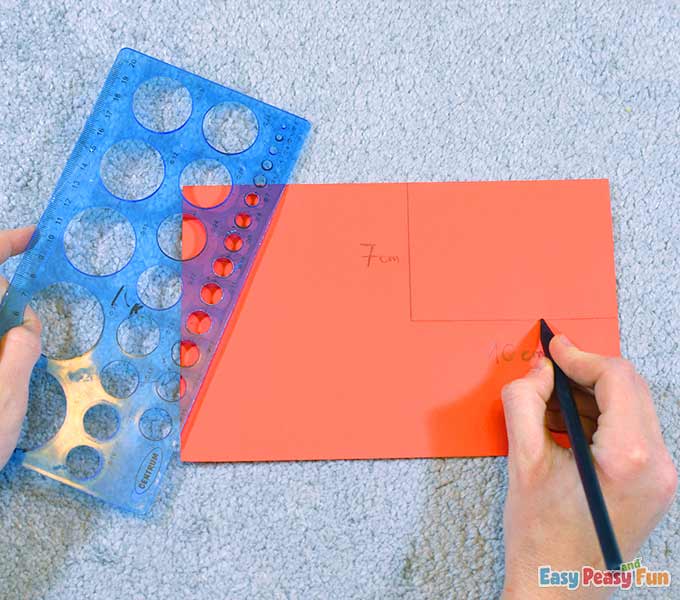
Cut the rectangle out. We are making a roof – the base of our card. It should open and close.
Draw horizontal lines 1 cm wide. Use a pencil for this so you can erase the lines afterward.
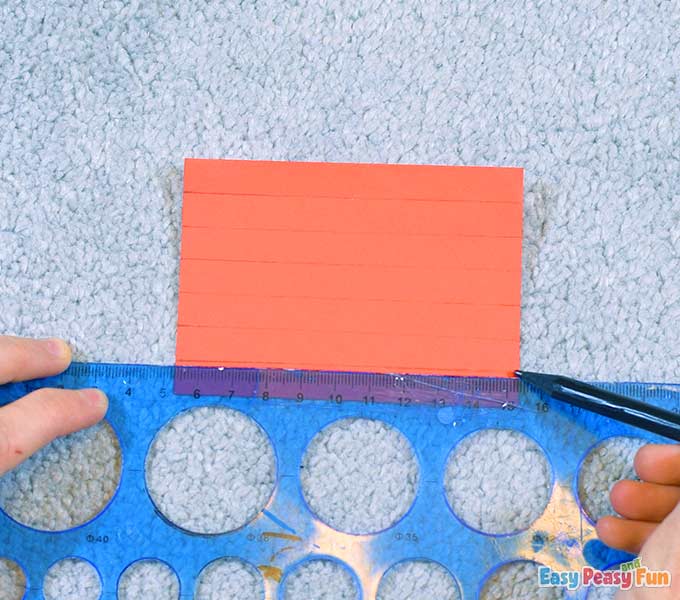
Draw vertical parallel lines 1cm wide.
These squares you see now will serve as guidelines for our roof tiles.
Take the white marker and start drawing the first row of roof tiles.
Make sure you make them equal in size.
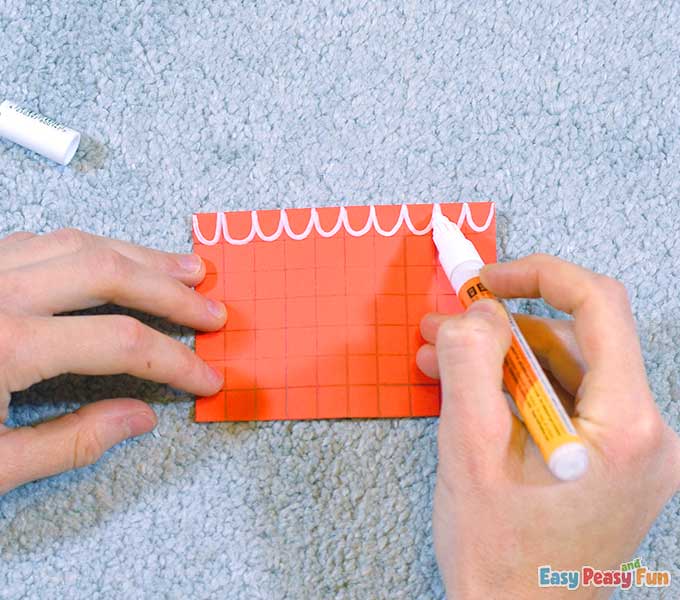
Continue with the second row of tiles …

… until you fill all the squares.
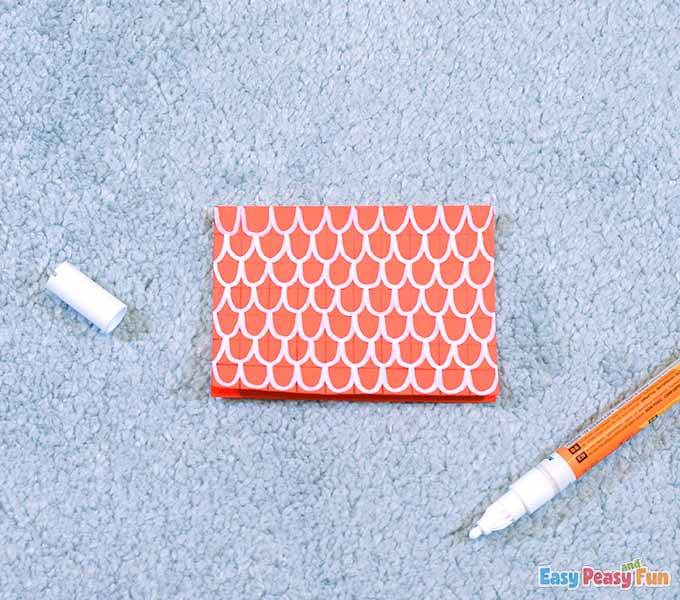
Erase the pencil marks.
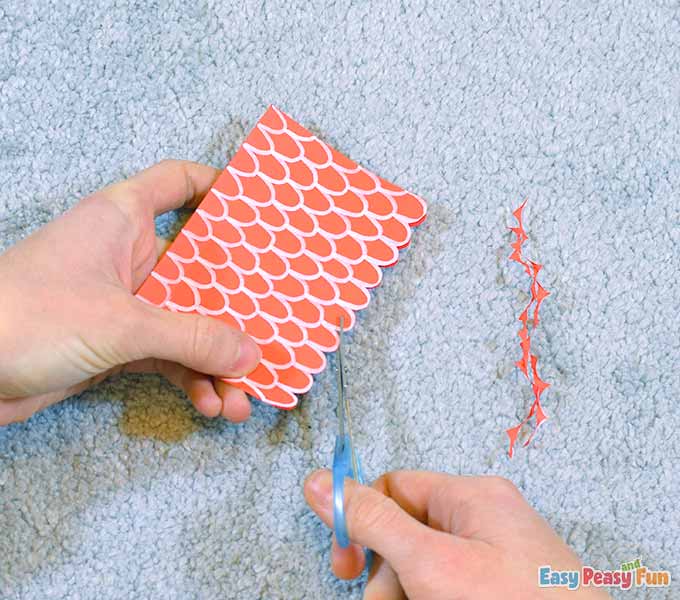
Take your scissors and shape the roof edge as shown.
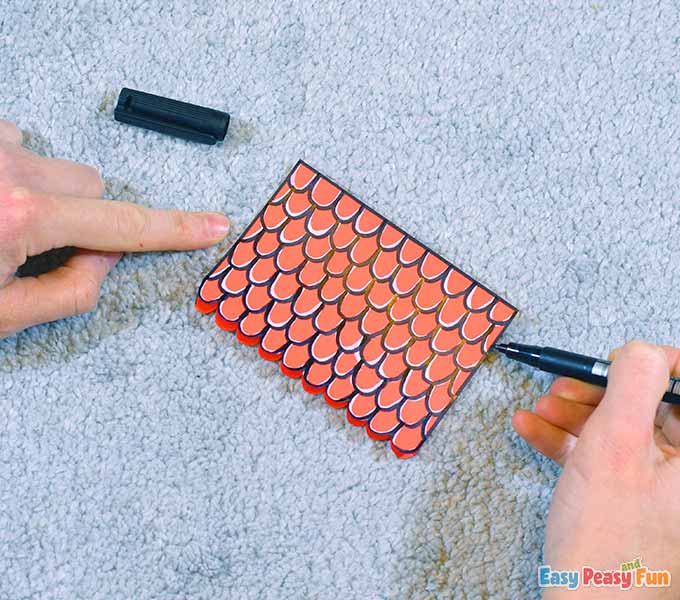
Now take the black marker and outline the white tiles.
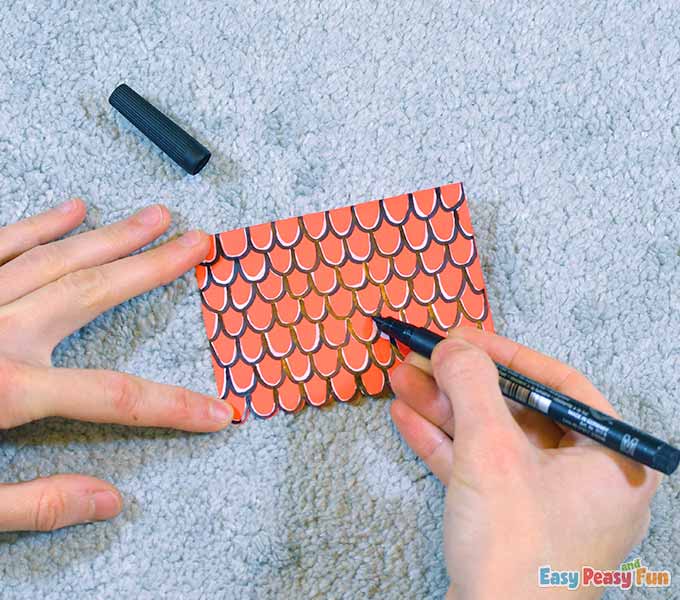
Then outline the front of the card (the edges) with the black marker.
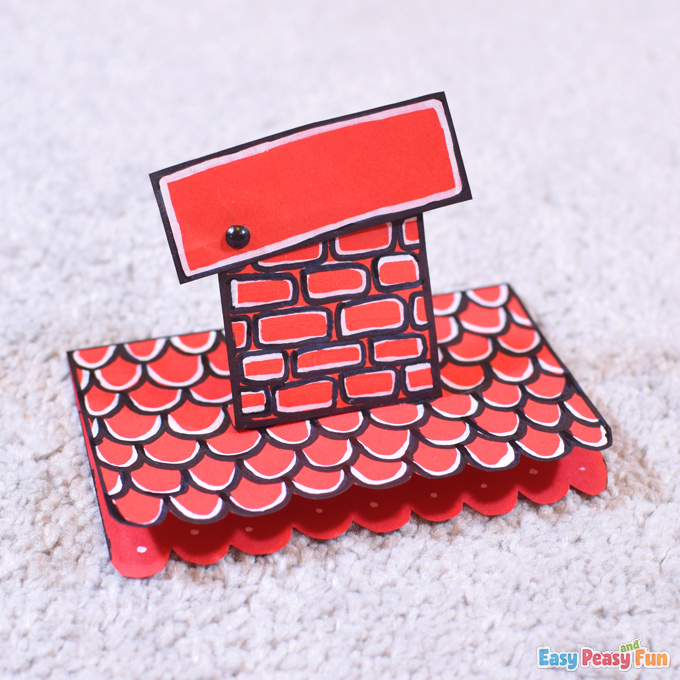
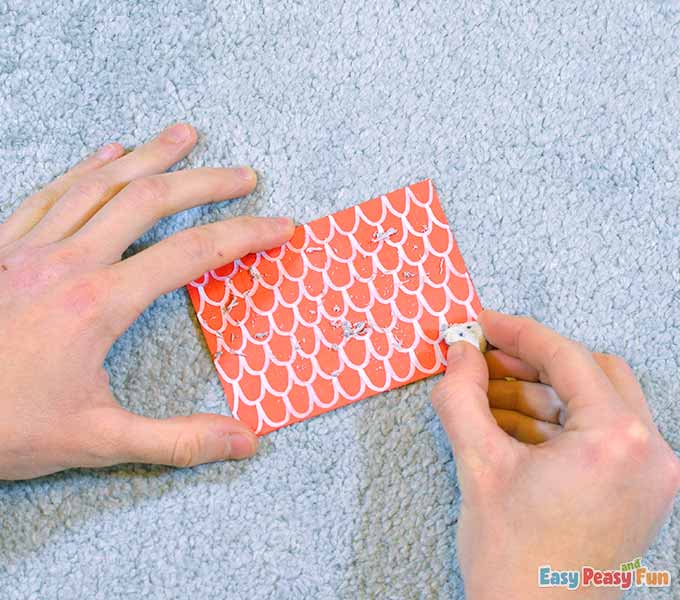
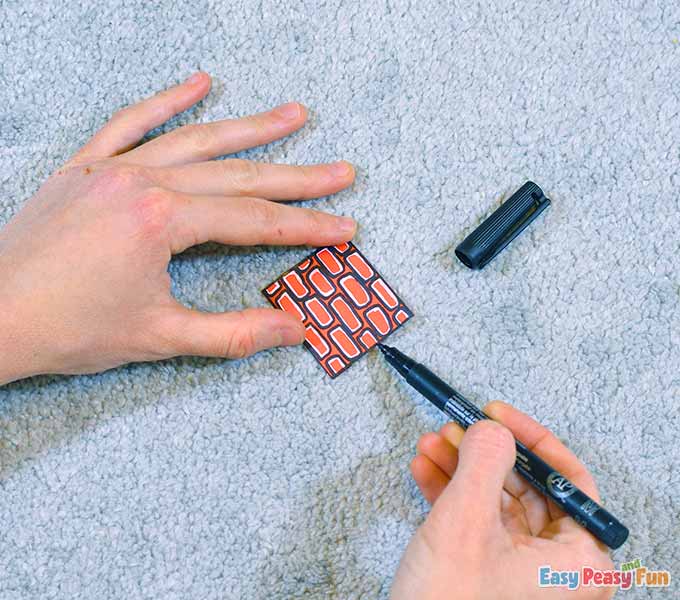
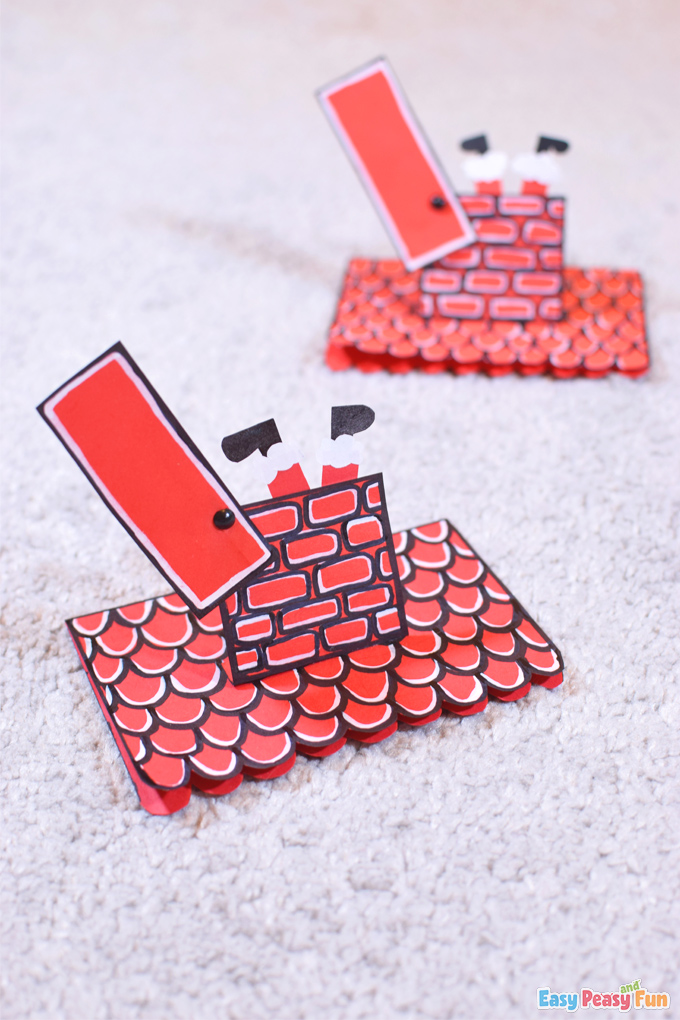
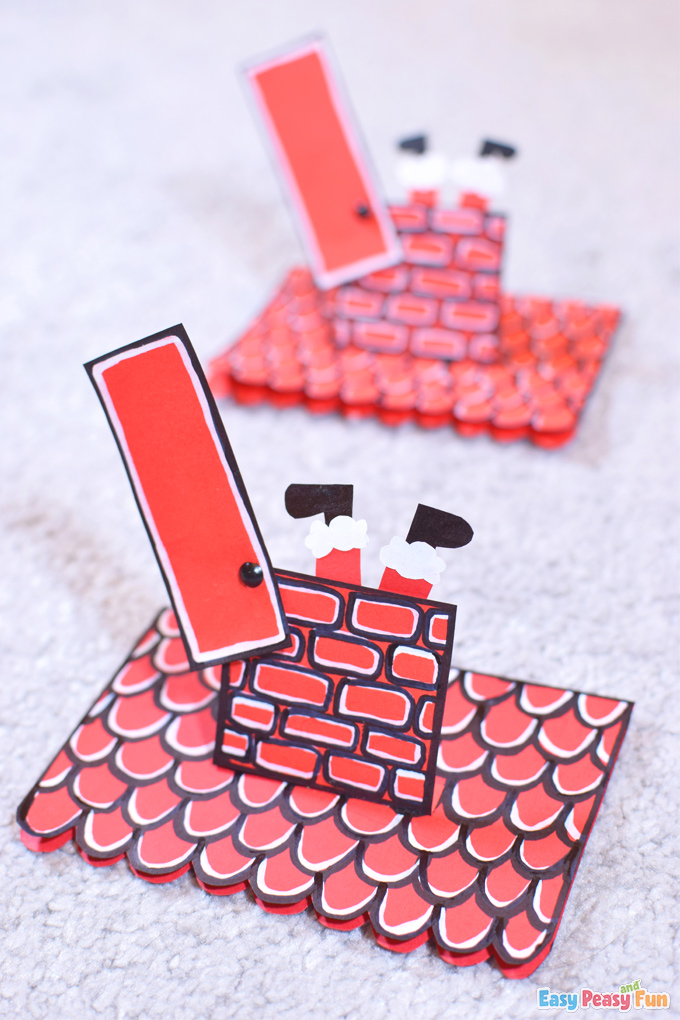
The Chimney
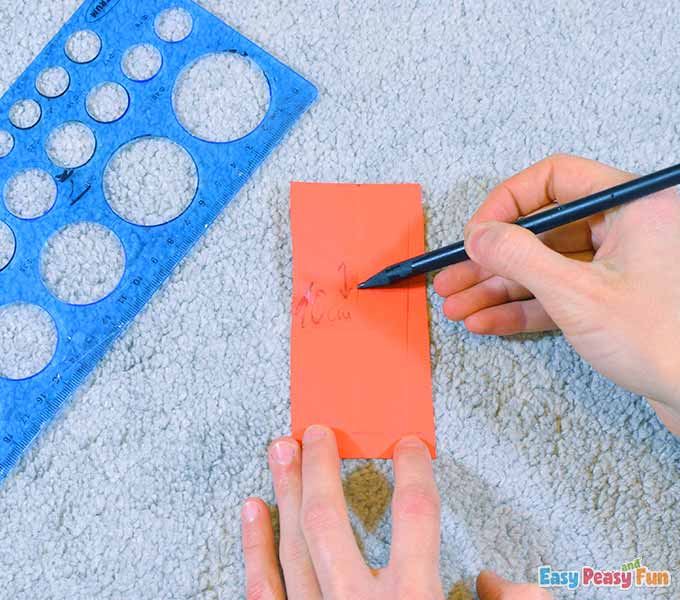
To make the chimney, first, you will need to draw and then cut a 5 cm x 4,5 cm rectangle out of the red cardstock.
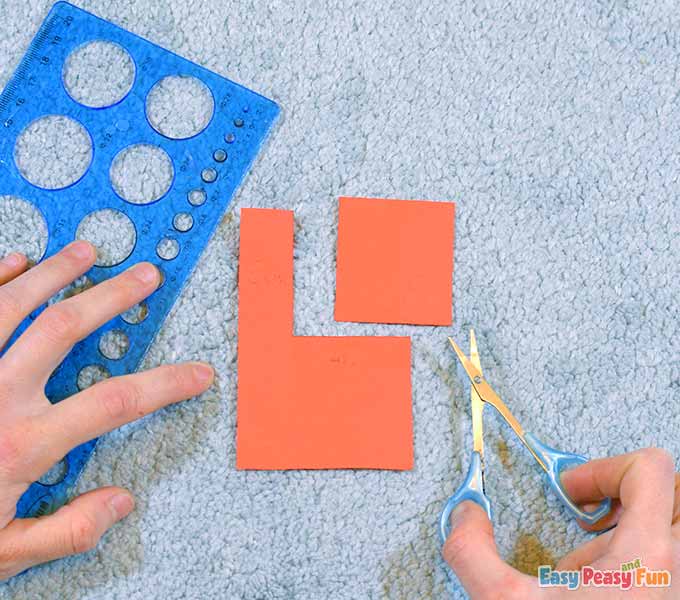
Mark a 1 cm wide part on this rectangle (as shown).
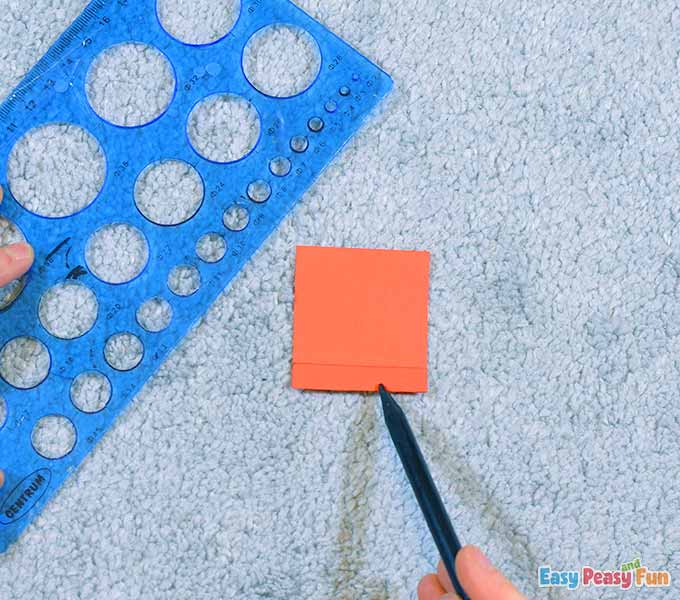
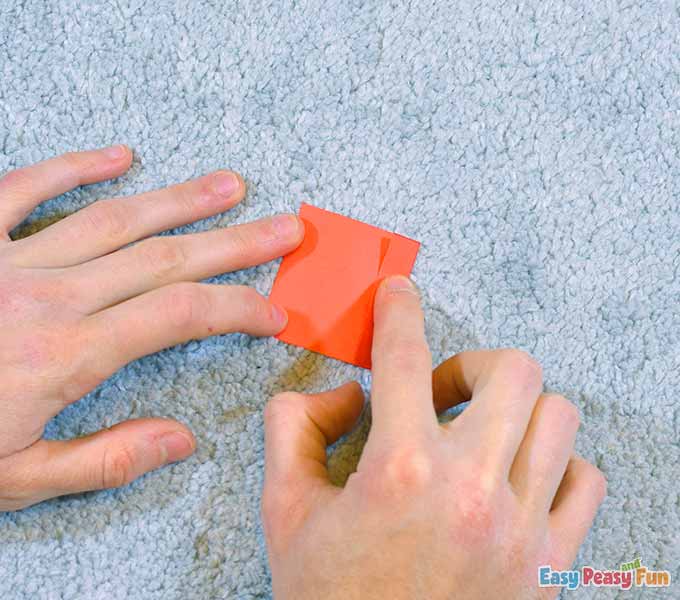
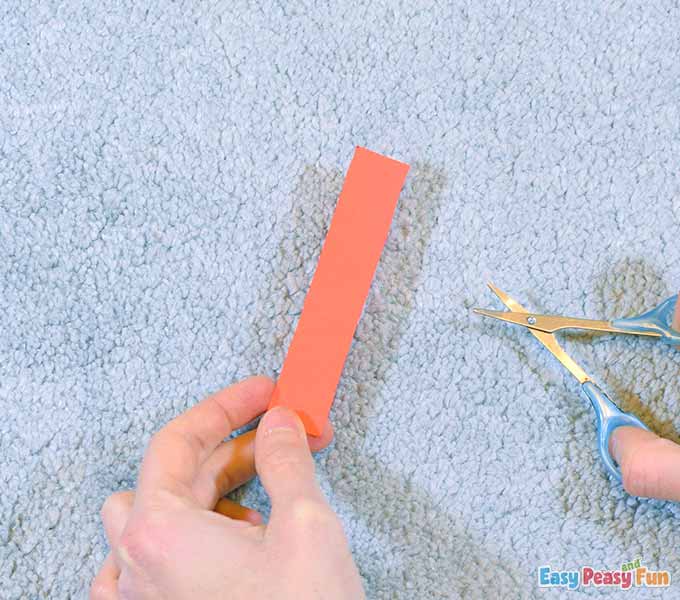
Make a fold.
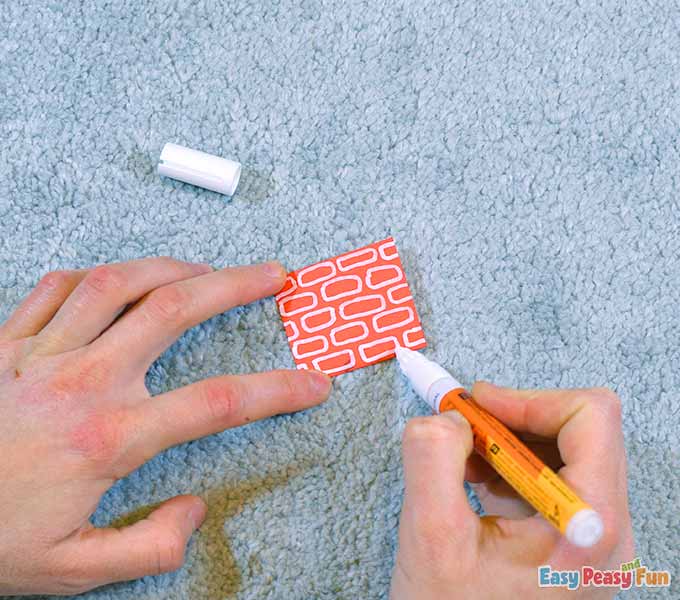
Draw some bricks on the chimney with the white marker. There is enough space to draw five rows of bricks.
Outline the bricks with the black marker.
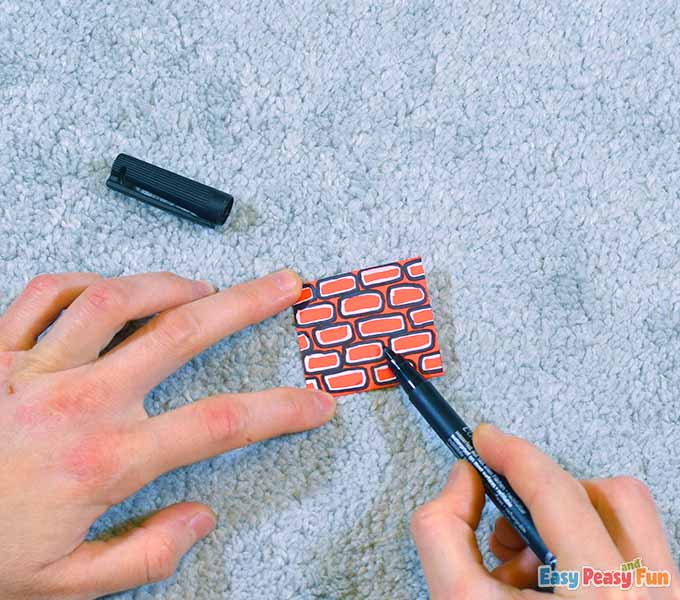
Outline the whole chimney (the edges) with the black marker.
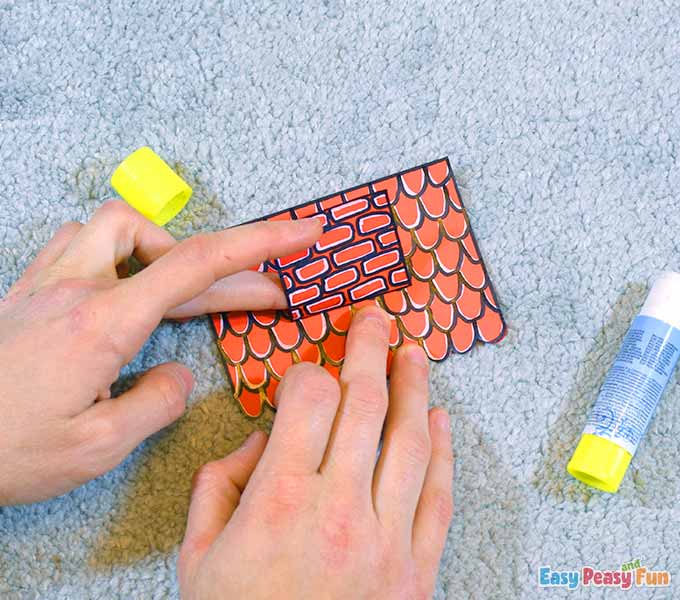
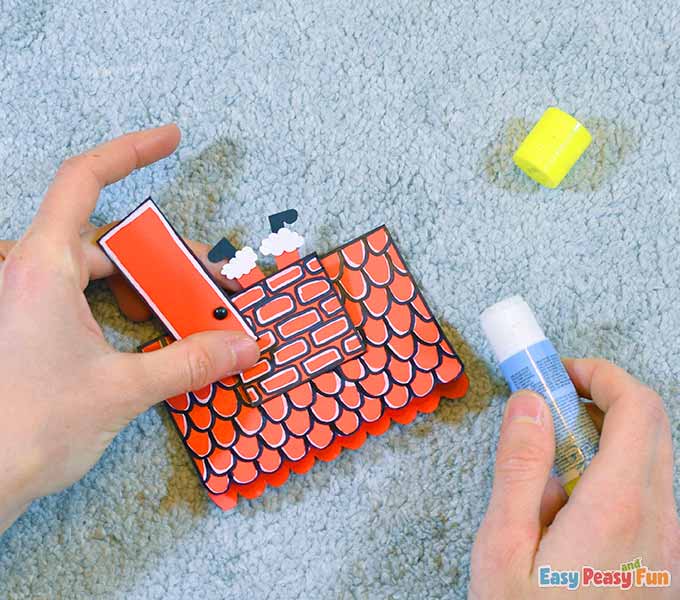
Apply some glue on the folded part of the chimney …
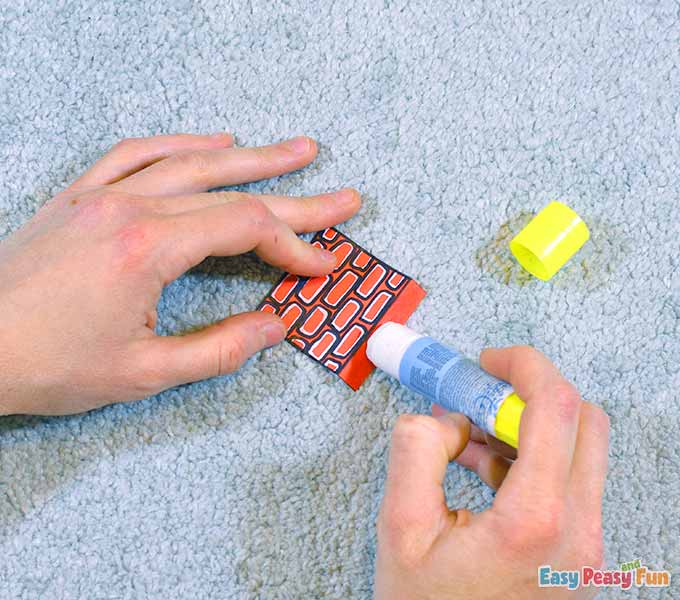
… and glue the chimney on top of the roof.
 The Chimney Cap
 The Chimney Cap
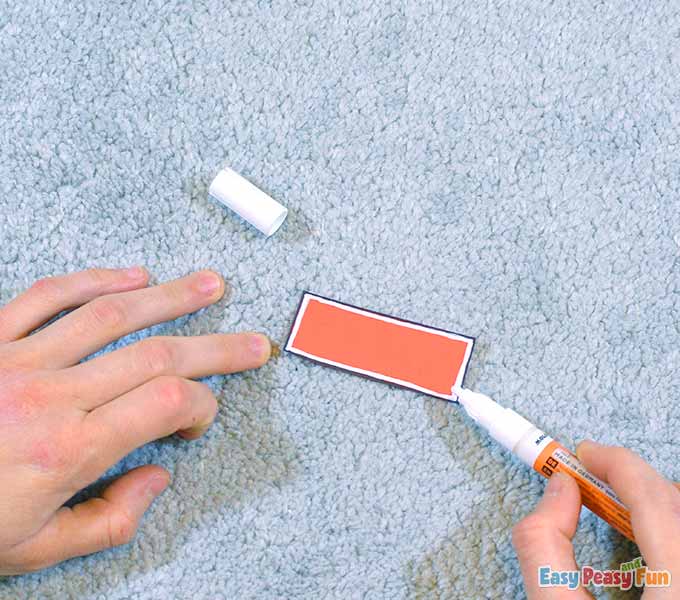
Draw one 2,5 cm x 6,5 cm rectangle on the red cardstock and cut it out.
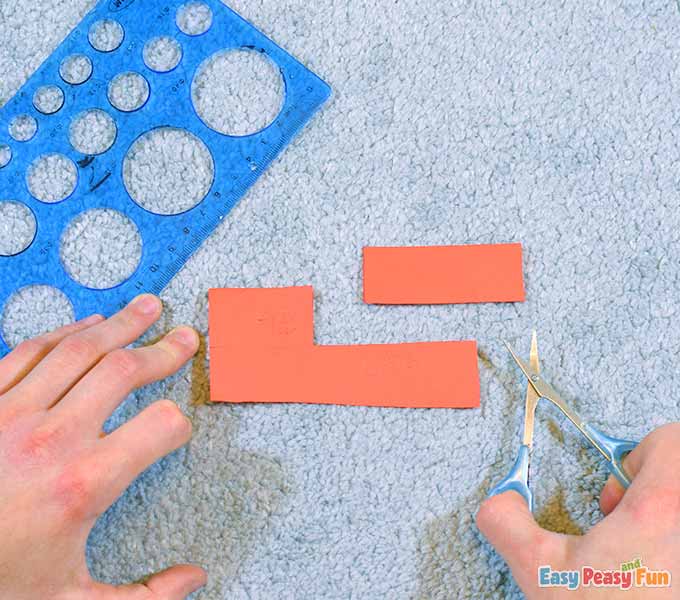
Outline it with the black marker and then draw a white rectangle close to the black line.
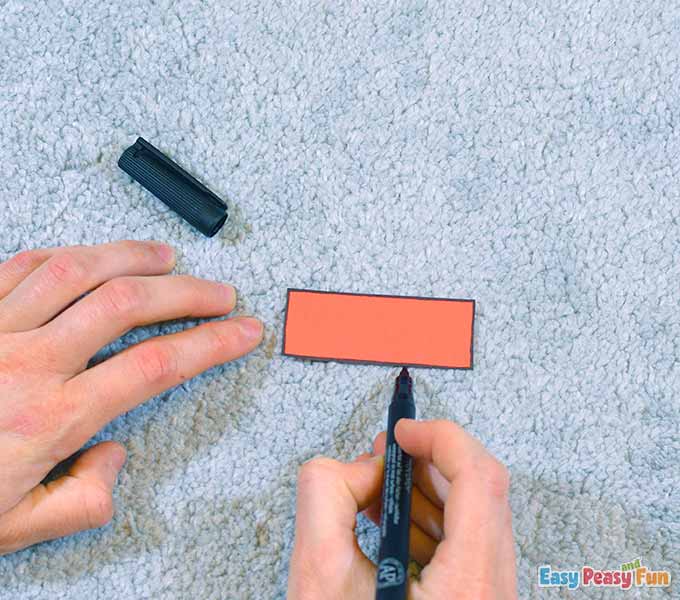
This piece will serve as a chimney cap.
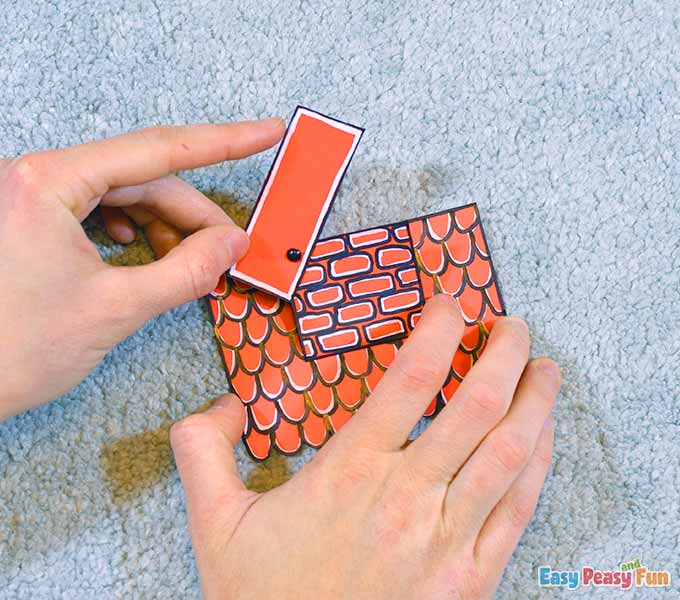
Place the chimney cap over and on top of the chimney, then push a split pin through both the cap and the chimney.
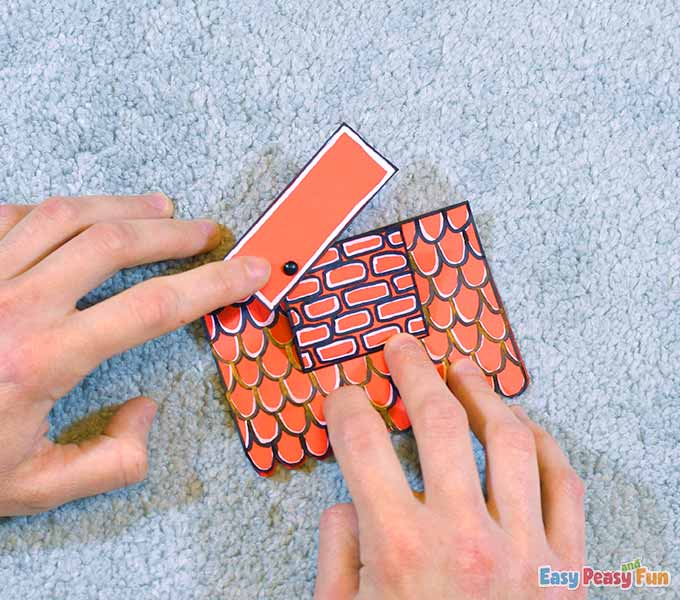
Split the ends of the pin and check if your mechanism works properly.
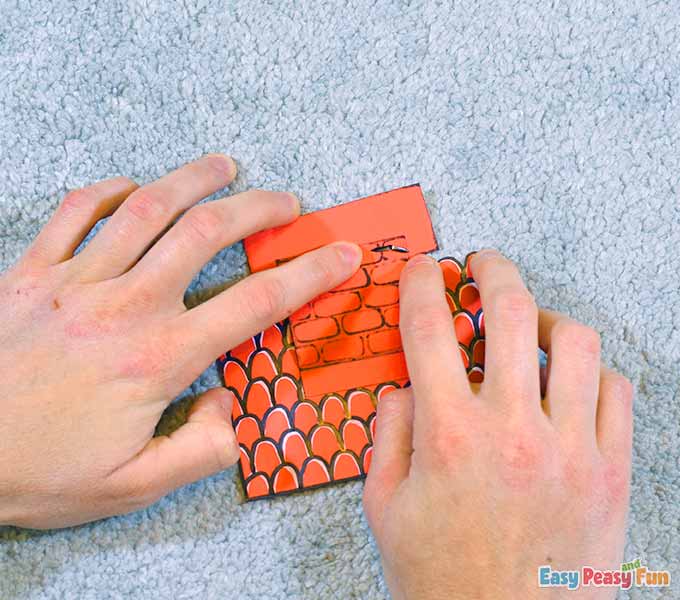
The cap should open and close without any obstacles.
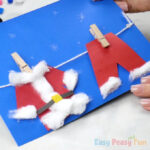
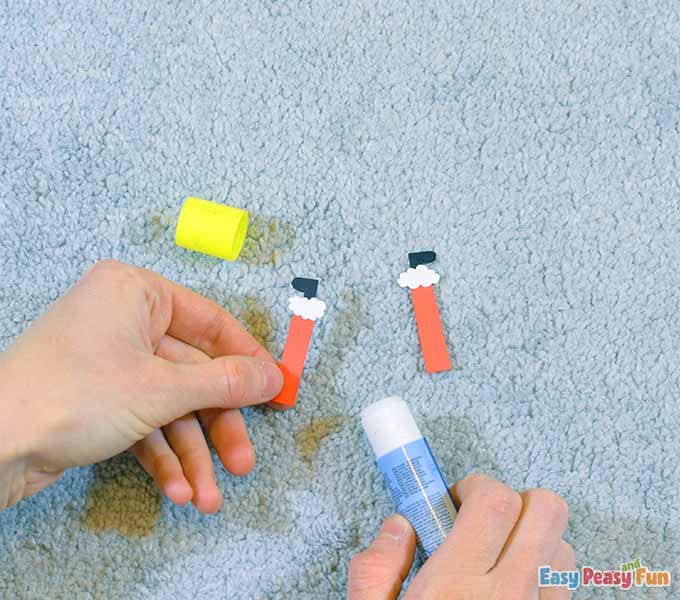
The Santa’s Legs
 The Santa’s Legs
Cut out two red rectangles.
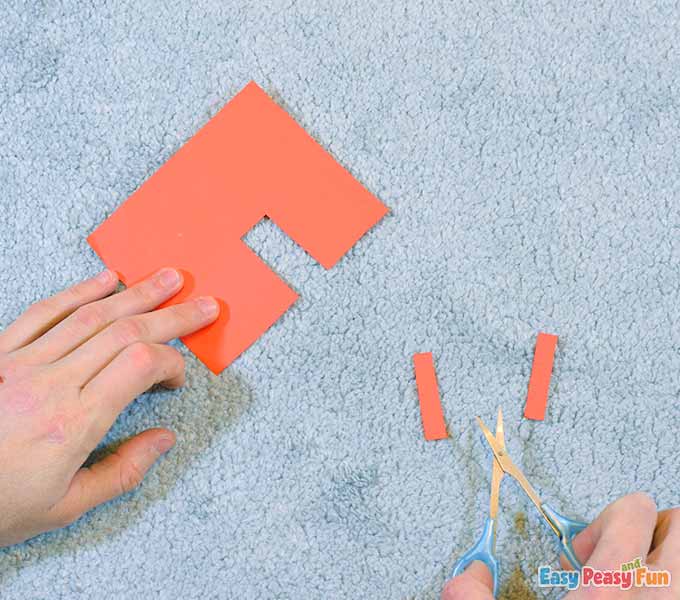
On the white paper, draw and cut out two “fluffy” pieces.
Draw and cut out two black boots.
Form the legs of our Santa by gluing these three pieces together.
Glue the “fluffy” pieces on the red rectangles’ ends and add the boots under the “fluffy” parts.
Open the chimney cap and glue the legs on the backside of the chimney.
The boots and some parts of the pants should peek out like this.
Isn’t it funny seeing Santa’s legs peeking out like this?
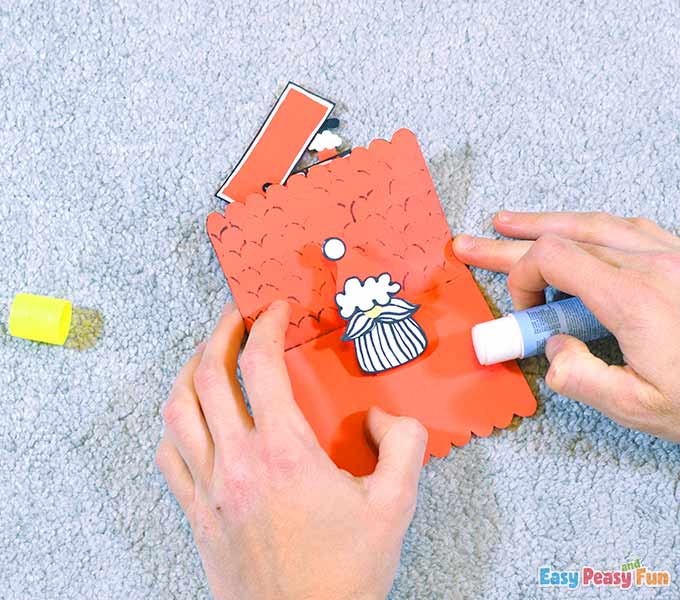
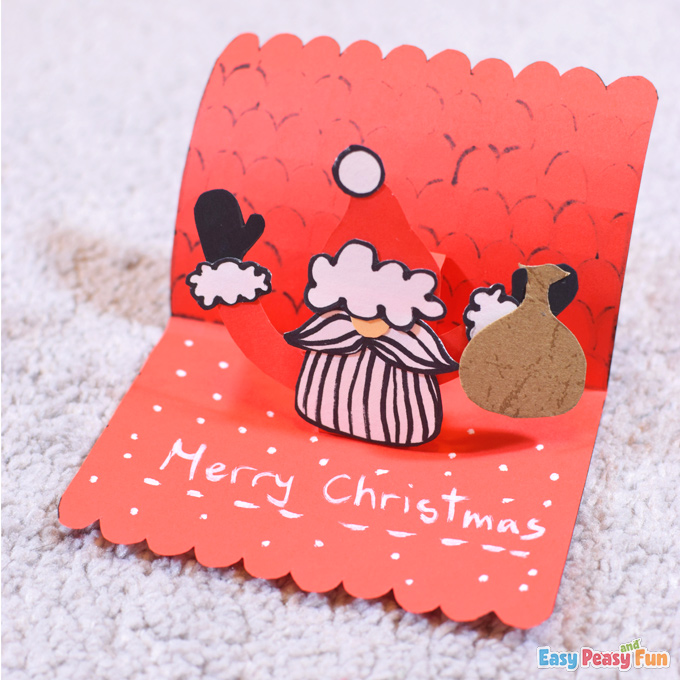
The Pop-Up Mechanism
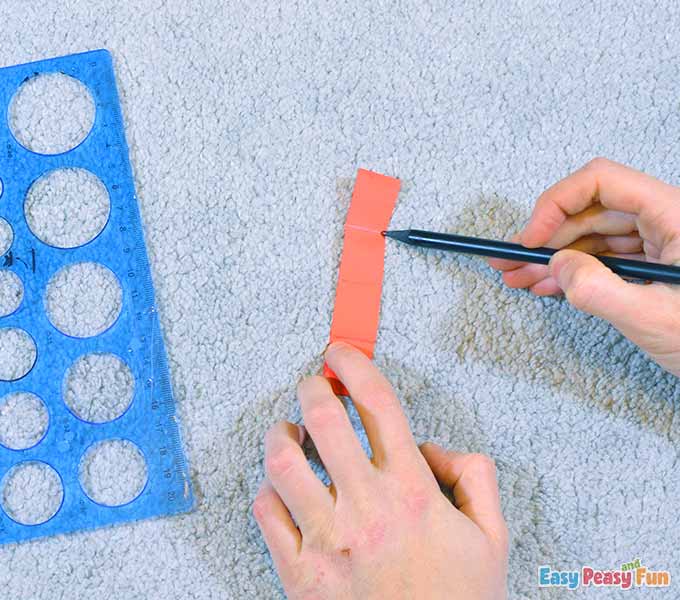
To form a pop-up piece for the inside of the card, draw a 2,5 cm x 10 cm rectangle.
Cut it out.
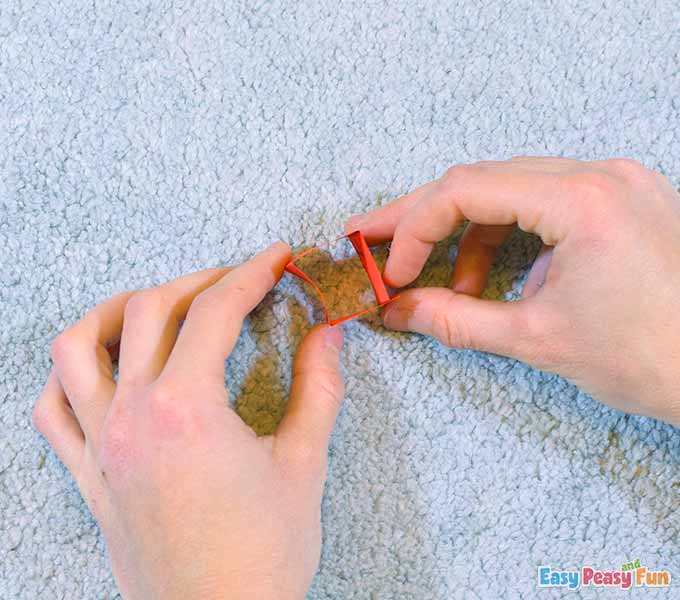
Divide it into 4 equal 2,5 cm parts.
Now fold them to make a square.
Apply some glue on the end parts of the pop-up piece …
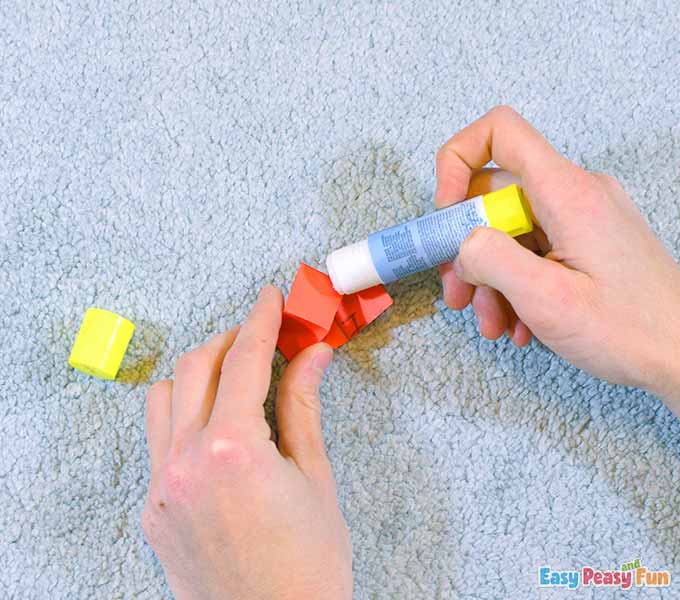
… then, glue the pop-up piece inside the card, in the middle.
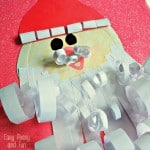
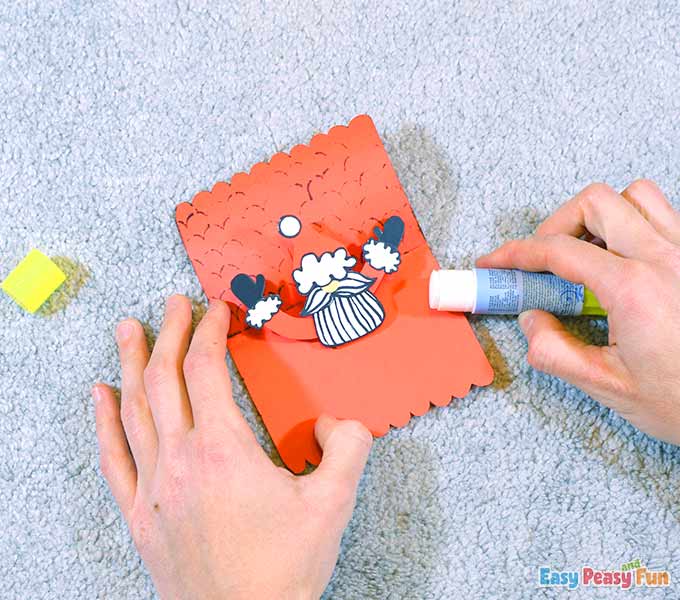
The Santa
 The Santa
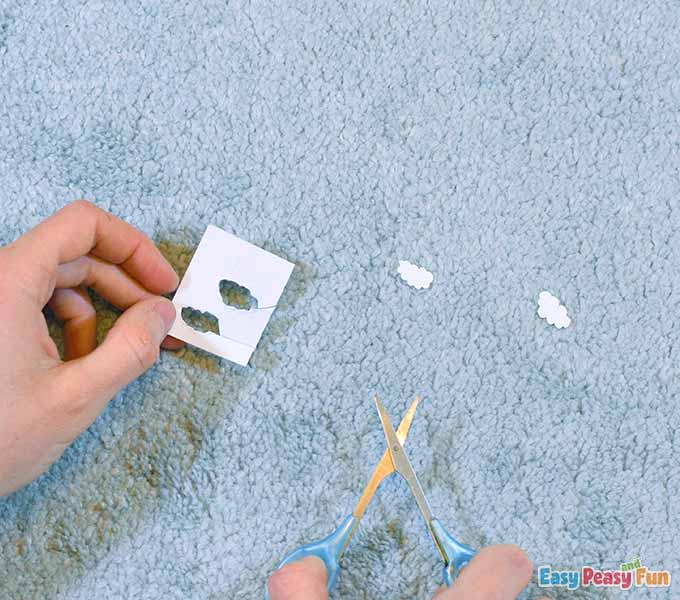
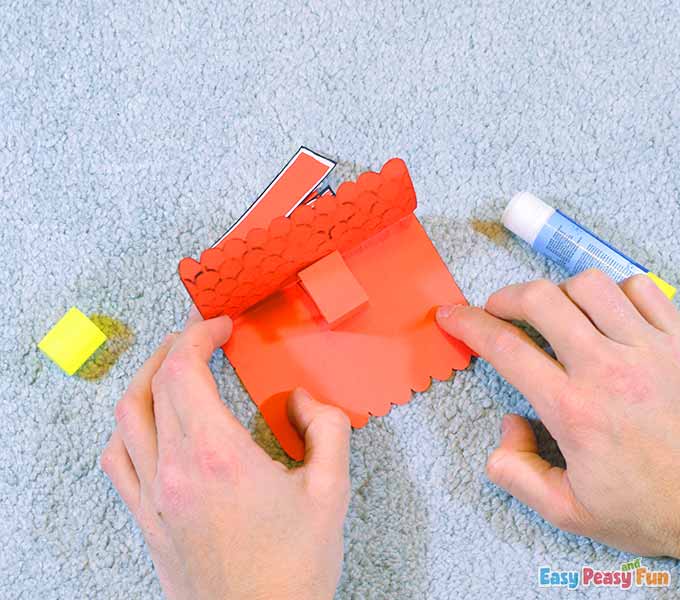
Draw and cut out a white beard and mustache, a small pale orange circle – a nose and a red Christmas hat + one white circle for the top of the hat and one “fluffy” piece for the bottom of the hat.
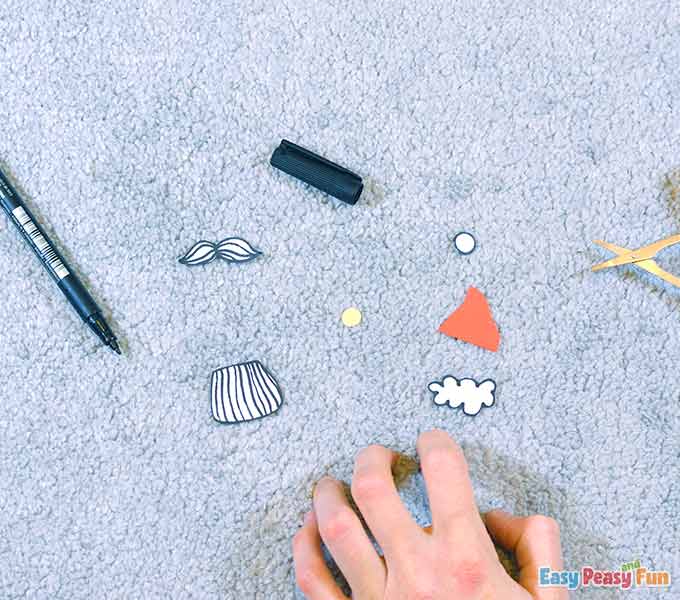
Glue them together. Take the mustache and glue them to the beard, then add the nose on top of the mustache and then glue the hat on top of the nose.
This will be Santa’s head. We won’t see his eyes because he is upside down, and the hat covers them.
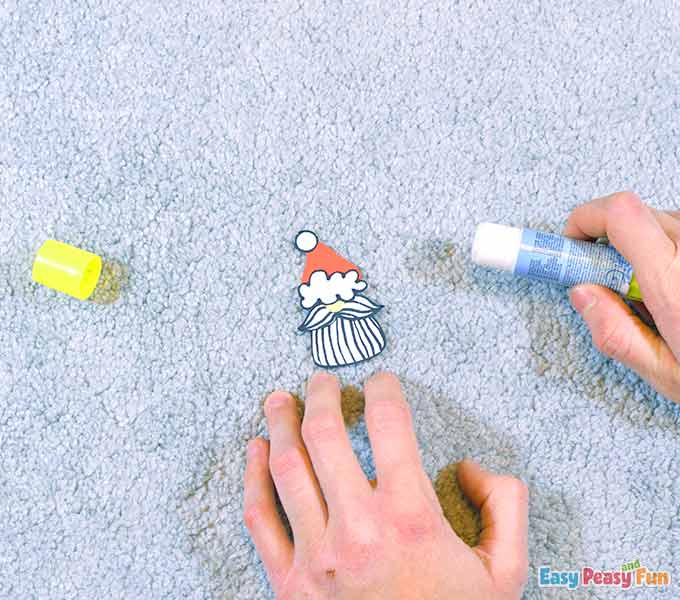
Glue the head on the pop-up piece.
The Santa’s Hands
 The Santa’s Hands
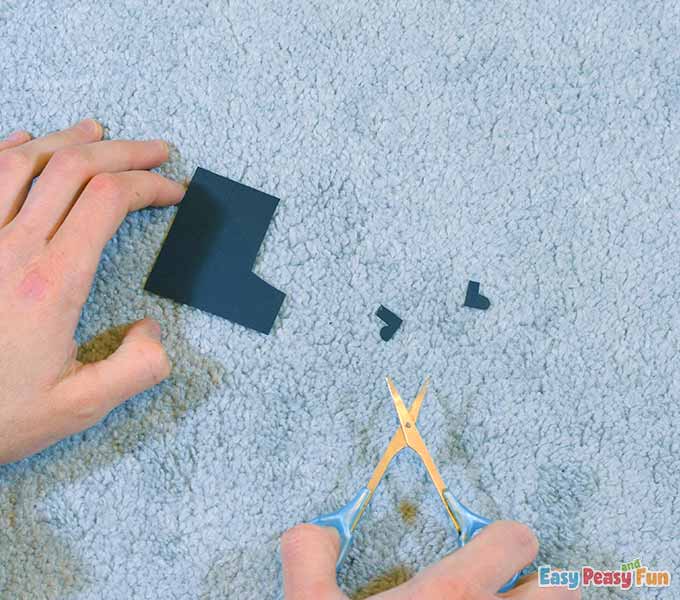
On the red color paper, draw two hands (make them slightly different), and on the black color paper, draw two gloves.
On the white color paper, draw two “fluffy” parts.
Cut all these pieces out.
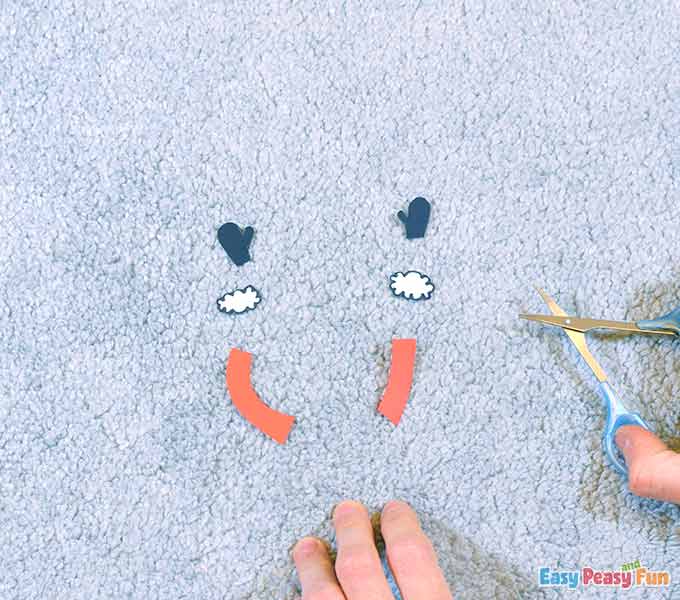
Then glue them together.
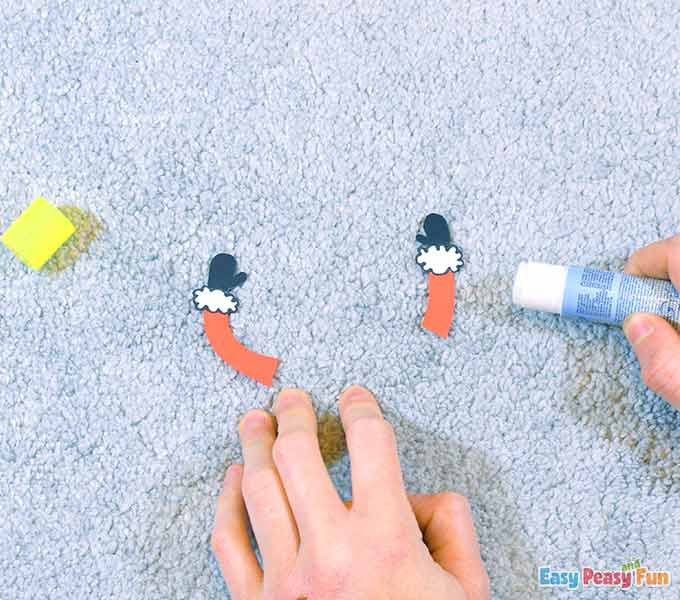
Now attach them to the pop-up piece behind the head of our Santa.
The Christmas Bag
On the brown color paper, draw Santa’s Christmas bag and cut it out.
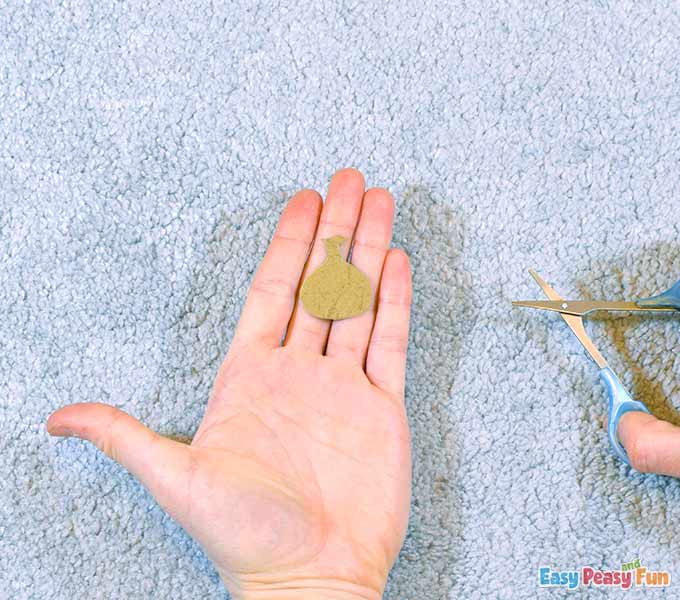
Apply some glue on the thinnest part of the bag and glue it on Santa’s glove, so it looks like he is holding it.

With the white marker, write a Christmas message inside the card and draw some tiny snowflakes.
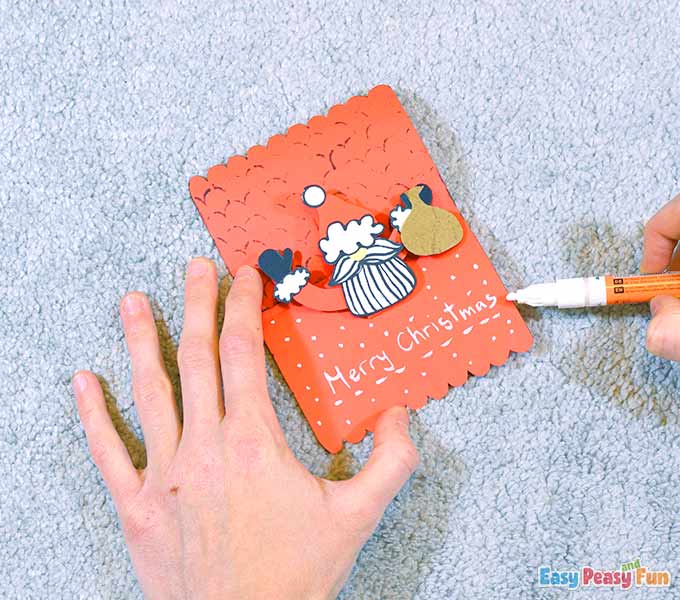
All done!
What a hilarious craft, huh?
Ho, ho, ho!
Merry Christmas, guys!
We hope you enjoyed making today’s project!
Get your Santa in Chimney Pop Up Card Craft Template Here
Want instant access to all of our printable crafts, activities, and resources?

With thousands of crafts, activities, worksheets, coloring pages, and drawing tutorials to print, you will always have just the resource you need at your disposal. Perfect for parents and teachers alike!