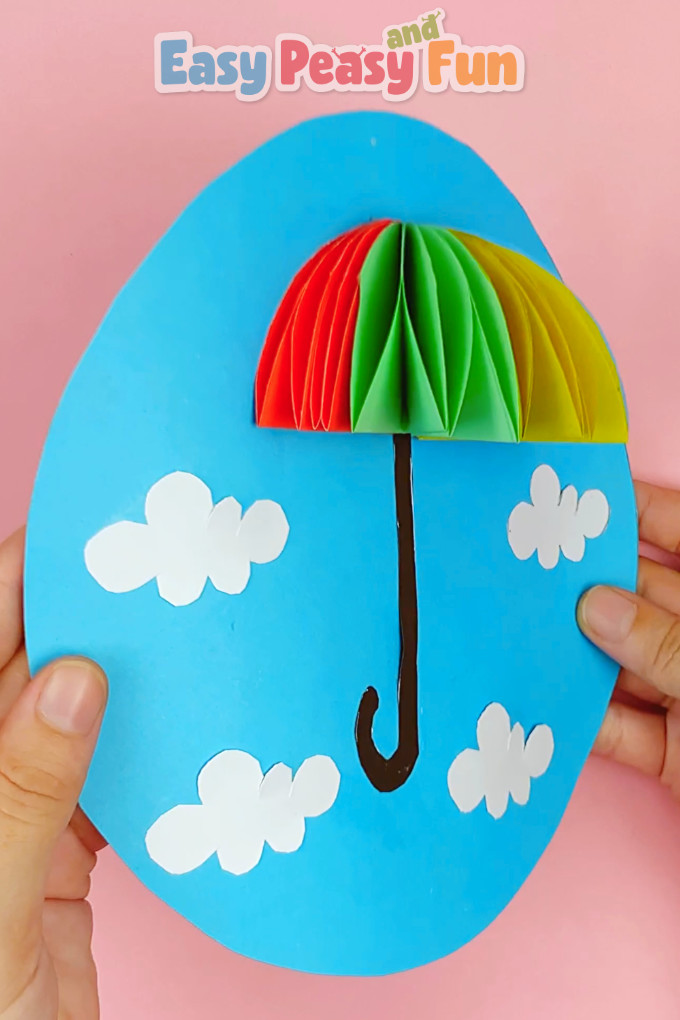
Spring brings many rainy days and if you and your kids are stuck at home because of rain, why not make the best of it and make this fun rainy day paper umbrella craft?
You only need paper, glue, and scissors and you can make the most colorful umbrella craft with your little ones. This one just screams to be showcased on the fridge.

*This post contains affiliate links*
We’ve already shown you how to make paper umbrellas in this folding manner, but those were more the ornament type than they were the hang-on-the-fridge type. So this time around we’re making a spring craft that has that cool 3D effect and can easily be hung on the wall (or a spring bulletin board if you are making this in the classroom).
Related: spring coloring pages
How to Make the Rainy Day Paper Umbrella Craft
What you need:
- pencil
- scissors
- glue stick
- white paper
- color paper (for example light blue, red, green, yellow, blue, purple, and brown)
Step by Step Tutorial
The Sky
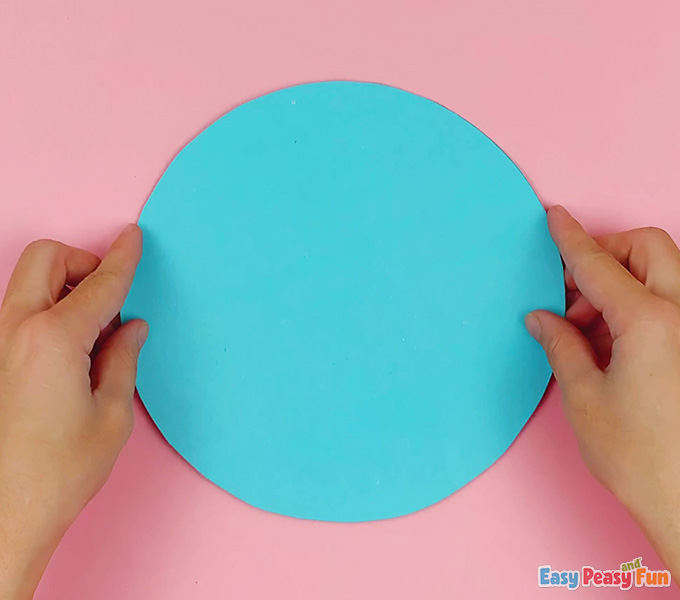
Have kids cut out a circle from light blue color paper. You can also cut the circle out of an old cereal box and paint it blue (yay for recycling).
Making the umbrella
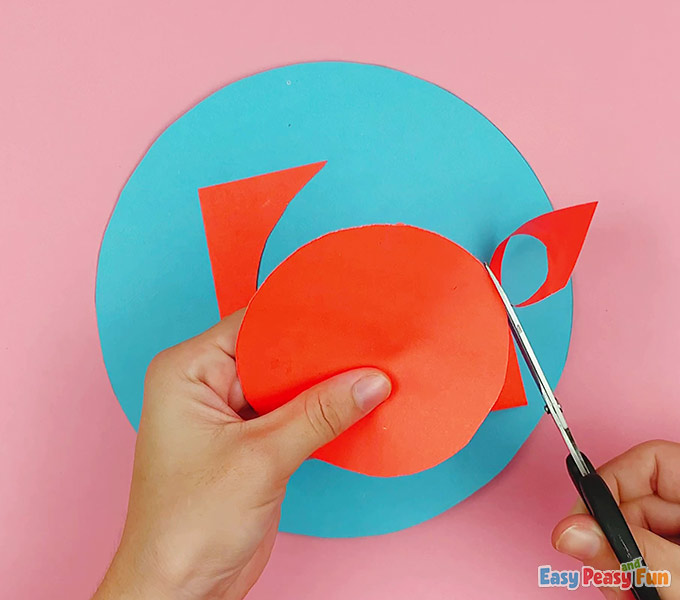
The canopy we made consist of 10 parts (you can use more to make the umbrella fuller, or a couple less). You can have the kids cut the circles on their own (use a round object as a stencil – cups work great) or have them use a paper punch.
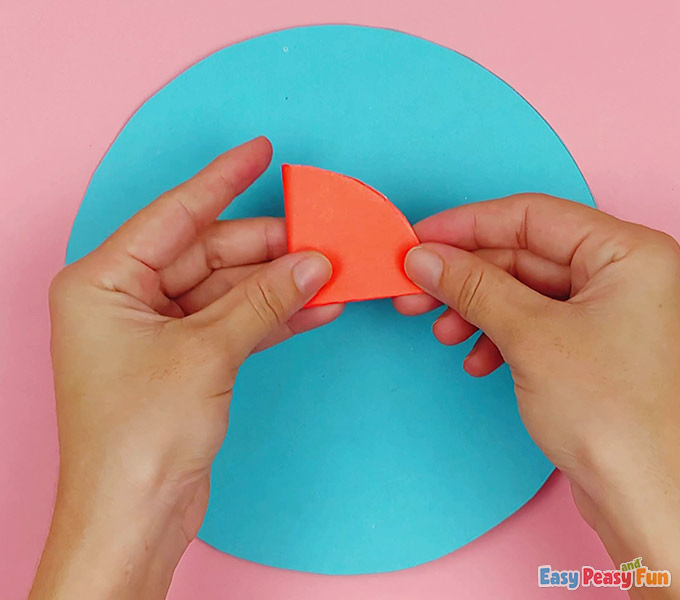
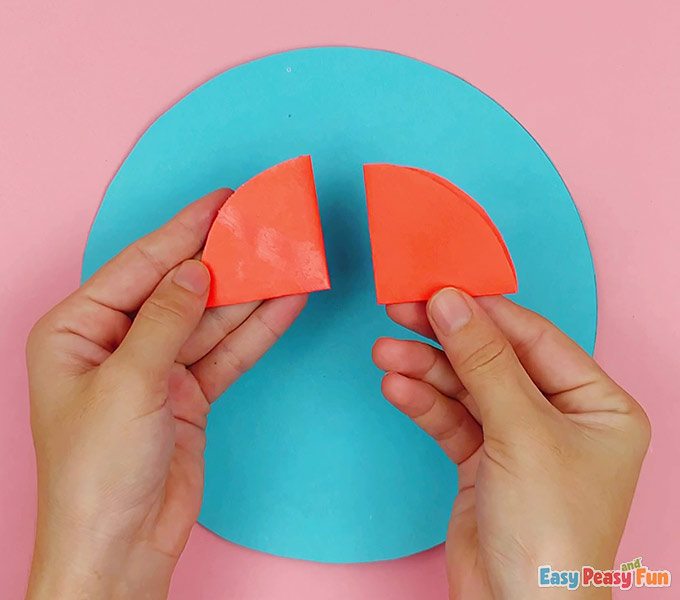
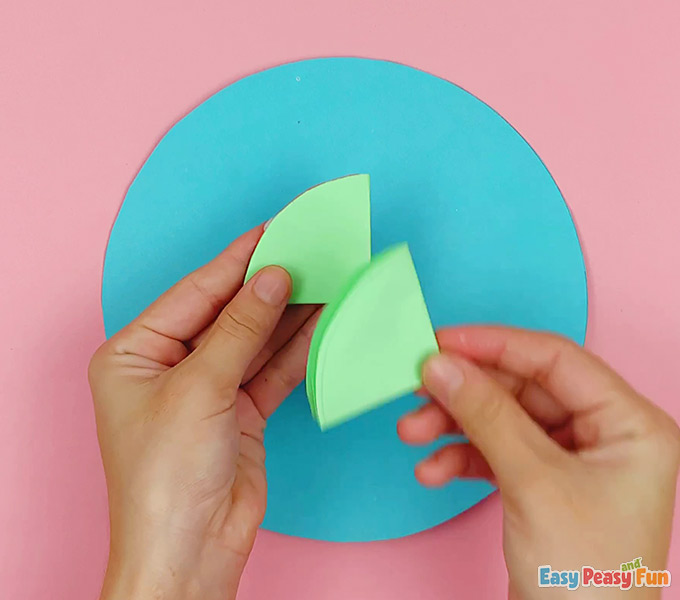
Now let’s fold the circles. Take the first circle and fold it inhalf.
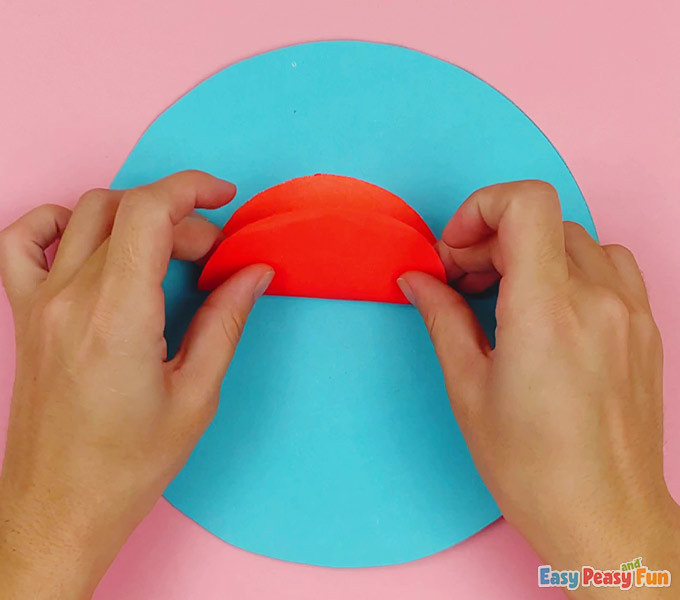
Then, fold it in half one more time.
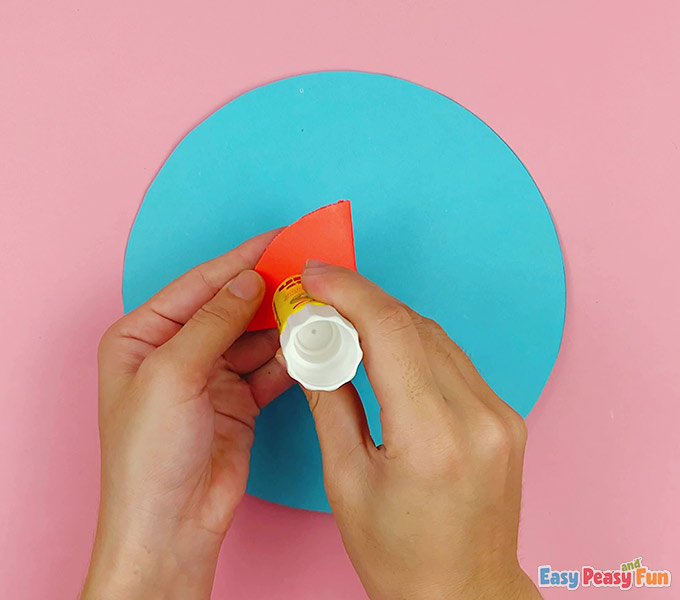
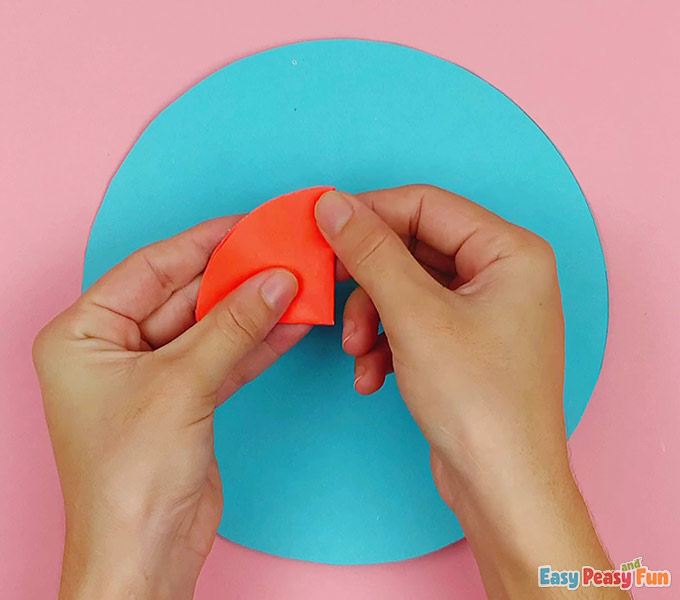
To create the first umbrella piece, let the kids open up the last fold and apply glue to the surface.

Gently press together.
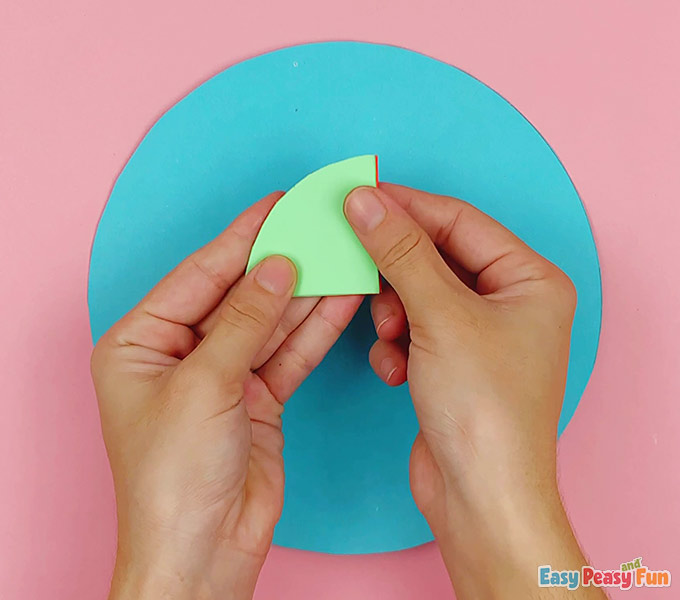
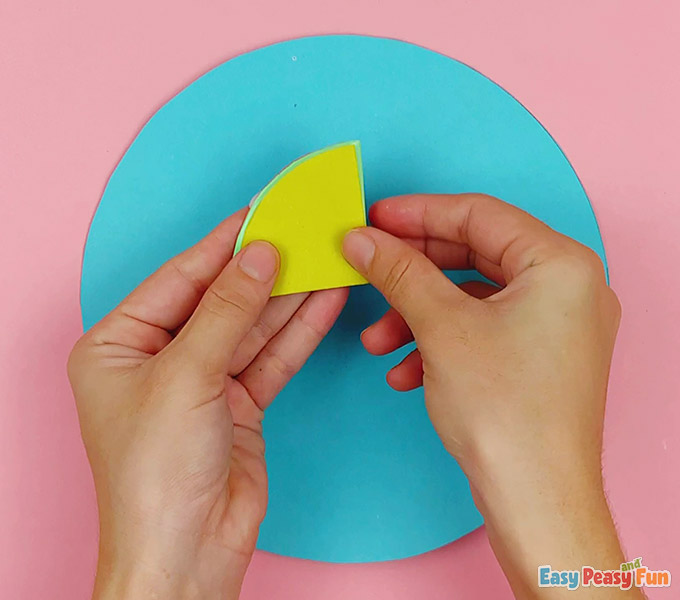
Fold another paper circle in the same way. We do recommend you make the second one in the same color as the first one to make the color really pop but your kids can choose any color they like.
Apply glue on one of the folded circles (on one side) and stick another on on it.
Gently press together for the glue to set.
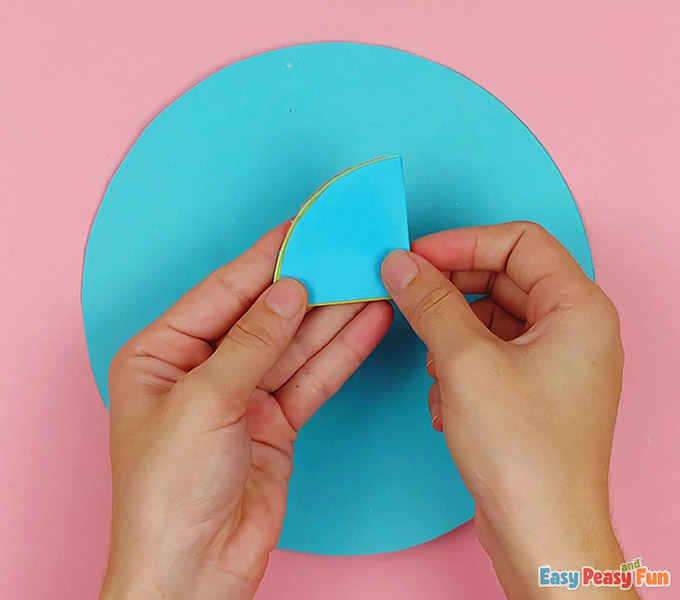
Have the kids repeat the process with other paper circles.
As they make more folded paper circles, have them glue them one on top of the other as they go.
You can make the umbrellas have as many colors as your kids want or even use just a single one.
We do think the more the merrier, for a cool-looking umbrella.
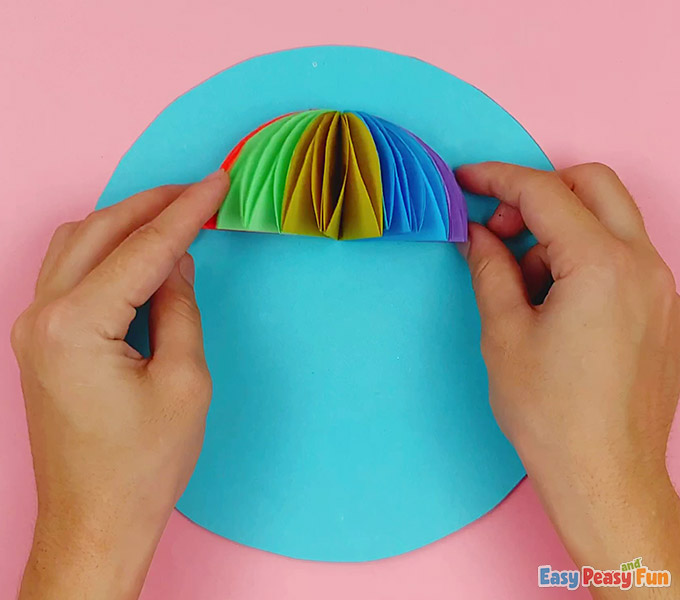
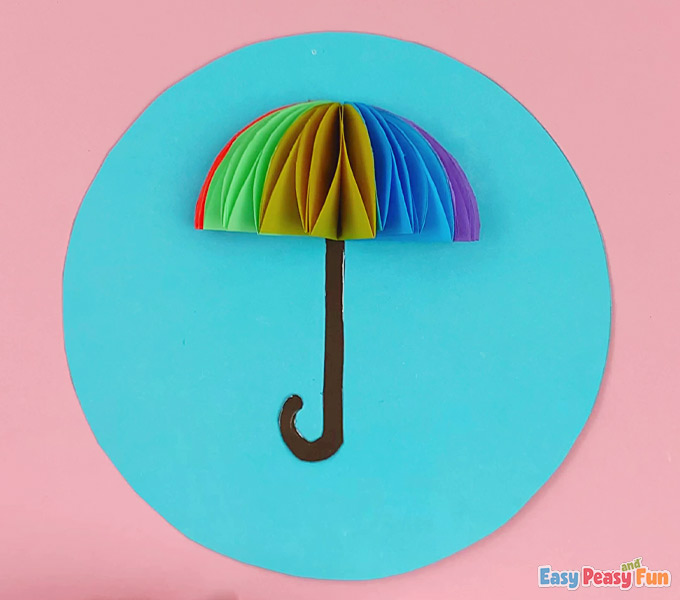
After all the pieces are glued together, let the kids apply a little bit of glue to the background circle (or on the umbrella), unfold the umbrella parts, and glue the umbrella on the background circle.
Aim it a little bit to the top.
The Handle
Now, draw an umbrella’s handle on the brown paper and cut it out.
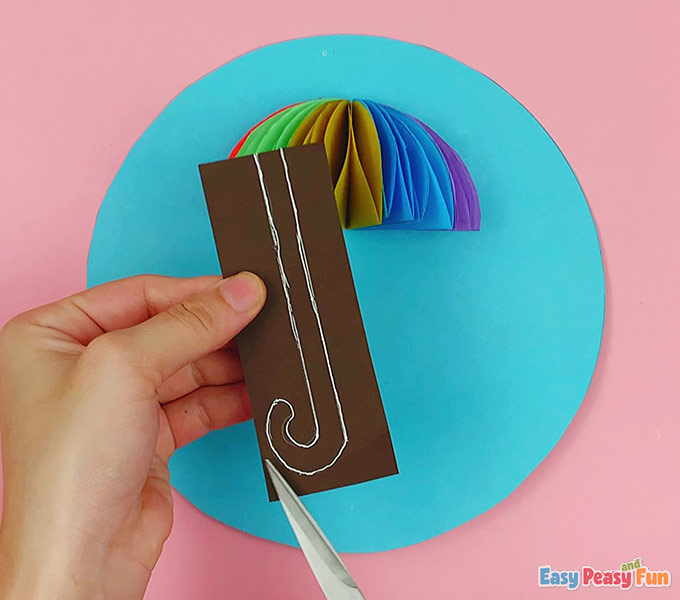
This part should be glued under the umbrella.
The Clouds
Have kids draw fluffy clouds on a piece of white paper.
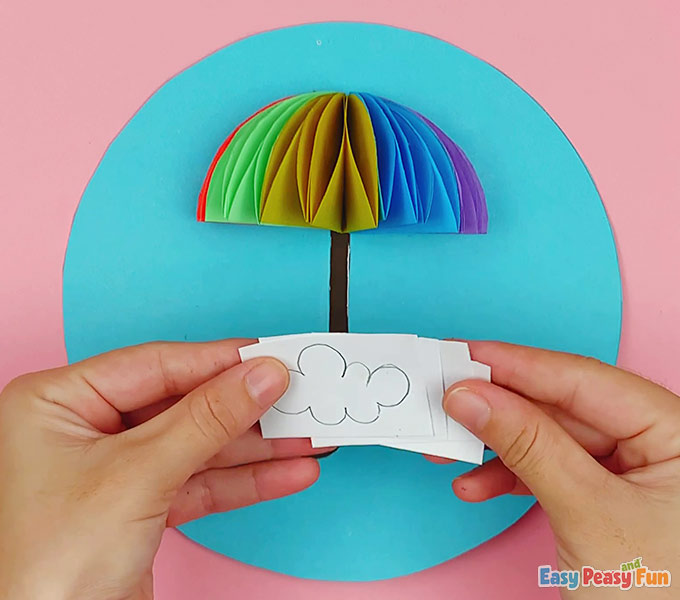
Have them glue the clouds onto the light blue sky.
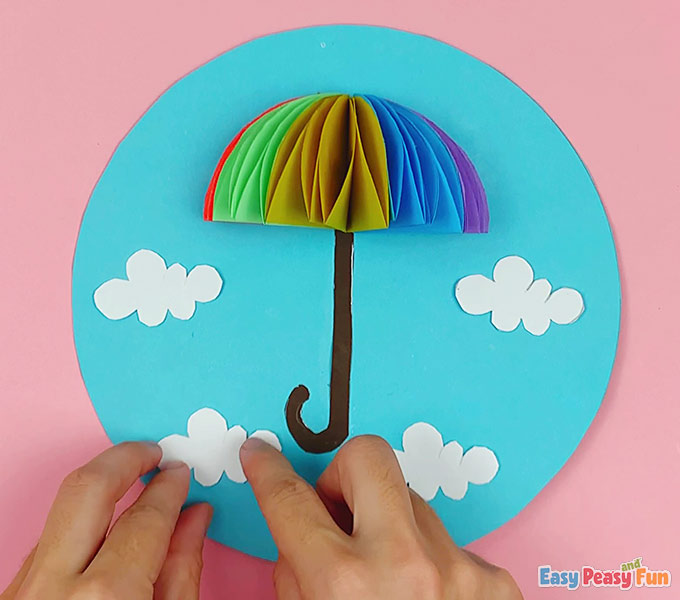
The rainy day paper umbrella craft is finished! You can also add in some raindrops by drawing them with a marker or by using the paper scraps from the hole punchers.
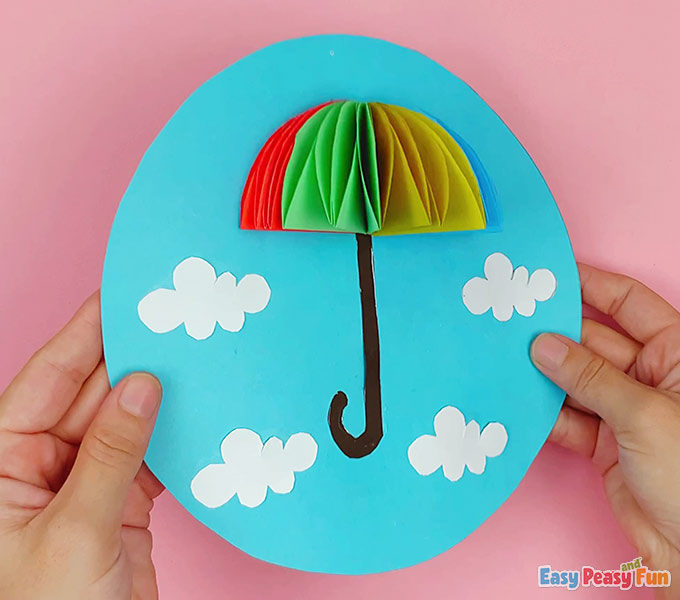
We love how colorful it is!

Want instant access to all of our printable crafts, activities, and resources?

With thousands of crafts, activities, worksheets, coloring pages, and drawing tutorials to print, you will always have just the resource you need at your disposal. Perfect for parents and teachers alike!