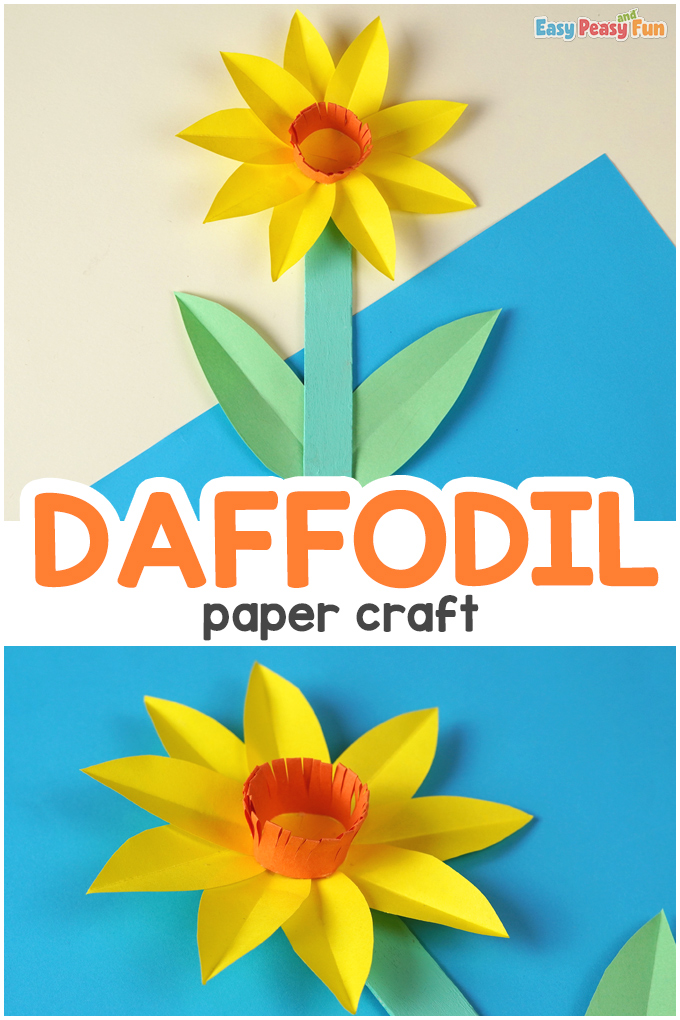
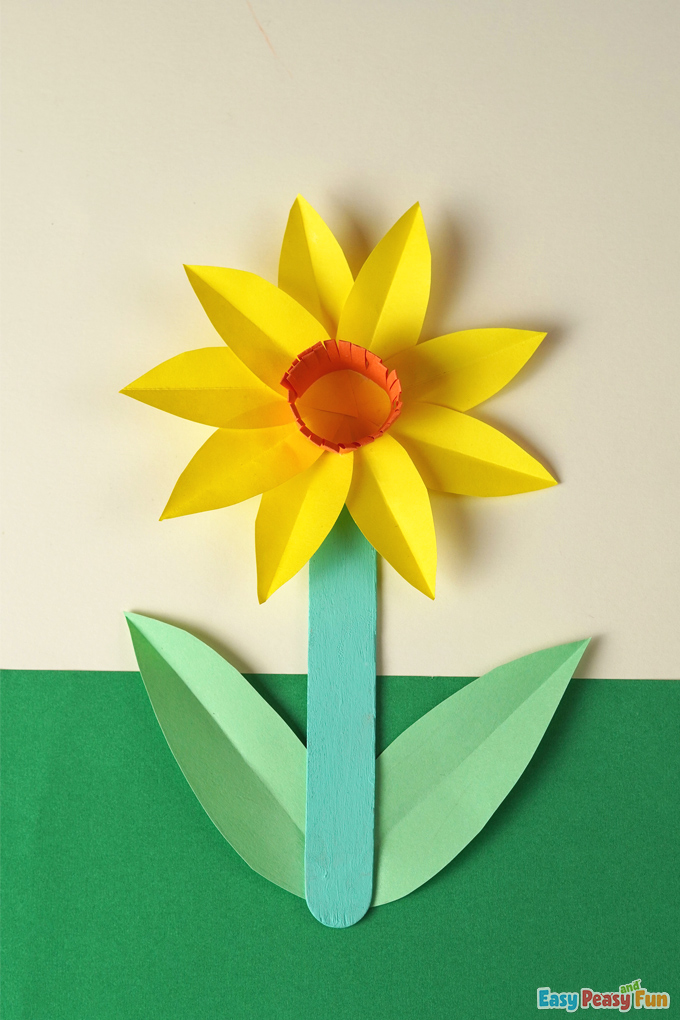
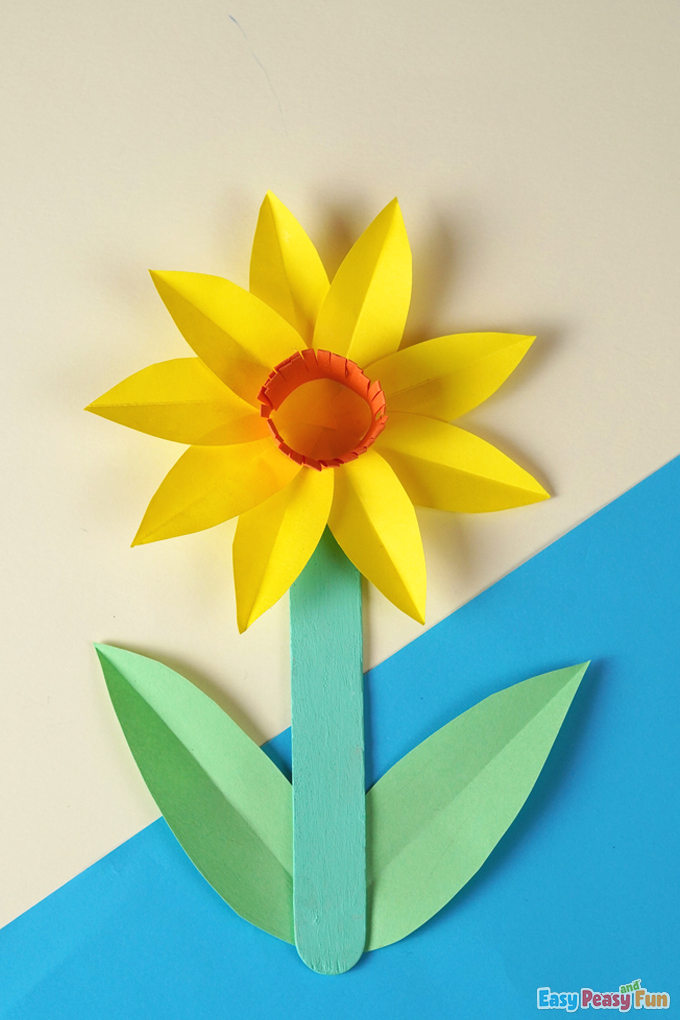
Spring is around the corner. There is no better way to celebrate spring than with this Daffodil Paper Craft. This craft helps bring sunshine to your home! If you’re missing flowers, the next best thing is to craft with them!
*This post contains affiliate links*
50 paper crafts your kids can actually do themselves

No fancy supplies — just paper, scissors, and a little imagination.
Be the first to get it on release day — and lock in the lowest price guaranteed.
While the colors are true to the Daffodil, you can easily switch things up. If you don’t have the colors this craft calls for, then feel free to switch up your construction paper. Creativity is so important when doing crafts.
How to Make a Daffodil Paper Craft
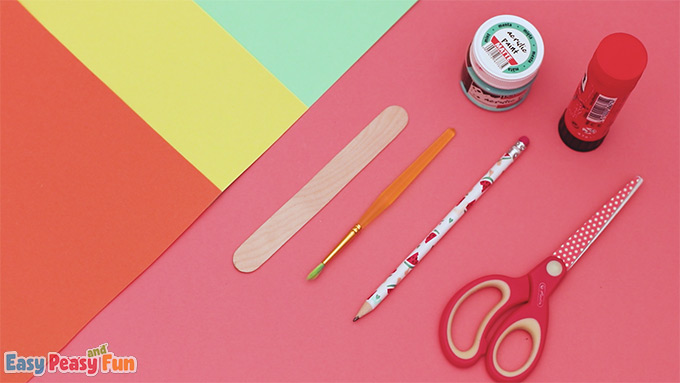
- What you need:
- Popsicle stick
- Green acrylic paint
- Paintbrush
- Orange, yellow, green papers
- Pencil
- Scissors
- Glue stick
Step by Step Tutorial
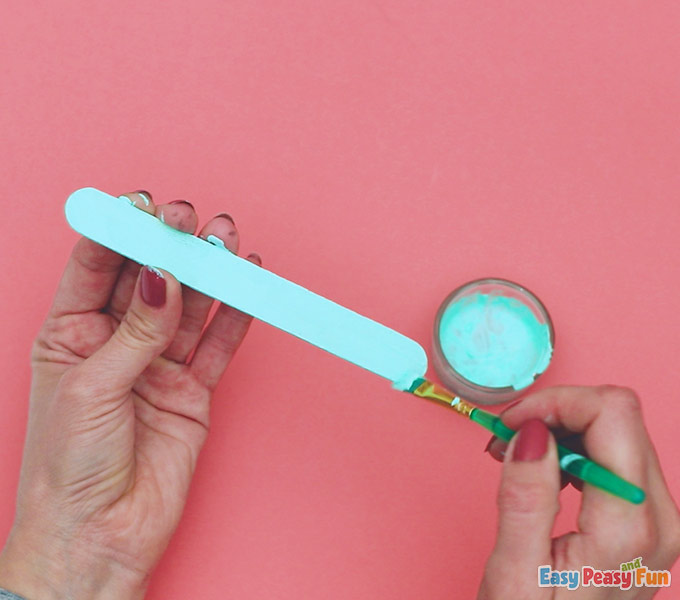
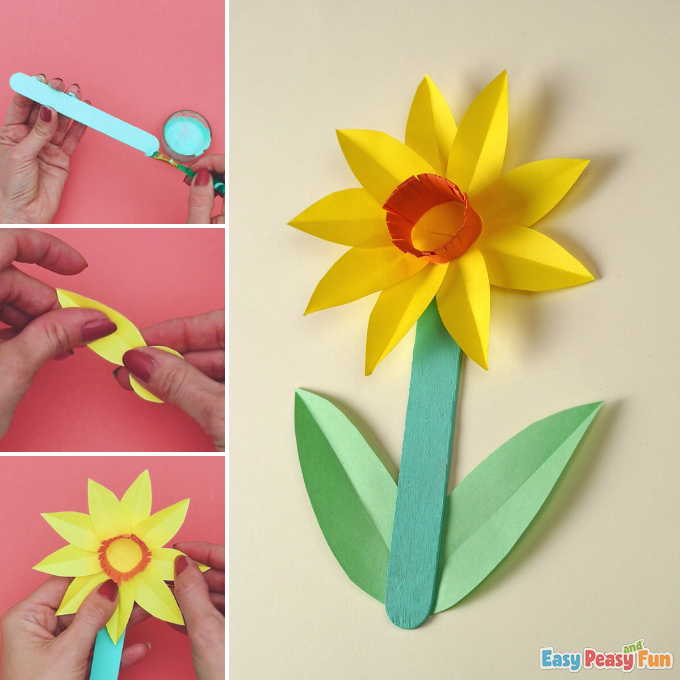
Paint a wooden spatula green. You can choose what type of green you want to paint the popsicle stick.
Draw a circle on yellow paper, cut it out. If you are helping a little one with this craft, you may need to help them cut out the petals. Although, this is a great craft for kids who need practice cutting with scissors.
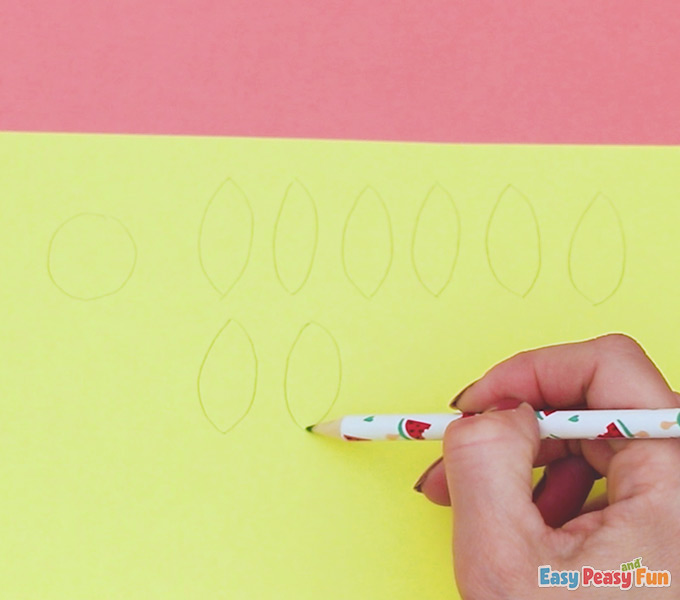
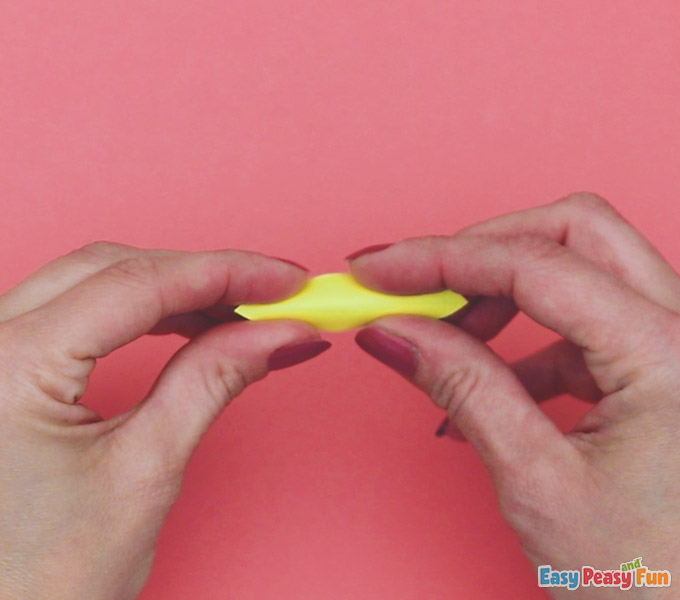
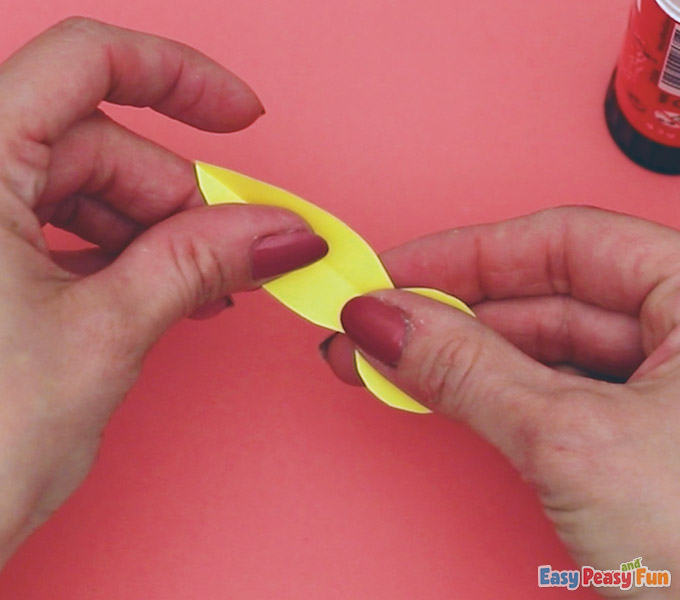
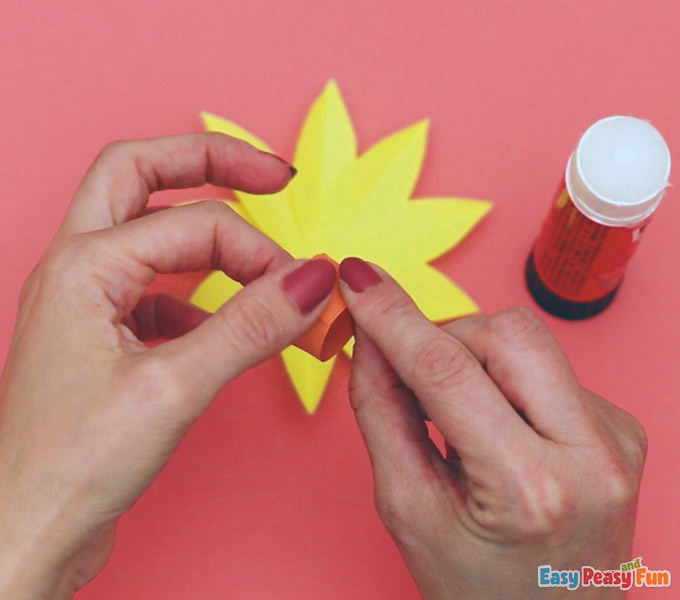
Then draw flower petals on the yellow paper, cut out, and fold them in half.
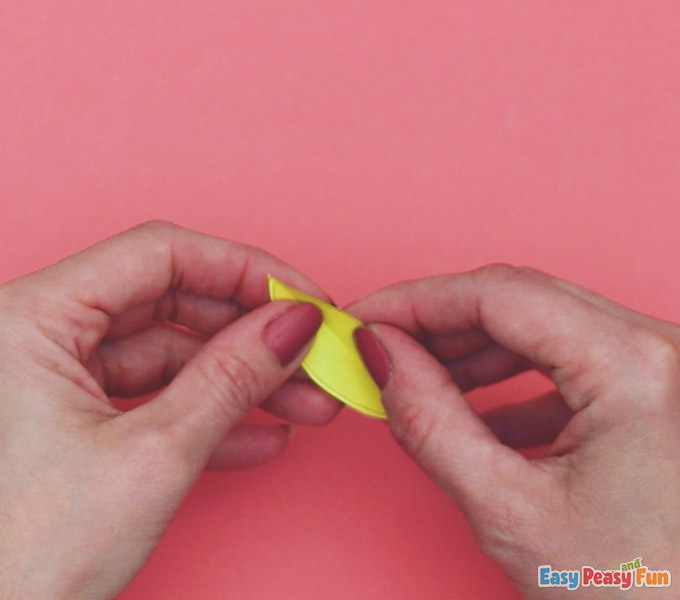

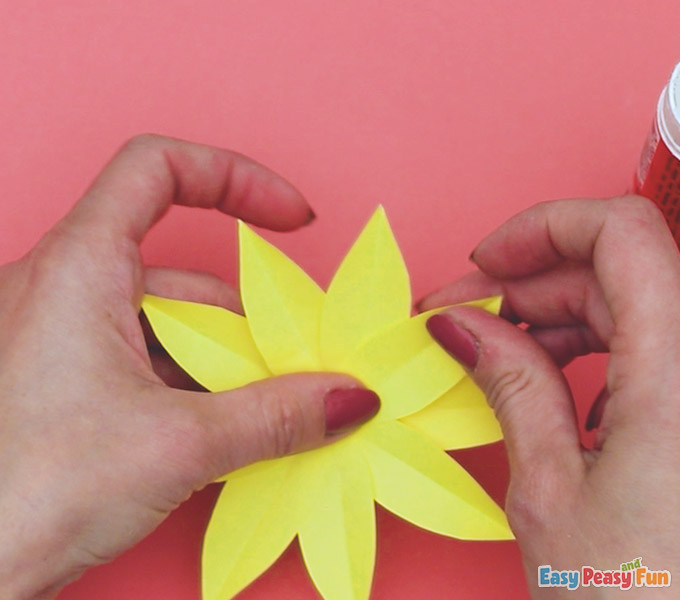
Start gluing the petals onto the yellow center.
Keep adding the petals until it looks like a complete flower.
Cut a long strip of orange paper.
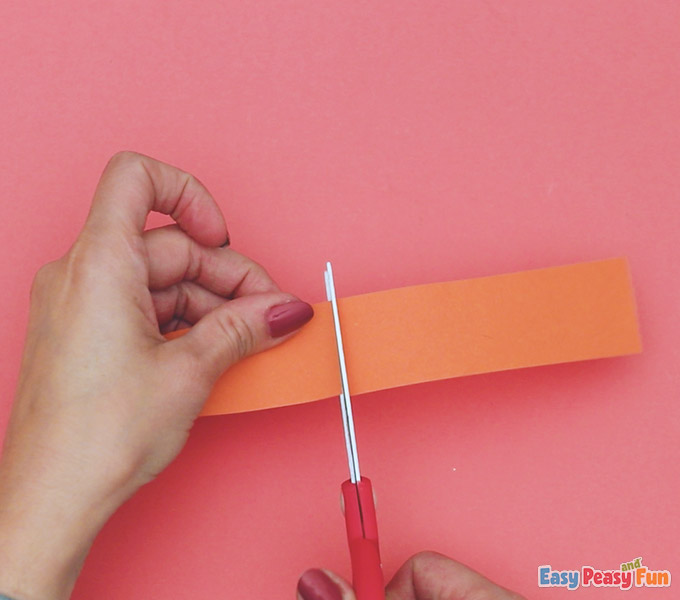
Fold it in half.

Cut it in half.
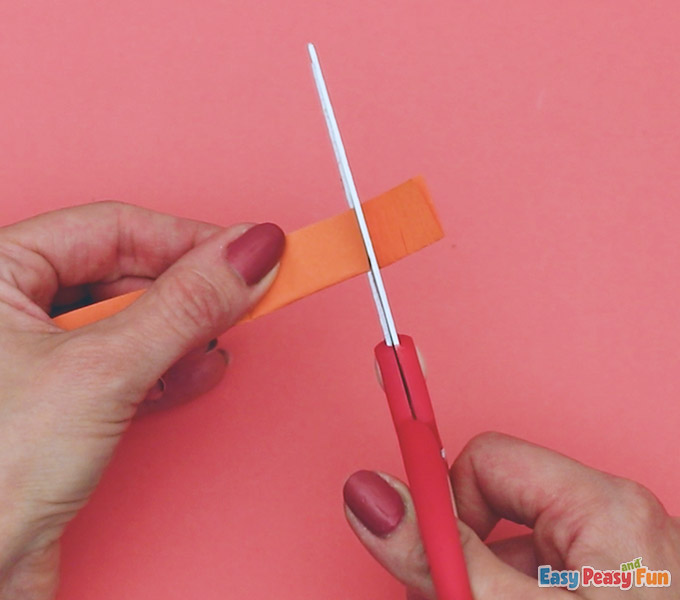
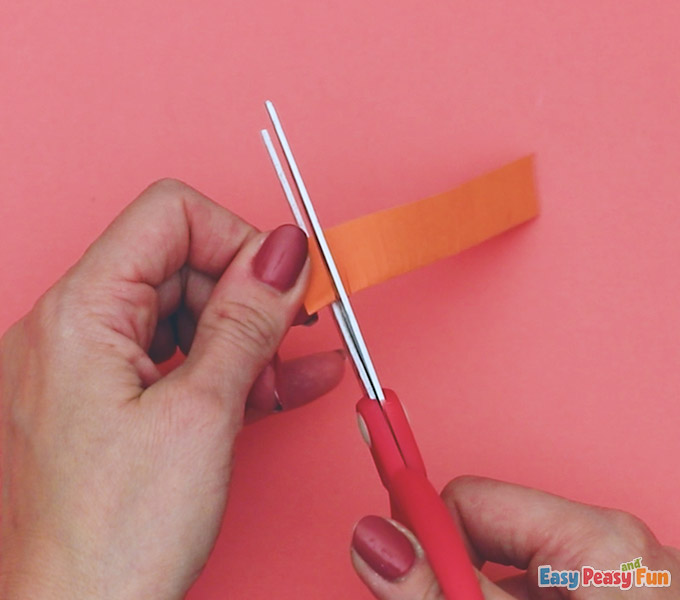
Fray the outside to the orange piece with scissors.
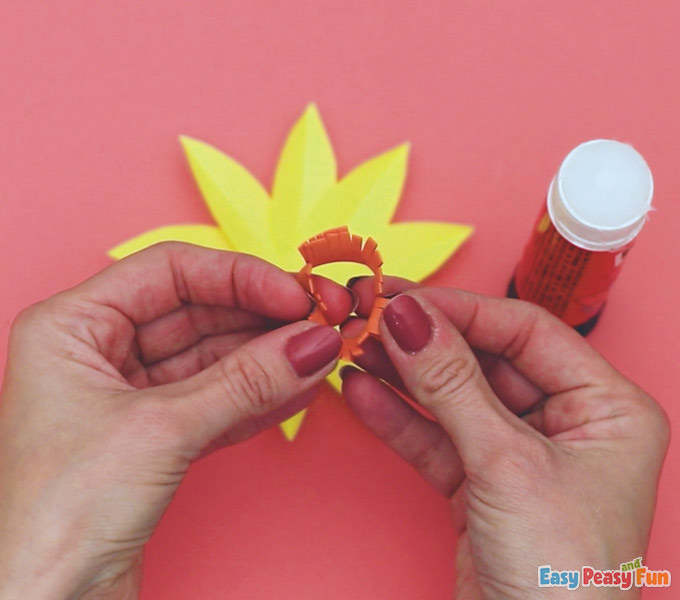
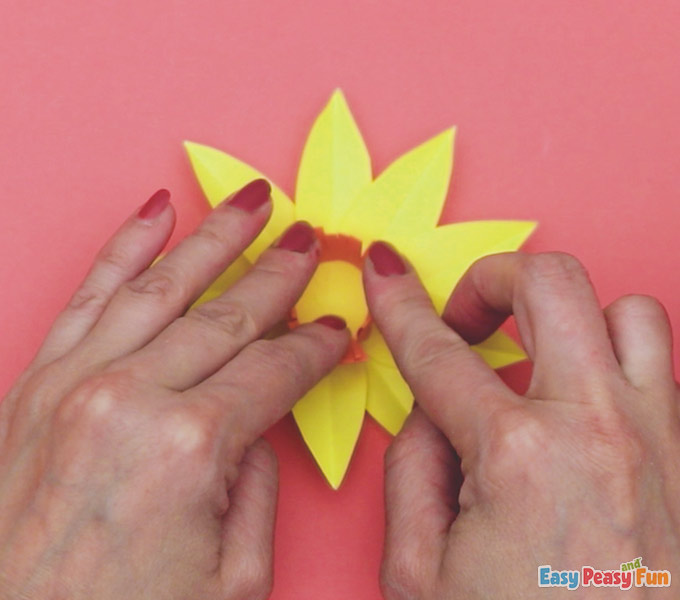
Take the frayed orange piece and add it to the flower.
Go ahead and glue the flower to the dried painted popsicle stick.

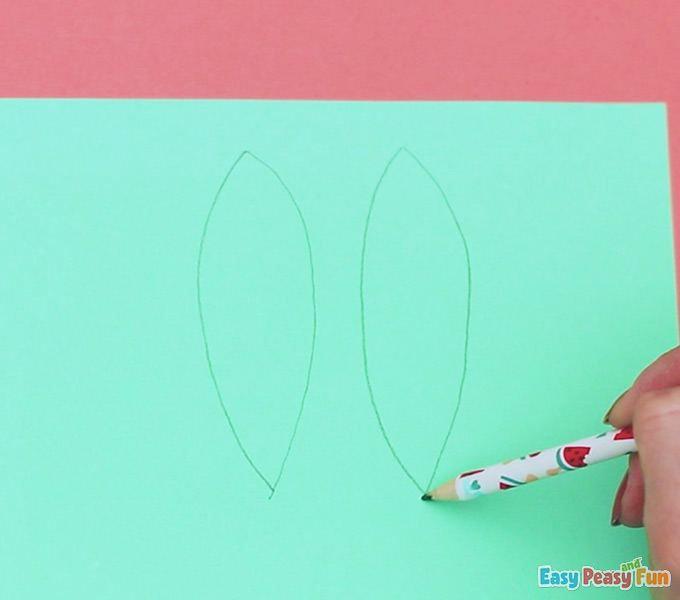
Draw two leaves onto the green paper.
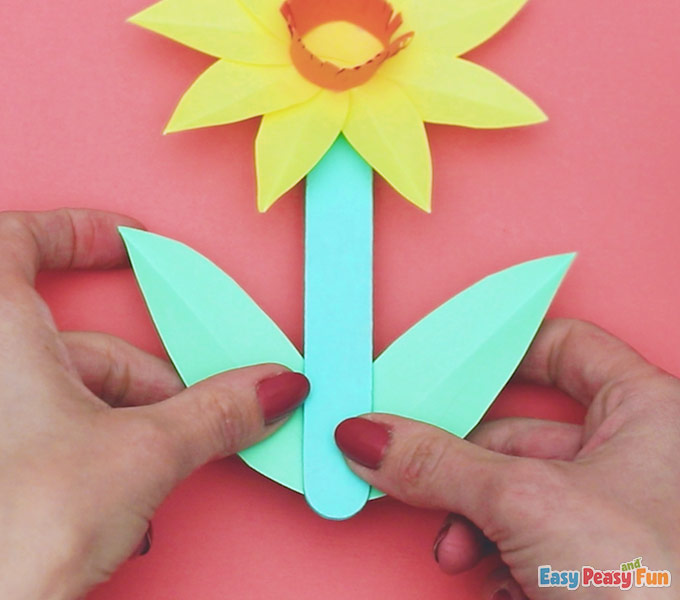
Once they’re cut out, you can glue the leaves onto the flower.
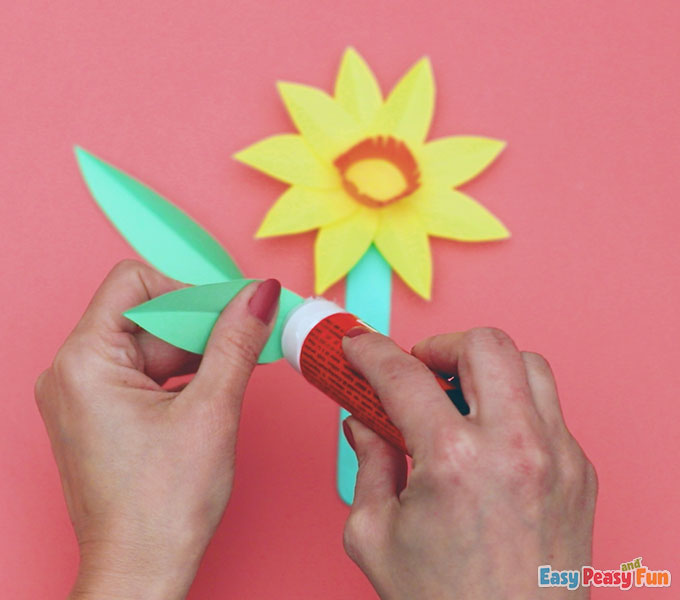
Glue them from behind, so the craft looks seamless.
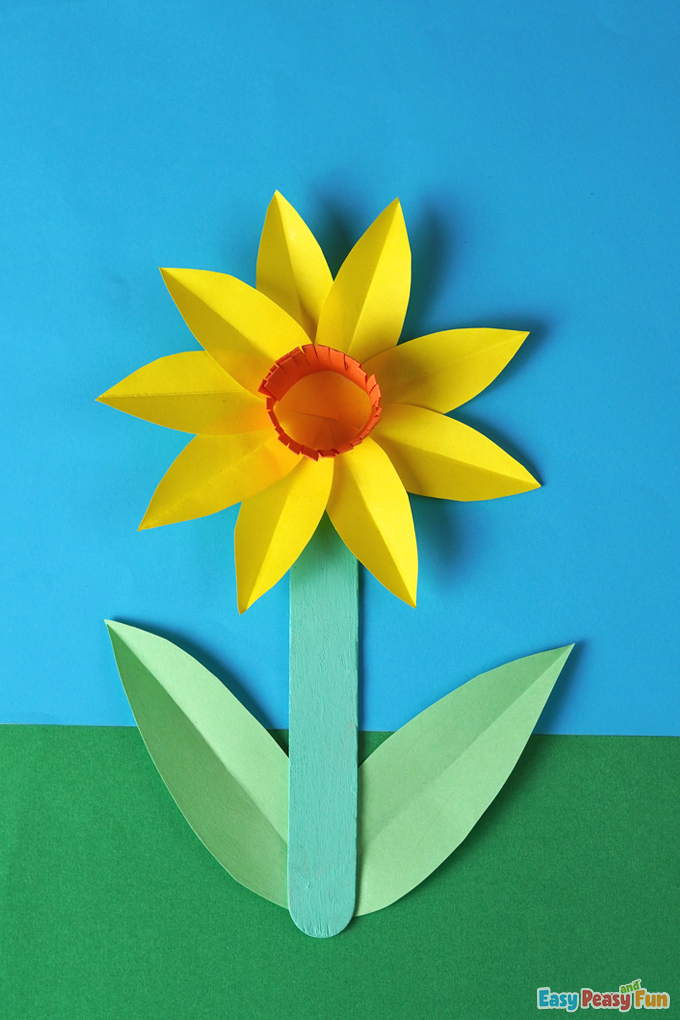
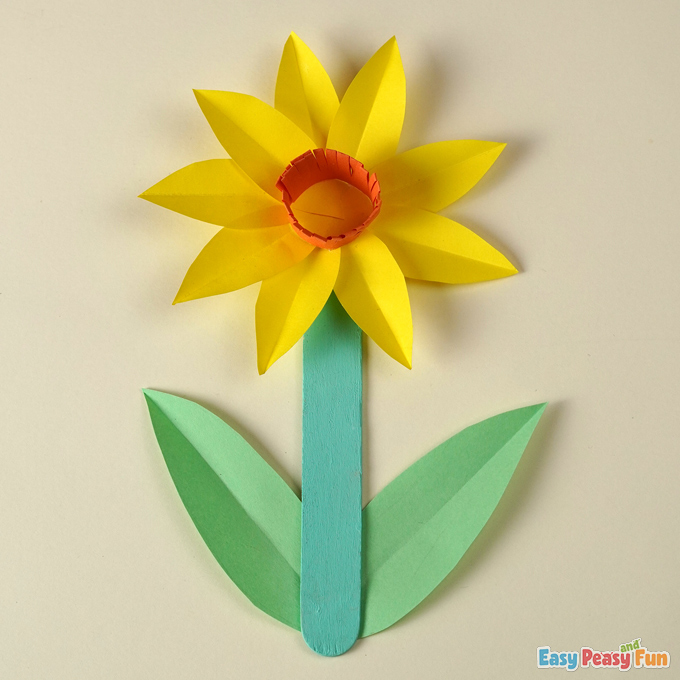
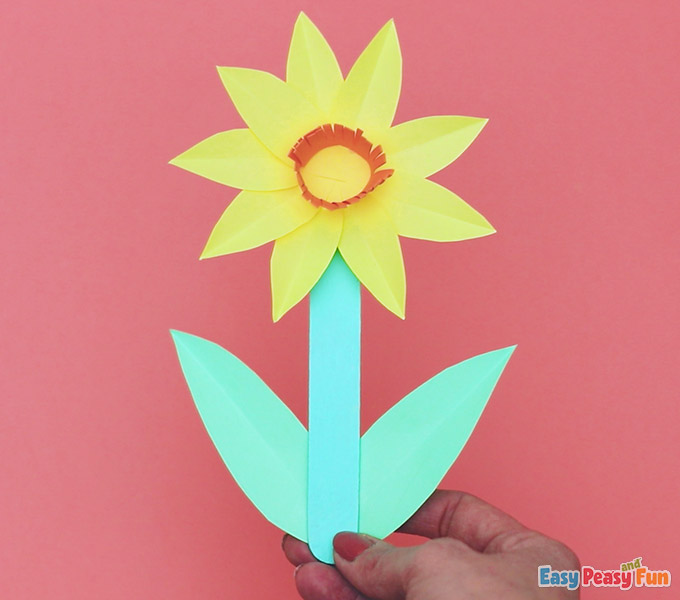
The final product is this adorable Daffodil Paper Craft. Make multiple flowers to create a whole bunch of flowers.
Want instant access to all of our printable crafts, activities, and resources?

With thousands of crafts, activities, worksheets, coloring pages, and drawing tutorials to print, you will always have just the resource you need at your disposal. Perfect for parents and teachers alike!