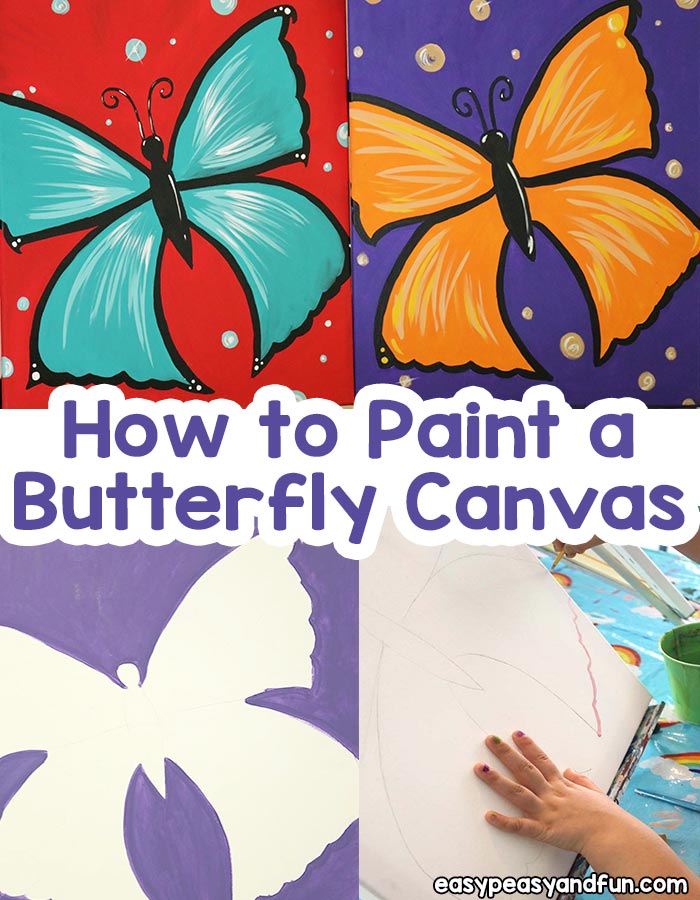
Learn how to paint an abstract butterfly on canvas with this step by step how to paint a butterfly acrylic painting lesson for kids, beginners and first time painters.
With this painting tutorial you will master acrylic paining for beginners and end up with a wonderful butterfly canvas – simple, quick and fun for home, classroom or painting party.
Also check: sun and moon acrylic painting tutorial
*this post contains affiliate links*
50 paper crafts your kids can actually do themselves

No fancy supplies — just paper, scissors, and a little imagination.
Be the first to get it on release day — and lock in the lowest price guaranteed.
Canvas painting has become a very popular pastime in the past few years and many people have taken to trying it at home now, instead of just going to a class elsewhere. Painting canvases using online instructions or videos makes that an easier task as well.
With this butterfly canvas, you can either just choose to paint it yourself, or make duplicates to have several people do it all together for a fun time or family activity.

You can teach it as an art class, too, if you do homeschool or art classes, and it will be enjoyed by all because you can customize the butterfly to be the color or style you prefer.
How to Paint a Butterfly
What you will need:
- Plastic disposable tablecloth
- Easel if you like
- Paints in various colors, acrylic is best, and you can get the cheap store brand, which works just fine
- Pencil and eraser
- Transfer paper and tracing paper if you want to do duplicates
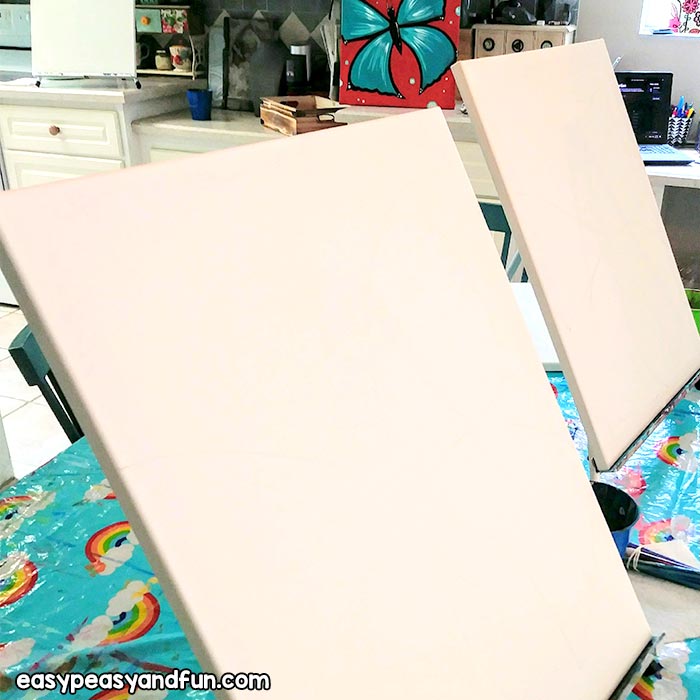
- Canvas in 16” x 20 for each person
- Paper towels
- Paint palette or paper plate and cup for water for each person
- Paintbrushes in various sizes from tiny to at least a 1”.
Step by Step Butterfly Painting Tutorial
Let’s learn how to paint a butterfly!
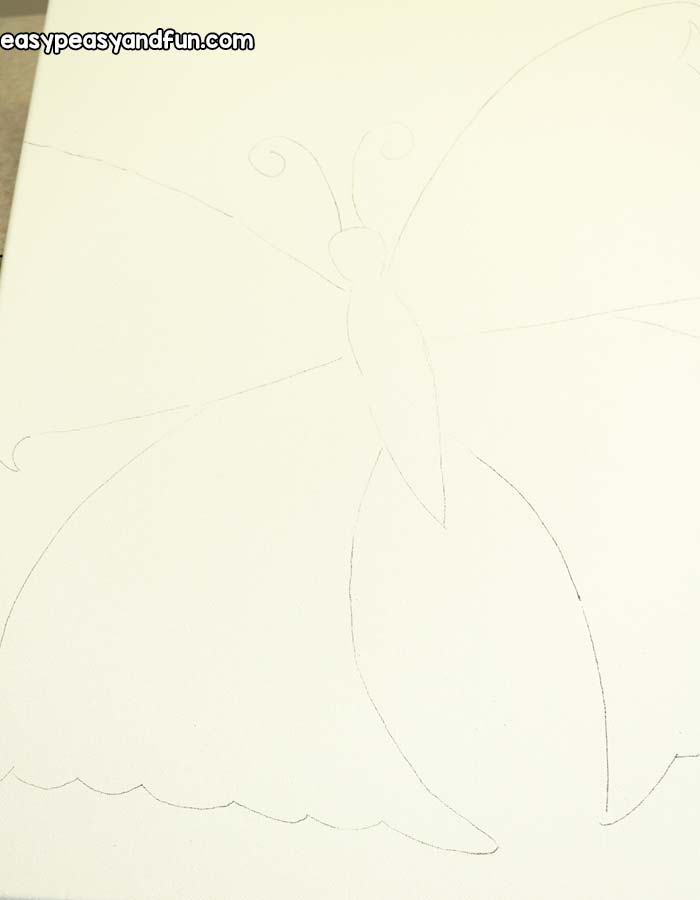
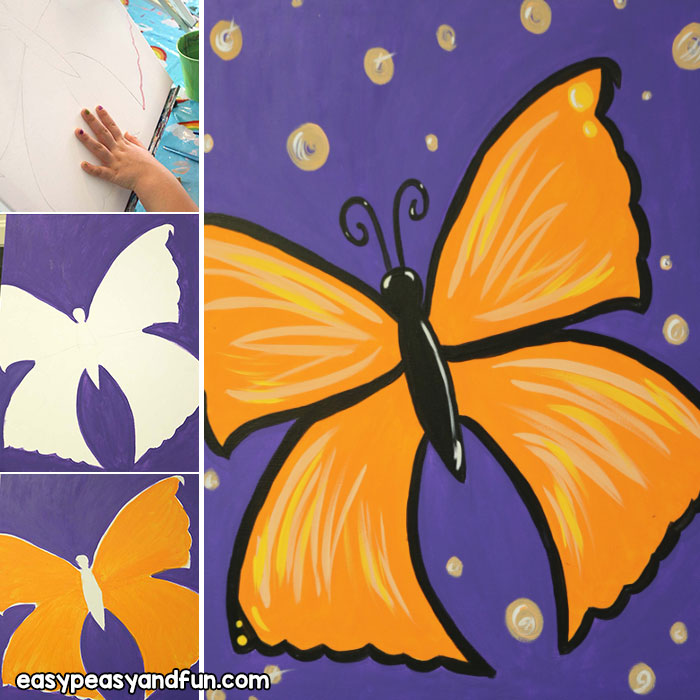
The first thing to do is to take one canvas and draw the outline of the butterfly.
Don’t let this overwhelm you, it doesn’t have to be detailed or perfect, you just need to make it fill about ¾ of the canvas and have the 4 wing sections, and body mainly. If you want to draw a more kid friendly butterfly with a smile on it’s face we also have a tutorial on how to draw a butterfly.
Draw it lightly and erase if you make a mistake.
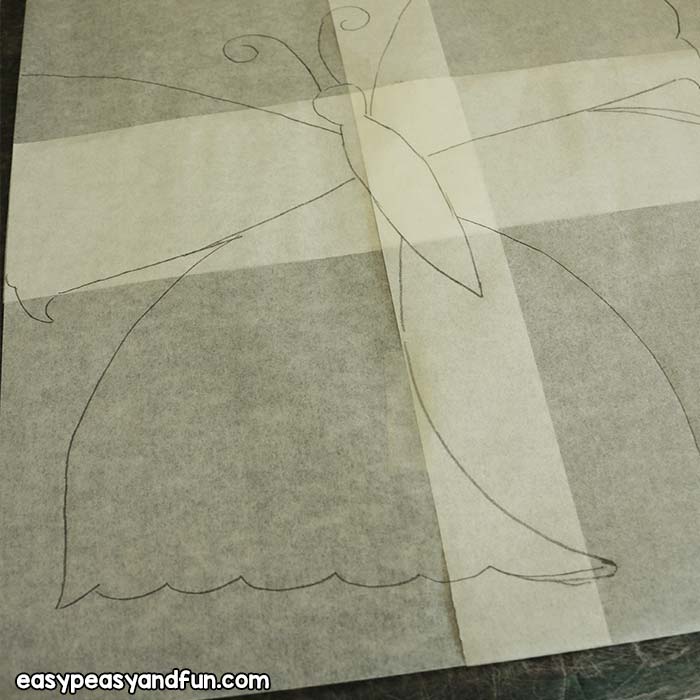
If it makes you too nervous to do it right on the canvas, then tape together tracing paper to fit over top of the canvas to make the 16” x 20” size and draw it on that instead.
Any dots, designs on the wings or antenna will be added later in painting, and will be painted over, so don’t bother to add those. Just the main outline of the butterfly is enough.
Now if you are doing this just for you, you don’t need to worry with making copies unless you drew it on the tracing paper.
If you did, or if you are making duplicates for a get together, or a class, use the transfer paper to make copies on to the rest of the canvases. This eliminates drawing it again. You will need to trace the butterfly you drew on to tracing paper first, and then transfer it.
If you have never used transfer paper here’s how it works:
Find the side of the paper that has the ink on it and lay that facing down on the canvas.
Then, line up the tracing paper over the top of it, to match up with the canvas, so that the butterfly is where you want it to go on the canvas.
Take a dull pencil or tracing tool and trace over each line you want copied. When you think you got all the lines done, try lifting the paper up a bit and peeking to be sure you didn’t miss any, before you pull the paper off, so it doesn’t come out of alignment with the tracing you just did, and fill in any lines you missed. Then repeat on each canvas you need a copy on. Saves a huge headache of drawing the same thing over and over!
Time to Paint
Now once your images are done on all the canvases you need, you are ready to paint. Put down the tablecloth on your surface first before pouring any paint.
Choose your background color and butterfly color, plus you will need black and white and at least one accent color. Get your paints ready and then begin your how to paint a butterfly adventure.
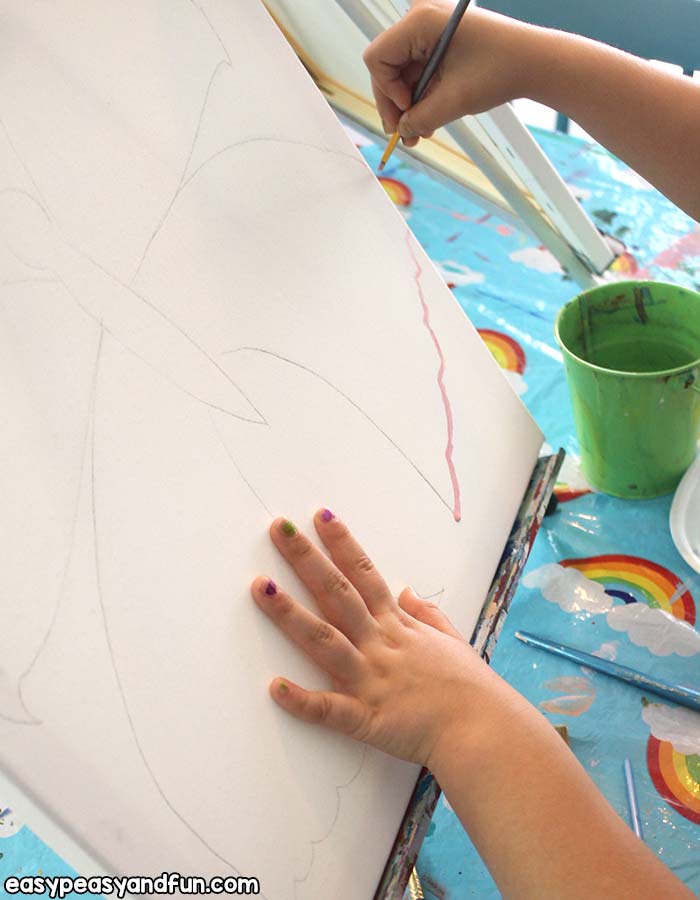
Begin by using a thinner, smaller brush to do an outline with.
You should always wet your brush the first time you use it, then blot the excess water on the paper towel, and then dip it in the paint. This just loosens the paint and brush up, so it flows better. You don’t want it dripping wet though, it will ruin the paint.
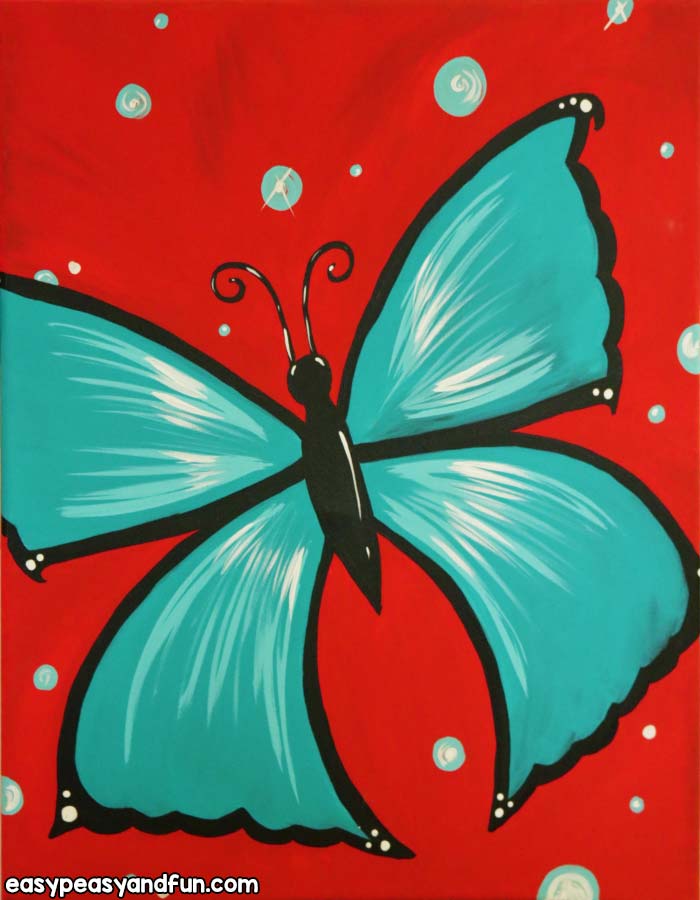
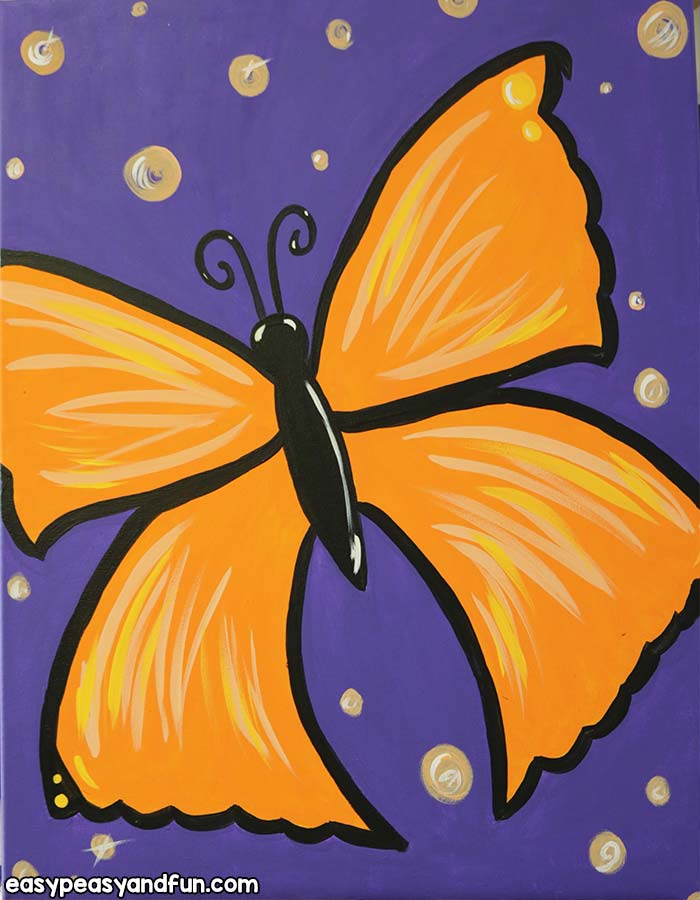
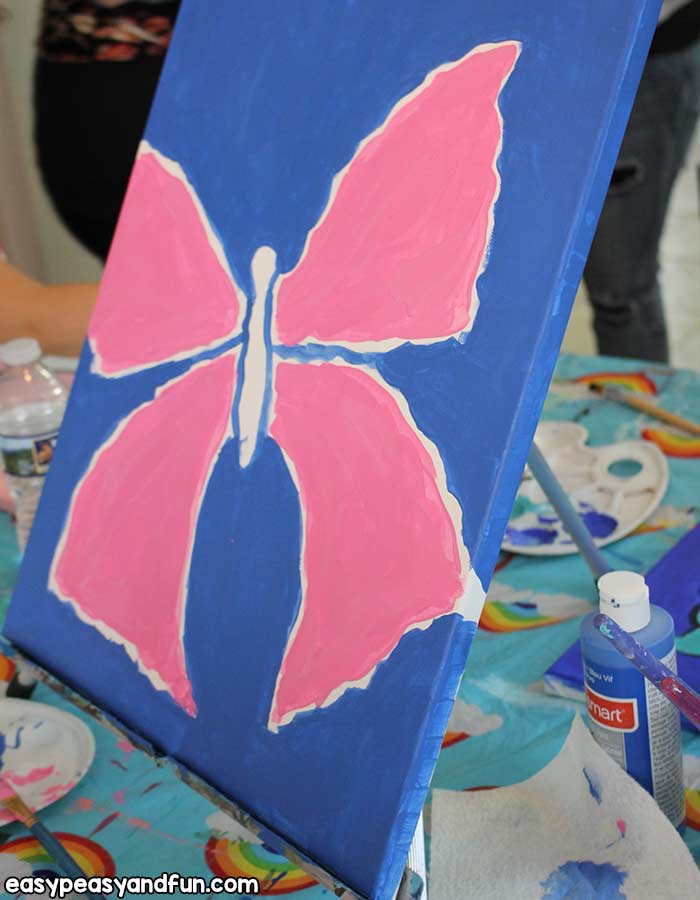
Now, with the color you chose for the background, paint an outline around the outside of the butterfly.
Go all the way around it, including any part of a wing that may reach around the outer edge.
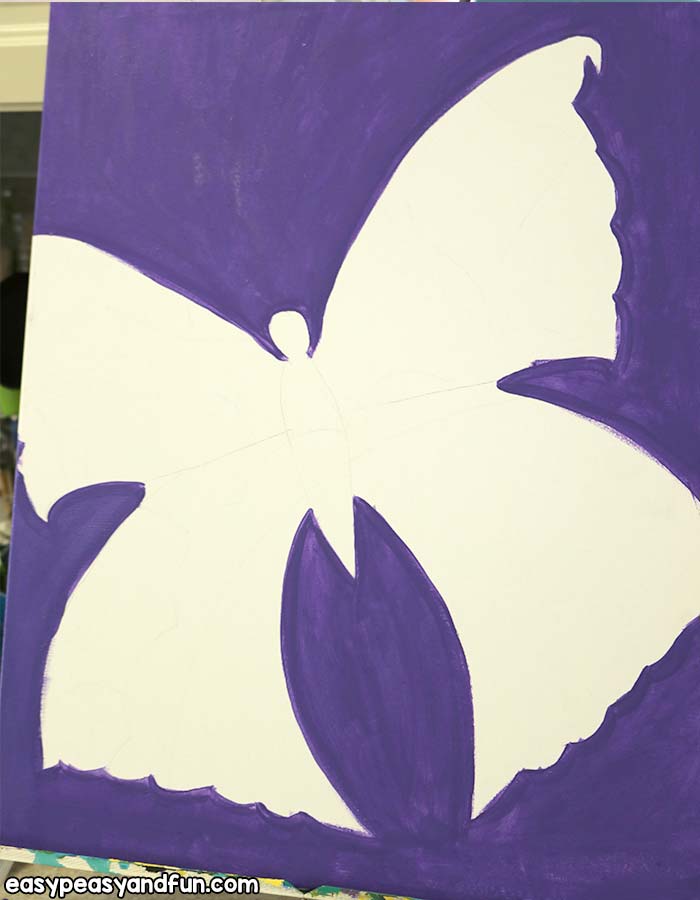
Then, come back with a larger brush and paint the background in.
It is possible, depending on the color you chose, that you will need a second coat of paint, but let the first one soak in somewhat before you paint the second one, so that you can tell how much you need.
Paint the butterfly
While that is soaking in, go ahead and paint in the butterfly. I like to outline it as well, the same way I did the background, going around the wings and center of the body, so that I know right where to stay in the lines and sections when I am painting it in. Leave the center of the body empty.

This also helps you get into the small areas on the canvas and not try to do that with a larger brush that isn’t meant for the job.
The wings will possibly need a second coat too, so let those dry some and go back to the background paint while they are.
Paint in the second coat on the background and try to keep your brush strokes going in the same direction on this coat.
This helps it fill in better and not have any streakiness showing in the paint.
Be sure to paint the edges of the canvas also. If you want to be sure to get the bottom edge now while you’re thinking of it, flip the canvas upside down and paint it, or you can wait until the very last to do this also.
Give your body’s center a coat of black paint before you go back to the wings, as the black will need another coat for sure.
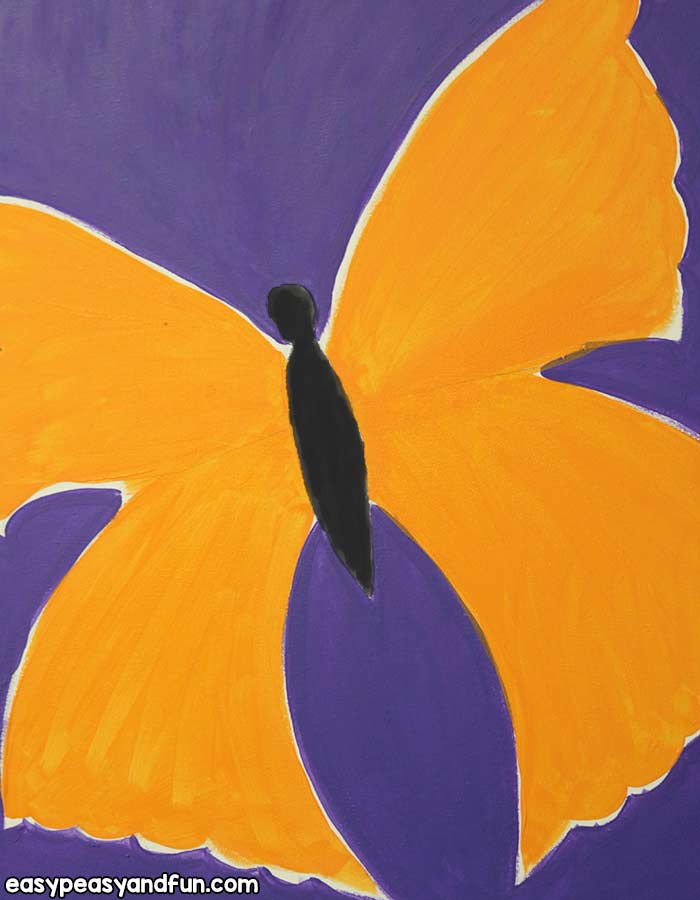
Now switch to the wings, paint in the second coat, and then repeat the black coat on the body again.
At this point, check for any spaces where white canvas is showing through your paint or you see streaks in the paint that need a little touching up. Go ahead and paint those in until you are satisfied.
Let this dry a few minutes and now you will need your accent color for wings and background swirls.
Adding the details
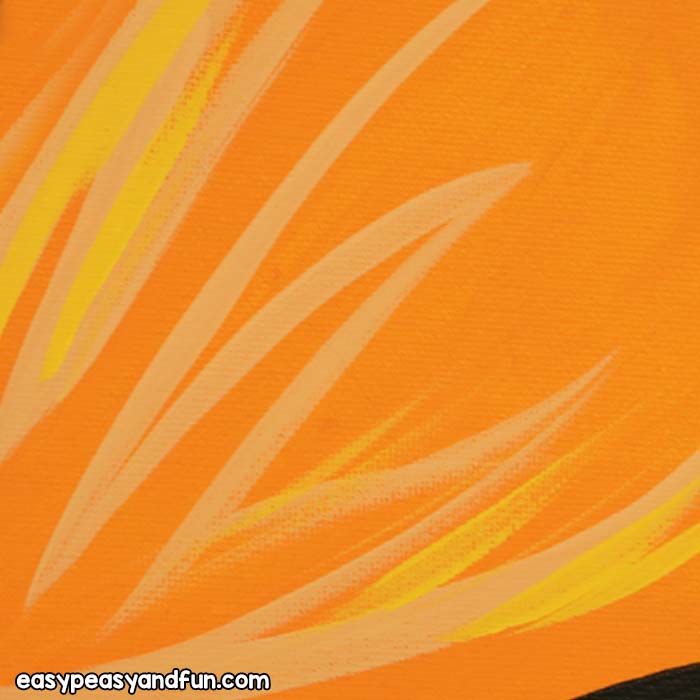
I prefer to use a lighter version of the color used on the wings for this, but you don’t have to. You can take a little white paint and mix it with the color of the wings to get this accent color, which is what I did on mine.
Now, using a medium to small brush that is longer than it is wide, paint strokes on the wings, or you can create your own pattern if you choose.
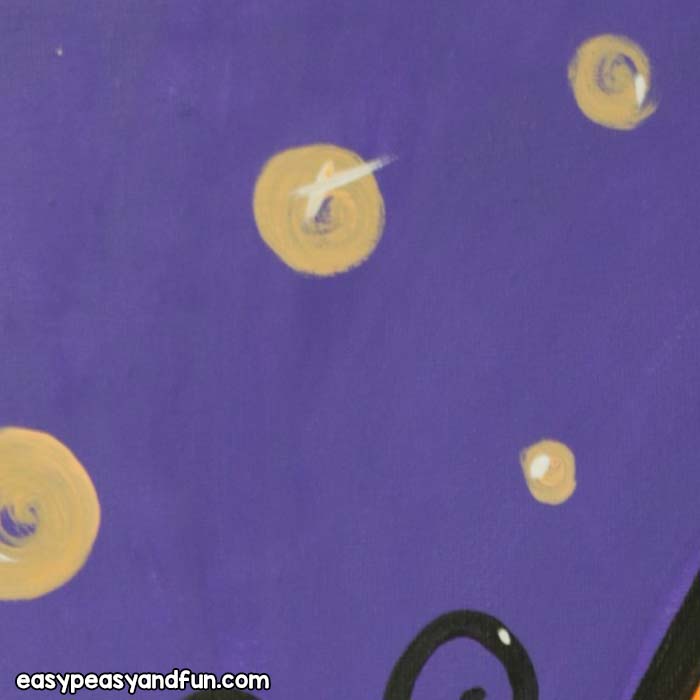
Paint random and varied sizes of circles in the background as well so that there is some dimension to the painting, creating the look of out of focus lights in the background.
You can also use a round sponge to stamp circles on if you prefer that. They don’t need to be perfect, the idea is to create movement without painting more to the wings themselves.
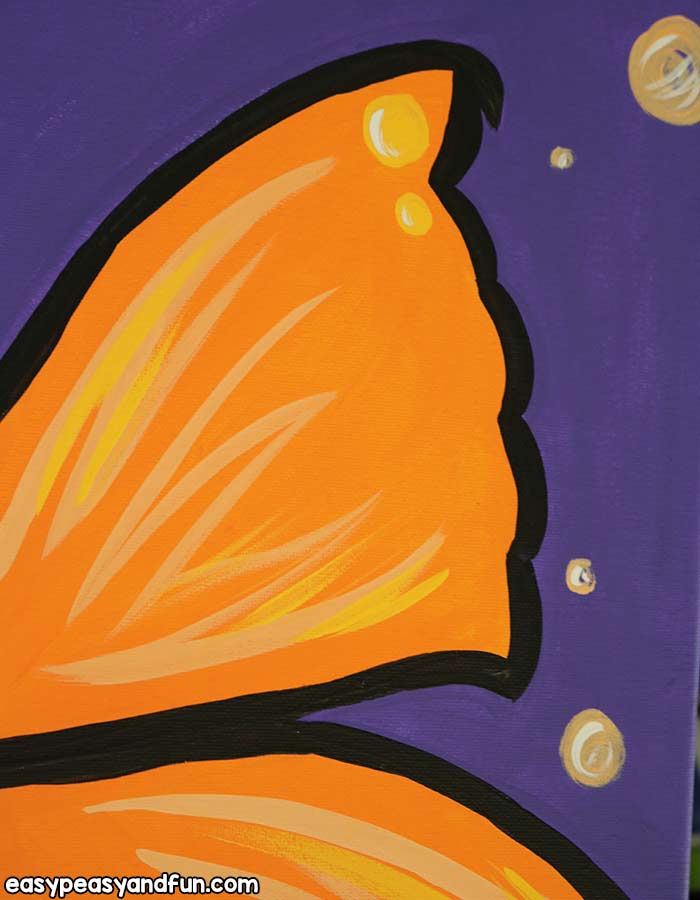
Then, using the same brush or a slightly smaller one, paint a black edge around the wings, and going inward in the center of the wings too so that it comes across the middle of the wings and to the body.
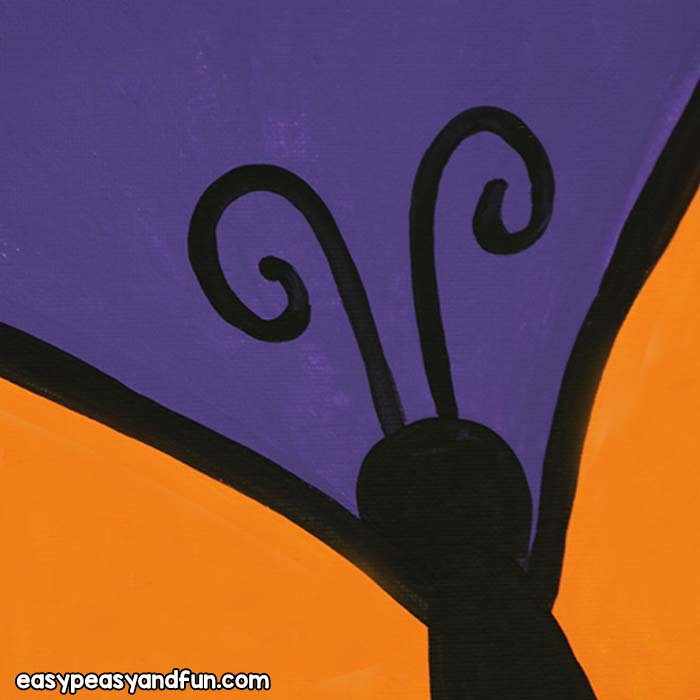
Now take a very small brush and paint in antenna.

The last step is to add a few highlights to finish it off.
Paint white highlights on wings, in corners of them and along the edges on one side at least, and then down one side of the body, as well as a highlight on the head and antennas.
Then, add a few white highlights here and there to the background circles, to give the illusion of light reflections.
Now just check for any areas you’d like to touch up, give it your signature, and you’re all done! Congratulations! You’ve learned how to paint a butterfly.
Want instant access to all of our printable crafts, activities, and resources?

With thousands of crafts, activities, worksheets, coloring pages, and drawing tutorials to print, you will always have just the resource you need at your disposal. Perfect for parents and teachers alike!
I LOVE this!! I’m a youth services librarian and I think my kiddos would enjoy this project. Is there a video?
No video for this one, sorry. So happy you love it, I think it’s a great project too 🙂