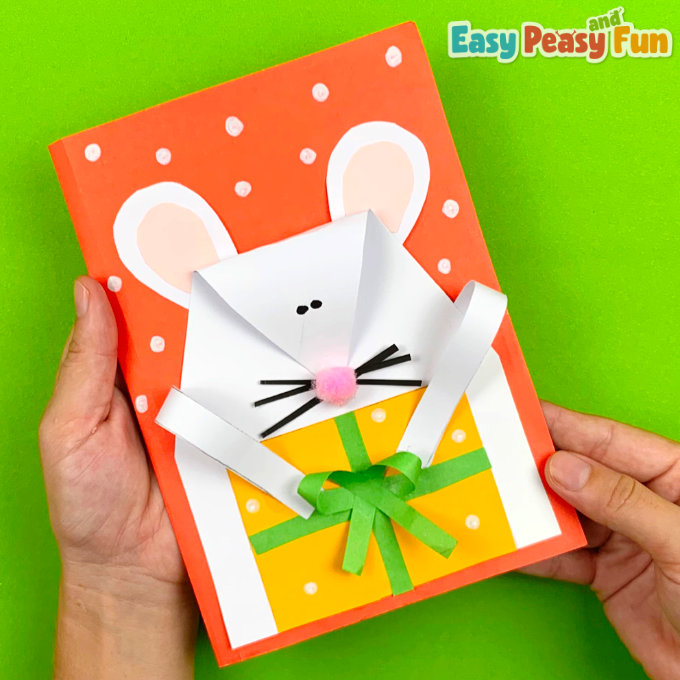
It’s time to make a sweet DIY mouse Christmas card! Handmade cards are the best way to spread holiday joy and they don’t need to be complicated in order to look amazing.
This card can easily be made by kids of almost all ages, although younger kids might need some assistance.

*This post contains affiliate links*
50 paper crafts your kids can actually do themselves

No fancy supplies — just paper, scissors, and a little imagination.
Be the first to get it on release day — and lock in the lowest price guaranteed.
Nothing beats making DIY Christmas cards, there is just something special about them. This mouse card is super sweet, we have a similar reindeer Christmas card kids can make. If you need something simpler but still super sweet, give this Santa Claus card a try.
How to Make the DIY Mouse Christmas Card
What you need:
- scissors
- glue
- white paper
- black paper
- color paper (red, yellow, pale pink, and green)
- black marker
- white marker
Step by Step Tutorial
The Card
Start by making a card. You will need a sheet of paper, cardstock being the best. You can make a large card by folding a letter-sized or A4-sized paper in half. Alternatively, you can make smaller cards by cutting the letter-sized or A4-sized paper in half and folding it.

The Mouse
Once you have your card folded, cut a rectangle out of white paper that is about the same size as the folded card. Fold the white paper in half (along the longer side).
With a pencil, draw a diagonal line from the top (starting from the folded side) to the edge, ending the line around halfway down the length of the paper.

Now cut along this line.

Unfold the paper and you should see a triangle shape on top of a rectangle shape (house shape).
Apply glue to the rectangle part of the white paper cutout. Do not apply glue on the triangle part.
Stick it onto the card, aligning the bottom of the white paper to the bottom of the red card.

The Head
Bend the top triangle part, apply glue to the tip, and stick the tip to the “body of the mouse”.

The Whiskers
Cut thin strips out of black construction paper.

Stick them one on top of the other to look like whiskers, then glue them onto the bent part of the white paper.

Take a pink pom-pom and glue it to the center.

The Ears
Our mouse needs ears! Cut out an ear-like shape from white paper and a smaller piece from pale pink paper.
Glue one on top of the other. Repeat the step to create the other ear.

Glue the ears to the red card – behind the bent mouse’s head.

Draw two tiny eyes with a black marker. You can also use googly eyes.

The Present
Now it’s time to turn this regular mouse into a Christmas mouse. Cut out a yellow rectangle and glue it onto the mouse.

Cut two green strips to fit the present, and glue them in a cross-like shape.

The Bow
To make a bow, cut a longer green strip. Twist one end to make a bow loop and glue it.

Repeat the bending procedure on the other side and glue the bow to the center of the present.

The Arms
Cut out two wider white strips and glue each on one side of the mouse’s body.

Apply glue at the end of tha arms and bend them so that the mouse looks like it is holding the present.

The Snowflakes
Time to add some snowflakes! Use a white chalk marker to draw the snowflakes. Alternatively, you can also have the kids use Q-tips dipped in paint or even their fingers to create snowflakes.

Your DIY mouse Christmas card is ready to be given to a friend or a family member!

We love how it turned out!
Want instant access to all of our printable crafts, activities, and resources?

With thousands of crafts, activities, worksheets, coloring pages, and drawing tutorials to print, you will always have just the resource you need at your disposal. Perfect for parents and teachers alike!