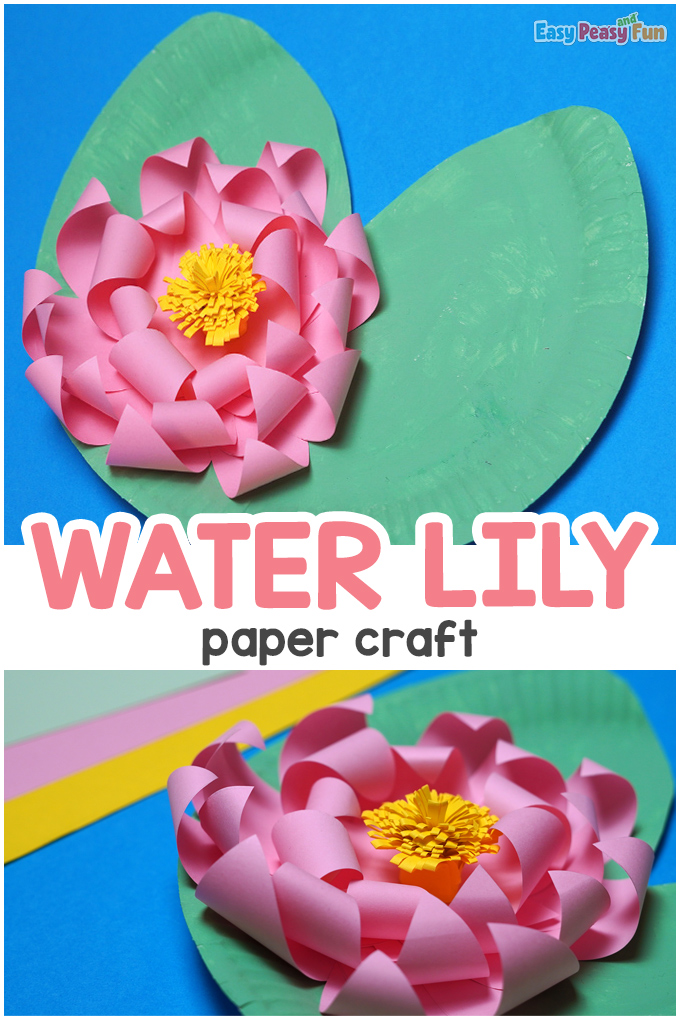
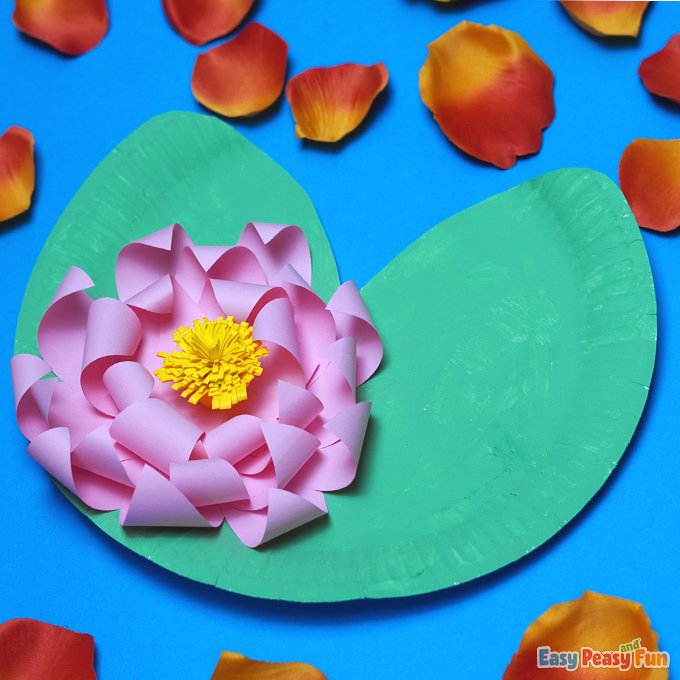
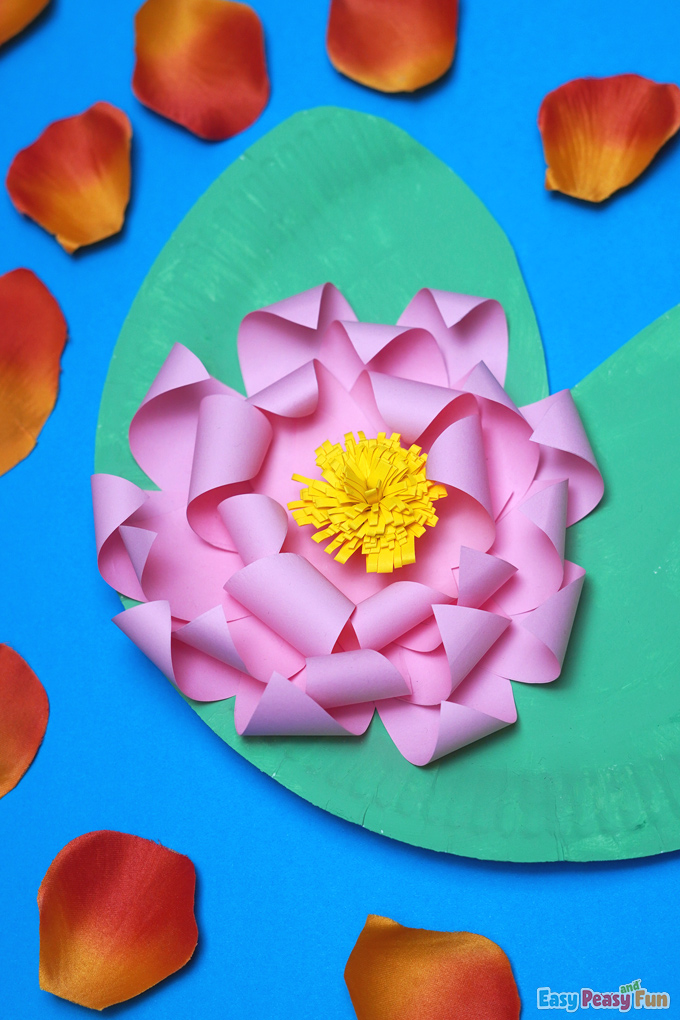
If you’ve ever wanted to create a water lily based craft, then this Water Lily Paper Plate Craft is for you. You can simply follow this tutorial to make a DIY craft.
Water lilies are popular because they exist in tropical climates around the world. They grow in slow-moving water! So the next time you see a frog on a lily pad, think about how long it took it to grow.
*this post contains affiliate links*
50 paper crafts your kids can actually do themselves

No fancy supplies — just paper, scissors, and a little imagination.
Be the first to get it on release day — and lock in the lowest price guaranteed.
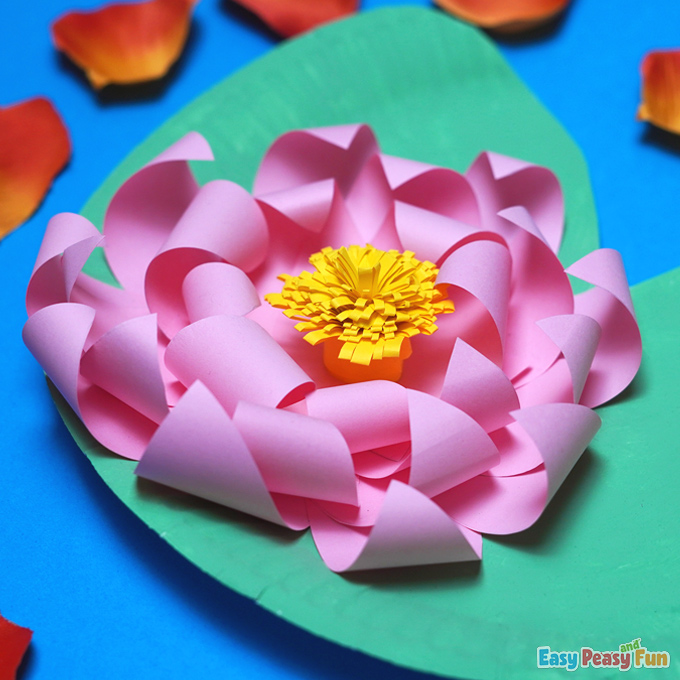
If you’ve ever looked in a pond and saw a water lily floating around, this is kind of what it looks like. If you are studying water lilies, this makes the perfect craft to do as you learn.
How to Make a Water Lily Paper Plate Craft
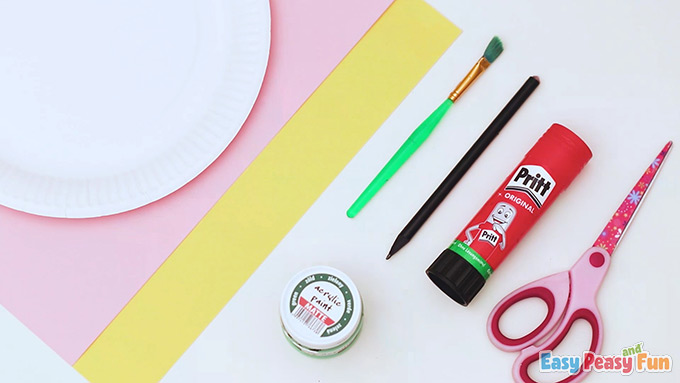
What you need:
- Paper plate
- Green acrylic paint
- Paintbrush, scissors, pencil
- Glue stick
- Rose and yellow papers
Step-by-Step Tutorial
Start by gathering all of your materials to make this Water Lily Paper Plate Craft.
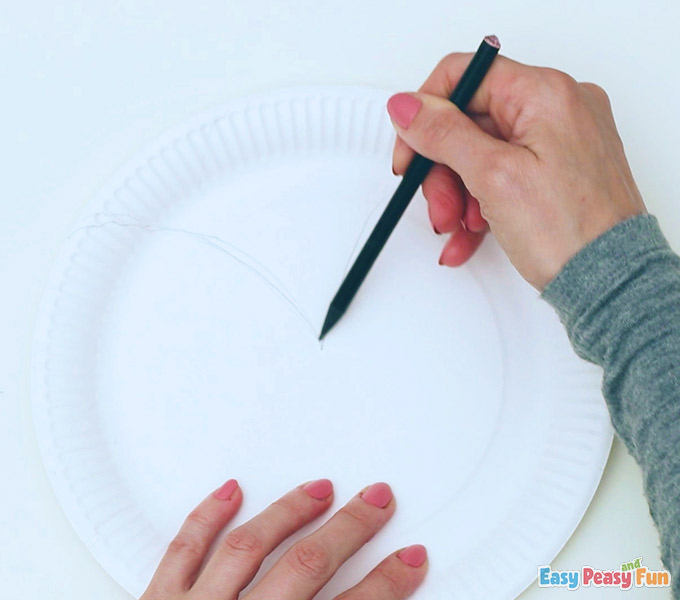
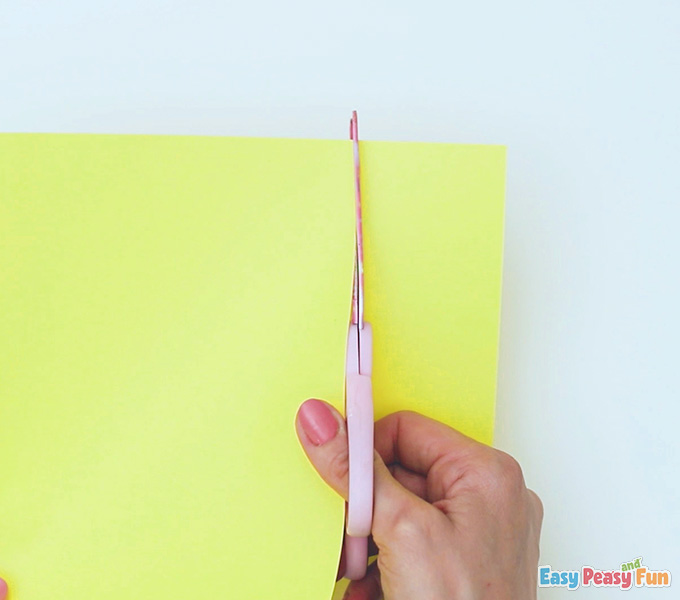
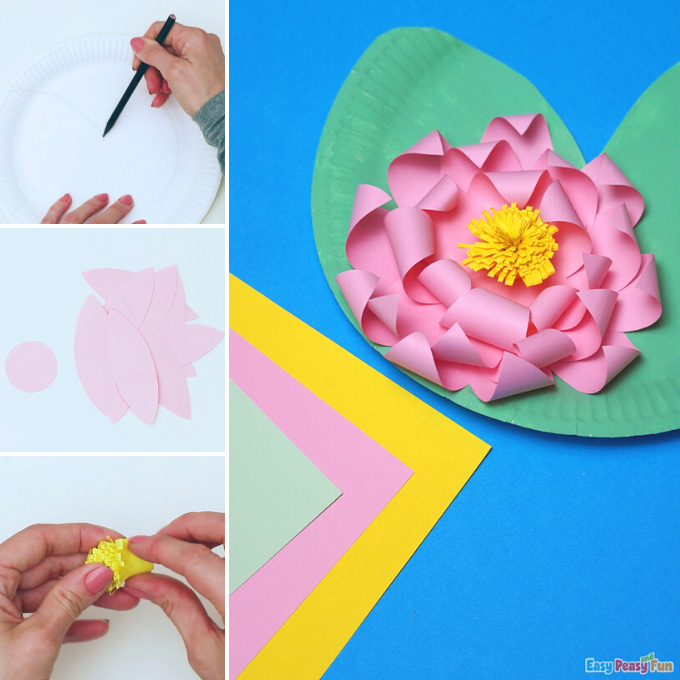
Draw the shape of the water lily leaf on a paper plate and cut it out.
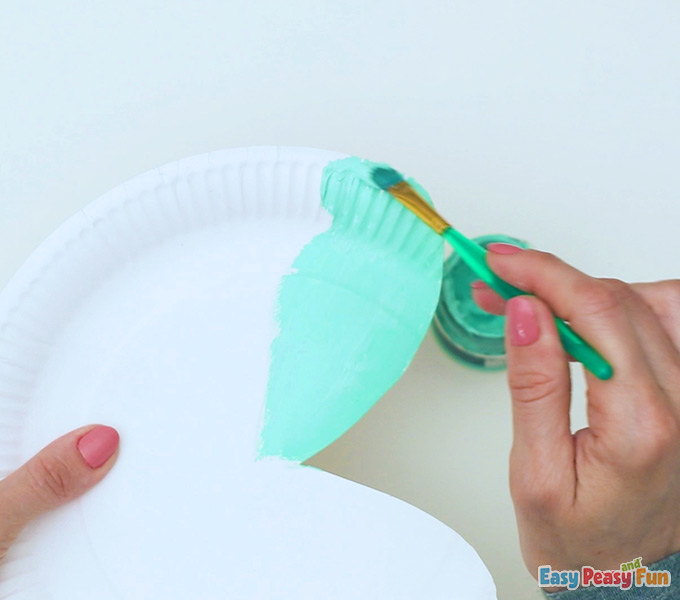
Go ahead and paint it green.
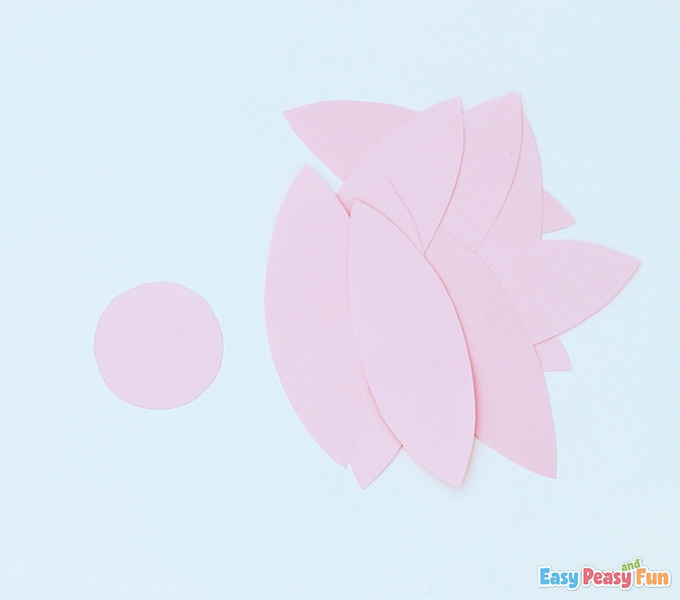
Make a circle on the pink paper.
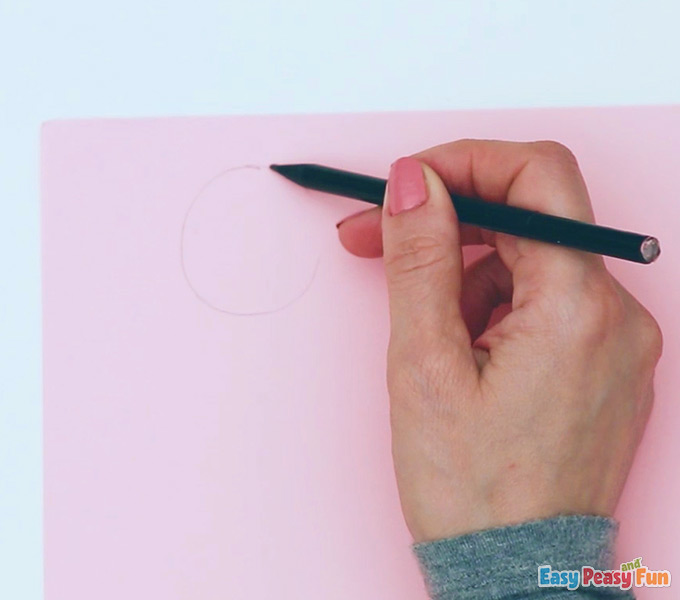
Cut out the circle.
Cut out the leaf’s template.
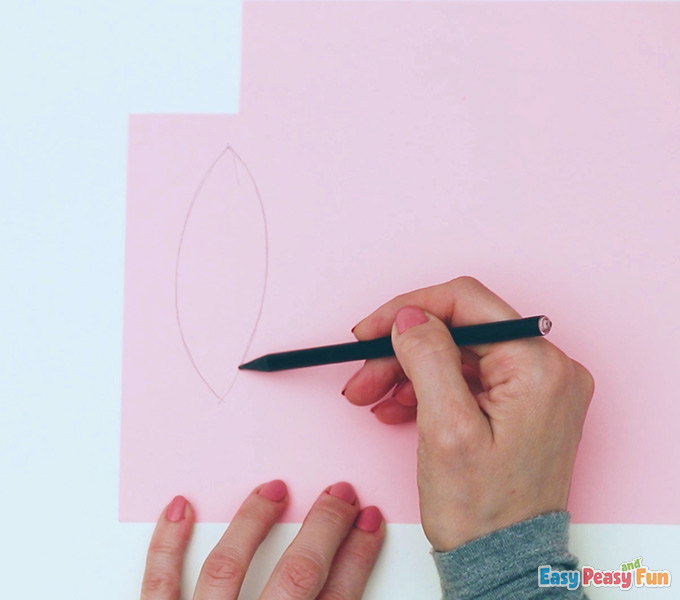
Draw around several times on the pink paper.
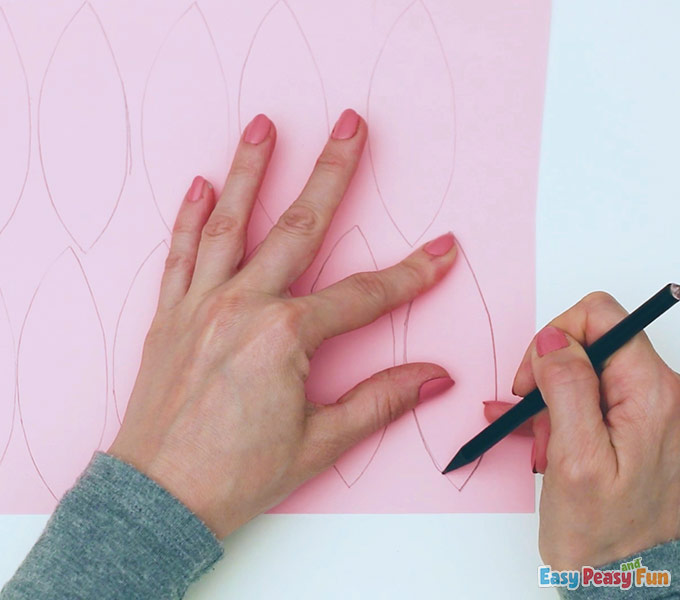
Cut everything out.
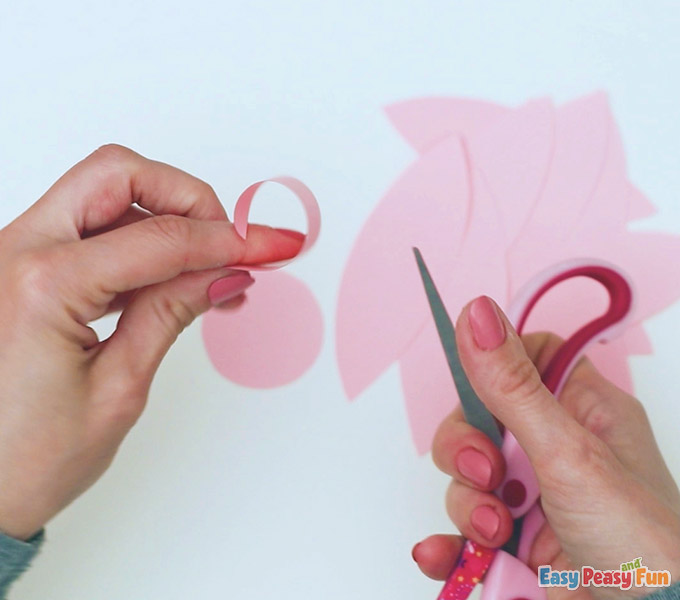
Pull the petals with the edge of the scissors to curl.
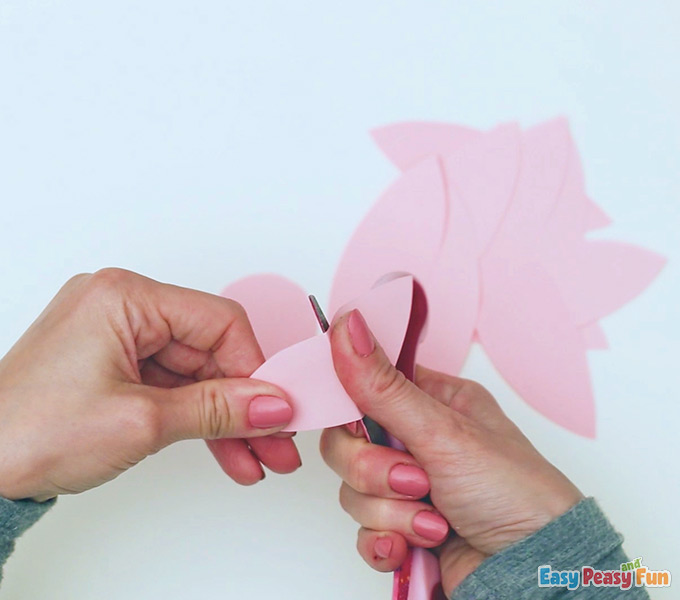
Keep curling the leaves with the scissors.
Glue them to the circle in several rows.
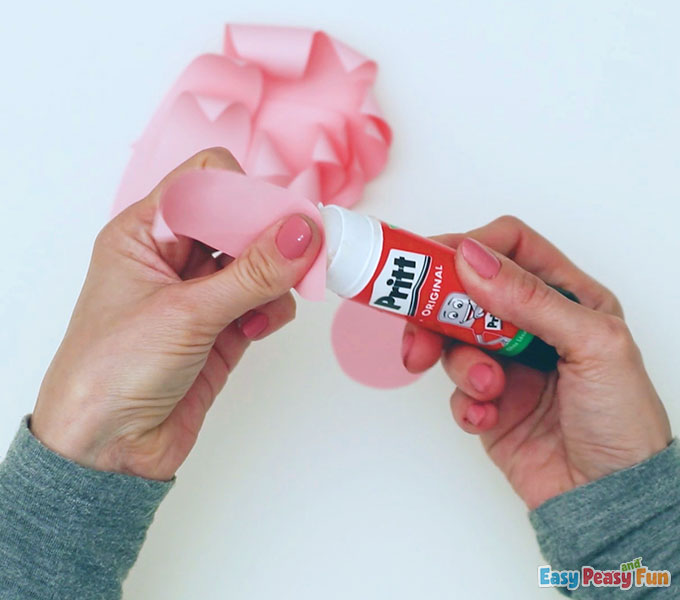
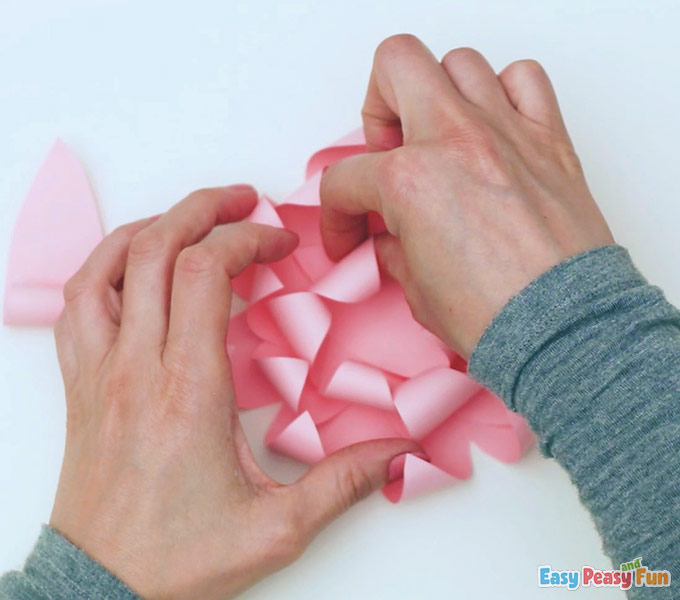
Keep gluing.

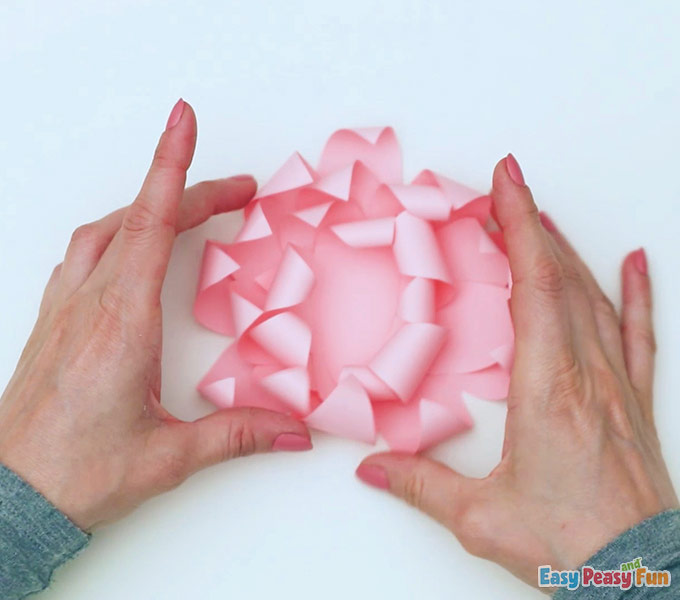
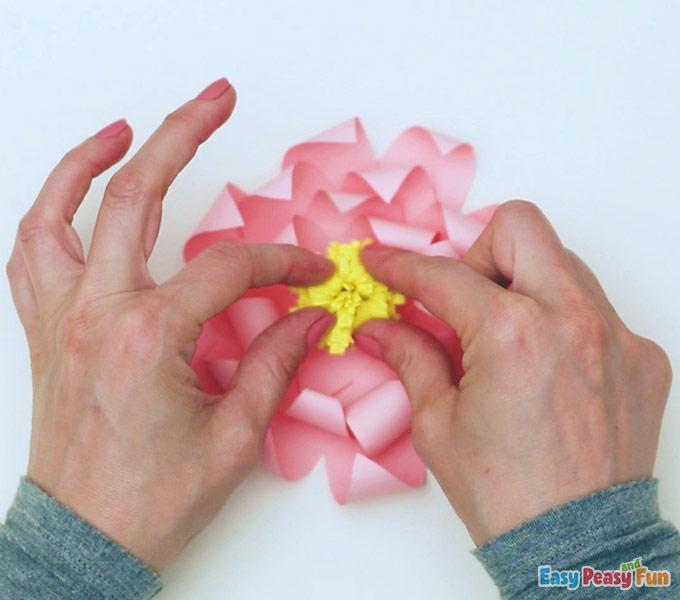
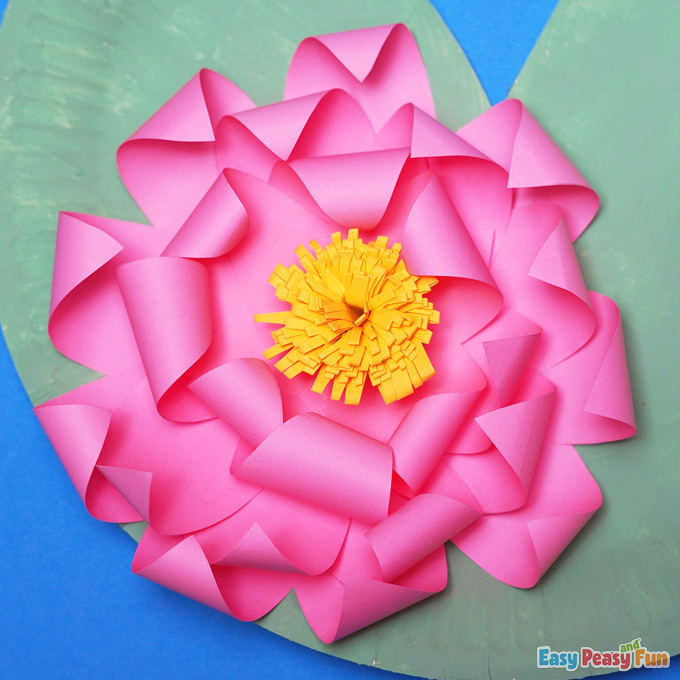
Keep going until the flower is complete. It should look like a curly flower when you are done!

Cut a long strip of the yellow paper.
Fold in half and cut with scissors from beginning to end.

Go ahead and wrap the yellow piece of paper up.
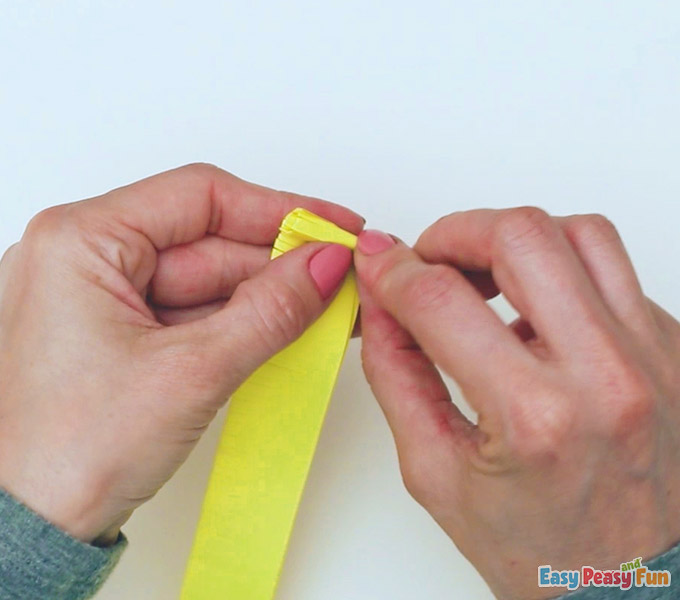
Glue it together. Gluing this together is going to give the flower an amazing real look!

Go ahead and add it to the center of the flower. Look at how beautiful the yellow POP of the center is.
Place the flower on the lily pad.
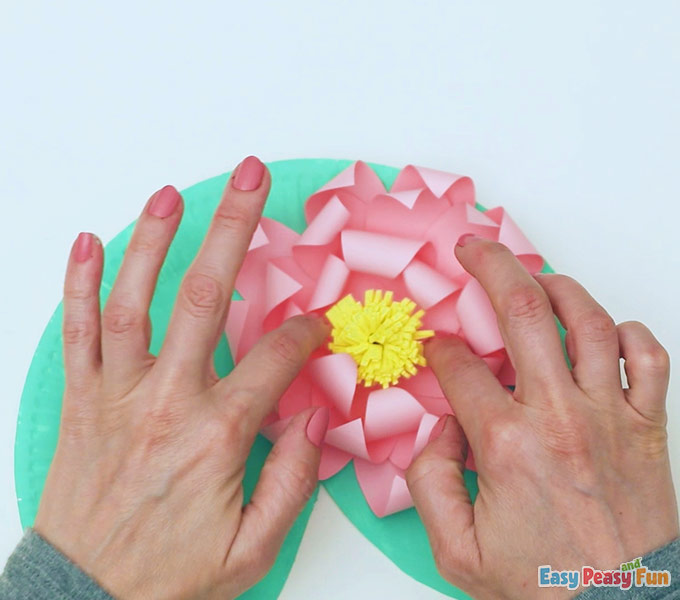
Now you have a complete Water Lily Paper Plate Craft.
Want instant access to all of our printable crafts, activities, and resources?

With thousands of crafts, activities, worksheets, coloring pages, and drawing tutorials to print, you will always have just the resource you need at your disposal. Perfect for parents and teachers alike!