Grab some print out our funky looking turkey leaf craft template and let’s make this wonderful fall activity.
Our fall craft template is great for kids of all ages (perfect for preschool and kindergarten), although you can just as easily make this project without the template.
*this post contains affiliate links*
50 paper crafts your kids can actually do themselves

No fancy supplies — just paper, scissors, and a little imagination.
Be the first to get it on release day — and lock in the lowest price guaranteed.
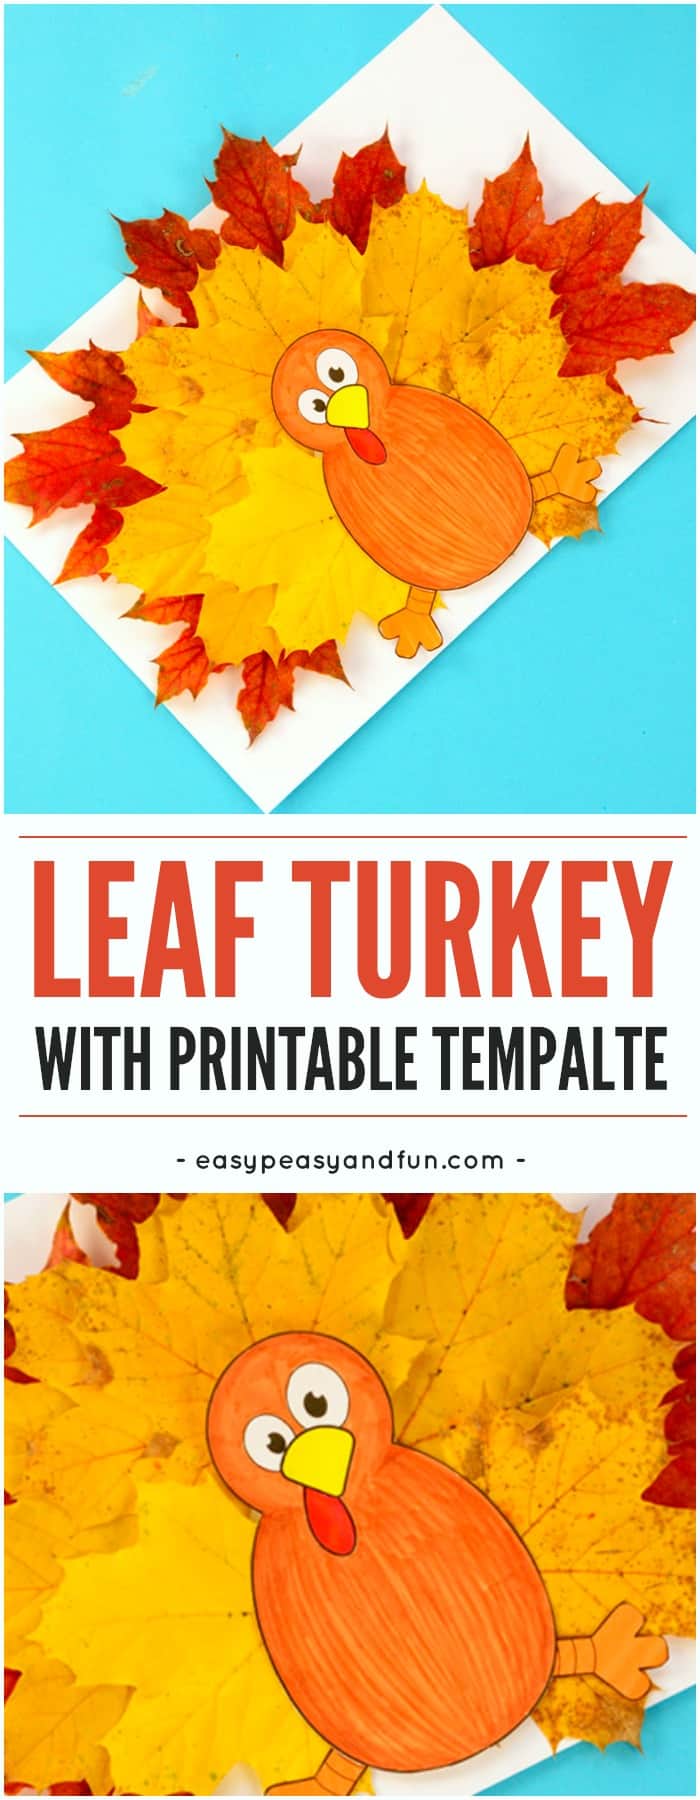
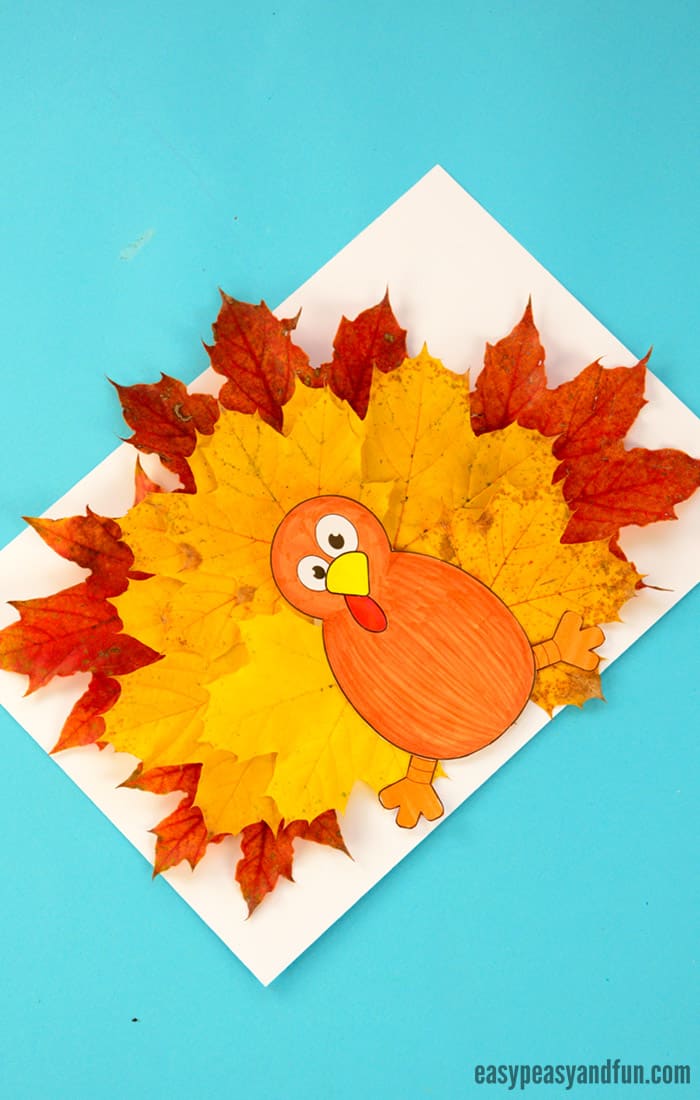
Fall is abundant in wonderful (and free) crafting materials… There are a whole lot of fun things you can create utilizing leaves of all colors (have you seen our leaf lion?).
We love picking leaves, it almost feels like we never have enough (although we have way more than we’ll ever use) and we love creating with them even more – be it crafts for display such as this turkey craft or all kinds of fun decorations.
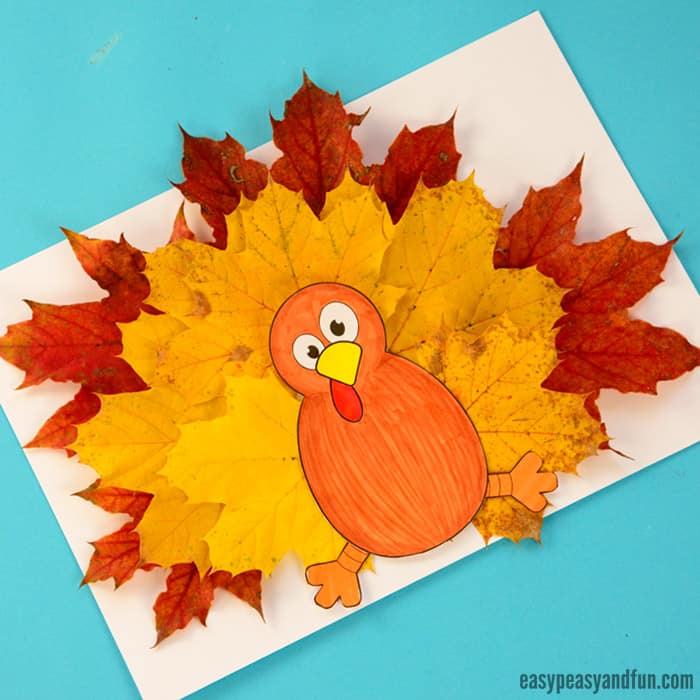
For this particular project, we were grabbing maple leaves in all colors. This project will look fantastic with any color although I must say, yellow and red leaves turned out the best! Naturally, you could even color the leaves or add some texture to them with markers to take this crafty project idea to a whole new level.
Ready? Print out our template (you can find it at the end of this tutorial) and let’s get crafting!
 How to Make a Leaf Turkey with our Turkey Leaf Craft Template
What you need:
- our printable template (you can grab it at the end of this tutorial)
- leaves, lots of colorful real leaves
- paper (heavier paper is best, regular paper will be OK too)
- coloring supplies
- scissors
- glue
When it comes to decorating, glitter glue is always welcome!
Watch the Video Tutorial
Or Follow These Step by Step Instructions with Pictures
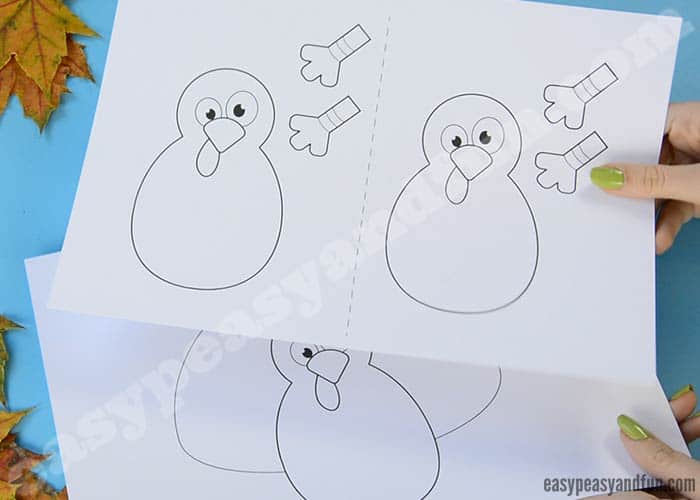
Print out our template. We recommend printing on heavier print paper as it will withstand the wetness of the blue better and won’t wrinkle. Regular paper will be OK too.
There are two pages included, one with only one turkey on it that can be used as a base (you can skip this one) and one with two turkeys for kids to color in and cut out.
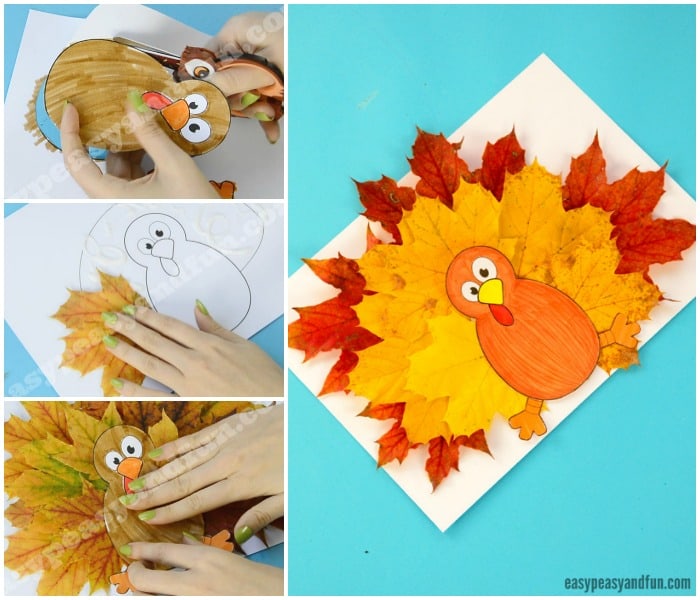
Color in the turkey. We used markers to color it in but any coloring medium will be fun to use – crayons, chalks, coloring pencils…
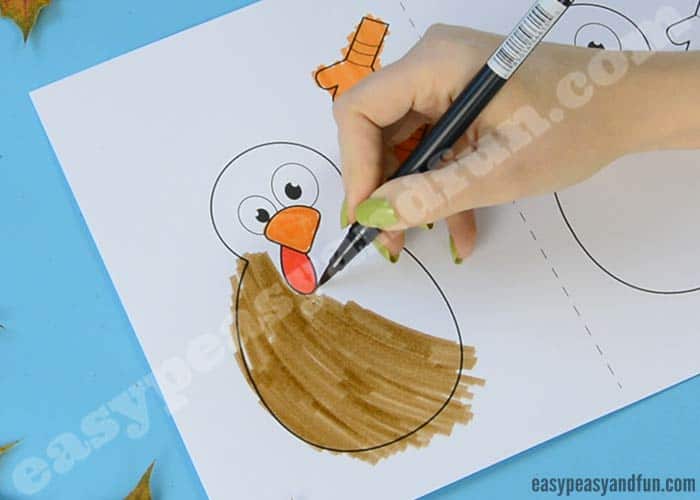
Once colored, cut out the turkey and it’s feet.

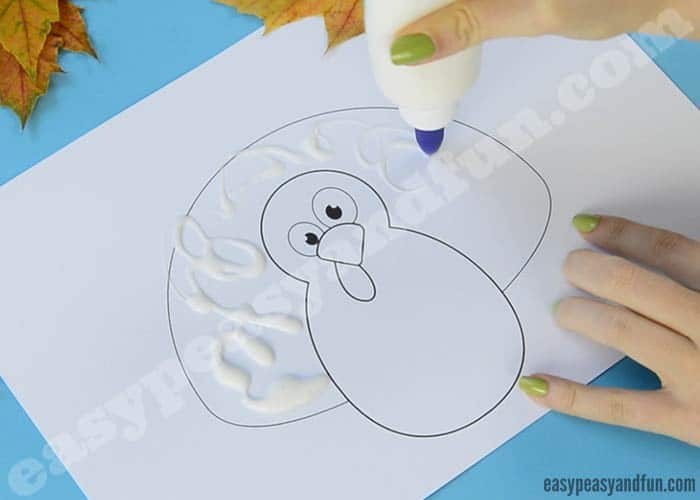
Take the other sheet of paper, with the turkey craft base and apply a generous amount of glue on the tail area.
Alternatively you can also apply glue on the leaves only.
You can cut of stipules of the leaves, or just leave them as they are.
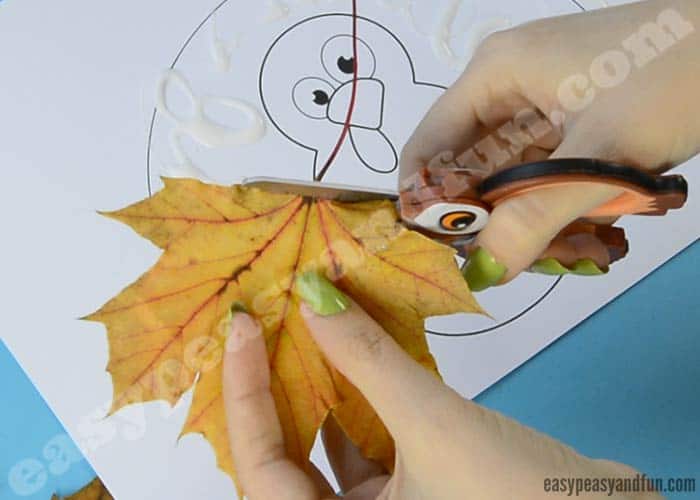
Stick the leaves on the turkey template.
If you want a multi-colored turkey tail, we recommend you make the base with larger red leaves, and place smaller yellow leaves on top of them.
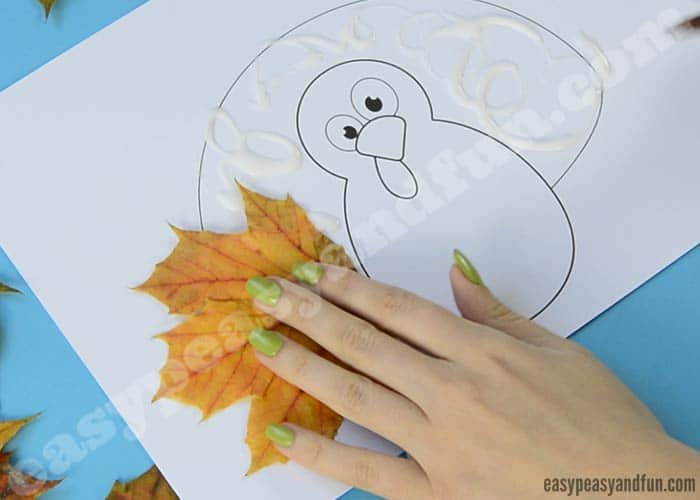
Continue sticking leaves on the template, adding glue either on the leaves or on the base as you go.

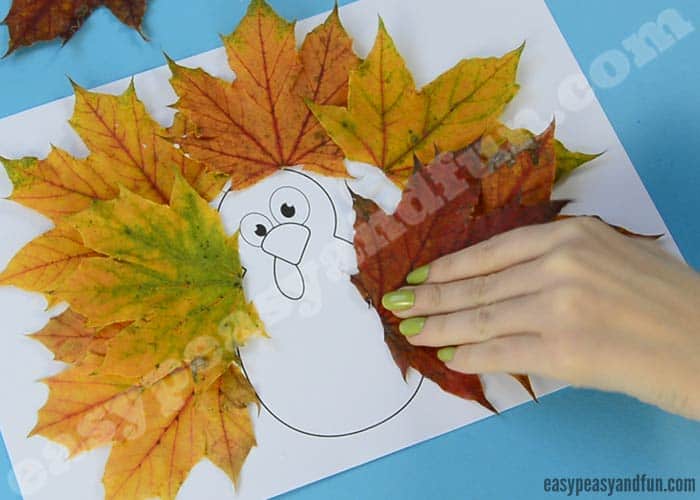
Once happy with how the turkey tail is starting to look, glue on two turkey feet on the base (you can also glue them directly on the colored body, whichever feels easier).
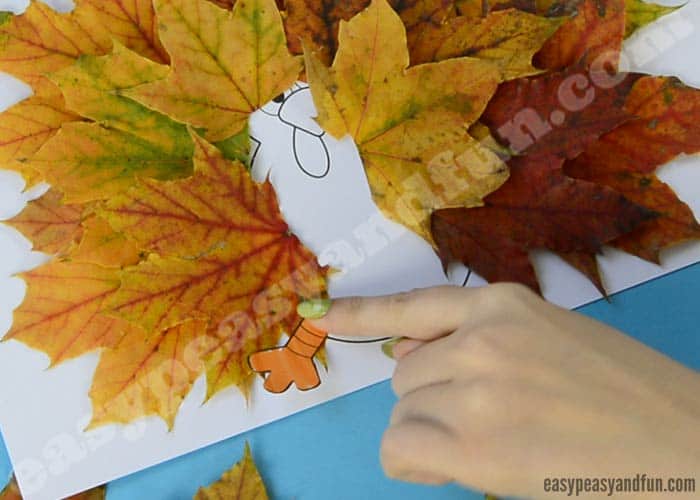
Take the colored turkey body, apply a generous amount of glue on the back.
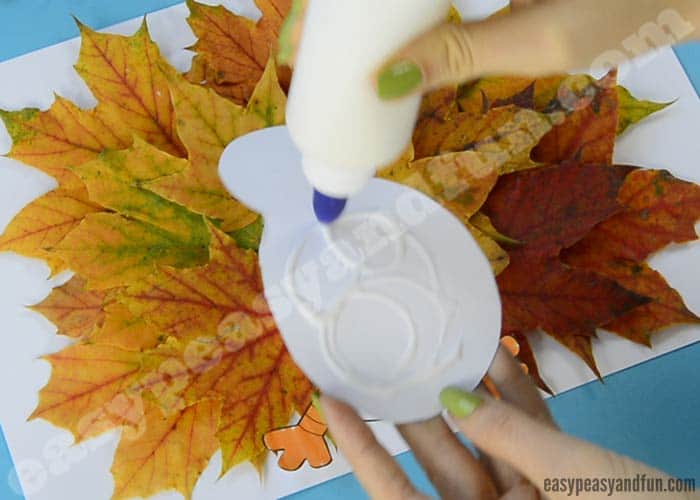
Press the turkey body to the base.
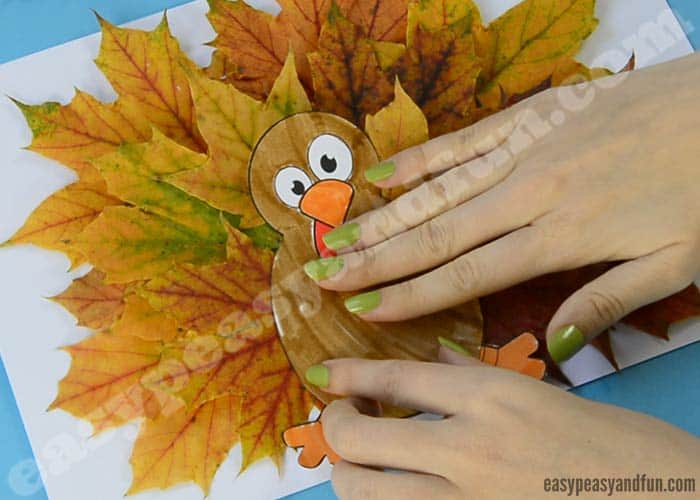
Give the glue some time to dry.
Voila! You’ve made a fun-looking turkey with our Turkey Leaf Craft Template.
Get our Turkey Leaf Craft Template Here
We hope you will enjoy making this fun turkey craft, if you need more fun ideas, we have a nice collection of turkey craft ideas here.
Want instant access to all of our printable crafts, activities, and resources?

With thousands of crafts, activities, worksheets, coloring pages, and drawing tutorials to print, you will always have just the resource you need at your disposal. Perfect for parents and teachers alike!
This is cute! Does anyone know about how many leaves each turkey would take? I’d love to do this, but have a large group. I want to make sure I can have enough leaves to pull this off for everyone.