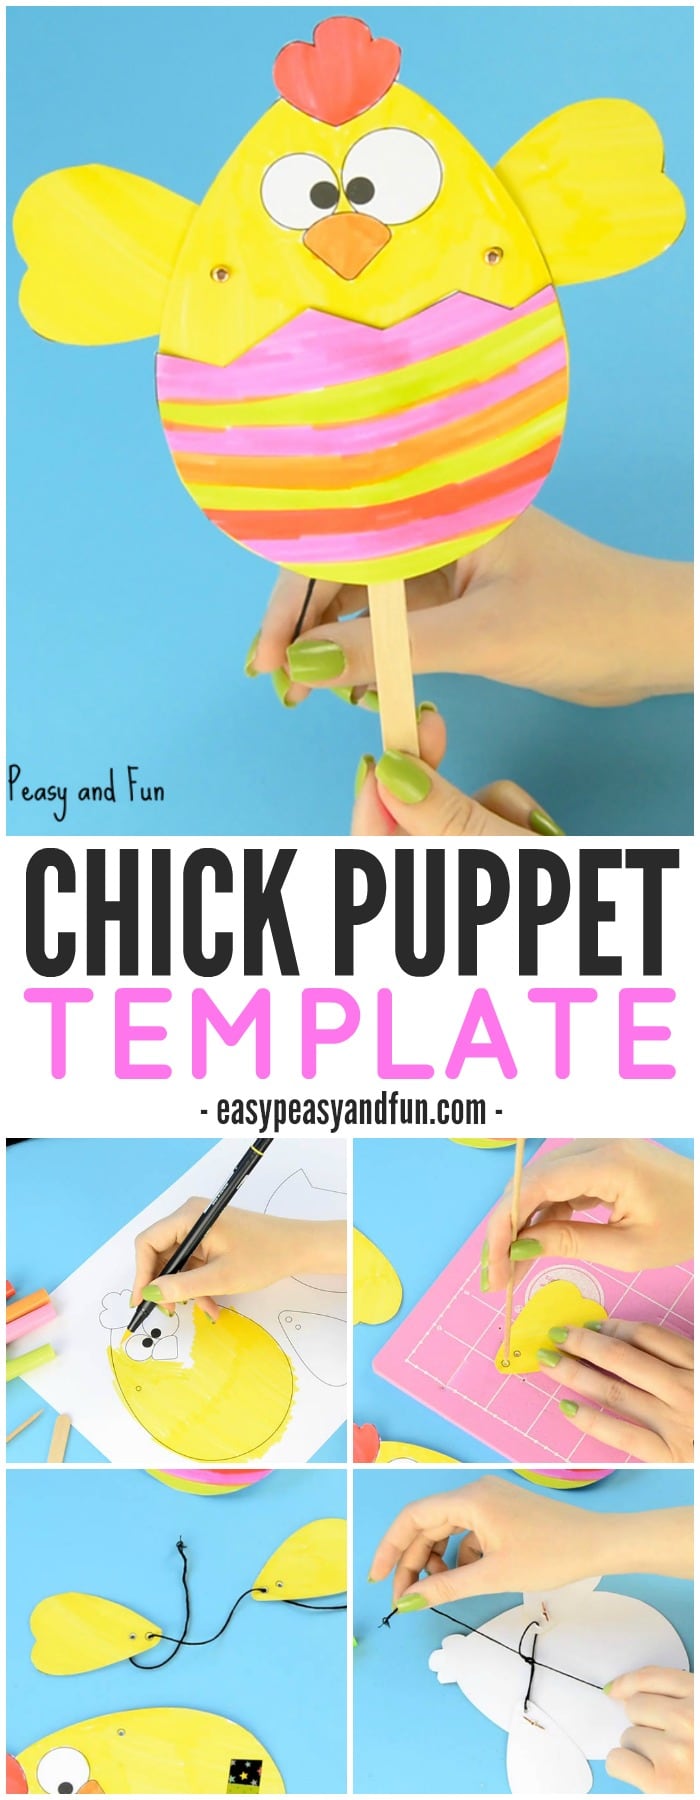
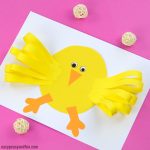
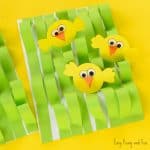
There is a whole lot of fun to be had with a DIY movable paper doll! As Easter is near we have prepared this paper chick puppet craft template for your kids to make and play with.
Ready to learn how to make your very own?
*this post contains affiliate links*
When I learned how to make the movable paper dolls as a kid (the same exact “mechanism” you’ll see used in this tutorial) I became unstoppable. There was a new funky creation on the menu daily and I was trying to make new ways for the dolls to move.
We hope this movable paper chick puppet will inspire your kids to go even beyond this one and to start designing their own (the first doll I made was a bird too, although I am not entirely sure which one it was – might be an owl).
This movable paper doll is pretty easy to make so it’s a perfect project for beginners. It can also make a great classroom project for older kids. Younger kids (kindergarten) can make most of the craft but will need help from grown ups and supervision when using “pointier” objects.
We used mini brads in this project, something that wasn’t really available when I was a kid so I do have an alternative for that (more about this in the tutorial).
Ready to make this Easter craft? Let’s do it!
Paper Chick Puppet Craft Template
For this Easter craft idea you will need:
- our printable chick puppet template (you can find it at the end of this tutorial)
- printer
- heavier print paper
- coloring markers, colorin pencils, crayons or any other coloring medium
- brads
- craft stick (or paper straw…)
- string
- scissors
- glue
- clear tape
Optional: Glitter! Fancy things up! We always prefer glitter glue to actual glitter though. As glitter can get everywhere!
We have prepared both a video for you to watch and photos with written instructions with tips and tricks.
Watch the Video Tutorial
Or Follow the Step by Step Instructions
Start by printing out our paper chick doll template (found at the end of this tutorial).
We printed ours on 160 gsm / 59lb white print paper which worked out perfectly.
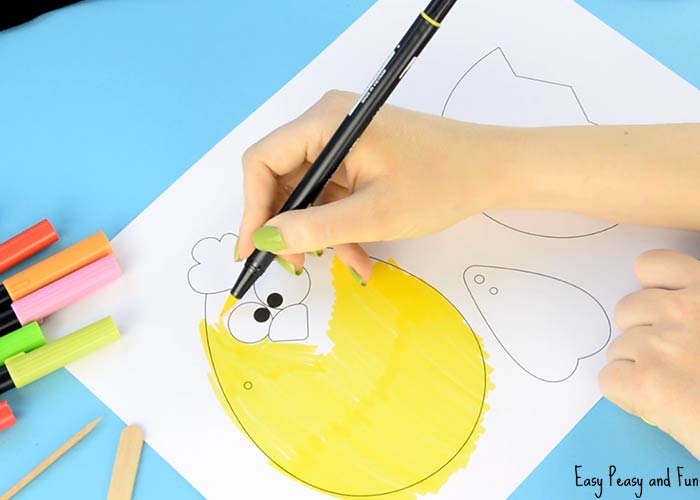
Once you have your template printed it’s time to color.
We colored ours with brush markers. Brush markers are great for coloring larger areas as you can quickly color with them. We are also fans of vibrant colors.
Color the chick in orange (or green if you are dealing with a chick from outer space, let the sky be the limit when it comes to colors.
Get really creative when choosing colors for the egg shell.
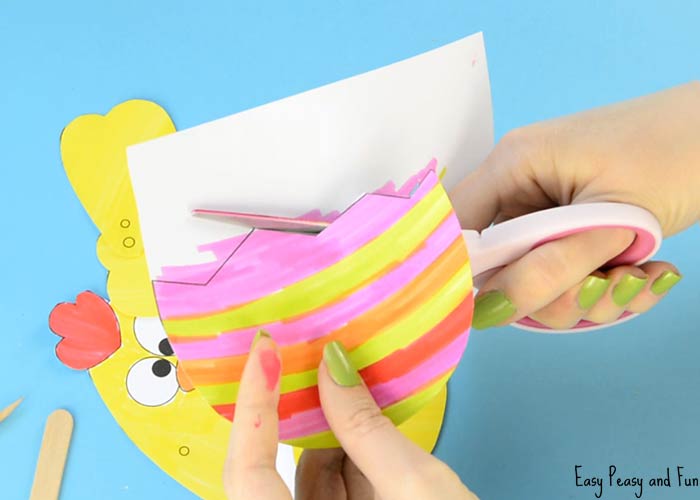
Once all is nicely colored and dry (if coloring with markers you might need to give them a bit of time to dry) cut all parts of the template out.
Cut, cut, cut!
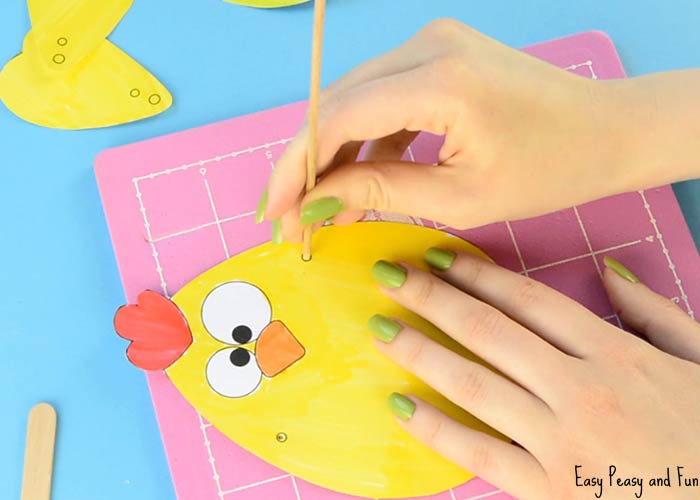
Time to punch a few holes. Slip something underneath the paper you are working on (styrofoam, foam, cutting mat…) and punch a pointy object through the small holes on the chick’s body.
We used a skewer which worked nicely. Pens and other “pointy” objects can work nicely too.
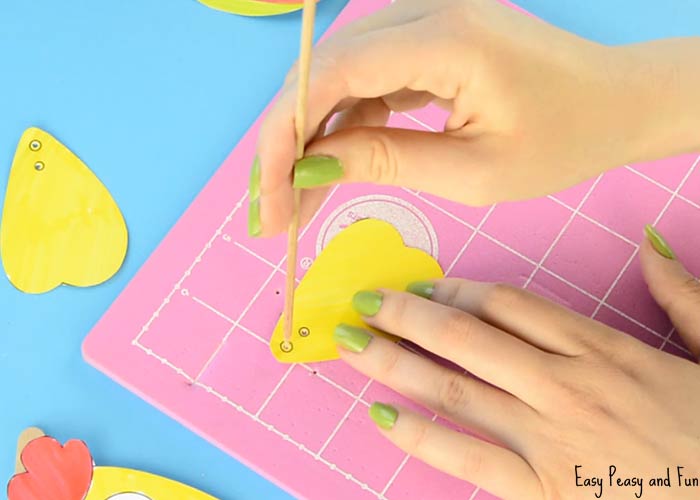
Now also punch through the holes on the wings.
Punch through both holes on both wings.
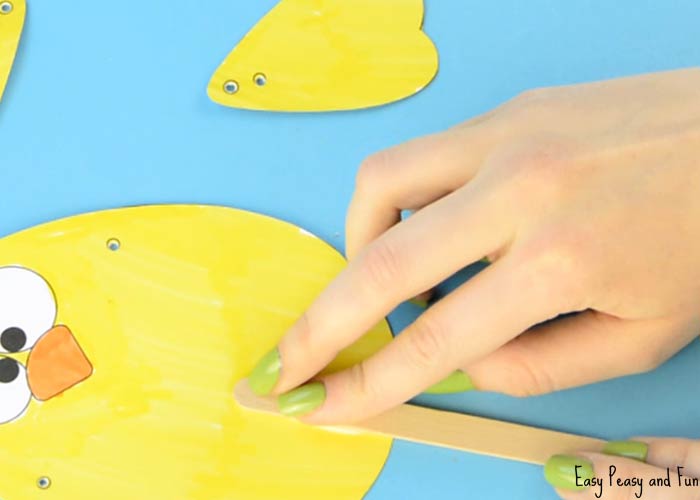
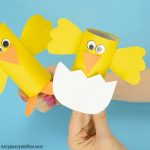
Take the craft stick and glue it on the chick body.
We used white school glue. To make things super secure we also added some clear tape.
Let’s assemble our Paper Chick Puppet!
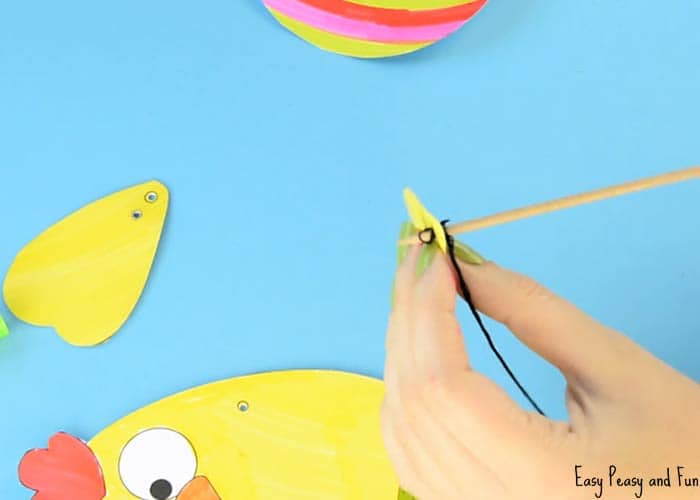
Take the string and string it through the hole on the outside of the wings.
String through the other wing, again through the outer hole.
Set aside.

Take a brad and push it through the hole one the chick.
Turn around, take one wing and push the same brad through the hole on the chick wing.
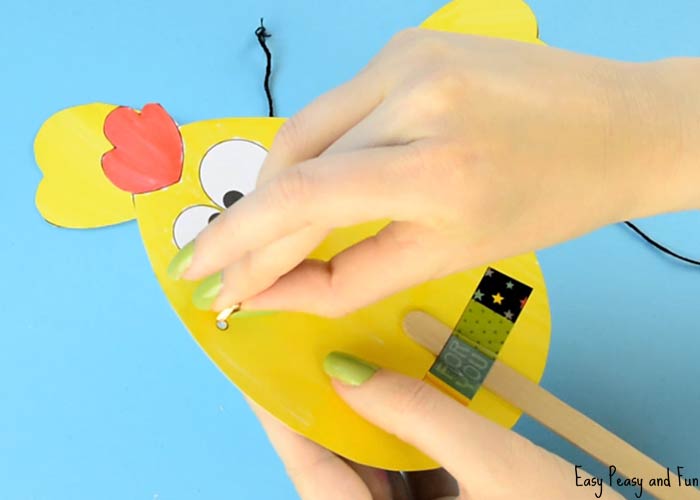
Spread the brad to secure it. You can turn it a few times to make the wing move more smoothly.
Do the same with the other hole.
No brads? No worries!
As I previously mentioned, brads were not really a thing when I was a kid (or at least I was not aware of them). There are some alternatives you can use.
Buttons! As a kid I used two buttons and string instead of one brad. Place one button on each side of the holes and “sew” them together.
Another alternative is to just make a large knot on each side of the holes.
Both alternatives will work out nicely.
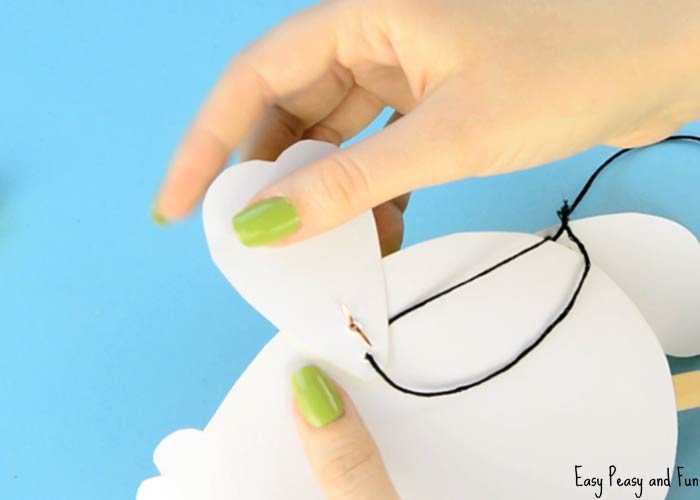
Now that both wings are attached to the body it’s time to tie the string.
The string connecting the two wings should be somewhat loose – just enough so that the wings can fall down, when the puppet is held upright.
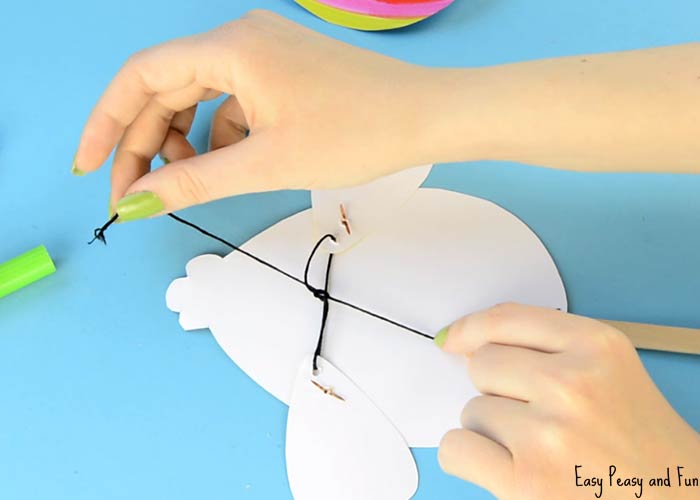
You will need to have a bit of sting “hanging” for you to pull and to make your puppet move.
If there wasn’t enough string left, just tie another string in between the wings.

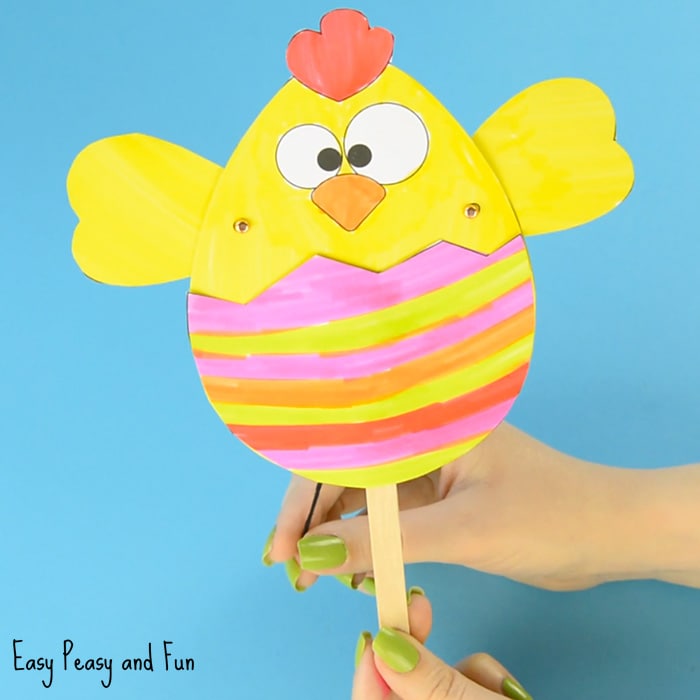
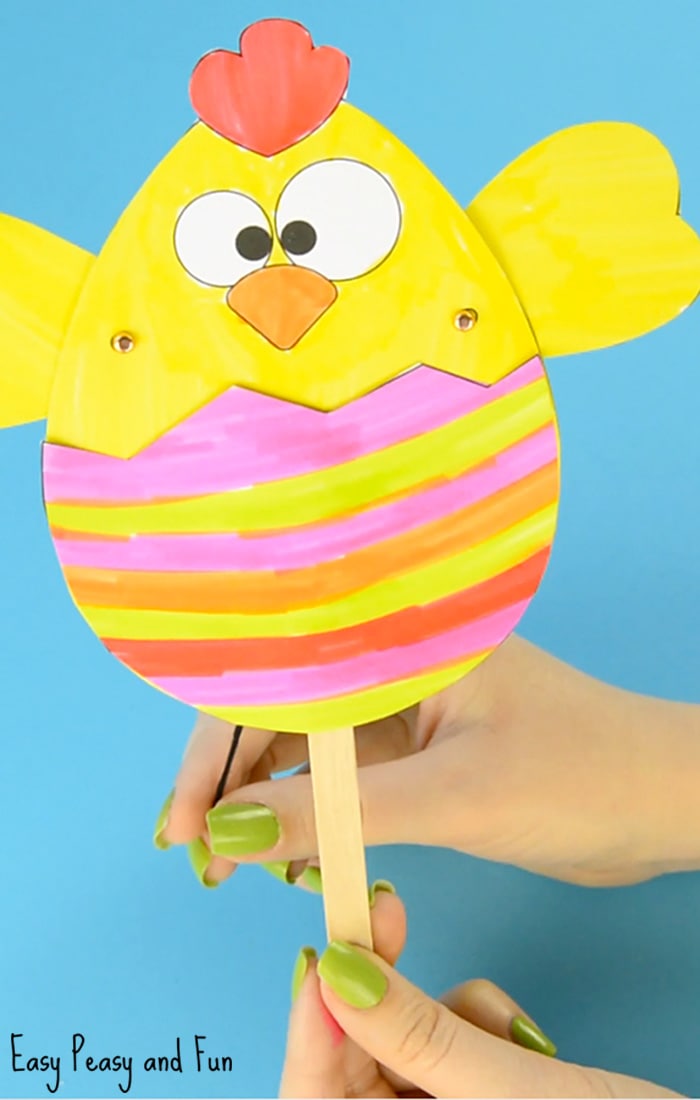
Last step to do is to glue the colored Easter egg shell to the chick.
Your Paper Chick Puppet craft is complete!
We hope you enjoyed this tutorial and that your kids will be making many puppets of their own!
Get the Paper Chick Puppet Template Here
Movable Paper Chick Doll Template
Want instant access to all of our printable crafts, activities, and resources?

With thousands of crafts, activities, worksheets, coloring pages, and drawing tutorials to print, you will always have just the resource you need at your disposal. Perfect for parents and teachers alike!
Thanks!!!!!!! This will be our Easter craft 2017!!! Great idea!!!! Love it!!!
Miss Paola (Fantasy Kids) Argentina.-
Great