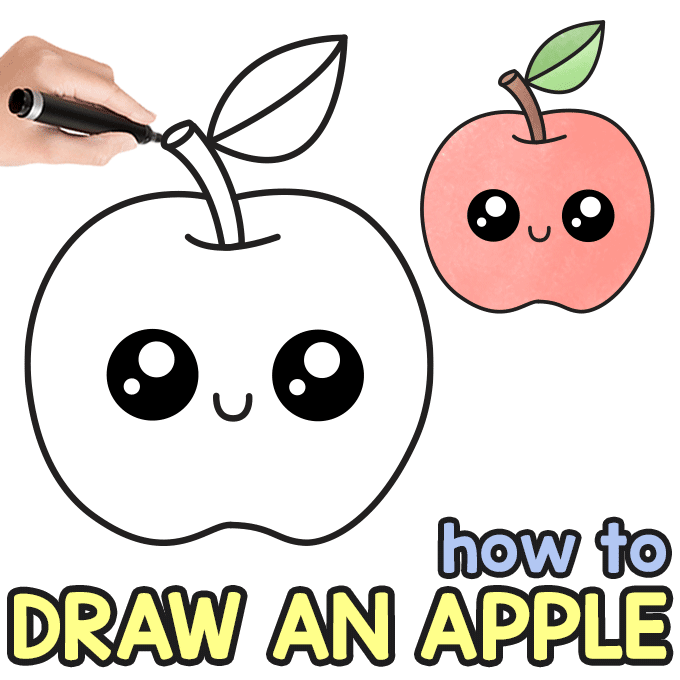
Apples are a classic symbol of fall, a traditional teacher gift, and one of the best basic shapes for children practicing their foundational drawing skills. Whether you are planning a seasonal classroom lesson, looking for a quick homeschooling art activity, or simply wanting a screen-free afternoon project, this simple cartoon apple tutorial is designed to guarantee success.
This guide breaks the process down into seven (eight if you count coloring) straightforward steps. Artists of all ages, from young children holding a marker for the first time to adults looking for a quick doodle, can easily follow along to create an apple with a friendly, cartoon expression.

*This post contains affiliate links*
50 paper crafts your kids can actually do themselves

No fancy supplies — just paper, scissors, and a little imagination.
Be the first to get it on release day — and lock in the lowest price guaranteed.
How to Draw an Apple Step by Step
One of the best aspects of this project is that it requires no specialized art supplies. You likely have everything you need on hand:
What you need:
- our printable drawing guide (optional)
- pencil or black marker
- paper
Step by Step Apple Drawing Instructions
For even more drawing fun, also check our extensive collection of how-to-draw tutorials.
Step 1: Draw the Left Side

Start near the top center of your page. Draw a large, smooth curve that resembles a backward capital letter “C”. Curve the line slightly back inward at the bottom to form the left half of the fruit.
Step 2: Begin Drawing the Stem
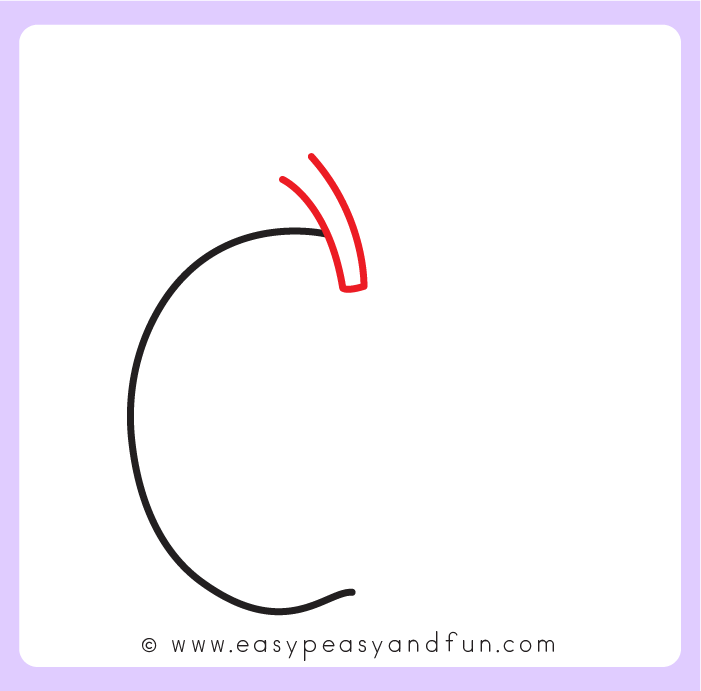
Return to the top indentation where your first line began. From that central dip, draw two parallel lines that curve slightly upward and to the right to establish the structure of the stem.
Step 3: Draw the Right Side
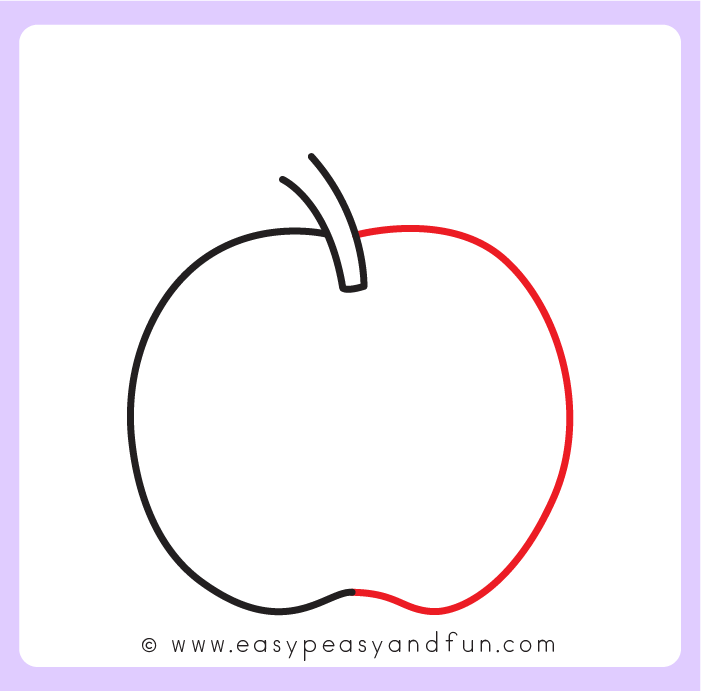
To close the shape, start from the right side of your stem lines and mirror the curve you drew in the first step. Bring the line down to meet the bottom curve seamlessly, completing the main body of the apple.
Step 4: Complete the Stem
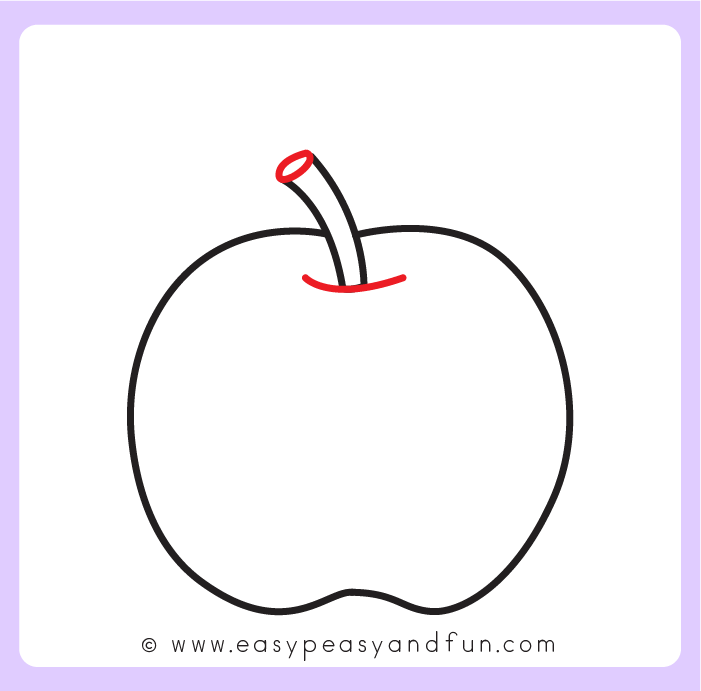
To give the stem a dimensional look, draw a small, tilted oval to close off the open lines at the top. Add a tiny, soft curved line right at the base of the stem where it meets the fruit to create depth.
Step 5: Add a Leaf Outline
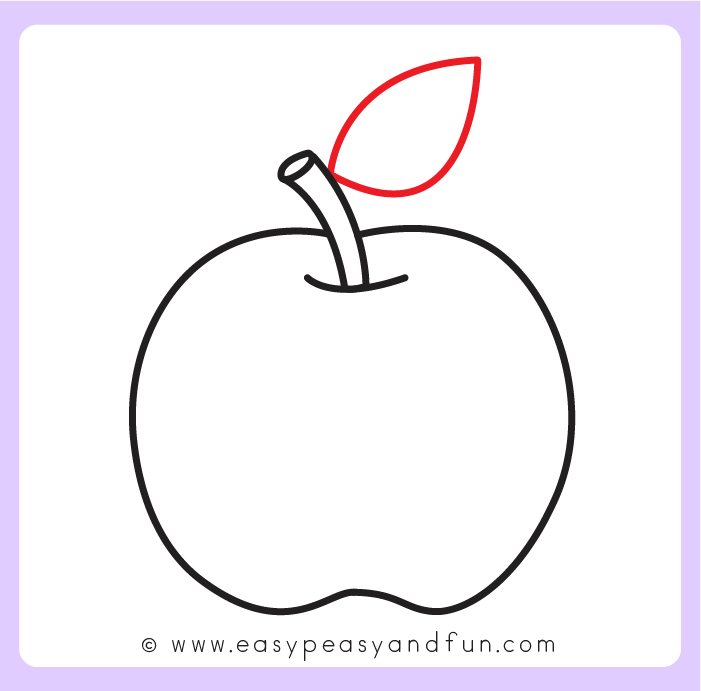
Starting directly from the middle section of the stem, draw an upward curve that loops out, comes to a sharp point at the top, and then curves back down to meet the stem again.
Step 6: Add a Leaf Vein
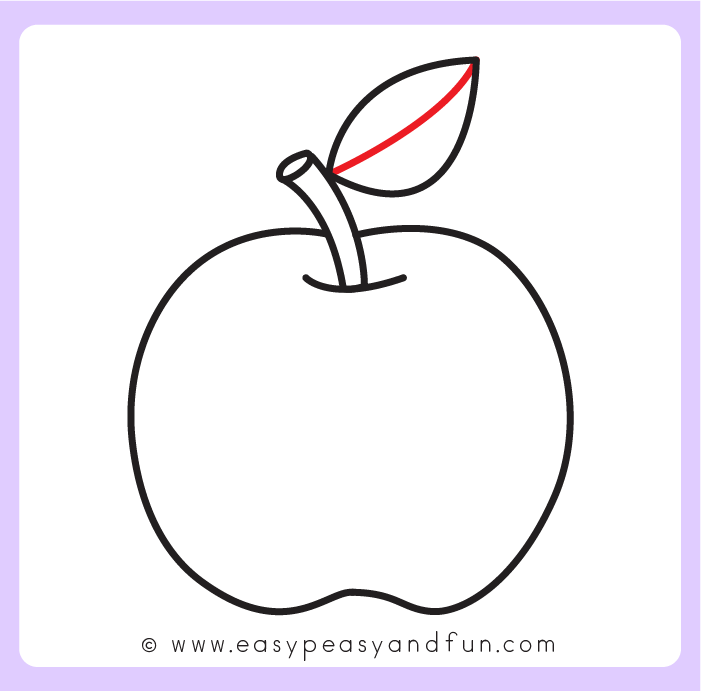
Give the leaf some definition by drawing a single, clean line straight through the center, running from the base of the leaf up to its pointed tip.
Step 7: Optional: Add a Face
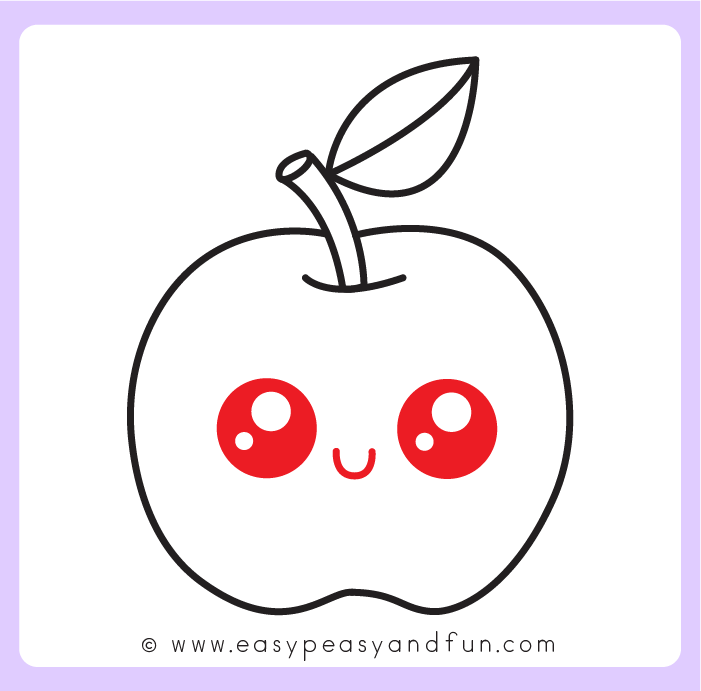
To give your drawing a cartoon personality, draw two large, solid circle eyes. Inside each eye, leave two small areas uncolored (one larger and one smaller) to act as highlights. Finish the expression with a small, centered “U” shaped smile between the eyes.
Step 8: Color
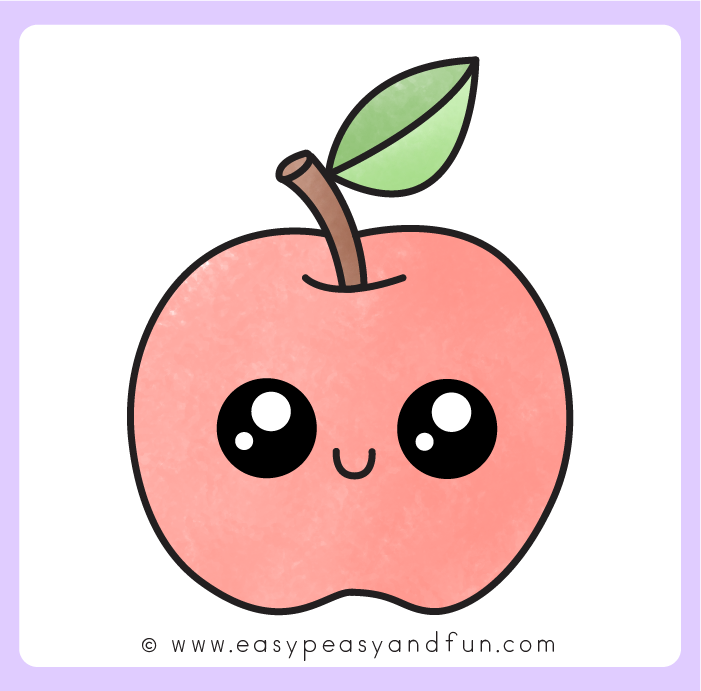
Finish the project by adding color. While a classic red for the apple body, brown for the stem, and green for the leaf work perfectly, you can encourage creativity by trying different color combinations.
Practical Tips for Parents and Teachers
To ensure a smooth drawing session, keep these practical tips in mind:
- The Air Tracing Method: If children find the initial curves challenging, have them trace the shape in the air above the paper a few times before letting their marker touch down.
- Simplifying for Nature Lessons: If you are teaching a botany or science lesson, simply omit Step 7. The base shape stands perfectly on its own as a realistic apple.
- Embracing Imperfections: If one side turns out larger than the other, use it as a teaching moment to explain how real fruit grows in unique, irregular shapes in nature.
Creative Variations to Try
Encourage young artists to experiment beyond a standard red apple:
- The Granny Smith: Use greens and yellows for a tart, crisp look.
- The Honeycrisp: Blend patches of yellow, orange, and deep red using crayons or colored pencils.
- The Apple Worm: Draw a small circle on the side of the apple and add a friendly worm poking its head out.

Get the Apple Guided Drawing Printable
The printable drawing guide is available to members of the Easy Peasy and Fun membership.
To access the template, log in to your account or become a member.
Already a member? Log in here.
More Fall and Fruit Activities
If your students or children enjoyed this tutorial, you can explore these related resources on our site:
- Seasonal Projects: Browse our collection of low-prep Fall Crafts for Kids.
- Coloring Pages: Explore our comprehensive bundle of Fall Coloring Pages
- Origami: Learn how to make an Origami Apple
Want instant access to all of our printable crafts, activities, and resources?

With thousands of crafts, activities, worksheets, coloring pages, and drawing tutorials to print, you will always have just the resource you need at your disposal. Perfect for parents and teachers alike!