Ready to head into outer space? Whether you’re putting together a lesson plan about the solar system or just need a quick activity for a rainy afternoon, learning how to draw a rocket is always a hit with kids. This tutorial breaks everything down into seven easy steps, so even the youngest artists can walk away with a cool-looking spacecraft they’re proud of.
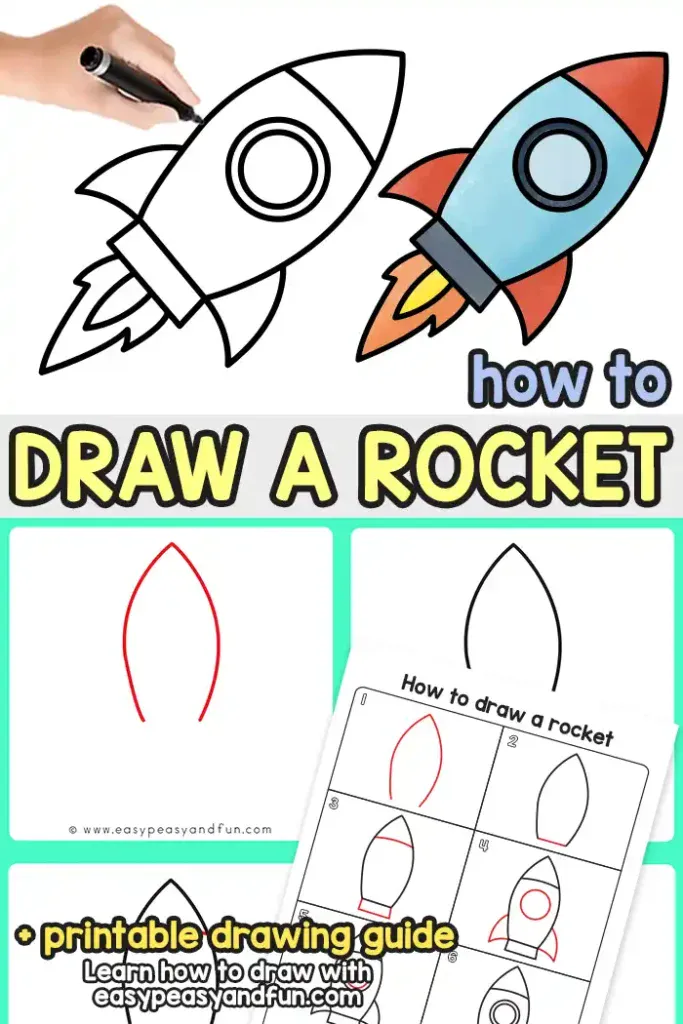
Why Kids Love Drawing Rockets
There is something about space that really sparks a child’s imagination. This guide is great because it uses basic shapes—like triangles, circles, and curves—to build a complex-looking rocket. It’s a low-stress way for kids to practice their drawing skills while dreaming of their own moon mission!
*This post contains affiliate links*
Hi, I'm Andreja from Easy Peasy and Fun — and I just wrote a book!
50 paper crafts your kids can actually do themselves
CRAFTS
I designed every project so kids can do it themselves — no fancy supplies, just paper, scissors, and a little imagination.
“If you need easy crafts to keep busy, Andreja delivers with this book!”
📚 As an indie author, your pre-order genuinely helps me — it counts toward first-week sales, which is how new books get noticed. Thank you!
How to Draw Rocket Step by Step

What you need:
- our printable drawing guide (optional)
- pencil or black marker
- paper
Step by Step Rocket Drawing Instructions
Step 1: Draw the Rocket Body
Start by drawing a tall, curved shape that tapers to a point at the top. This “bullet” shape will serve as the main fuselage of your rocket.

Step 2: Add the Base
Close the bottom of your rocket body with a straight horizontal line.
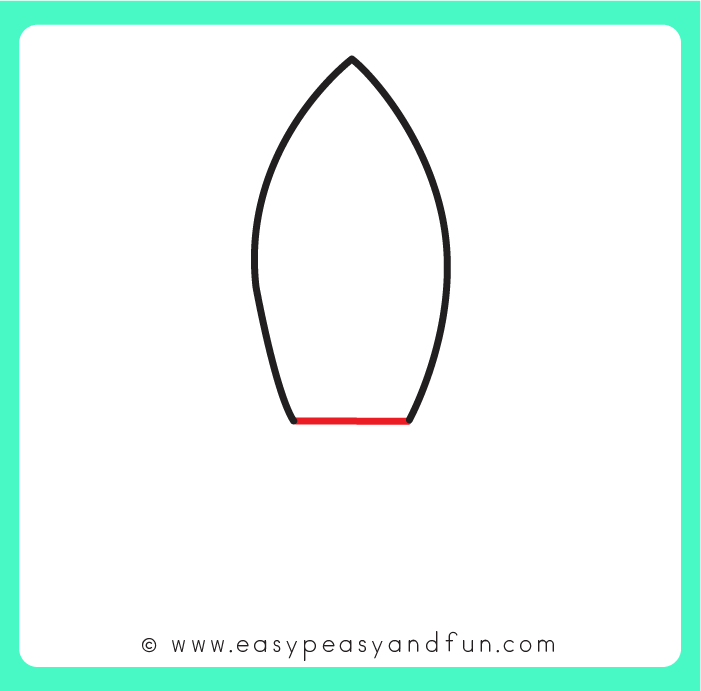
Step 3: Create the Nose Cone and Engine
Draw a slightly curved horizontal line near the top to create the nose cone. At the bottom, add a small rectangle or trapezoid shape to represent the rocket engine.
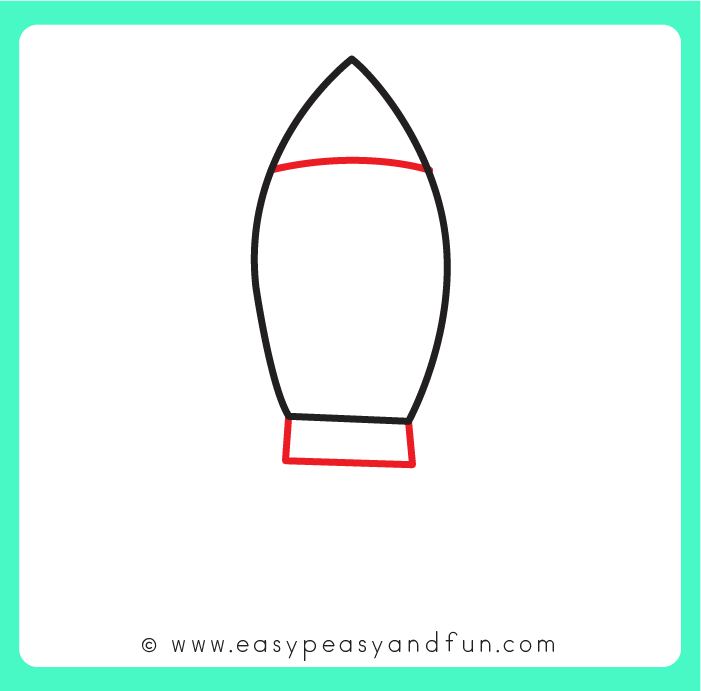
Step 4: Draw the Fins and Window
To give your rocket stability in “flight,” draw two triangular fins on either side of the base. Then, draw a large circle in the center of the body for the porthole window.

Step 5: Add Detail to the Window
Draw a smaller circle inside the first one to create a window frame effect.

Step 6: Add the Fire Blast
Every rocket needs power! Draw a jagged, flame-like shape coming out from the bottom of the engine.

Step 7: Final Details and Coloring
Add a small “inner flame” shape inside the larger one for extra detail. Now, grab your favorite crayons or markers and bring your rocket to life with fun colors!

Take Your Space Art Further
Once you’ve mastered the rocket, why not draw a whole galaxy? You can add stars, planets, or even a little alien waving from the window. This activity is a great addition to space-themed lesson plans or summer camp activities. Or explore our other how to draw tutorials for kids.
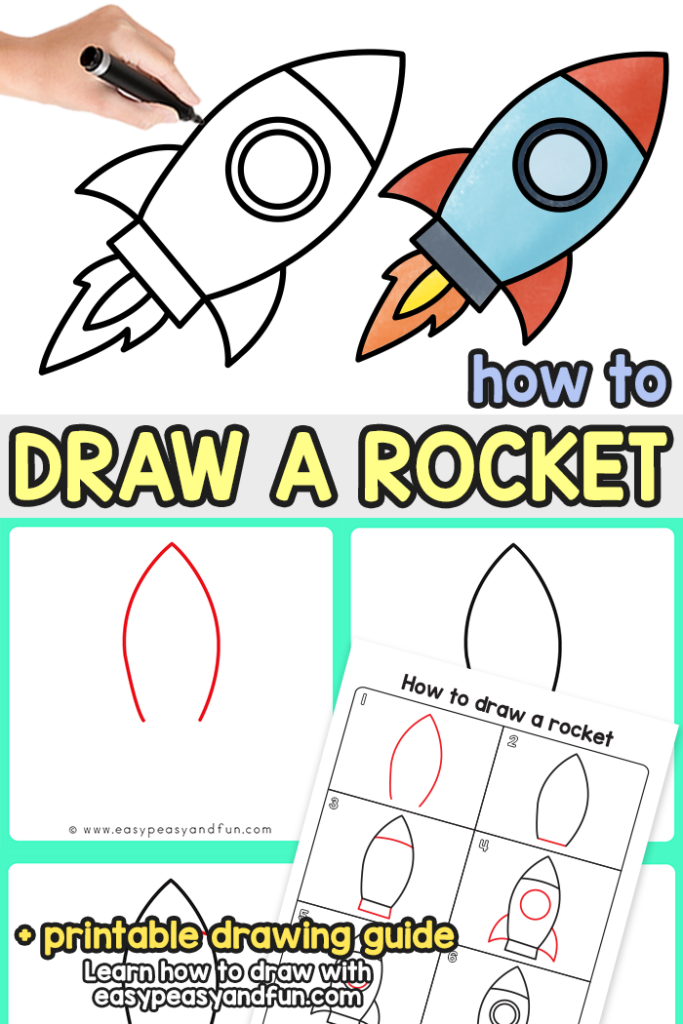
Get the Rocket Guided Drawing Printable
The printable drawing guide is available to members of the Easy Peasy and Fun membership.
To access the template, log in to your account or become a member.
Already a member? Log in here.
Want instant access to all of our printable crafts, activities, and resources?
With thousands of crafts, activities, worksheets, coloring pages, and drawing tutorials to print, you will always have just the resource you need at your disposal. Perfect for parents and teachers alike!