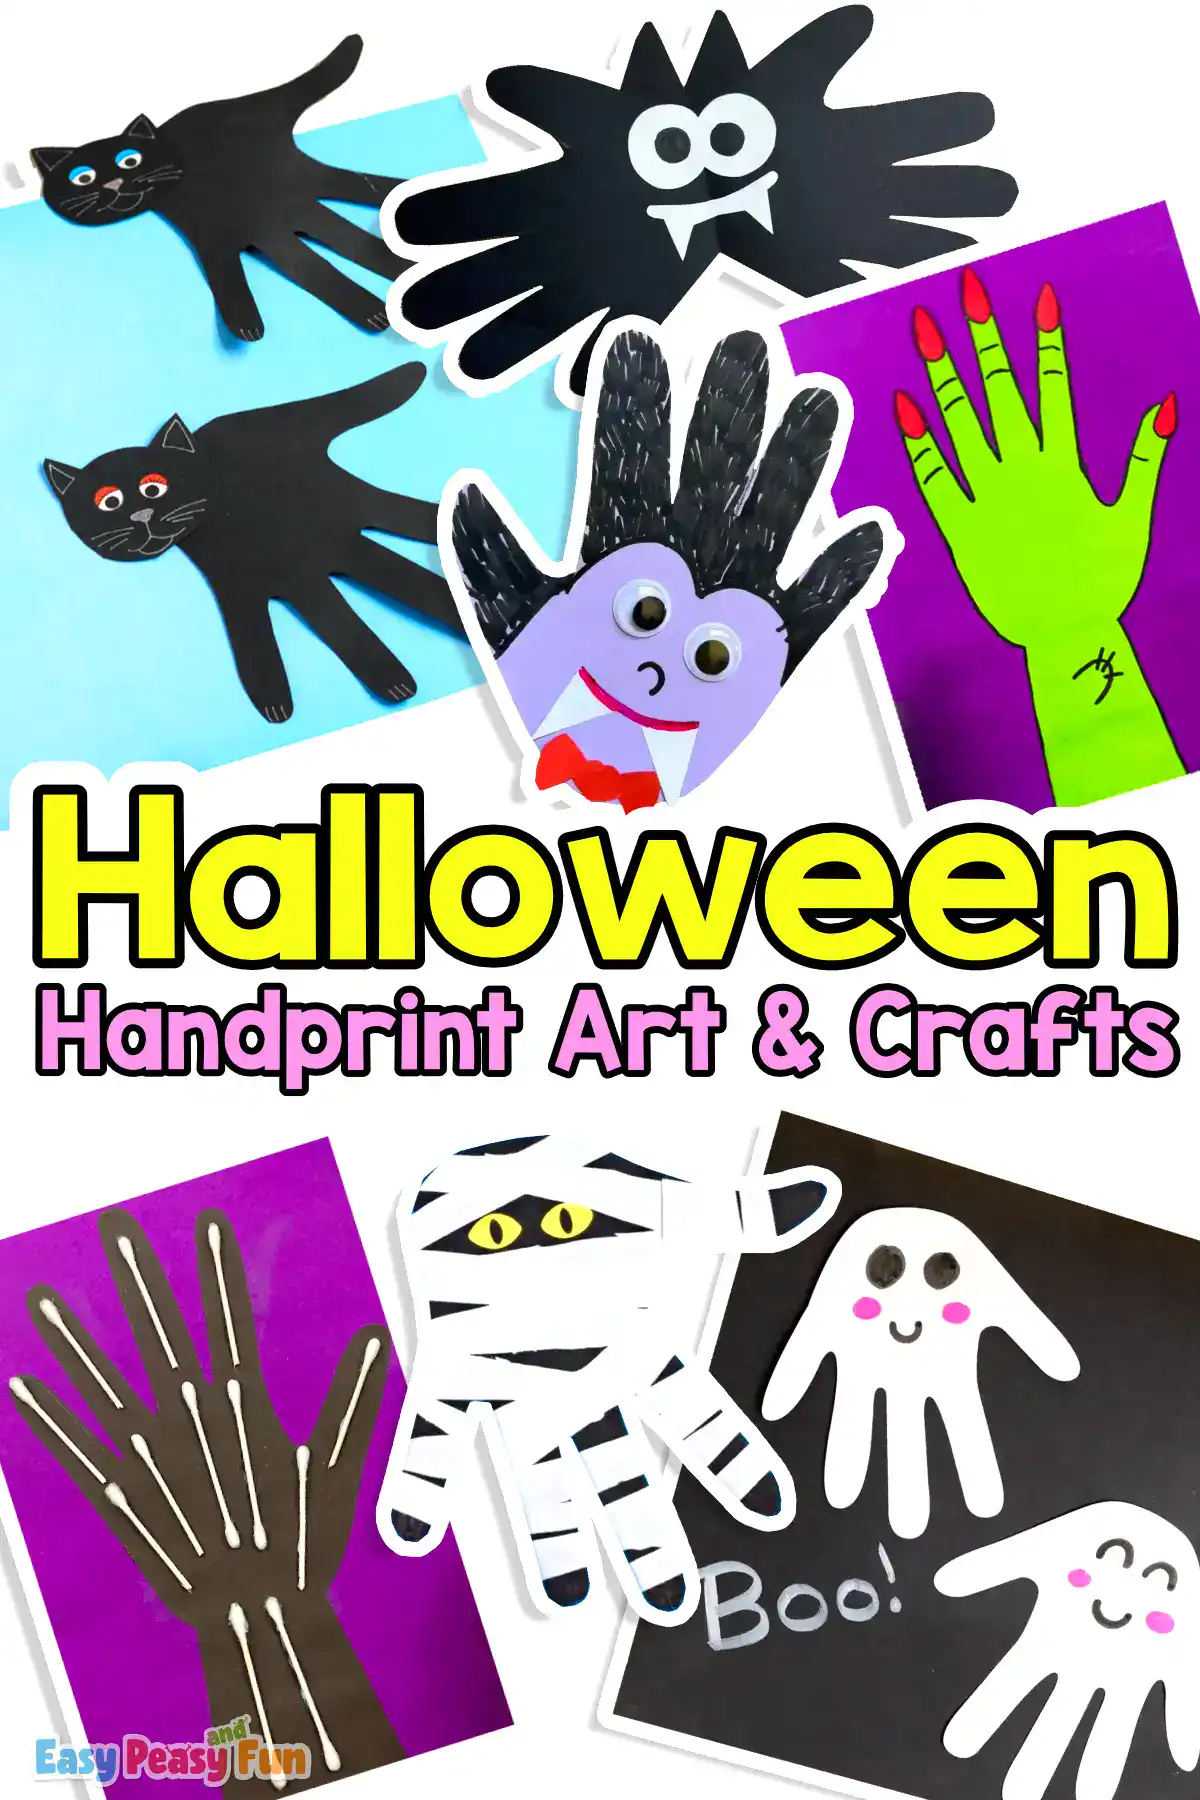
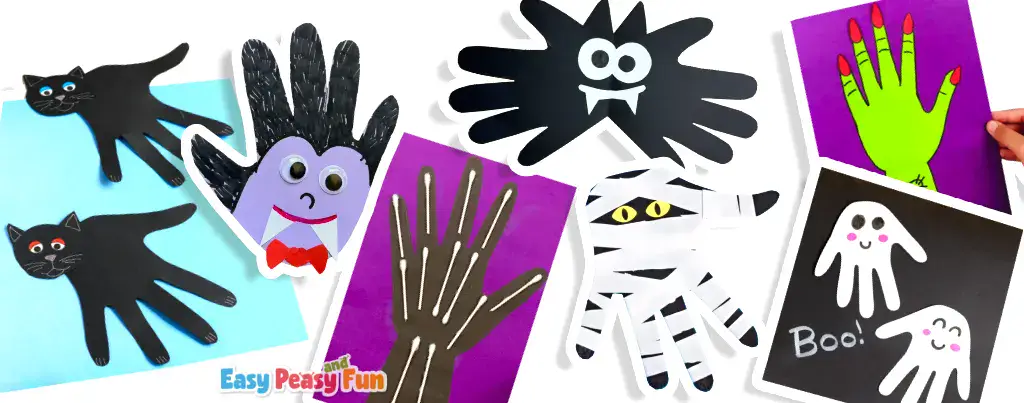
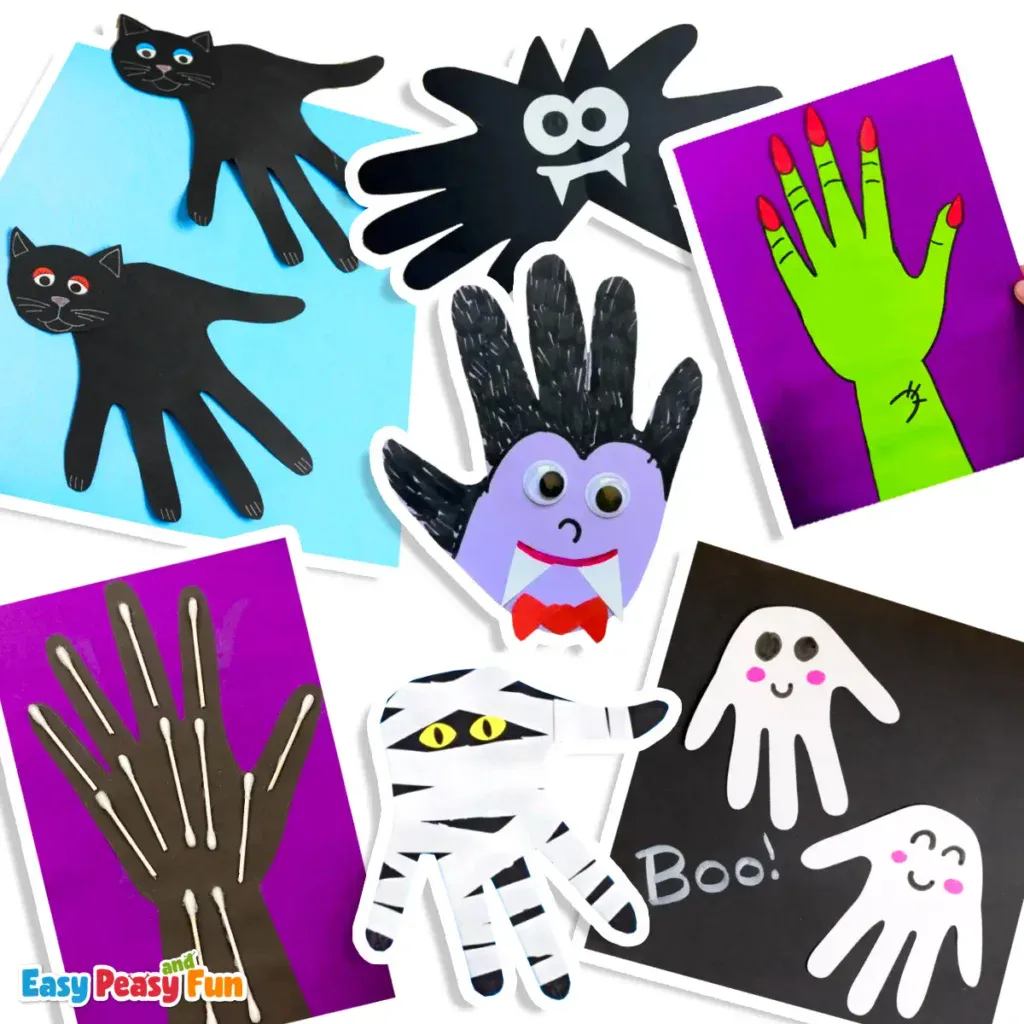
Halloween is almost here, and these Halloween handprint art and craft ideas are a fun way to get your kids in the spooky spirit! We’ve gathered our favorite handprint crafts in one place, from friendly ghosts and flapping bats to creepy witch hands, mummies, and cats. Every idea starts with a simple handprint and a few basic supplies you probably already have at home.
Handprint crafts are great for toddlers, preschoolers, and older kids alike, and they make sweet keepsakes you’ll want to look back on year after year. Whether you need a rainy-day activity, a classroom party craft, or homemade Halloween decor, you’ll find a handprint idea here that’s quick to make and easy to clean up.
*This post contains affiliate links*
Hi, I'm Andreja from Easy Peasy and Fun — and I just wrote a book!
50 paper crafts your kids can actually do themselves
CRAFTS
I designed every project so kids can do it themselves — no fancy supplies, just paper, scissors, and a little imagination.
“If you need easy crafts to keep busy, Andreja delivers with this book!”
📚 As an indie author, your pre-order genuinely helps me — it counts toward first-week sales, which is how new books get noticed. Thank you!
Grab the paint and wipes or paper and glue, pick your favorites, and let’s get Halloween crafting!
Supplies for Halloween Handprint Crafts
Most of these crafts can be made two ways: with paint or by tracing a hand on paper. Pick whichever method suits your kids (and your tolerance for mess!), and swap them freely from craft to craft.
Option 1: Painted Handprints
- Washable, non-toxic paint (black, orange, white, green, purple, and red are the Halloween essentials) – you can also see my guide on best paints for handprint art depending on the medium you choose to make them on
- Paintbrushes or sponge brushes for applying paint to little hands
- Paper plates or shallow trays to hold the paint
- Construction paper, cardstock, or white paper
- Baby wipes or a damp towel for quick cleanup
Option 2: Traced Handprints
- Pencil or marker for tracing
- Construction paper or cardstock in Halloween colors
- Child-safe scissors
- Glue stick or white school glue
Tracing is a great choice for kids who don’t love paint on their hands, for younger toddlers who wiggle. It’s also less messy, which helps in a classroom.
Extras for Finishing Touches
- Googly eyes
- Black markers or Sharpies for faces, webs, and details
- Pom-poms and pipe cleaners
- Q-tips (these are the star of our skeleton hand craft)
- Glitter or glitter glue, if you’re feeling brave
- Yarn or string for hanging your finished crafts
Tip: Handprint crafts don’t need every item on this list. Check the supplies each craft calls for before you start, and you can gather just what you need.
Tips for Making Handprint Crafts with a Group or Class
Handprint crafts are a classroom favorite, but a room full of paint and little hands takes some planning. These tricks keep things fun instead of chaotic:
- Set up stations. Put paint at one table and drying space at another so kids aren’t carrying wet paper across the room.
- Use one color of paint at a time. Too many colors at once means muddy handprints and bigger messes. Do the base handprint first, then add details after it dries.
- Paint the hand for them. Use a sponge brush to apply an even, thin layer of paint to each child’s palm and fingers. Thick paint blurs the fingers together and makes smudgy prints.
- Press, don’t wiggle. Show kids how to press down gently, then lift straight up. Older kids can help the younger ones.
- Have a wipe-down line. Keep a bucket of soapy water or wipes at the end of the paint station so kids clean up before moving on.
- Offer tracing as a backup. Some kids don’t like the feeling of paint on their hands. Let them trace instead, and no one misses out.
- Label before you paint. Write each child’s name on the back of their paper first. It’s much harder to tell whose ghost is whose once ten of them are drying side by side.
- Plan for drying time. Lay finished crafts flat on a drying rack, countertop, or the floor, and use a clothesline with clothespins if you’re short on space.
- Prep detail pieces ahead. Pre-cut googly eyes, pipe cleaners, or Q-tips into small cups so kids can grab and go during the detail stage.
- Cover the tables. Butcher paper, newspaper, or a cheap plastic tablecloth makes cleanup a snap.
- Recruit helpers. If you can, have an extra adult or older student handle the paint station while you help with details.
1. Handprint Ghost Craft
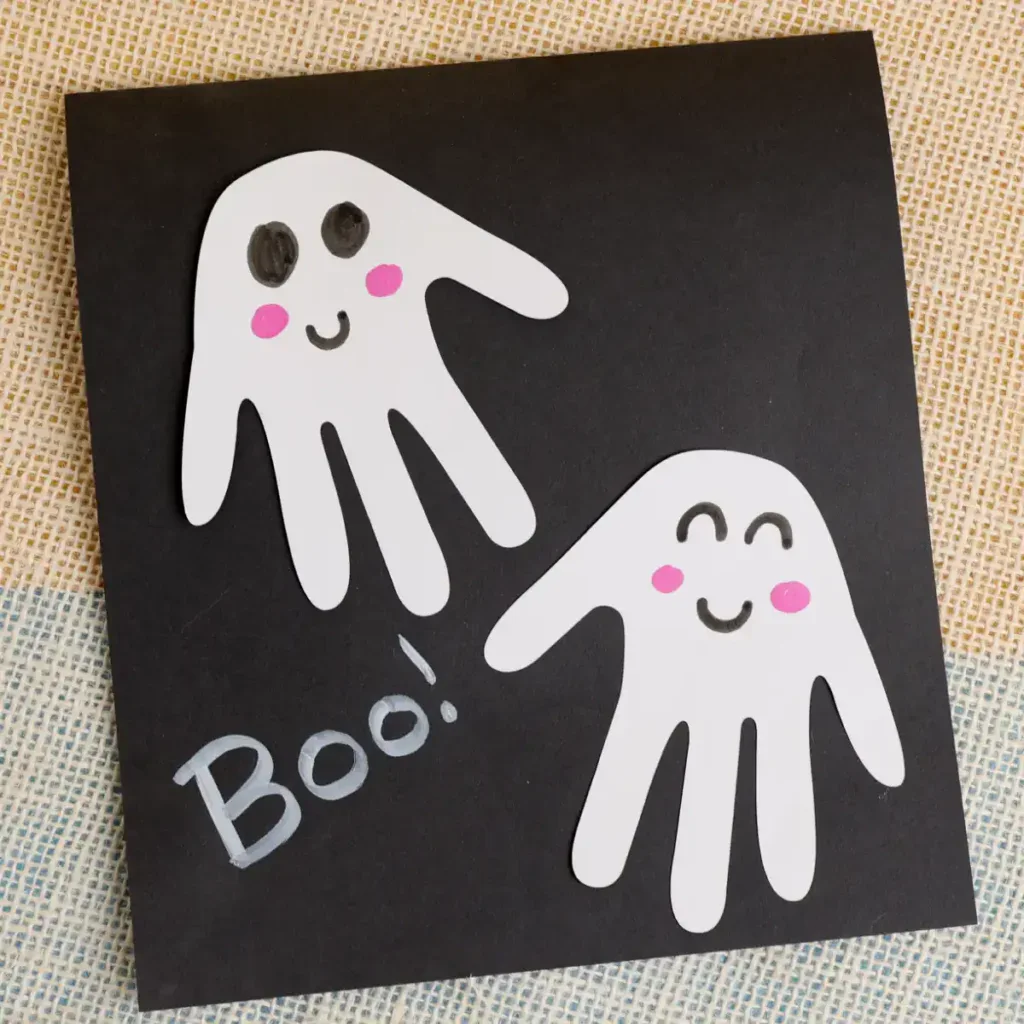
Our friendly handprint ghosts are about as classic as Halloween crafts get. Turn a handprint upside down and the fingers become the ghost’s wavy, floating tail. Add a couple of black eyes, rosy cheeks, and a smile, and they’re more cute than spooky.
Trace your child’s hand on white paper (or press a painted hand onto black paper), then cut it out and flip it so the fingers point down. Draw on a face with markers, glue the ghost onto black cardstock, and finish with a “Boo!” in a white paint pen. You’ll find all the details in our ghost handprint art.
2. Witch Hand Handprint Craft
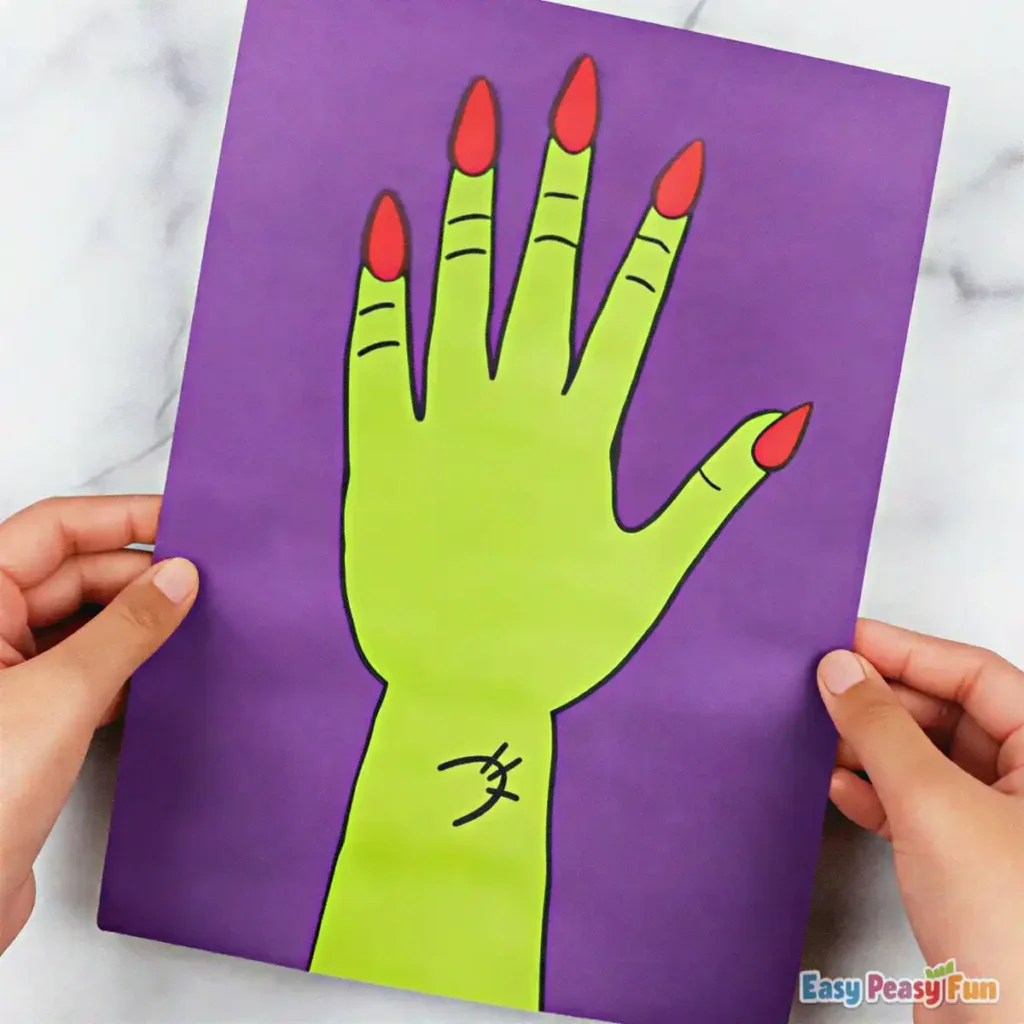
Green skin, long red nails, and a mysterious mark on the wrist make this witch’s hand a deliciously creepy addition to your Halloween crafts. It’s a fun one for kids who want something a little spookier than a cute ghost, and it looks great hung up as Halloween decor.
Trace your child’s hand and part of their forearm on green paper, or paint it green and press it onto purple paper. Cut out the hand and glue it onto a purple background. Then add pointy red fingernails and draw wrinkly knuckle lines and a spooky mark on the wrist with a black marker. Grab the full details in our witch handprint art.
3. Handprint Mummy Craft
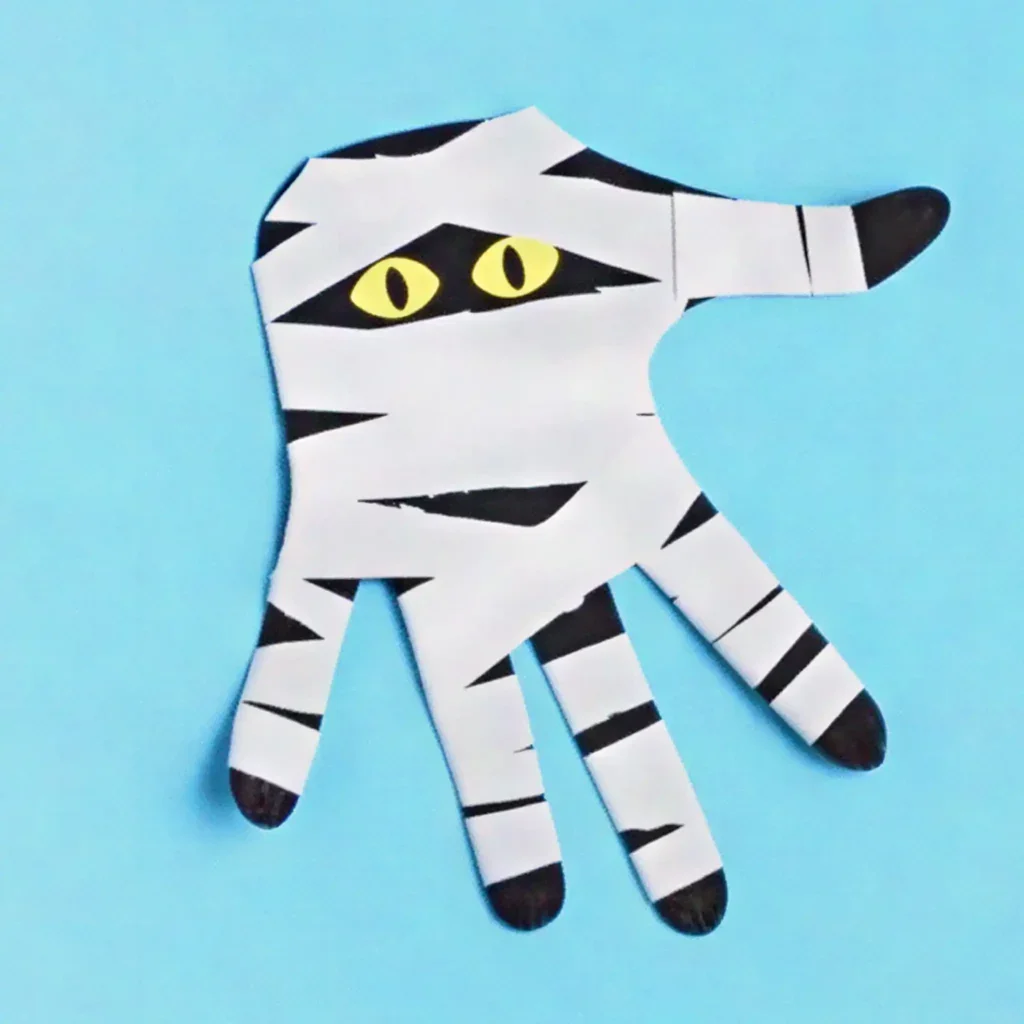
This wrapped handprint mummy is a fun twist on the usual painted crafts. Strips of white “bandages” crisscross over a dark handprint, with just a peek of black showing through and a pair of yellow eyes staring out. It’s a great fine-motor activity too, since kids get to snip, stick, and wrap.
Start with a handprint on black paper, either traced and cut out or painted, then wrap it with strips of white paper, washi tape, or white medical tape (the kind sold as surgical or first aid tape). Leave small gaps so the dark color shows through, and don’t worry about neat lines, since messy wrapping looks more mummy-like. Finish with two yellow eyes tucked into the biggest gap. See how it all comes together in our mummy handprint craft.
4. Skeleton Hand Handprint Craft
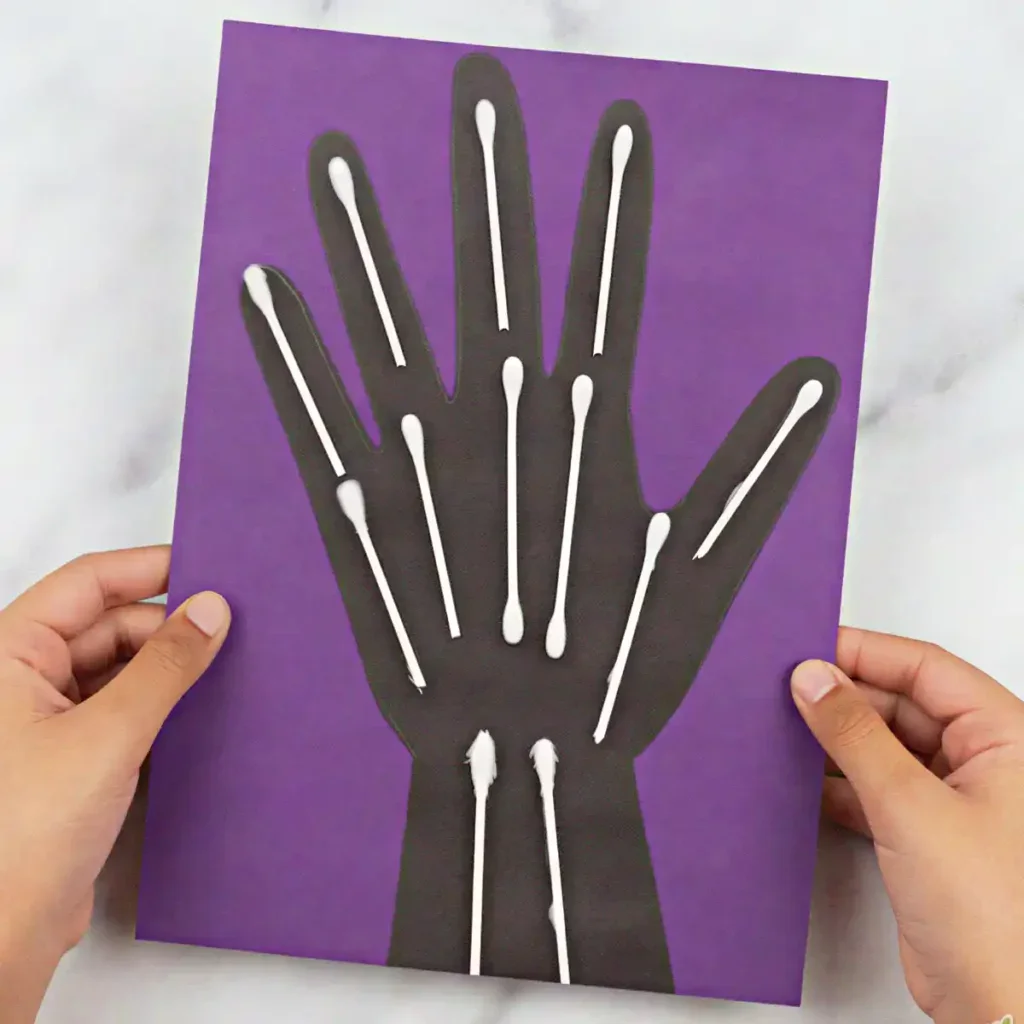
Q-tips make surprisingly great bones! This X-ray style skeleton hand is a clever way to turn a simple handprint into something that looks like it came straight from the doctor’s office (or a haunted one). It’s also a fun one for kids learning about the body, since they can work out where the bones go in the fingers, palm, and wrist.
Trace your child’s hand and forearm on black paper, or paint it black, then glue it onto a bright background like purple. Snip the Q-tips to the right lengths for the finger, hand, and arm bones, and glue them in place. Press them down well so they stay put. Get the full step-by-step in our skeleton handprint craft.
5. Handprint Bat Craft
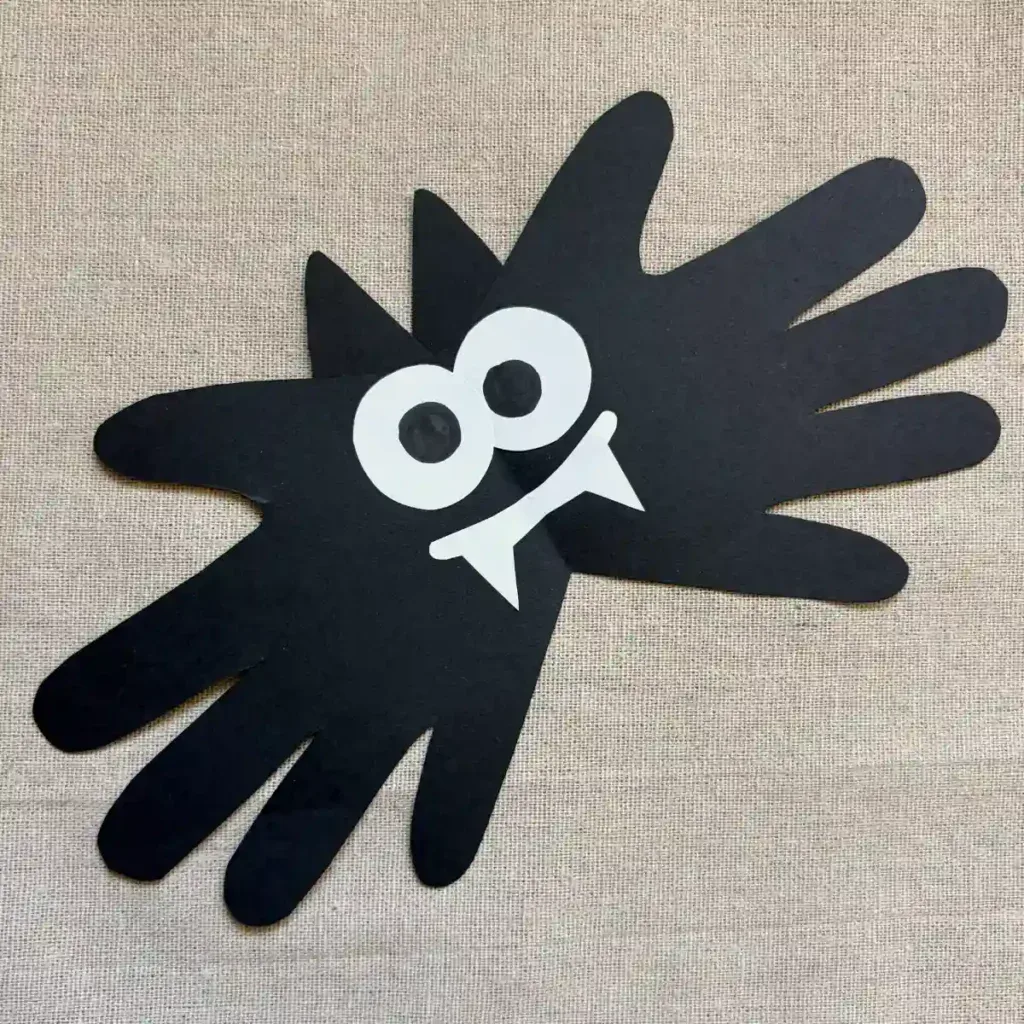
This goofy handprint bat has big wings, wide eyes, and a pair of fangs. Two handprints join together to make the wings, so it’s a fun craft for kids who like to cut and build. It also looks great flying across a wall, window, or classroom bulletin board.
Fold a sheet of black paper in half and trace your child’s hand with the palm side lined up along the fold. Cut around the hand through both layers, then open it up and you’ll have a pair of wings joined in the middle, all in one go. Add two pointy ears on top, then glue on big white eyes with black pupils and a white mouth with fangs. Find all the details in our bat handprint craft.
6. Black Cat Handprint Craft
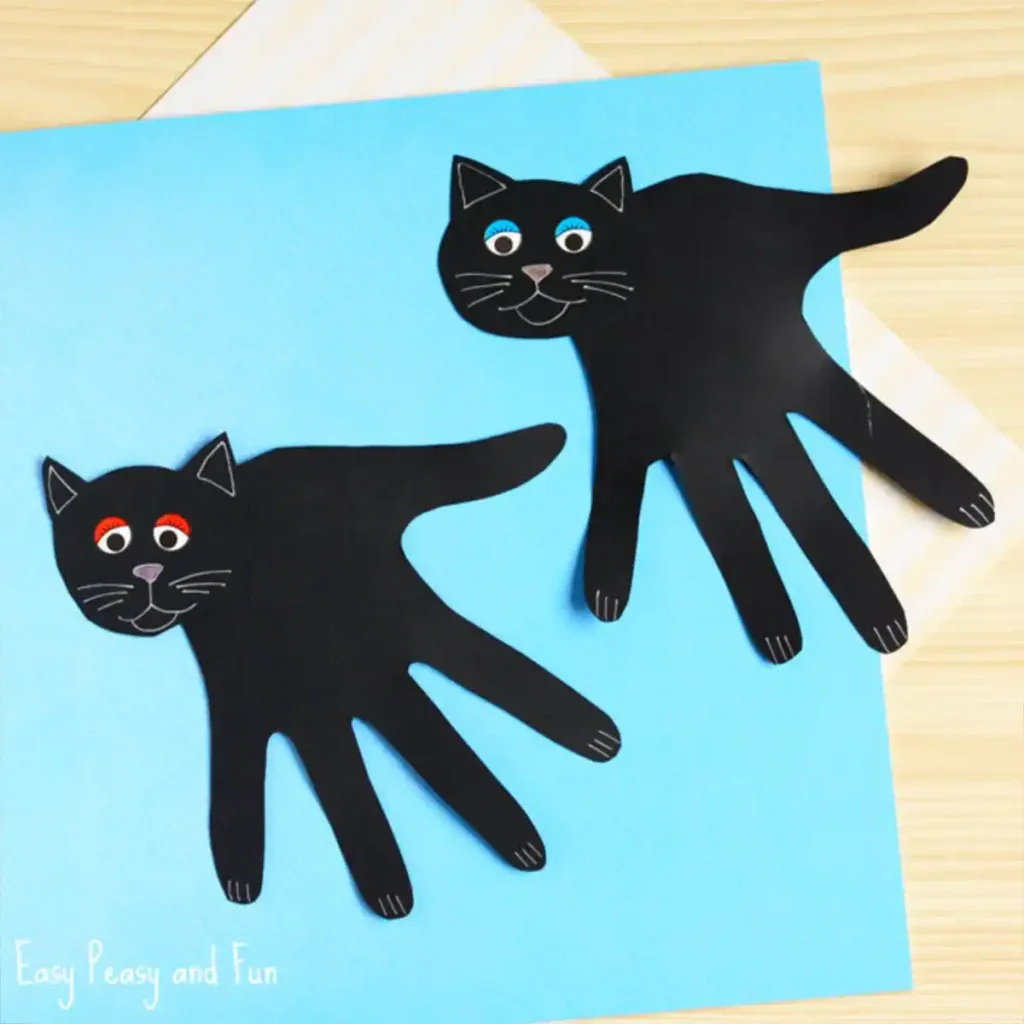
Black cats are a Halloween classic, and this one is made from a handprint turned on its side! The thumb becomes a curvy tail, the fingers turn into four little legs, and a separate head with pointy ears finishes the look. Mount it on a bright background and give each cat its own personality with different eye colors.
Trace your child’s hand on black paper (or paint a black handprint) with the fingers spread out, then cut it out and turn it sideways so the thumb points up like a tail. Cut a round head with two ears from more black paper, and glue it to the palm. Add eyes, a little nose, and a smile, then draw whiskers, ear details, and tiny claws on the toes with a white pen. Find all the steps in our black cat handprint craft.
7. Handprint Vampire Craft
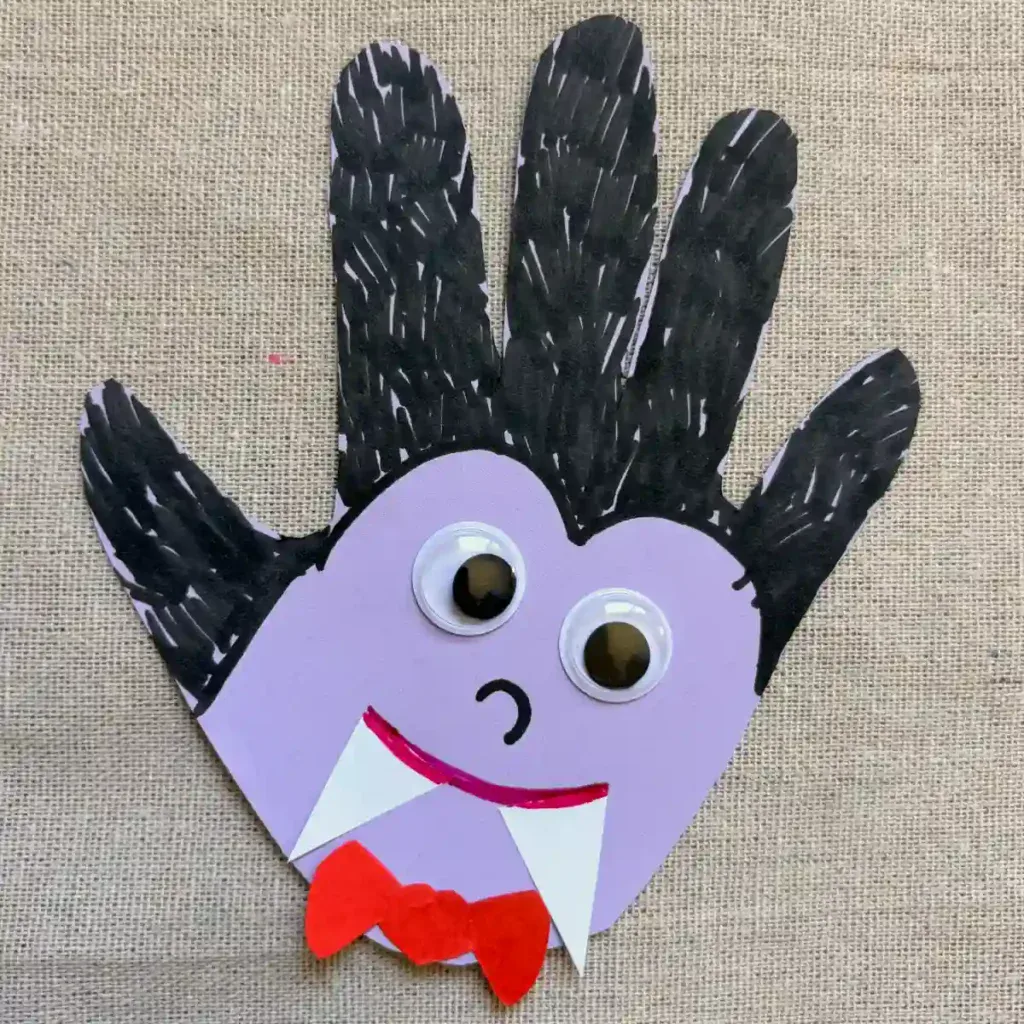
Meet the most dapper vampire in town! The fingers of this handprint turn into black hair, while the palm becomes a pale purple face with googly eyes, sharp white fangs, and a red bow tie. It’s sillier than scary, which makes it a hit with little ones and a fun one to make a whole family of.
Trace your child’s hand on light purple paper and cut it out, then color the fingers black with a marker for the slicked-back hair. Glue on two googly eyes, then add a smile in red or pink marker and two white paper fangs peeking out from the top lip. Finish with a little red bow tie under the chin. Get all the details in our vampire handprint craft.
Want instant access to all of our printable crafts, activities, and resources?
With thousands of crafts, activities, worksheets, coloring pages, and drawing tutorials to print, you will always have just the resource you need at your disposal. Perfect for parents and teachers alike!