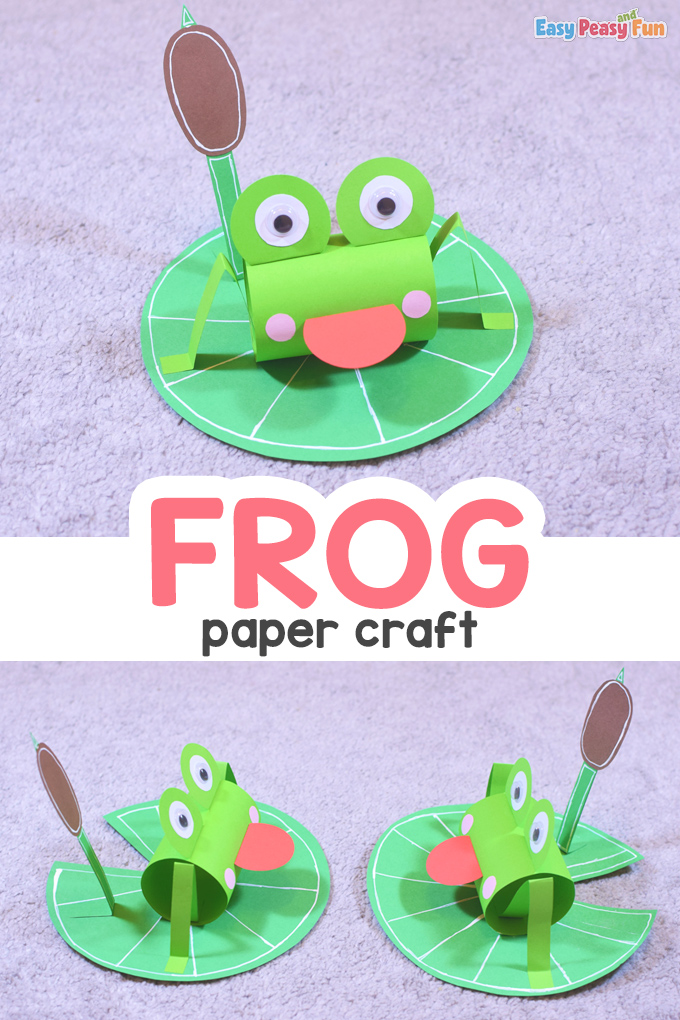
Have your kids make a Frog on a Lily Pad Craft – it will be perfect for spring, and children will love how it’ll turn out.
With only a few essential tools, your amphibian will be finished in no time.
*This post contains affiliate links*
50 paper crafts your kids can actually do themselves

No fancy supplies — just paper, scissors, and a little imagination.
Be the first to get it on release day — and lock in the lowest price guaranteed.
We are always in the mood for making Spring Crafts for Kids (check out our Movable Bird Paper Doll or have fun learning with a Ladybug Shape Matching Cardboard Activity).
If you want to learn How to Draw a Frog, we have a step-by-step tutorial for you too.
We love frogs – you can tell that by how many frog crafts we have on our website.
Today we will show you how to make a silly frog on a lily pad that is having a fun time pointing its tongue out.
We made our frog green, but not all the frogs are green – you already know that.
So, you can make your frog any color you wish and share it with us afterward – we will be glad to see it!
How to Make the Frog on a Lily Pad Craft
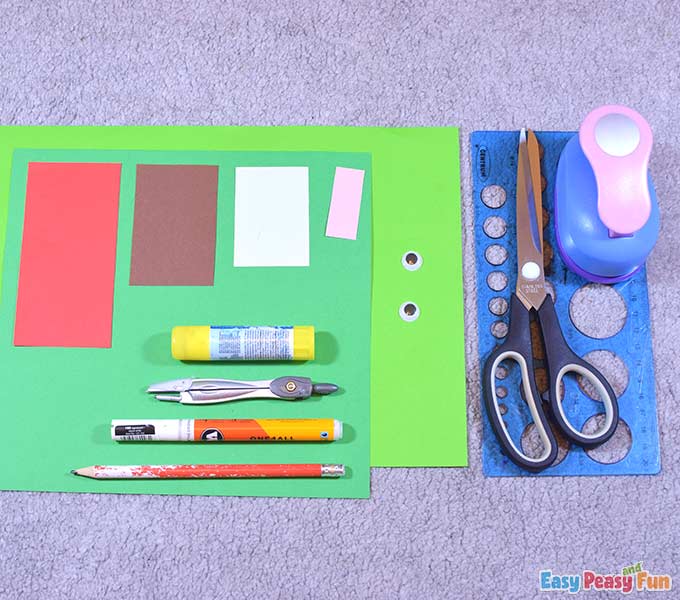
What you need:
- printable template (optional)
- cardstock (dark green and brown)
- color papers (green, pink, and red)
- circle puncher
- white paper
- two big googly eyes
- compass
- glue
- scissors
- white marker
- ruler with circle shapes
- pencil
Let’s craft!
Step by Step Tutorial
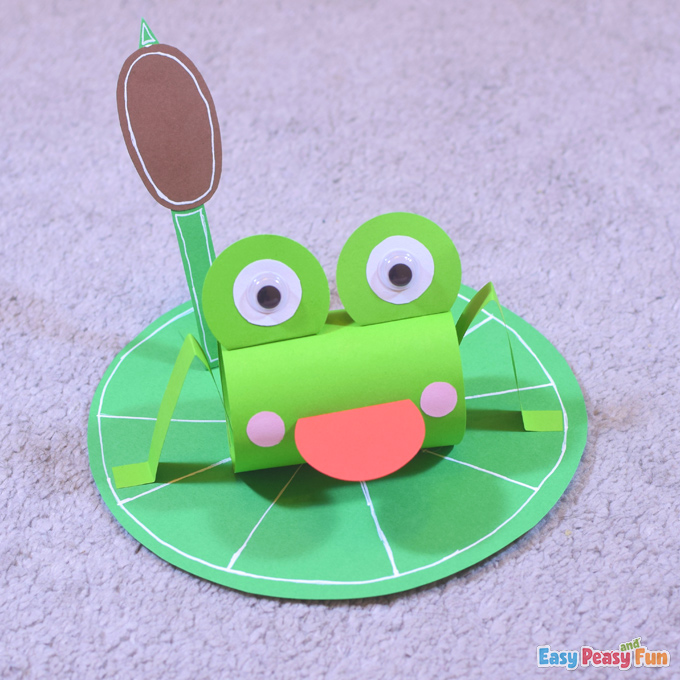
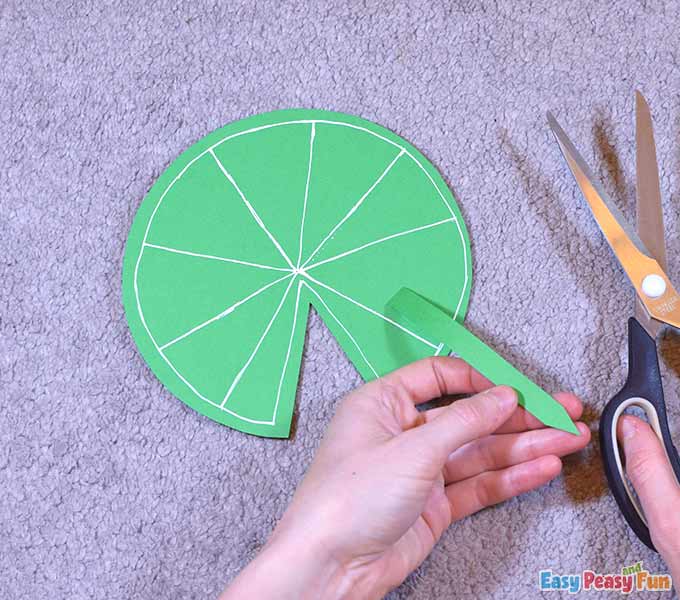
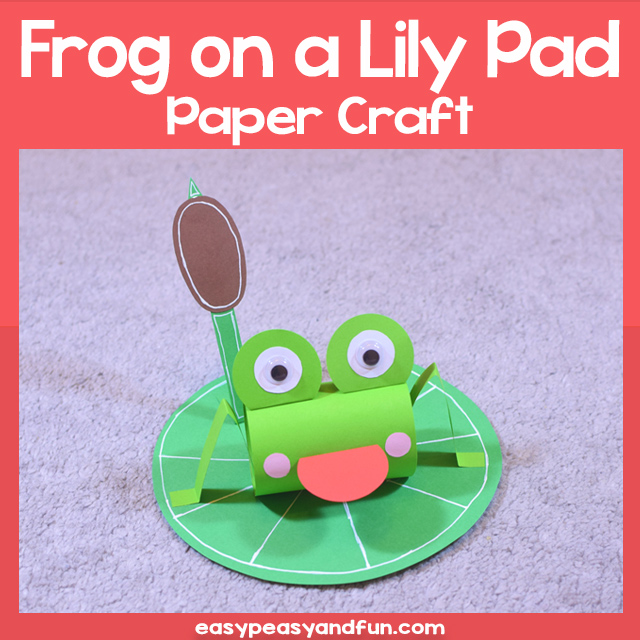
The Lily Pad
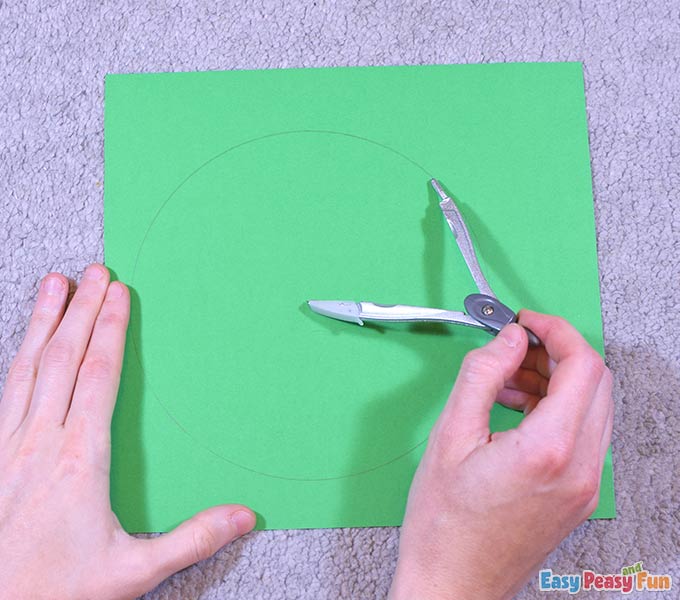
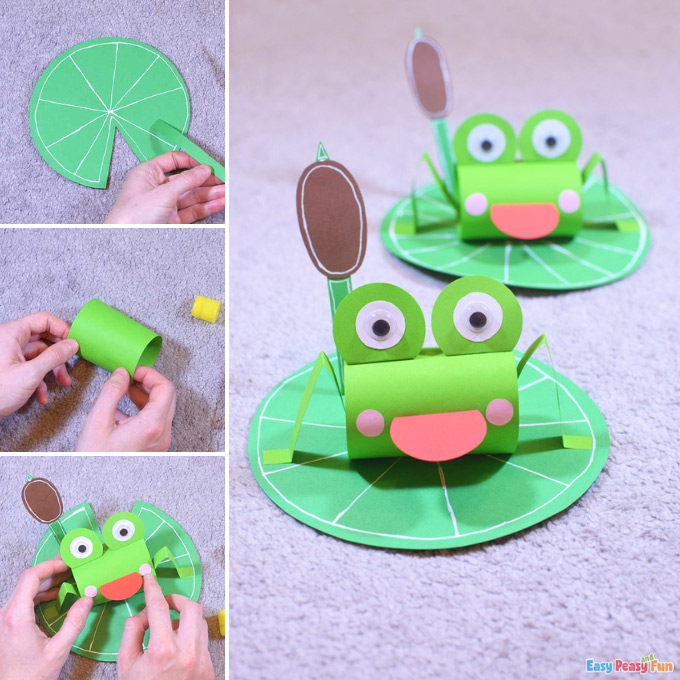
Draw a circle with a 16 cm diameter on the dark green cardstock.
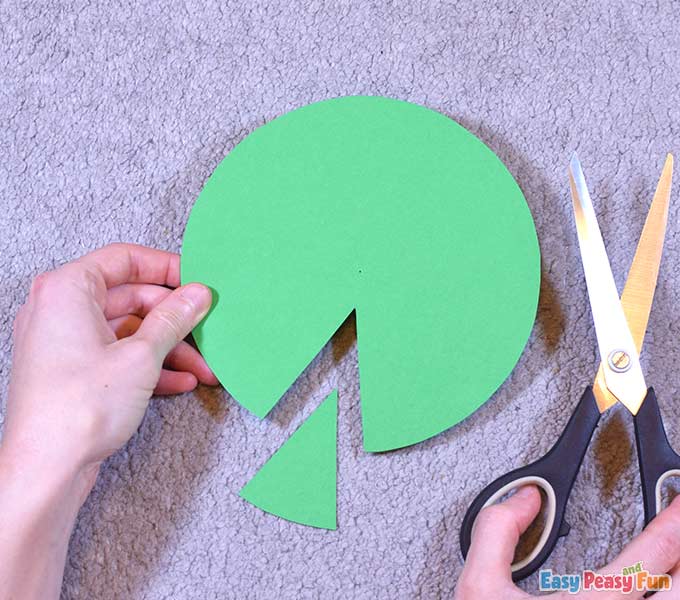
Cut out the circle and a triangle shape to form the lily pad.
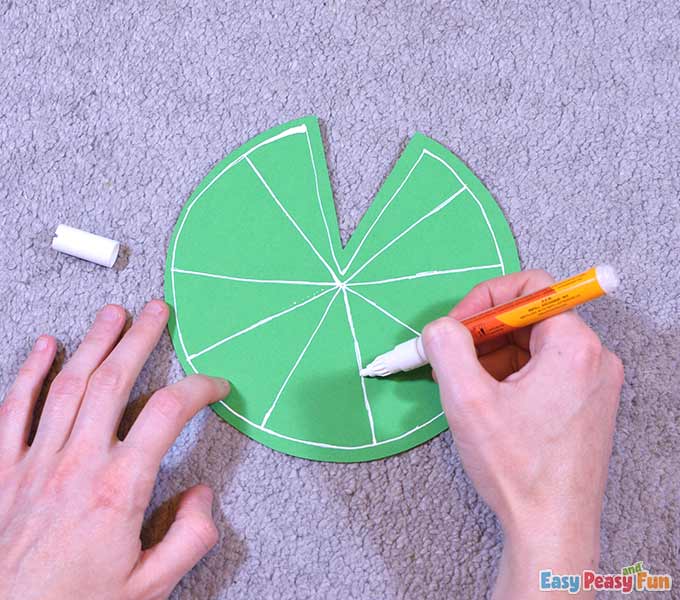
Take the white marker and decorate it.
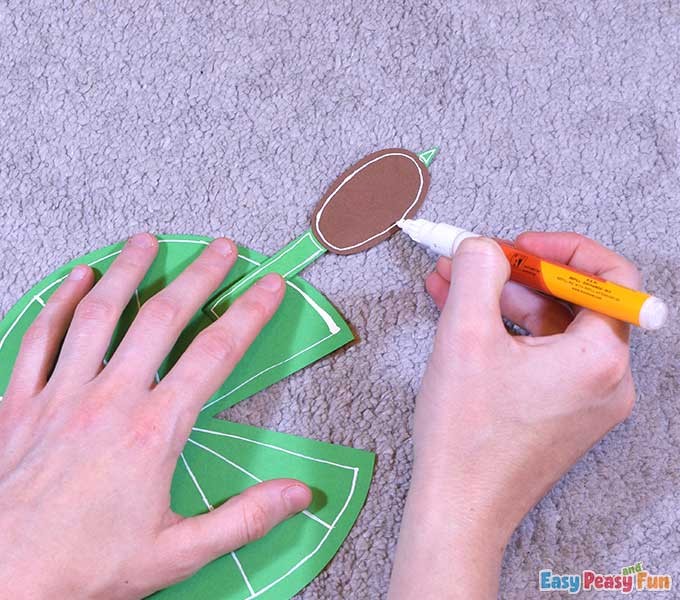
The Reedmace
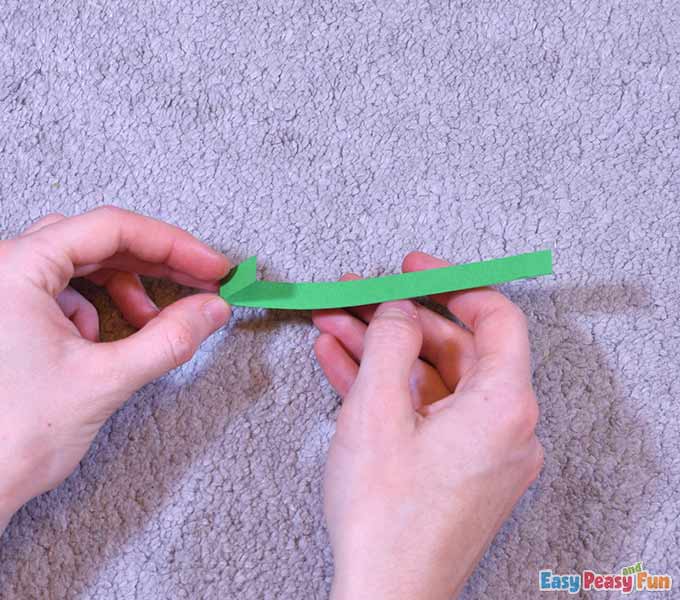
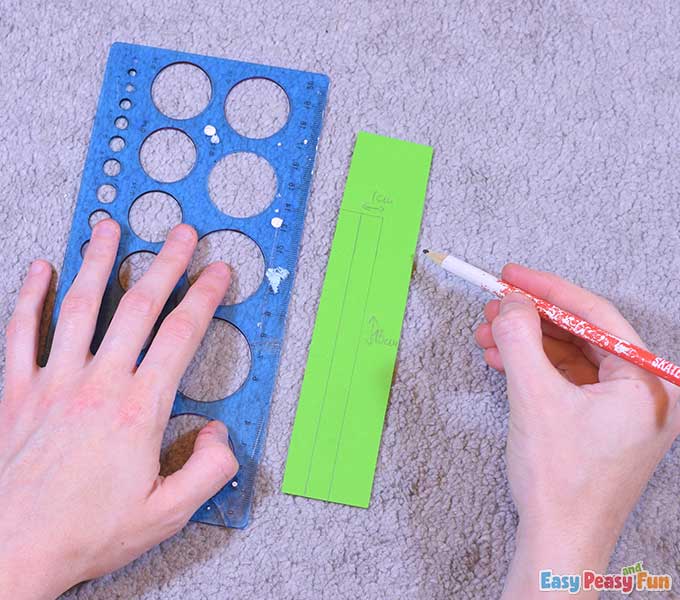
Draw a strip with dimensions 1 x 12 cm on the dark green cardstock.

Cut out the strip and make a fold on one end of it.
Apply some glue to it and glue the strip on the lily pad.
Take the scissors and make the other end of the strip pointy.
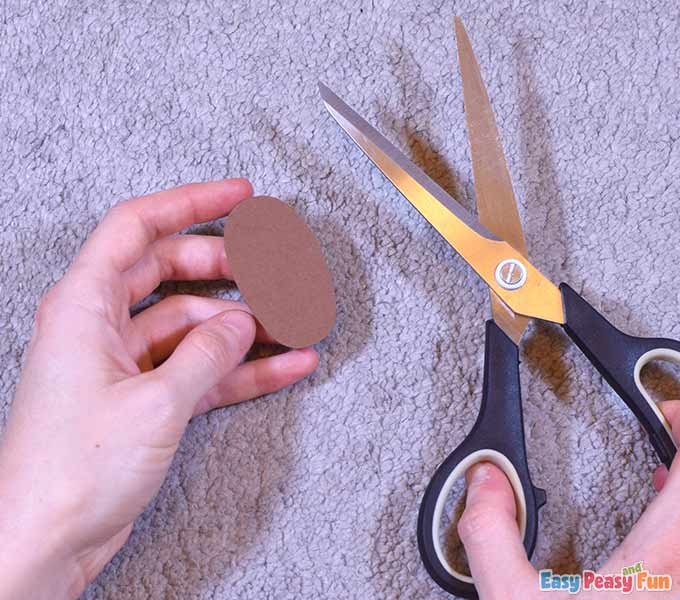
Draw an oval shape on the brown cardstock.
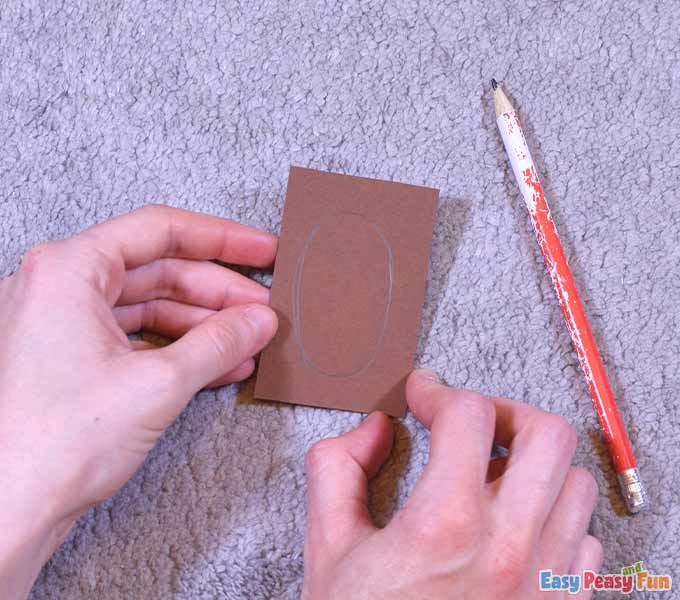
Cut it out.
Glue the oval shape on the green strip and ensure the pointy part peeks out. Our reedmace is now complete.
Reinforce the green strip (the stem) with another piece of green cardstock if it doesn’t stand straight and bends.
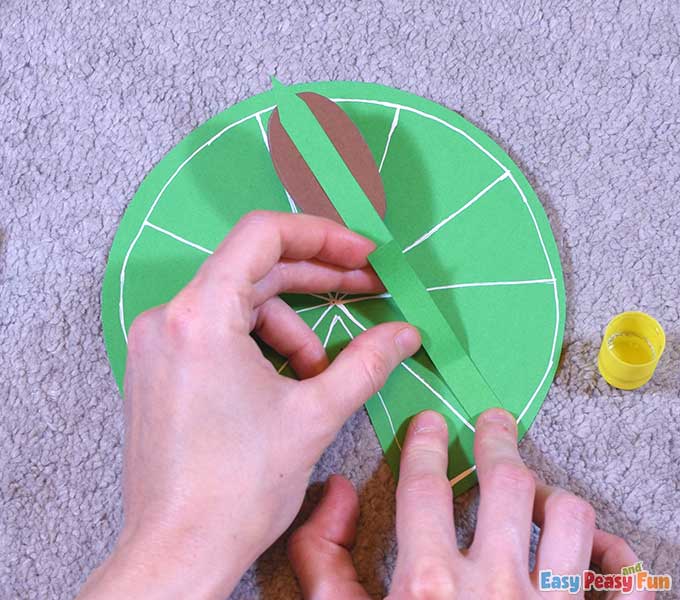
Decorate the reedmace with the white marker as shown.
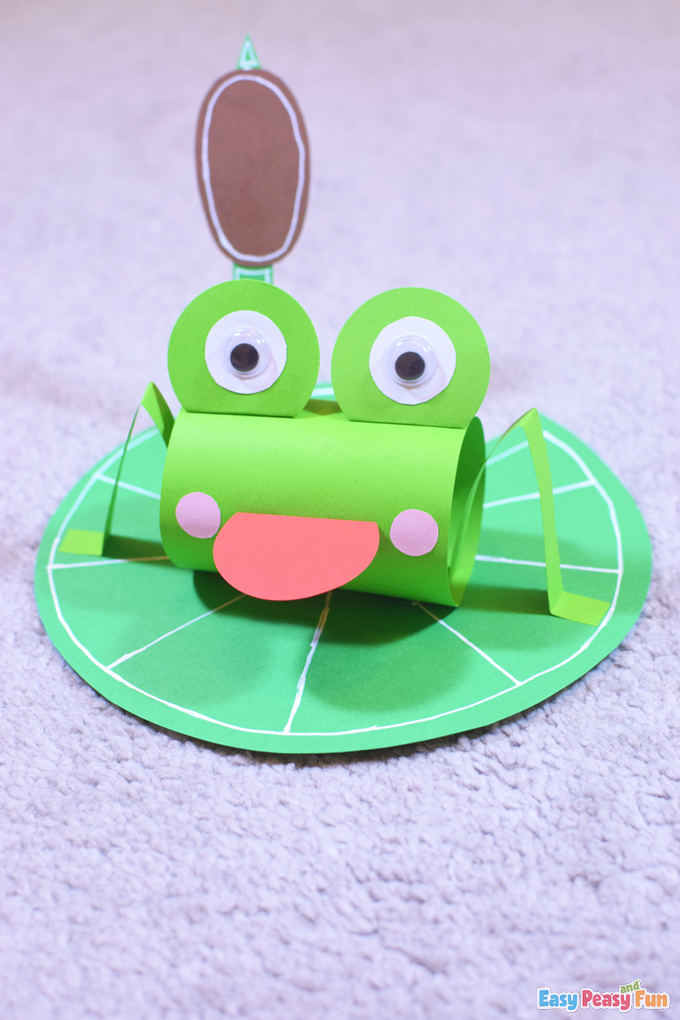
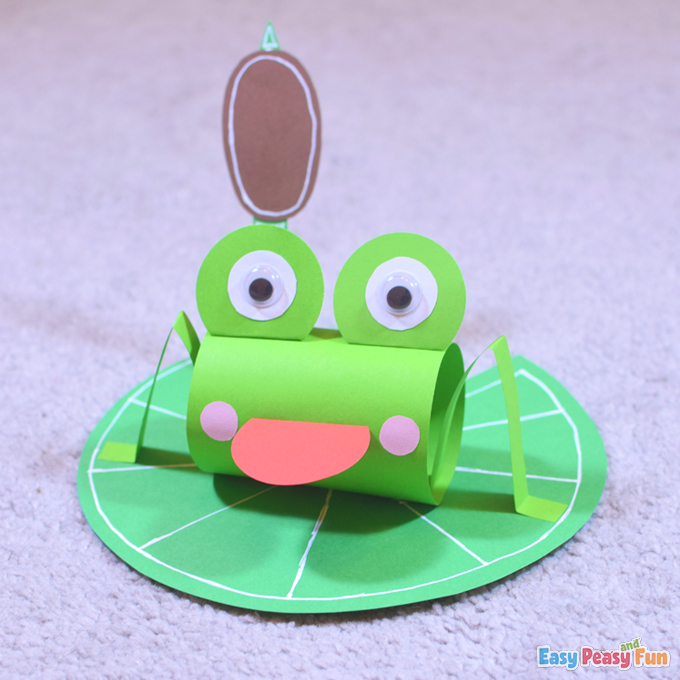
The Frog
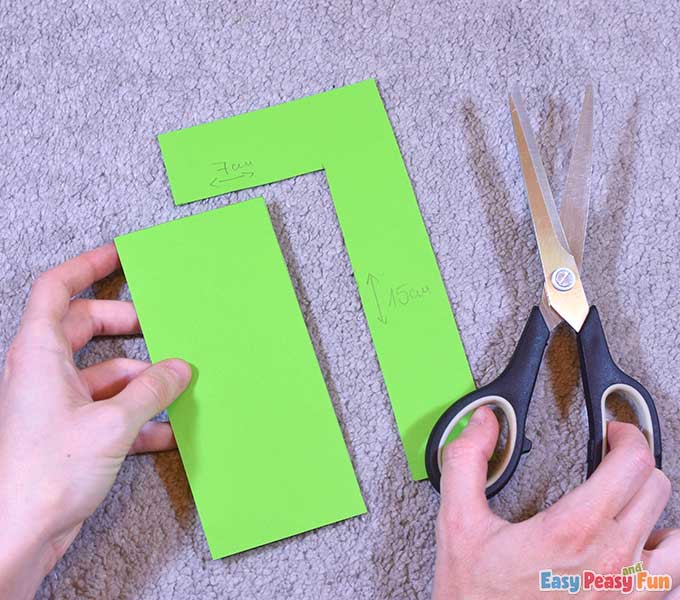
First, we need to cut out a green rectangle with 7 x 15 cm dimensions.
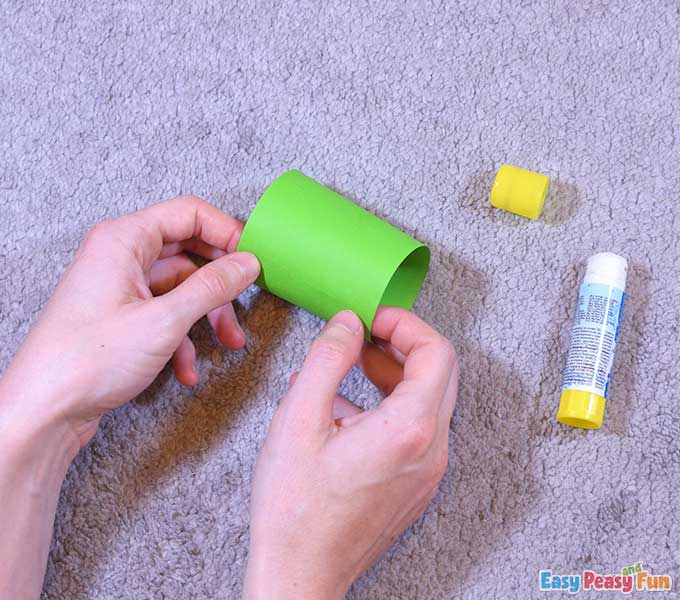
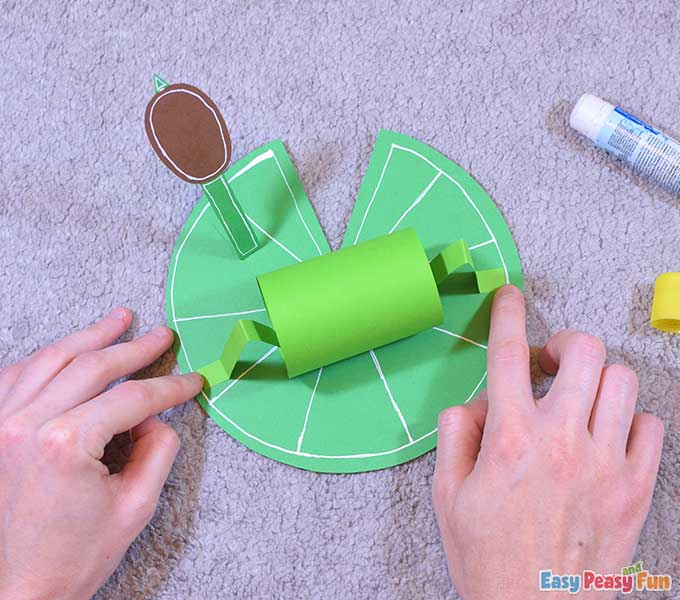
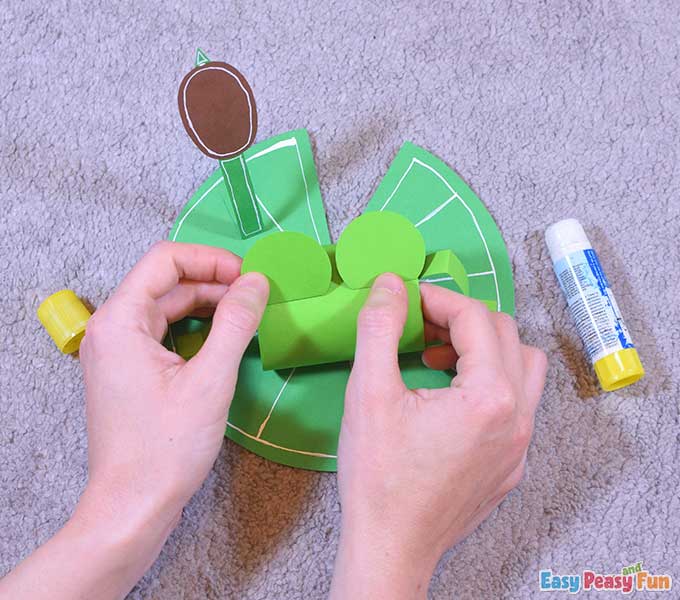
Make a roll and glue its ends together.
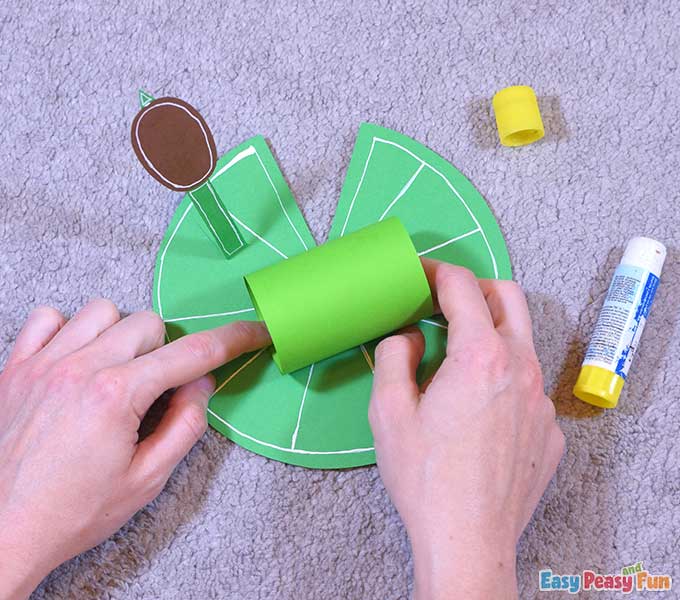
Glue the roll in the center of the lily pad.
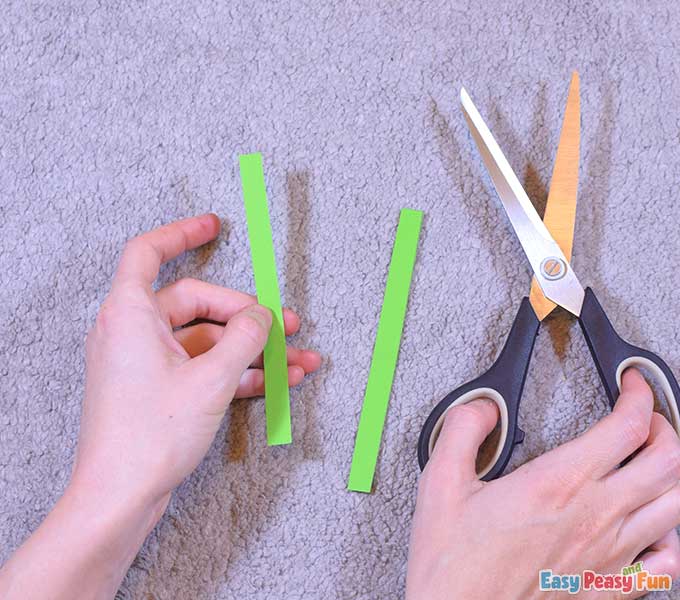
Draw two strips with dimensions 1 x 13 cm on the green paper.
Cut them out.
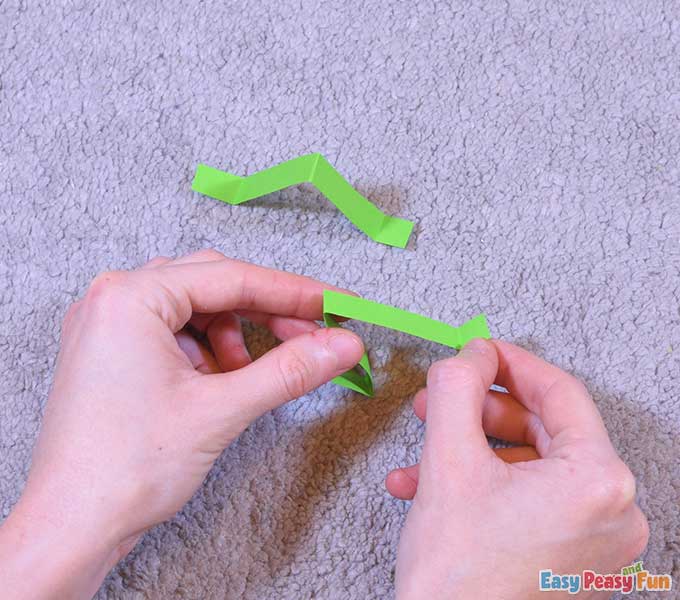
Form two frog legs and feet by folding the two strips as shown.
Glue the legs inside the roll and the feet onto the lily pad.
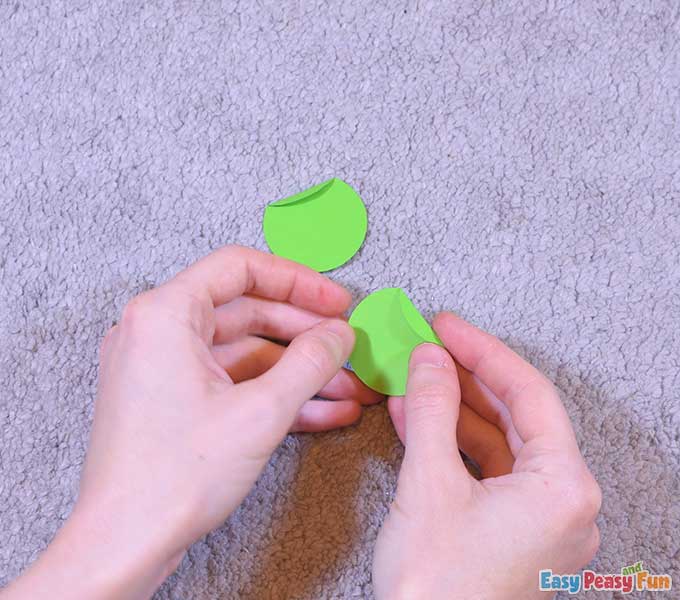
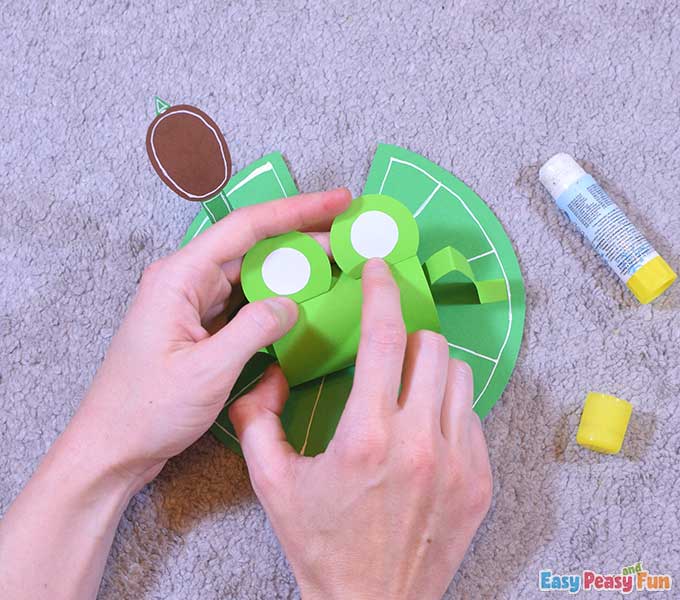
Punch out two green circles to form the eyes of the frog.
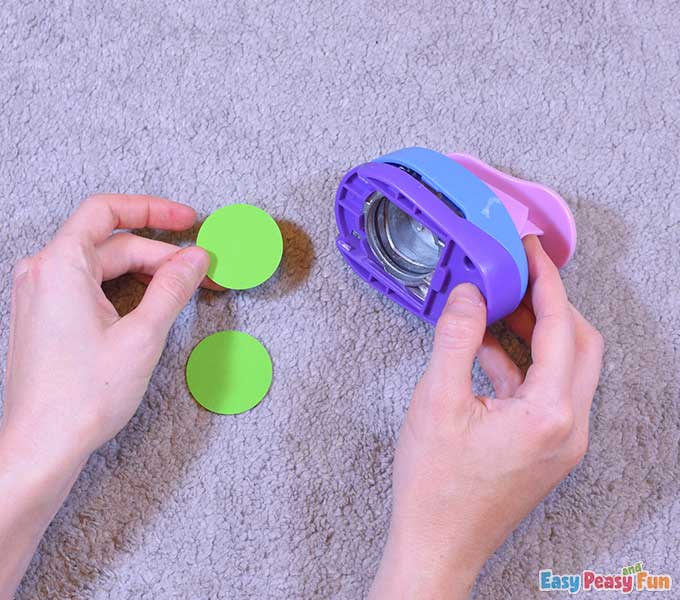
Fold a small part of the green circles.
Glue them on top of the frog’s body.
Draw two circles (smaller than the punched green ones) on the white paper.
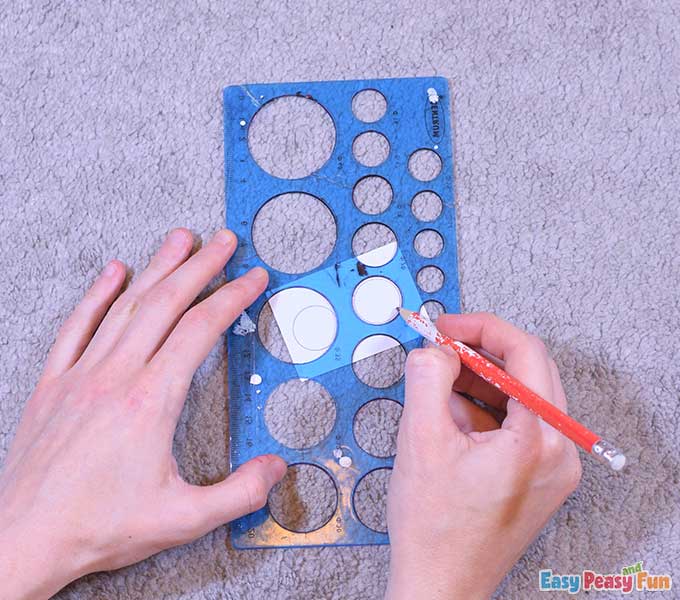
Cut them out.
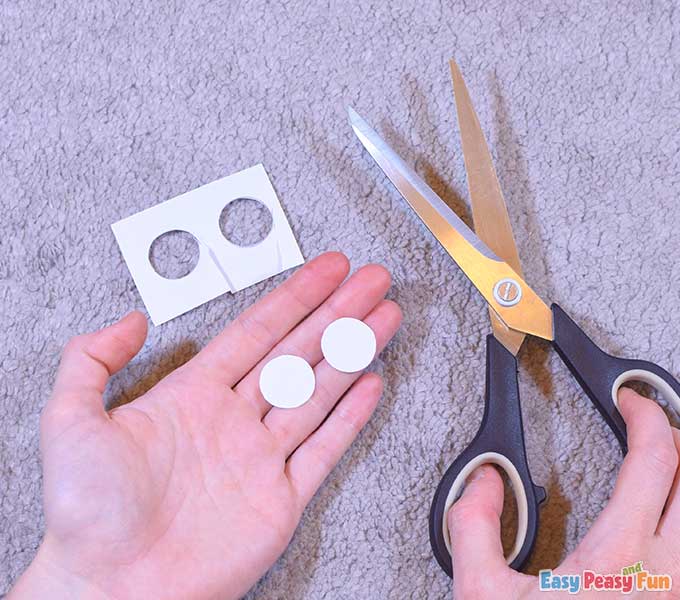
Glue them on the green circles.
Take the big googly eyes and attach them to the white circles.
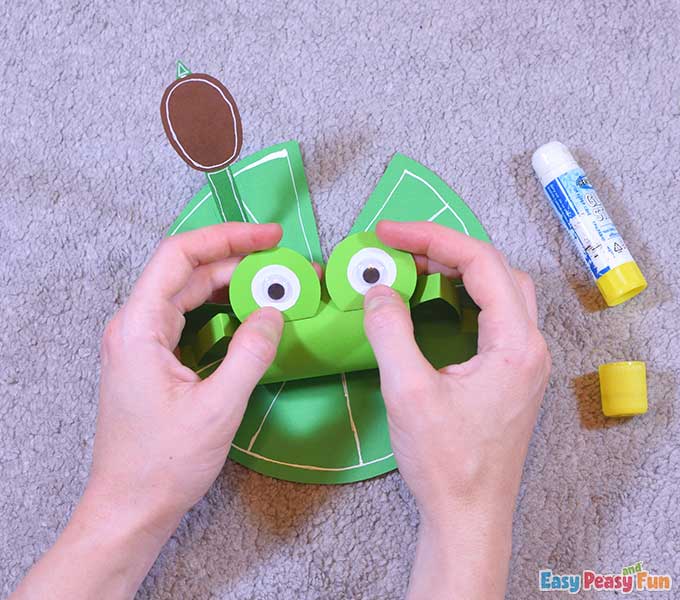
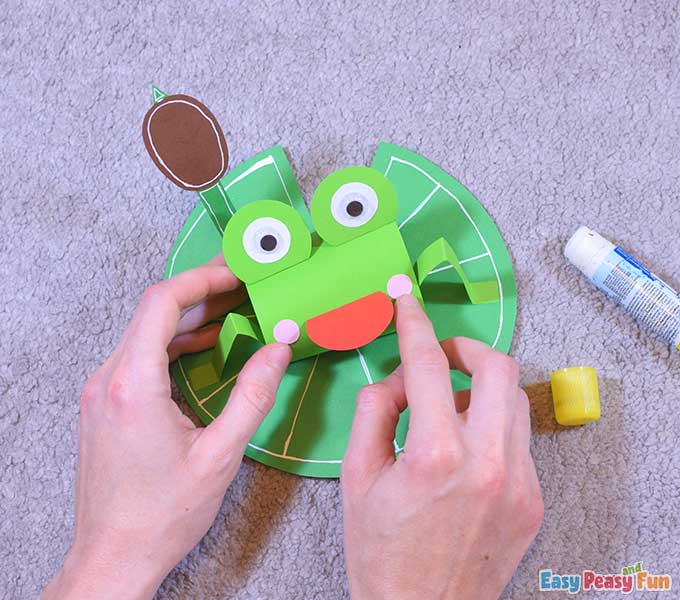
Now punch out one red circle.
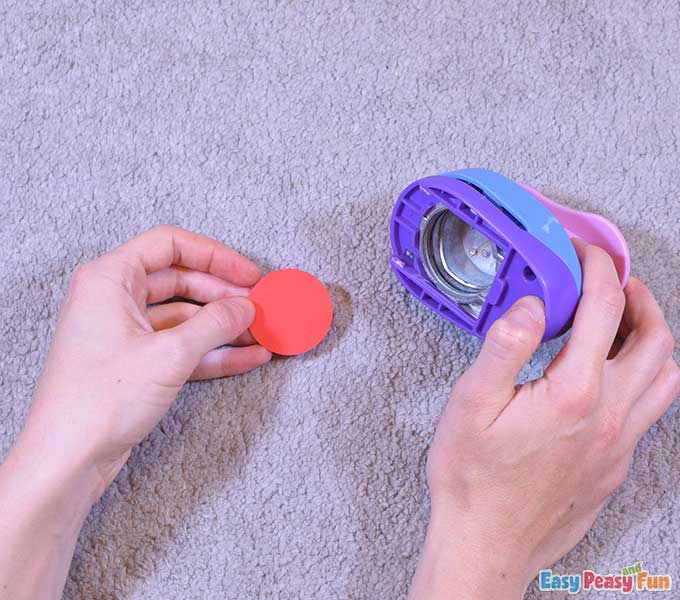
Fold a small part of it,
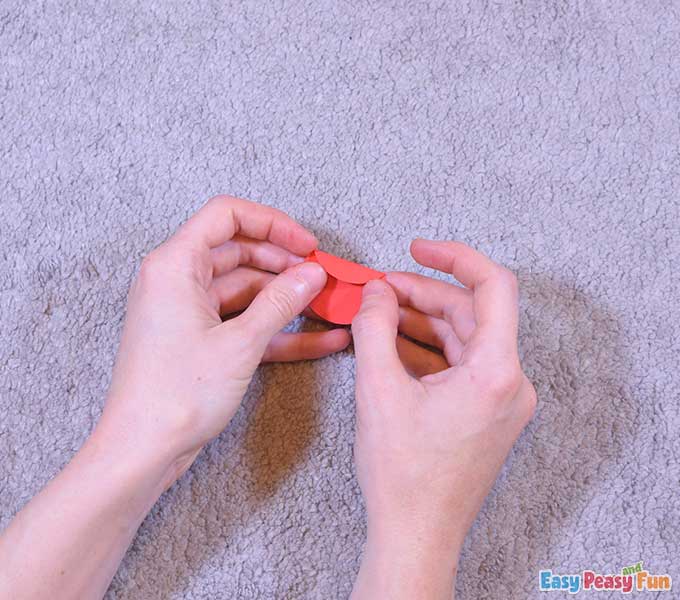
Glue it on the frog as a tongue.
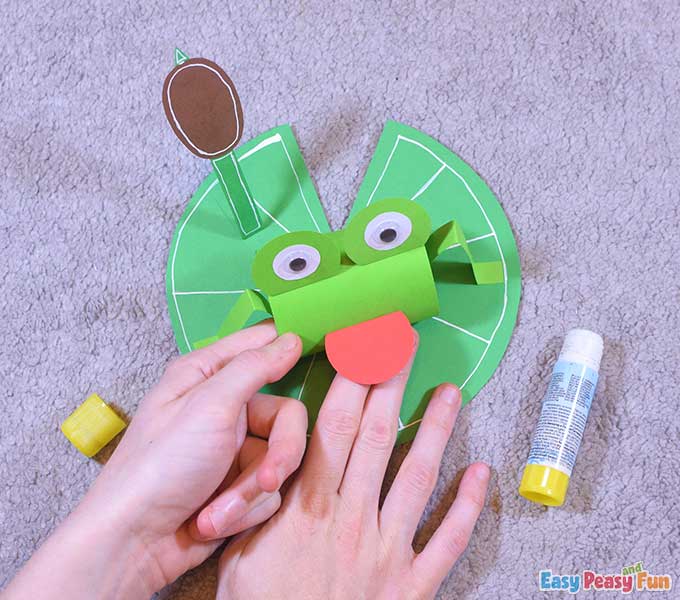
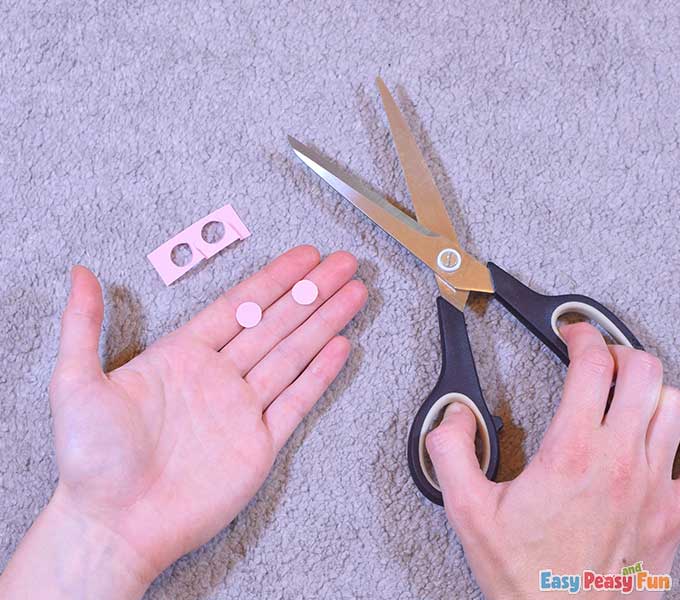
Draw two small circles on the pink paper.
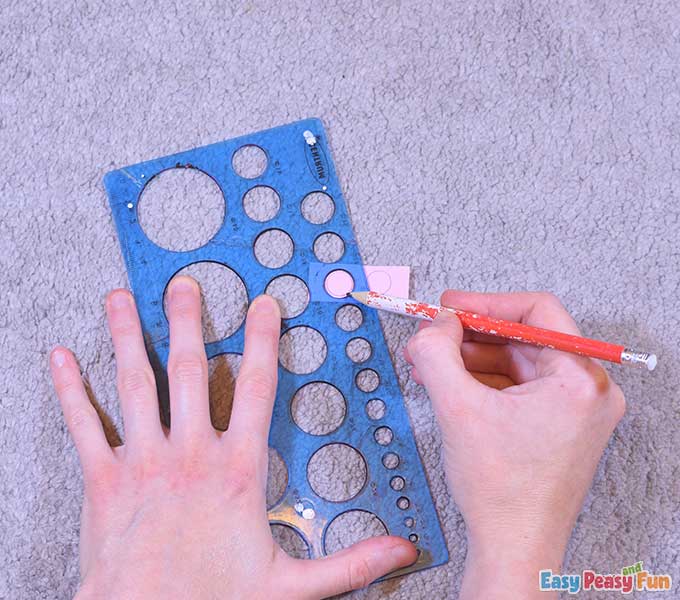
Cut them out.
Glue them on the frog as cheeks.
Croak, croak!
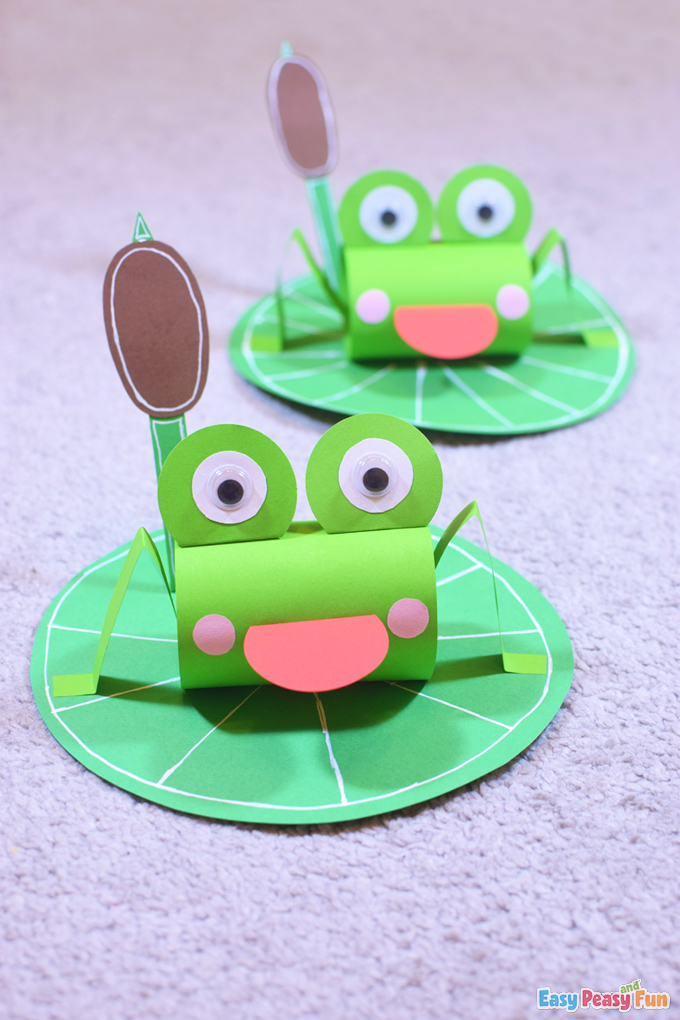
All done!
Was this an easy and fun craft to assemble?
Get Your Frog on a Lily Pad Craft Template Here
Want instant access to all of our printable crafts, activities, and resources?

With thousands of crafts, activities, worksheets, coloring pages, and drawing tutorials to print, you will always have just the resource you need at your disposal. Perfect for parents and teachers alike!