If you are one of those people (as are we) that loves anything that has to do with fairies you are going to adore this simple DIY fairy garden in a jar! It’s the easiest DIY fairy garden (no fail one even) that you will have ready in no time.
You can display this fairy garden outdoors (just keep it under a roof) or as a decoration in your house, it will look great as a centerpiece on your dinner table. This project is suitable both for kids and adults.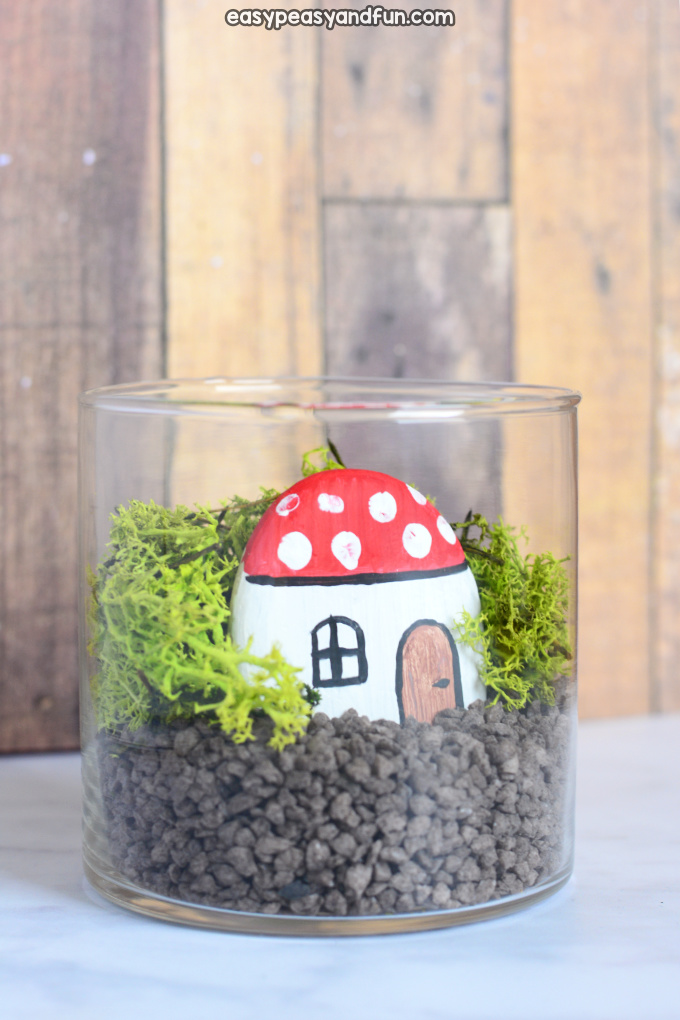
*this post contains affiliate links*
50 paper crafts your kids can actually do themselves

No fancy supplies — just paper, scissors, and a little imagination.
Be the first to get it on release day — and lock in the lowest price guaranteed.
Fairies are magical and you can easily capture some of that magic by making a fairy garden of your own. This one can be made out of materials that you gather on your nature walk or you can grab them from the nearest craft store (or similar).
We do need to warn you, making rock fairy houses is insanely addictive and you might have trouble stopping after you create your first one. But they can fit pretty much anywhere so the more you make, the more magic gets spread.
Ready to make your miniature DIY fairy garden? Let’s make one!
How to Make a Mini DIY Fairy Garden in a Jar
What you need:
- a large flat rock (other shapes will do too, but flat round one is awesome). – we got ours near the river, but craft stores usually hold them too (or garden stores)
- acrylic paints, white, black, brown, red
- paint brushes
- pencil with eraser (optional)
- decorative sand or small rocks – again craft stores have them at a reasonable price, nature is your friend too
- moss (store bought or from nature)
- glass jar
Optional: other magical decorations (shells, gemstones, sea glass…), varnish
Step by Step Tutorial
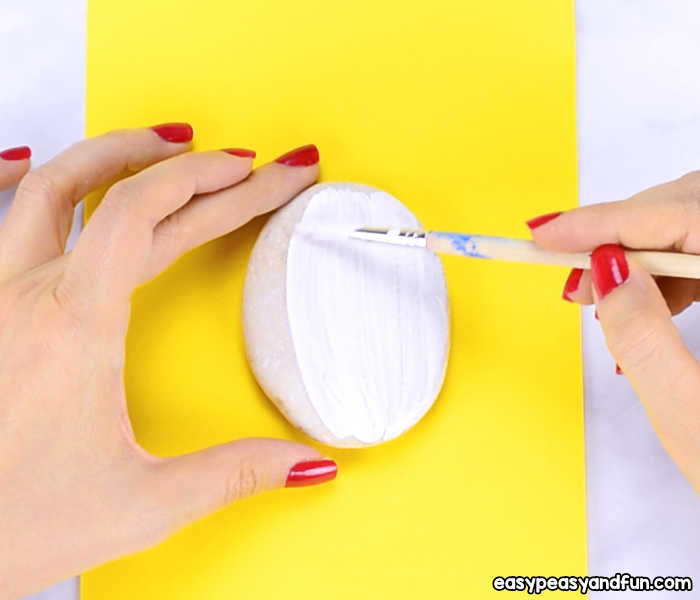
If you got your stone from the nature, wash it and let it dry completely.
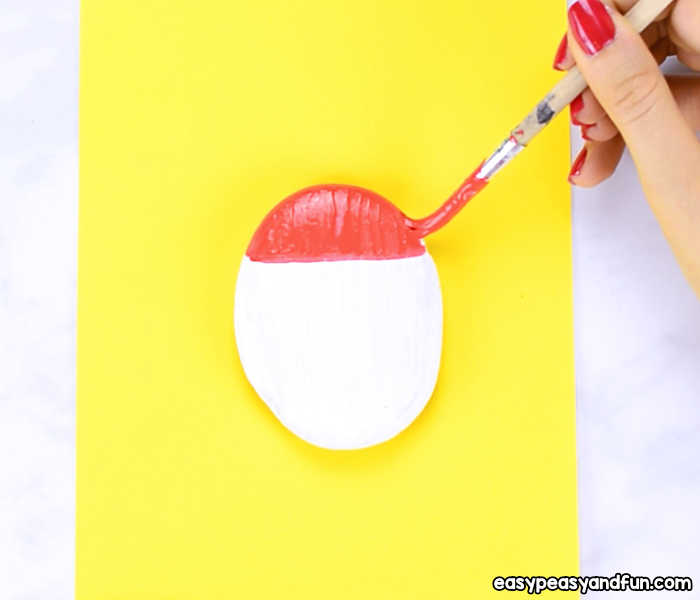
Paint with white paint. Depending on the paint pigmentation you might need to do more than one layers. You can also leave the rock in it’s natural color. Let the paint dry.
Once the paint is dry, paint the top of the stone red.
While you wait for the red paint to dry, paint the doors – brown ones with a black frame.
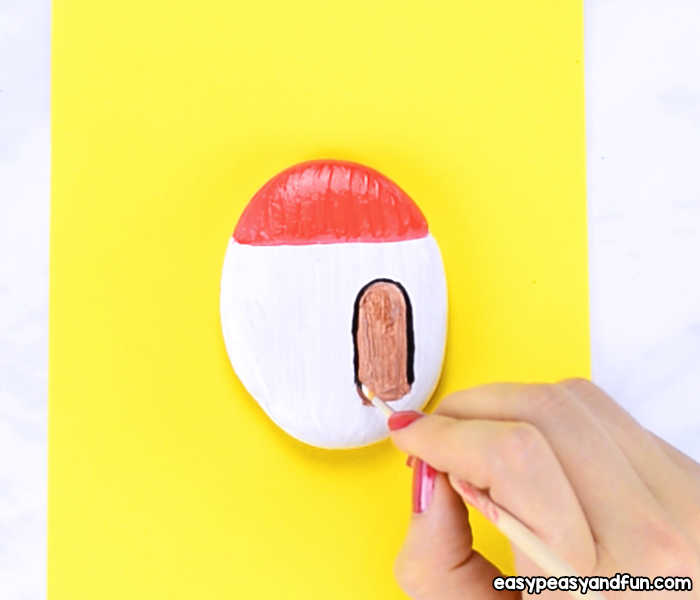
Also draw a tiny window.
Tip: if you find it hard to paint the windows or doors with a paint brush, you can also draw them with a permanent marker.

Paint or draw a black line under the red roof.
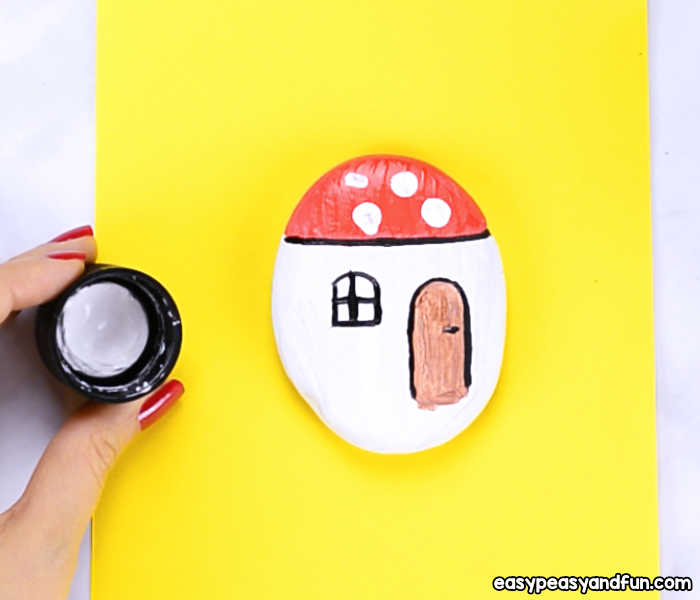
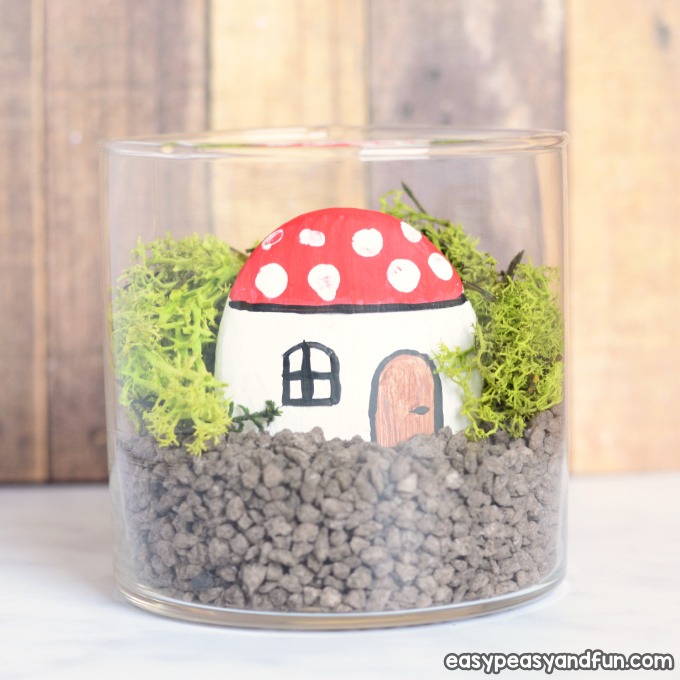
We are making our fairy house to be a mushroom, so white spots are in order. You can paint them with a brush, our you can dip the eraser from a pencil into white paint and stamp the round dots on the stone.
Let the paint dry completely before you move to the next step.
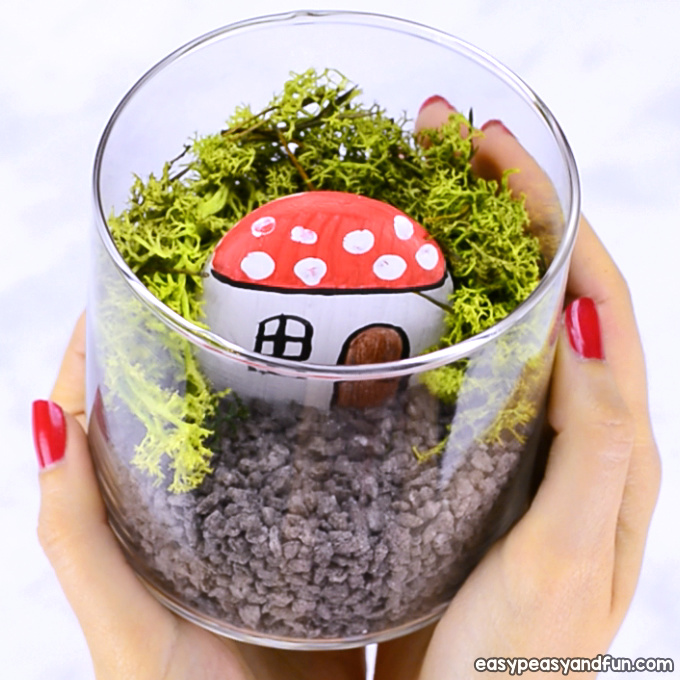
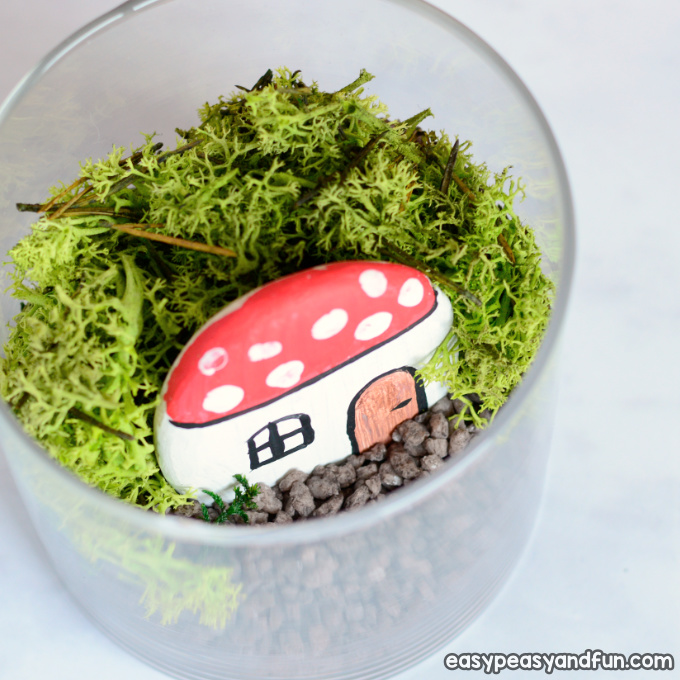
Find a nice glass jar that will fit your stone and will still have enough “wiggle” room for the fairy garden decorations.

Add a bit of sand or rocks into the jar.

Push the stone into the jar. Add more sand or rocks if needed.
Add moss and, if you wish, other decorations to your fairy garden.
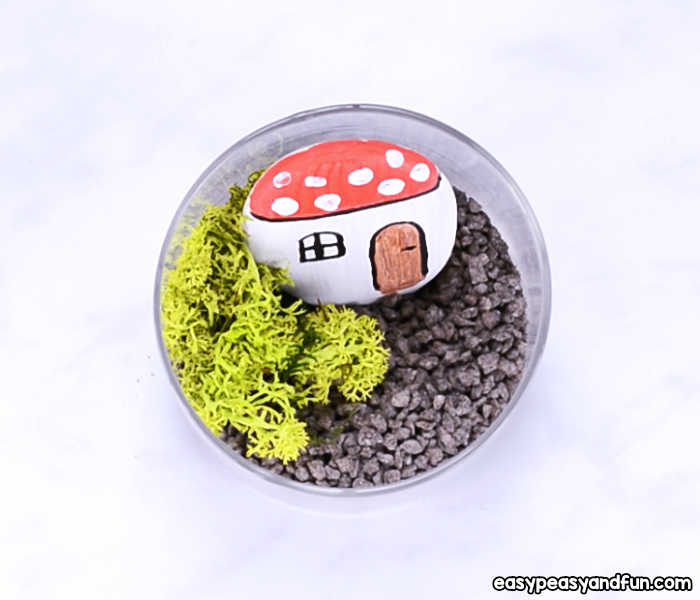
All that is left to do is to find a place worthy of your magical DIY fairy garden.

Want instant access to all of our printable crafts, activities, and resources?

With thousands of crafts, activities, worksheets, coloring pages, and drawing tutorials to print, you will always have just the resource you need at your disposal. Perfect for parents and teachers alike!
What a wonderful craft! Thank you, Andreja.