This lesson is an introduction to charcoal drawing for kids as it is intended to be fairly basic and help get them used to just using charcoals and the feel of them and to know what they are in general.
Teaching art at home to your kids is a great idea, whether you are a homeschooler or just looking to incorporate more art into their lives.
*this post contains affiliate links*
50 paper crafts your kids can actually do themselves

No fancy supplies — just paper, scissors, and a little imagination.
Be the first to get it on release day — and lock in the lowest price guaranteed.
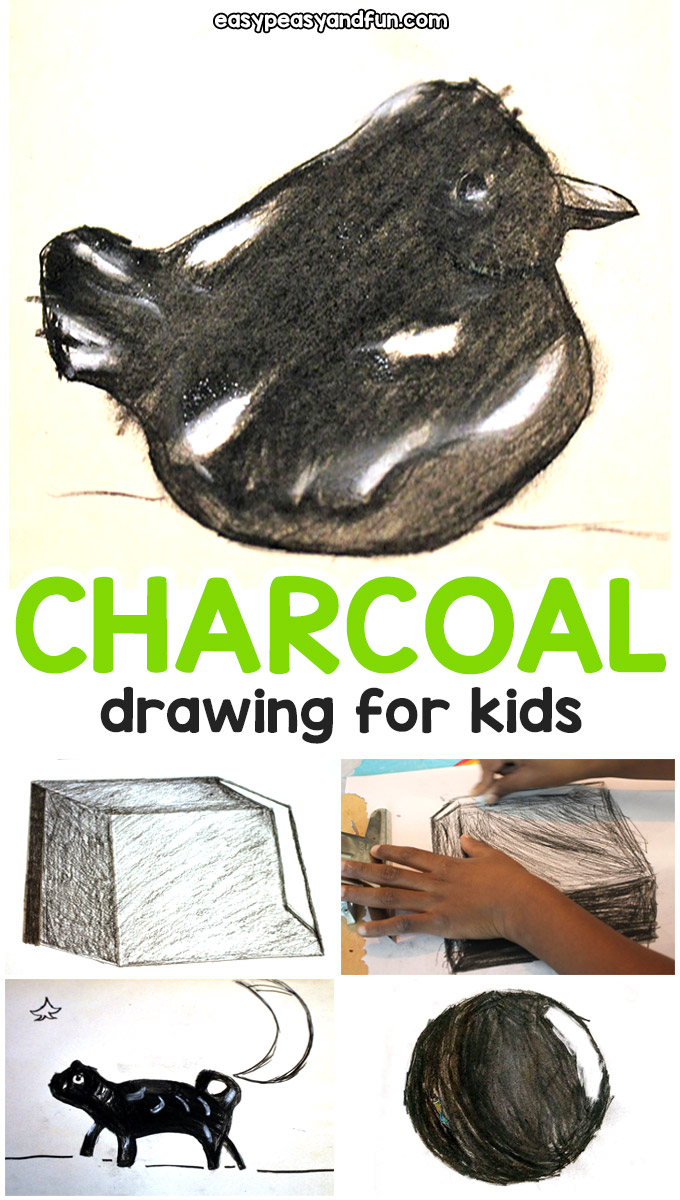
Charcoals are not something that you hear as much about as some of the other art mediums and they really are a great tool for teaching shading and shadowing in art, as well as highlighting.
If you know you need to work on those concepts, then this is a great way to do that.
You can teach this to a group of kids too, of course, just figure out enough space and supplies for each child.
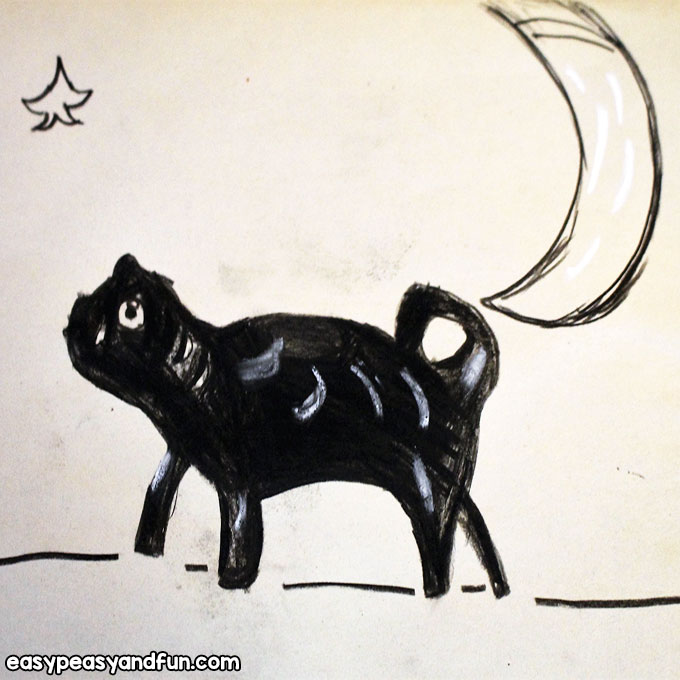
Charcoal Drawing for Kids
What you will need:
- plastic disposable tablecloth
- wet wipes and paper towels
- newsprint paper or just a mixed media type paper
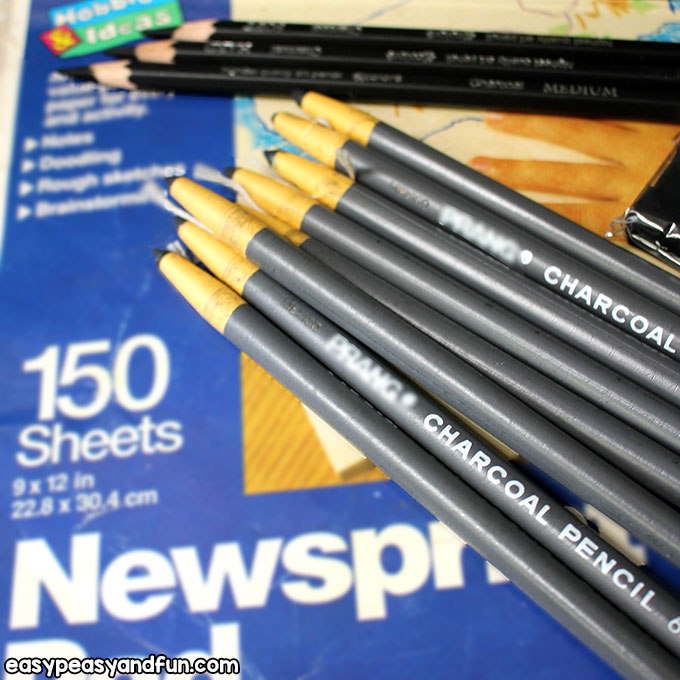
- charcoal pencils in various types
- rubber eraser (Many basic charcoal sets come with everything you need)
- white pastel chalk or pencil
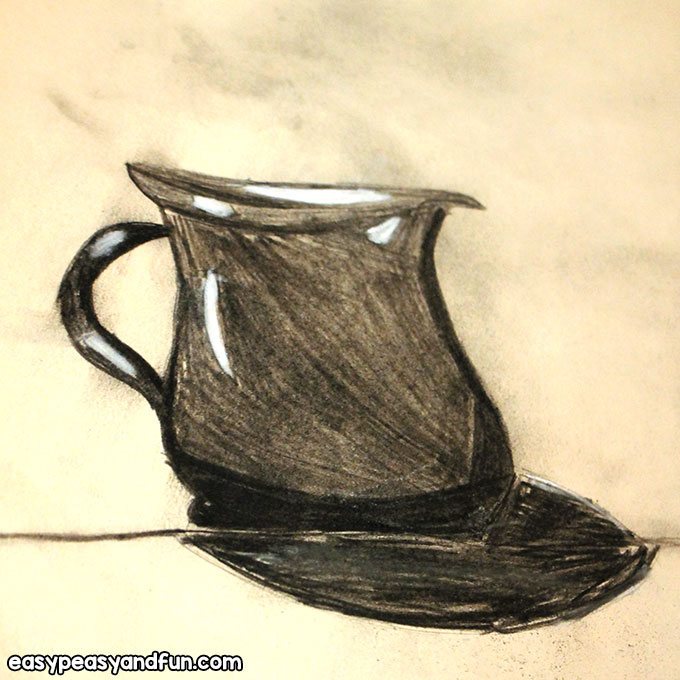
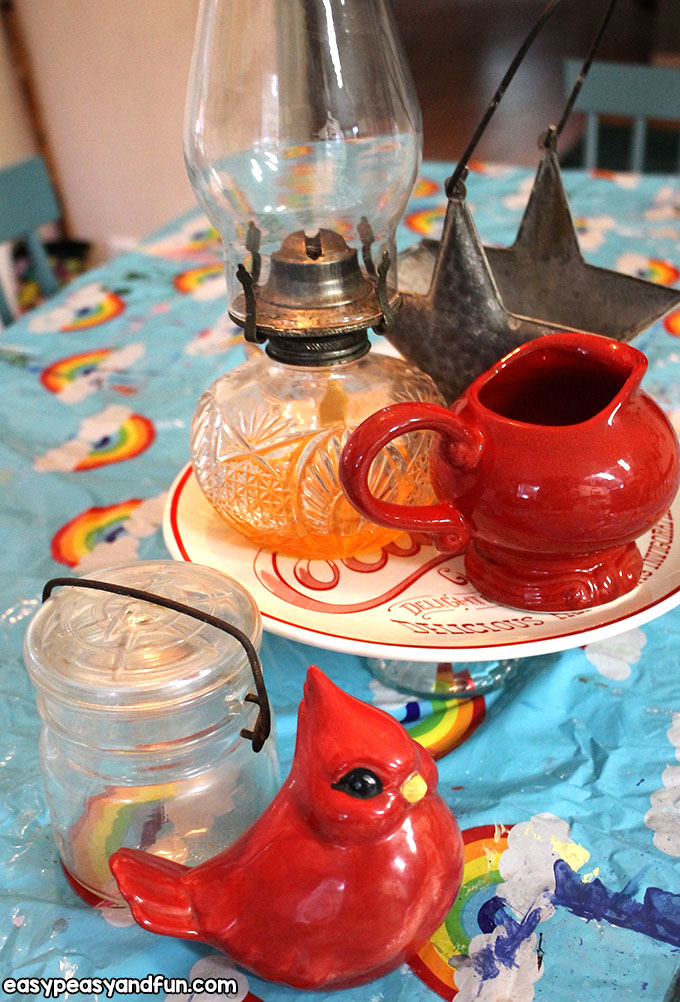
- still, life objects for them to look at and sketch
for younger kids:
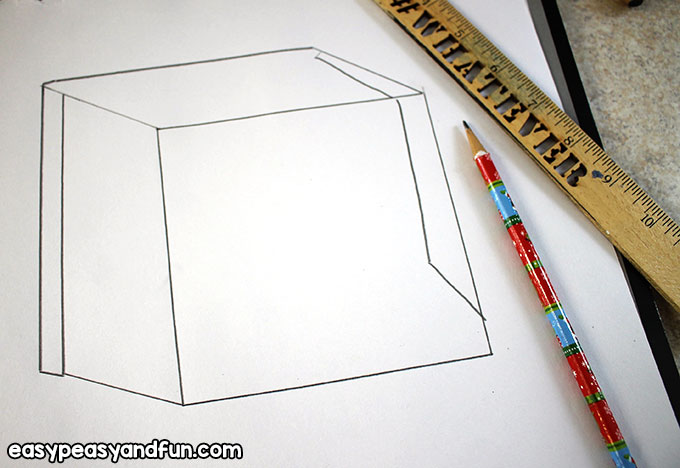
- ruler
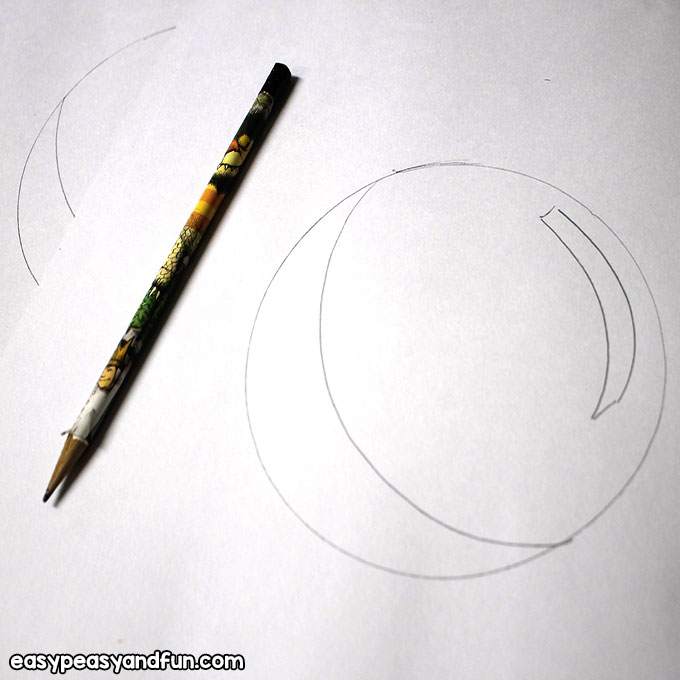
- circular object like a small plate to pre- trace images on their papers for them
Step by Step Instructions
First, lay down the tablecloth to catch any of the charcoal dust and afterward it makes for easy cleanup.
Put out a set of wet wipes for them. Some kids won’t be rattled by the mess it will put on their hands, and some will need to clean periodically as they work.
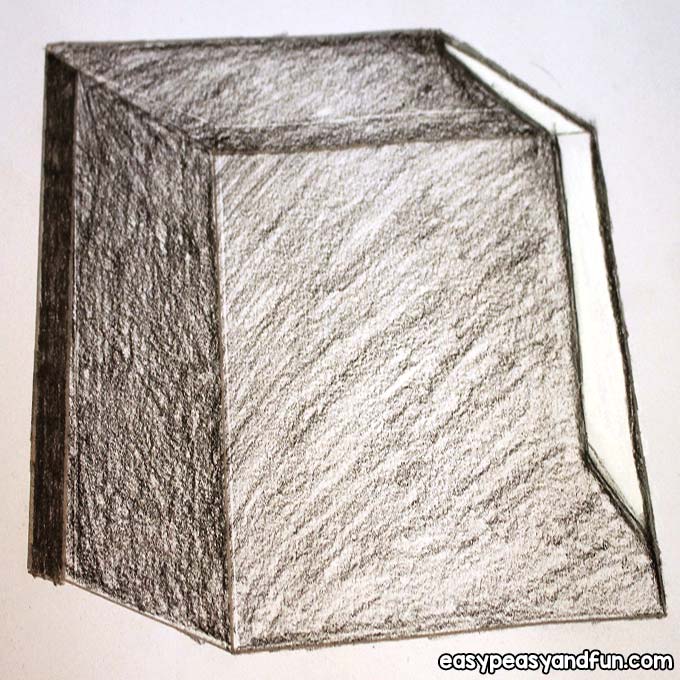
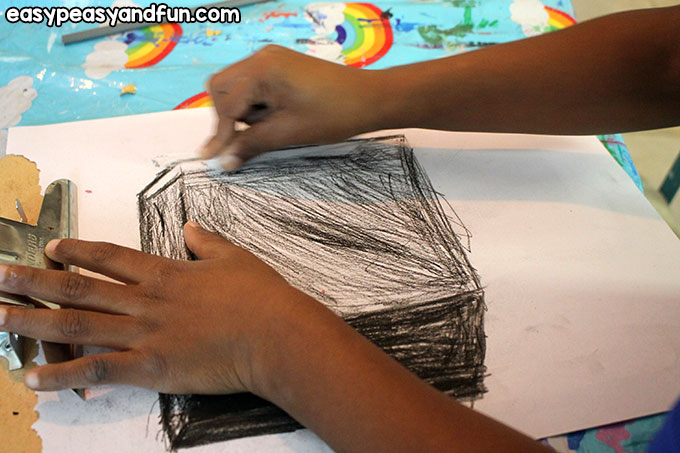
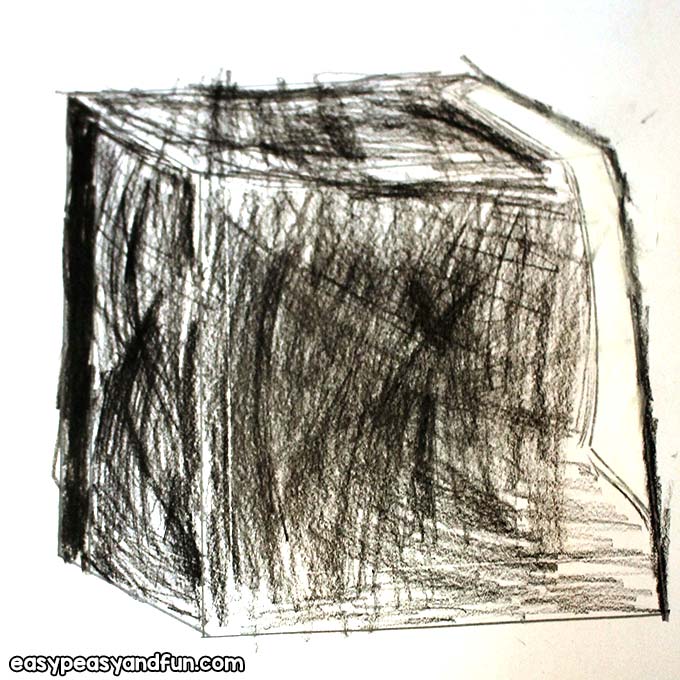
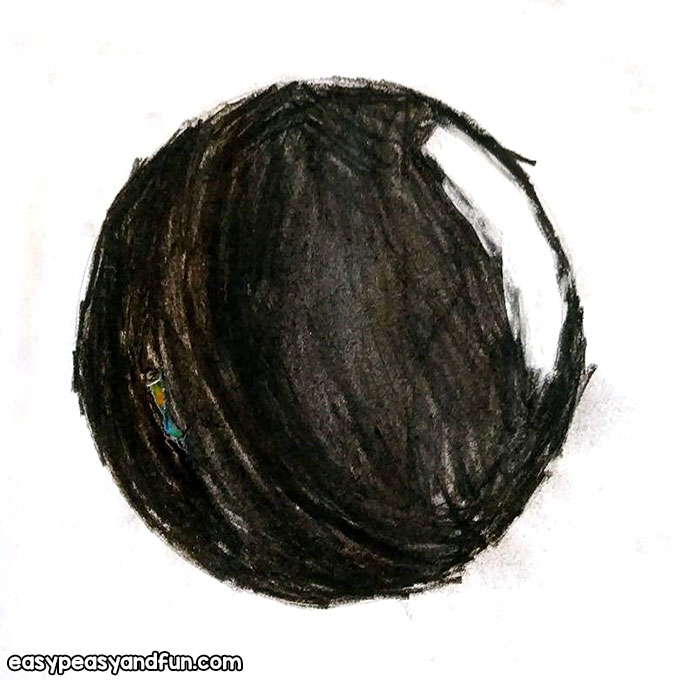
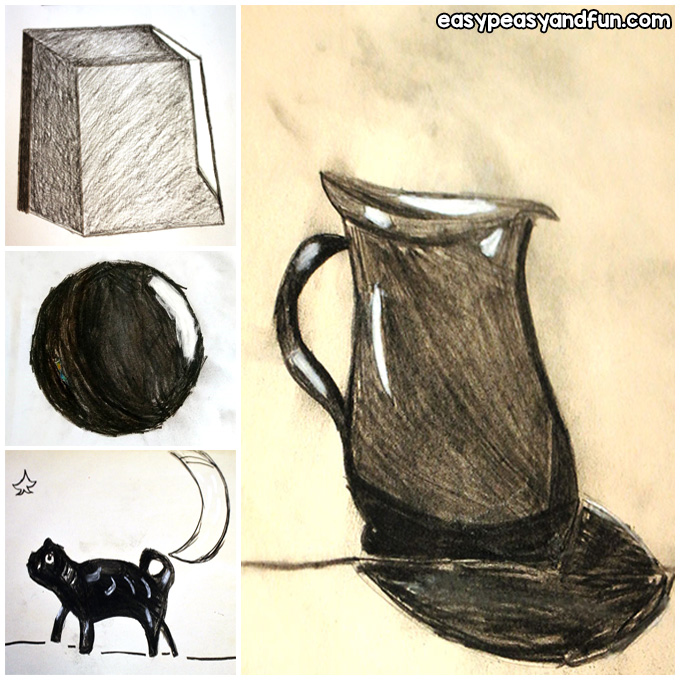
For the younger kids, which to me, is about preschool through 1st graders, I pre-traced either a square, in a 3-D shape so they could shade the different sides, or a circle, where I drew a highlight area and a shadow area ahead of time for them.
Show Examples
I first told them about charcoals and showed them a few examples of what they looked like on paper, and the different numbers and types of pencils.
I find it is best to just draw samples out and show them what you mean, not just show them a finished piece of charcoal art.
Keept it a little more simplified for the younger kids on this part and give them a soft, hard and regular pencil so they can try all 3.
Then I told them the areas they should shadow, also showing them a cube-shaped toy (for the ones I did squares for) and some other objects, so they could see how it was shaded with shadows and light in real life.
I made sure they knew that where I drew the highlight area that they would color that in with the pastel chalk last, and to just leave it empty.
Some will still color over the lines or even into it, and they can still just erase or smudge it a bit with their fingers and then cover it with white at the end.
Let Them Experiment
Let them experiment some in this process but you will likely have to remind them a few times which part was meant to be darker than the other, and which to use a medium pencil on and leave more grayish- black.
Explain that the darkest part is where the shadow is and it should look solid black.
One warning I will give you is that with the newsprint paper, some kids will color heavy-handed and end up tearing it. I do like it better for these than the mixed media paper, as it lets the pencil lines stay a little softer.
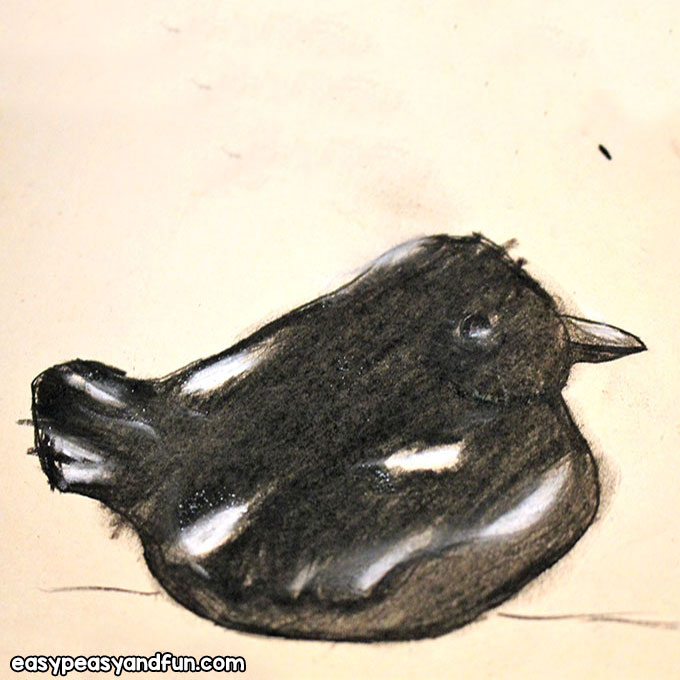
With the older kids, set out several objects at different levels for them to choose from and advise them to choose just one or two, max.
Then show them how to notice the darker and lighter parts of each object.
Where the light hits the items on the top is where they should leave blank for the highlight and remind them to leave that till last.
Then, have them look for different values of black. The darkest shadows again should be true black, and they will want to layer the charcoals on to get it that true black. The other values that are lighter can be more in the middle, grayish-black.
You may have kids that just keep layering and end up with very dark drawings. Don’t sweat it though, the main goal is an introduction to the charcoals more than anything else.
Show the Shadows
Also show them where the shadows fall on the table or surface around the item, as they can also draw that in too.
If they want to play with them a bit before they begin drawing, give them a scrap piece of paper to work on too.
As they go, remind them that if there is charcoal on their hands, especially on the sides. It can smear on to the paper and ruin the negative space for them, so have them be aware of keeping them wiped clean at least somewhat.
I store my charcoals with a piece of tracing paper over the top to protect them. You can also use a spray fixative on them to help secure the chalk on the paper.
I don’t like using it at classes because it has to be done outside and it stinks.
But if it is your own home, you may like this option.
Want instant access to all of our printable crafts, activities, and resources?

With thousands of crafts, activities, worksheets, coloring pages, and drawing tutorials to print, you will always have just the resource you need at your disposal. Perfect for parents and teachers alike!