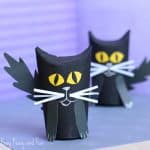
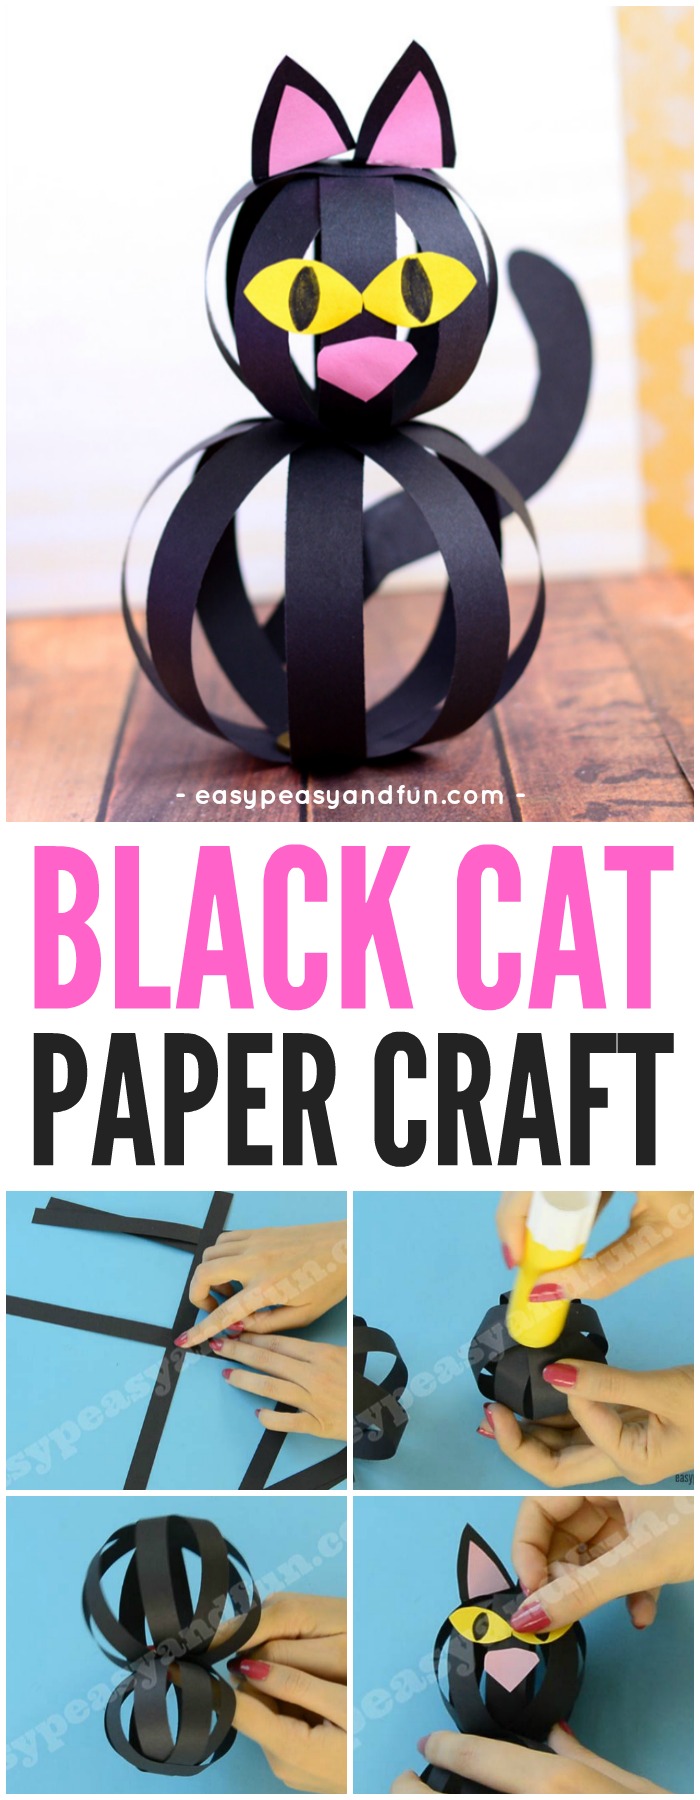
Who loves Halloween? We do! And we have another wonderful craft idea to share with you – lets make a cat craft with paper strips together!
We sure do love crafting with construction paper strips. Frugal and insanely fun.
 *this post contains affiliate links*
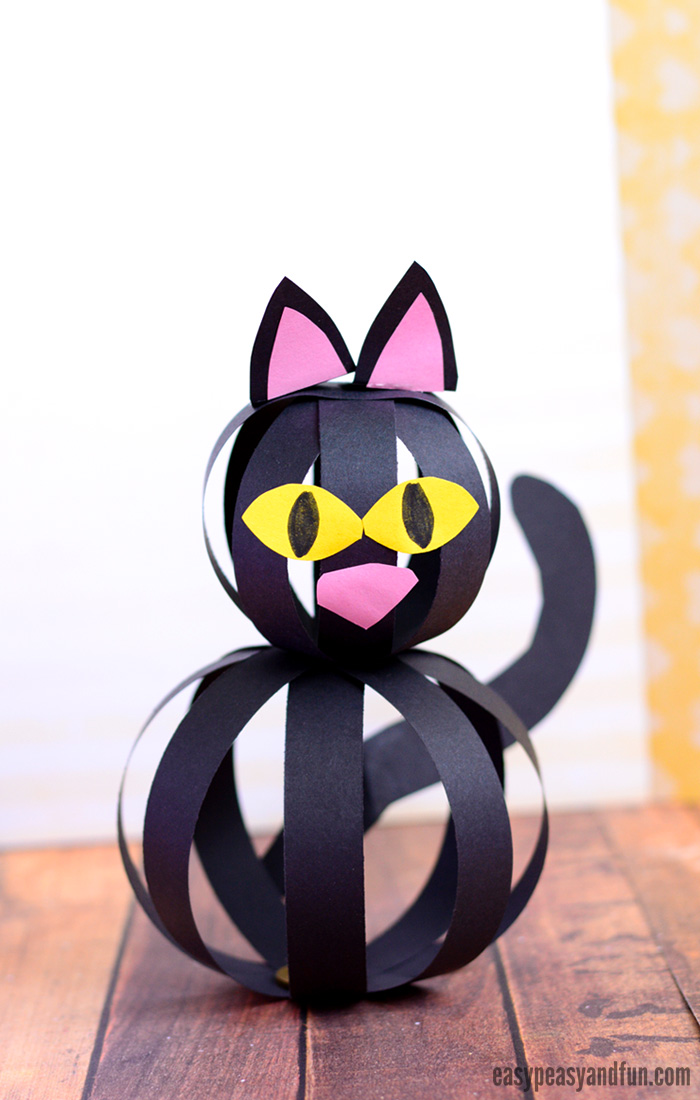
Cat lovers will love this craft idea all year round, but make a black one and this will be a great Halloween craft to make with your kids. Me? I am a cataholic! I could do cat crafts all year round without a doubt.
This one can be used both as a Halloween garland decoration – just hang them on the thread or they can stand on their own if you add a coin or a pebble inside or make a base out of paper.
We really enjoy making these paper strip crafts (we have a ton of ideas around the website already and keep on adding more, it’s amazing how many wonderful things you can make from simple paper strips).
Ready to make your very own black cat?
Cat Craft with Paper Strips
What you need:
- black paper (regular print paper or construction paper)
- scissors or paper trimmer (we suggest a trimmer)
- a little bit of yellow paper
- a little bit of pink paper
- glue
Other color combinations are welcome too.
Watch The Video Tutorial
Or Follow these Step by Step Instructions
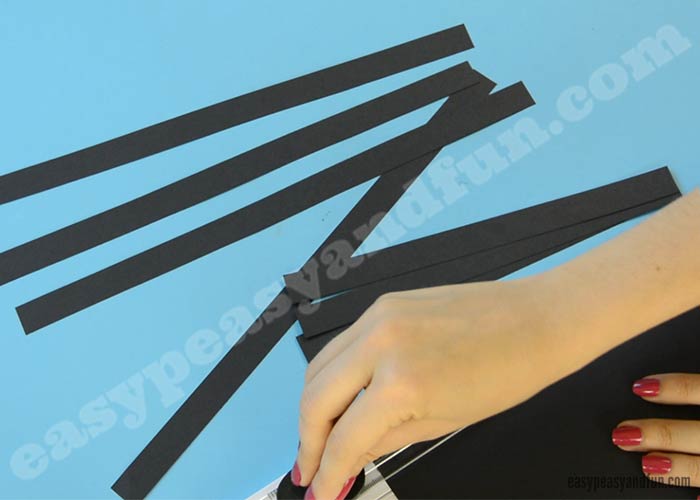
We are working with 2 letter sized (A4) sheets of paper.
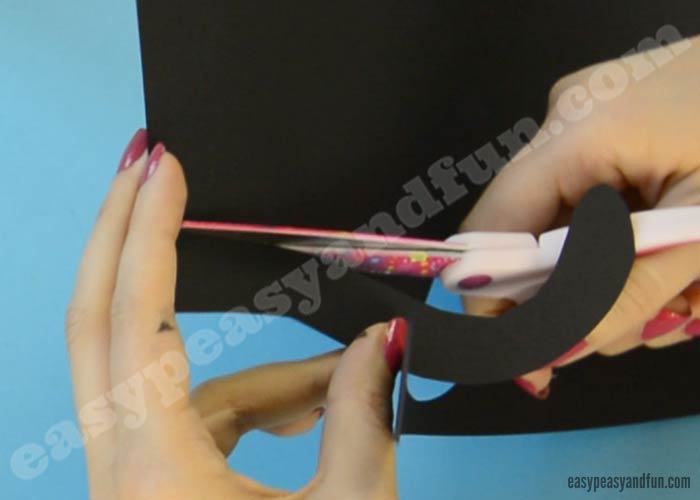
You will need to cut 4 short strips and 4 longer strips of paper (the strips are about an finger wide, younger kids will make wider, older kids can make thinner and even use more strips).
For the long strips we made them by cutting the letter/A4 sized paper across it’s length.
Shorter ones we did by cutting the letter/A4 sized paper across it’s width.
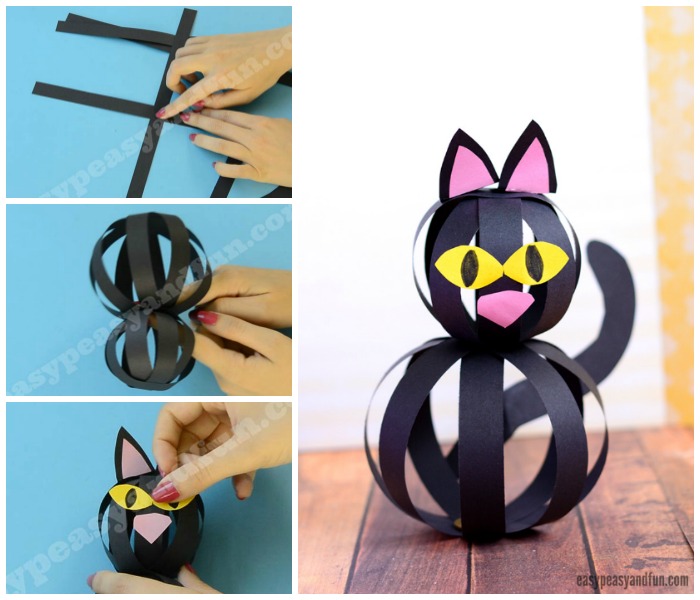
 Align the short strips and the long strips (separately). Gently bend in half to mark the middle of the strips (you can also do one by one).
 Start with one length. Glue the two strips one on top of the other (crossing in the middle – at the fold where you bent them).
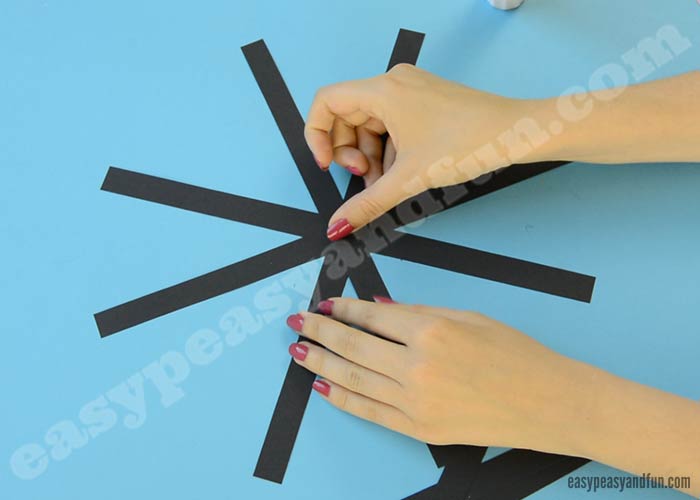
 Glue on other two to form the “snowflake” shape.
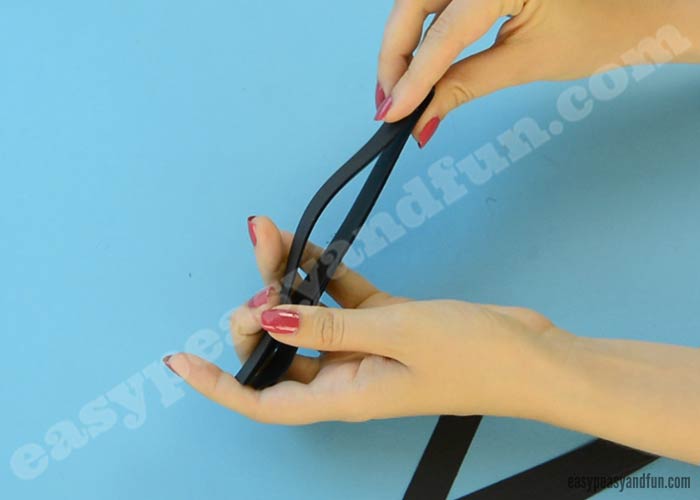
 Now loop the strips and glue the ends together.
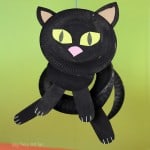
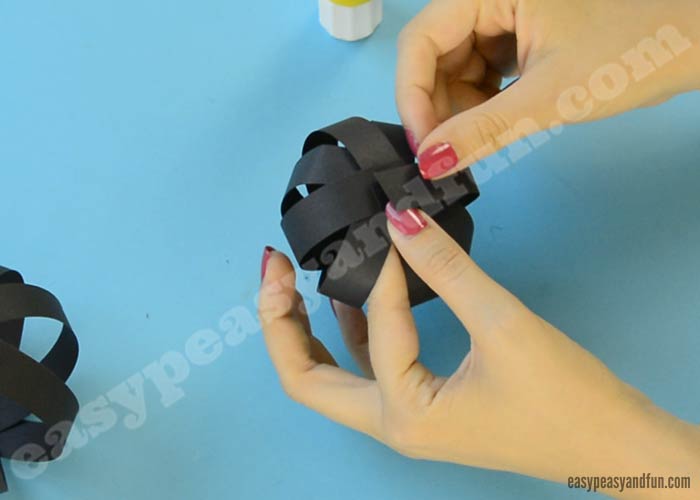
Loop and glue all the strips, a paper ball will form.

Repeat with the other ball.
Let the glue dry before you continue.
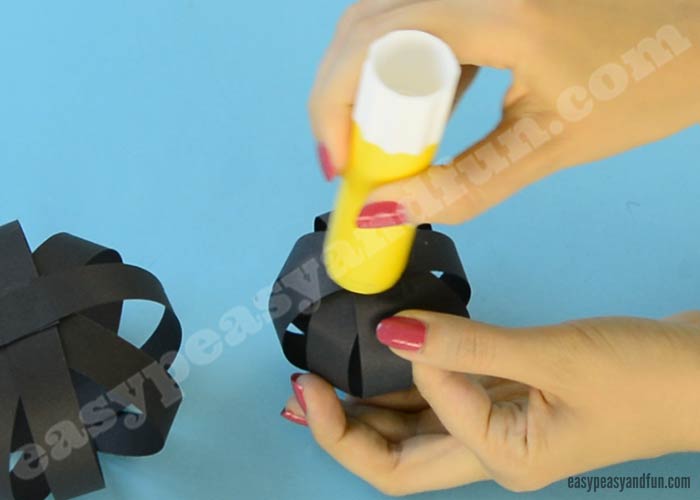
 Apply a generous amount of glue at the bottom of one of the balls.
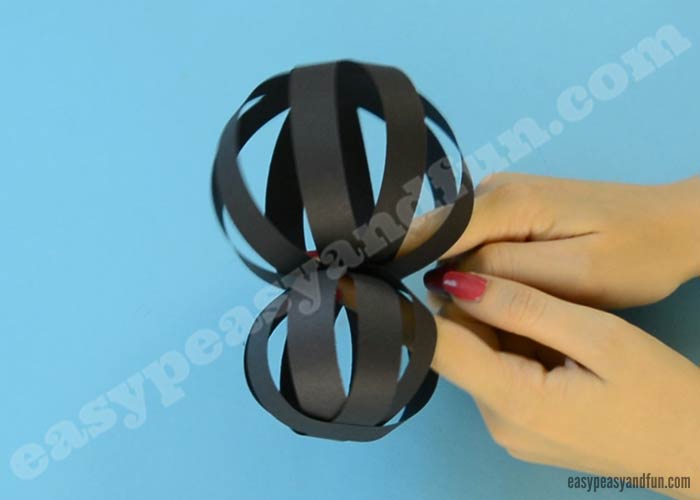
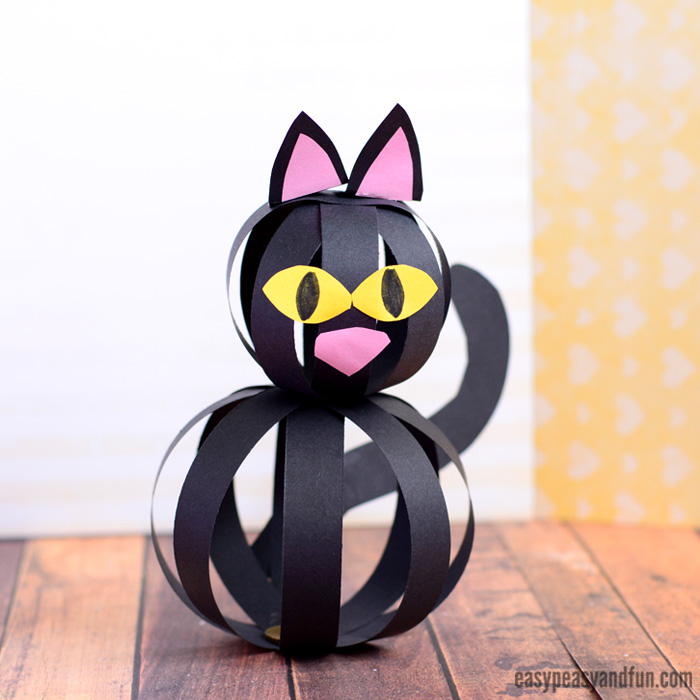
 Stick the two paper balls together.
You will have to hold them together for a while to allow the glue some time to set.
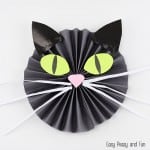
Decorate!
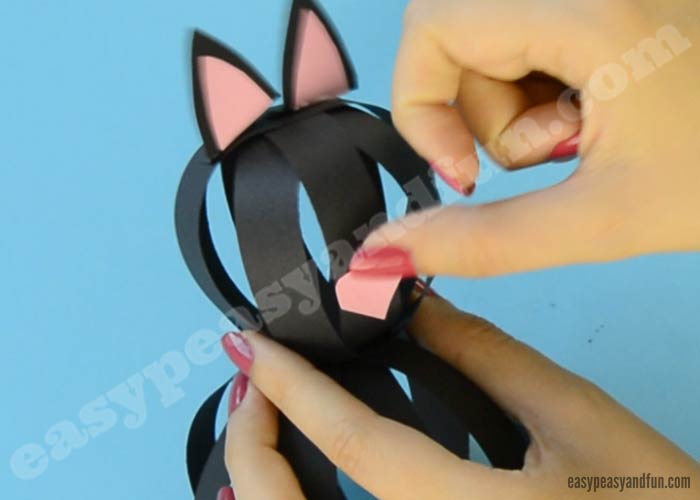
Cut two triangle shapes for the ears. You can decorate them with pink paper.
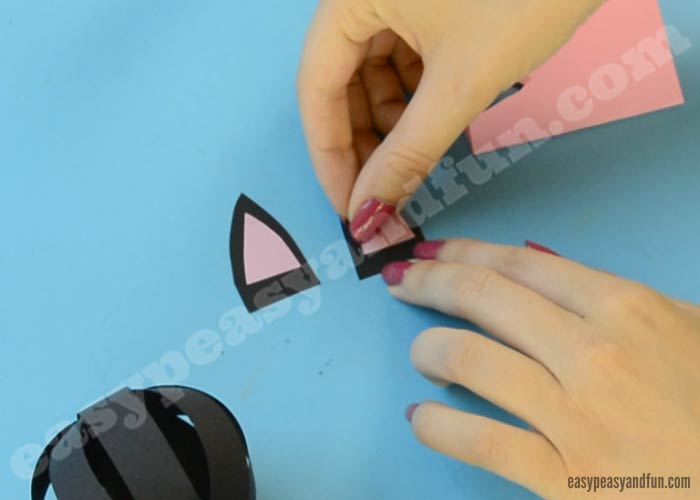 Fold into a L shape (pointy end on top), apply glue and glue on top of the smaller ball.

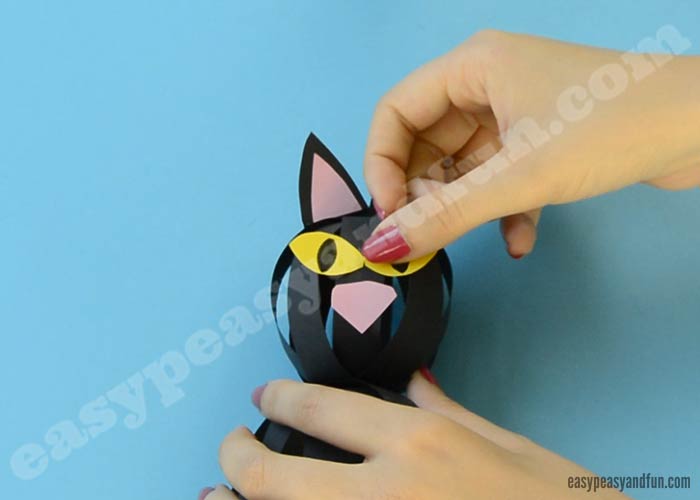
 Cut a small pink triangle for the nose and glue it onto the paper ball.
 Cut two eyes out of yellow construction paper, draw in eye details and glue on the head.
You can also add whiskers.
 Cut tail out of black paper.
 Glue it on the back of the larger paper ball.
If you want your Cat Craft with Paper Strips to stand on it’s own, also cut a round base and glue it on the bottom of the large paper ball (alternatively you can also glue a coin inside).
Want instant access to all of our printable crafts, activities, and resources?

With thousands of crafts, activities, worksheets, coloring pages, and drawing tutorials to print, you will always have just the resource you need at your disposal. Perfect for parents and teachers alike!