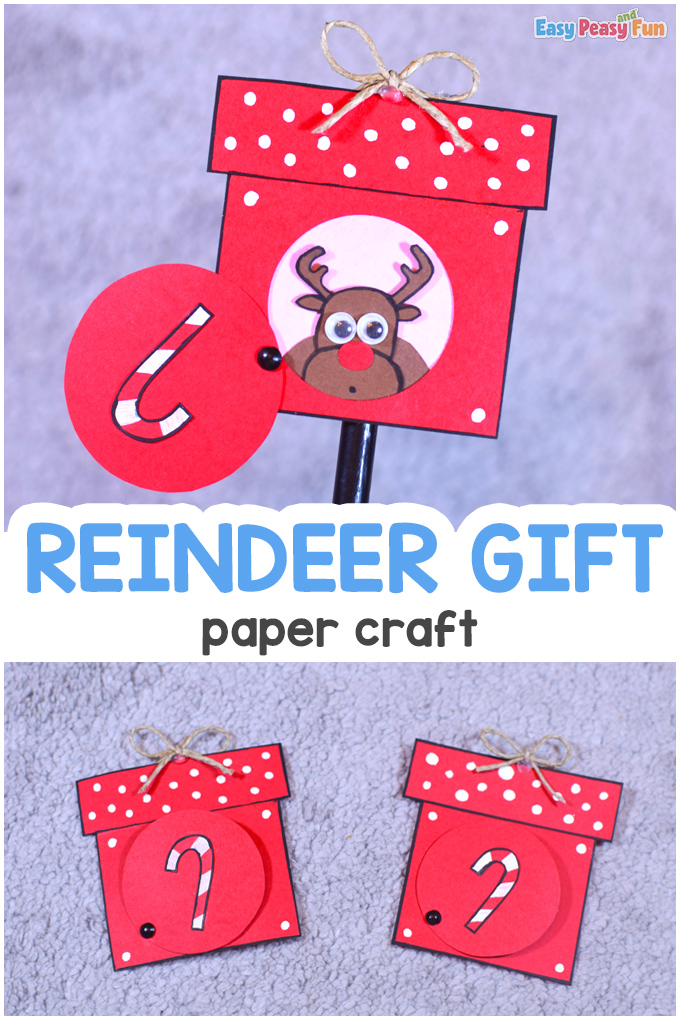
If you’re wondering what project you should try next, we have a wonderful Rudolph Reindeer Gift Craft for your young ones to make.
It is fun and easy to make, and we think it will look great as a Christmas decoration too.
*This post contains affiliate links*
Making reindeers or making Christmas Projects that include reindeer always brings us so much joy and excitement.
Your kids can try out their skills and learn how to draw their Rudolph independently with our How to Draw a Deer tutorial. Color the deer’s nose red.
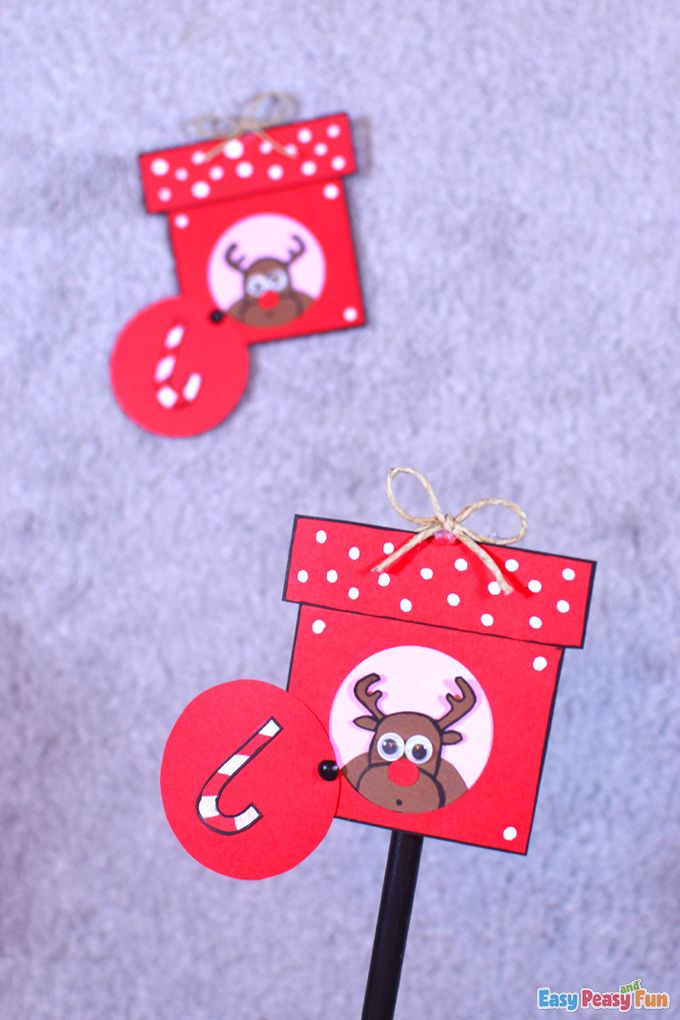
And what we are more excited about is that today we thought of a way to hide our reindeer inside a Christmas box and let it peek out when we like.
You can use this tiny box as an ornament for your Christmas tree, or you can write a Christmas note on the back of it and gift it to anyone you want.
So guys, if you are up for making a Christmas box with a reindeer inside, let’s start!

How to Make a Rudolph Reindeer Gift Craft
What you need:
- red cardstock
- pink cardstock (or pink color paper)
- brown cardstock
- yarn
- split pin
- scissors
- glue
- ruler
- googly eyes
- pencil (and an eraser to erase the pencil marks)
- black marker
- white marker
- hot glue (+a hot glue gun)
- circle puncher
- compass
Step by Step Tutorial
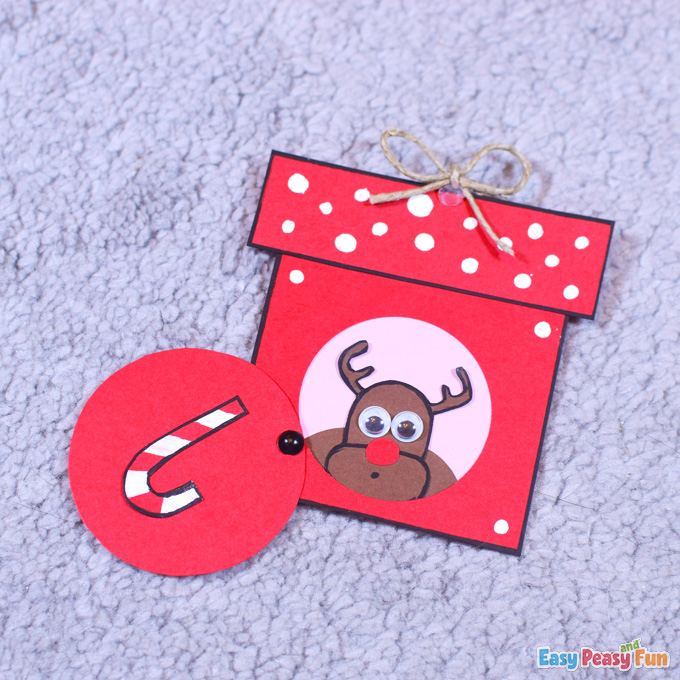
The Gift Box
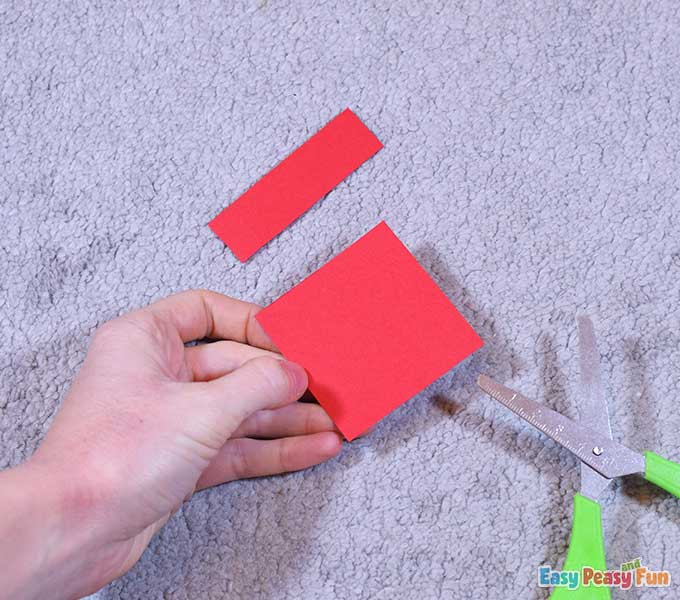
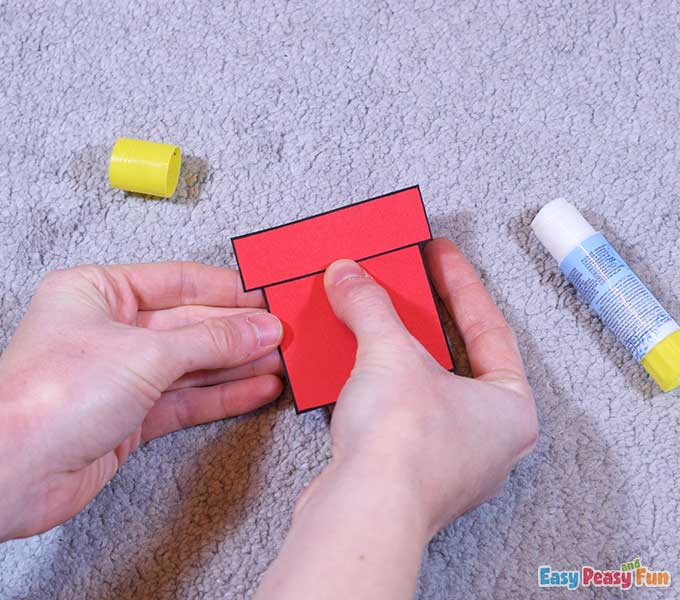
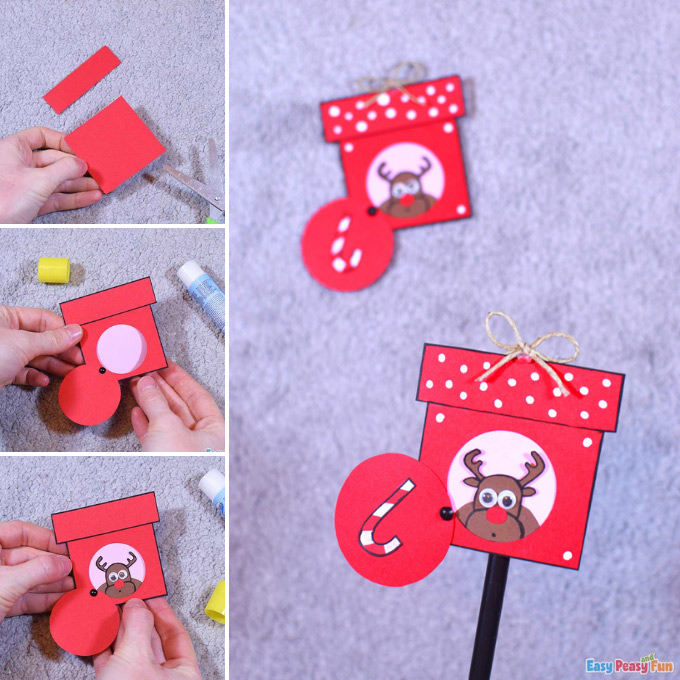
On the red cardstock, draw a 6 x 6 cm square (the box) and a 7 x 2 cm rectangle (the lid).
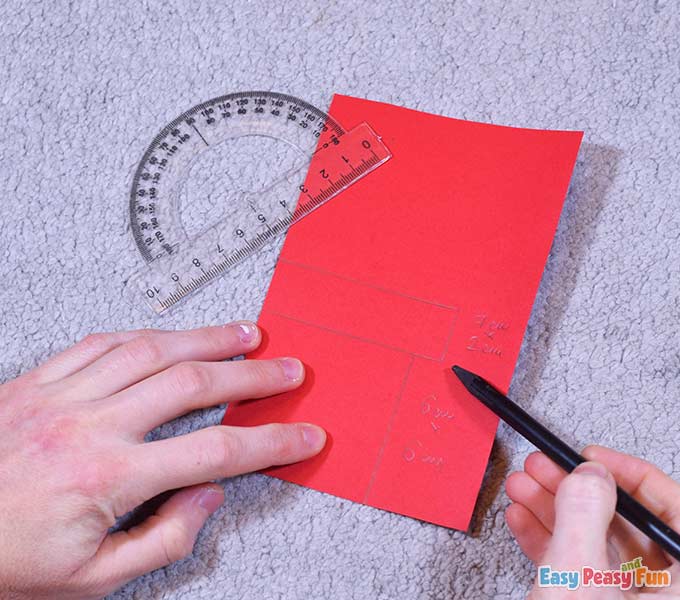
Cut them out using scissors.
Outline them with the black marker.

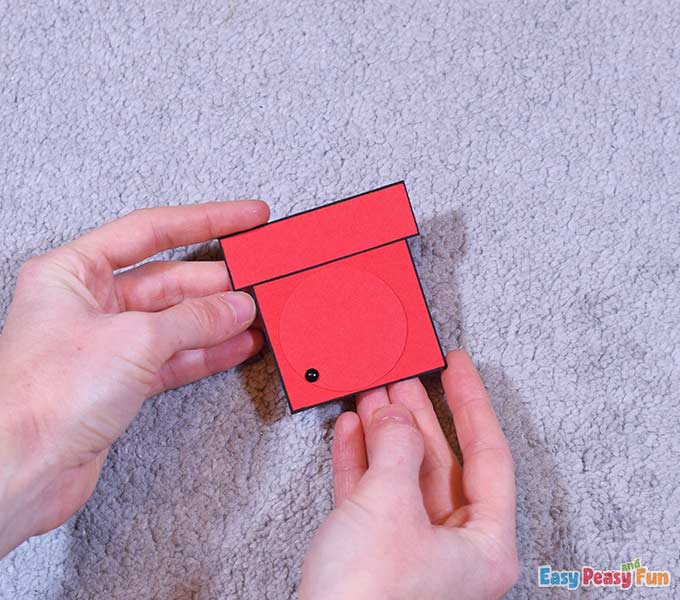
Glue the lid on top of the box.
The Moving Mechanism
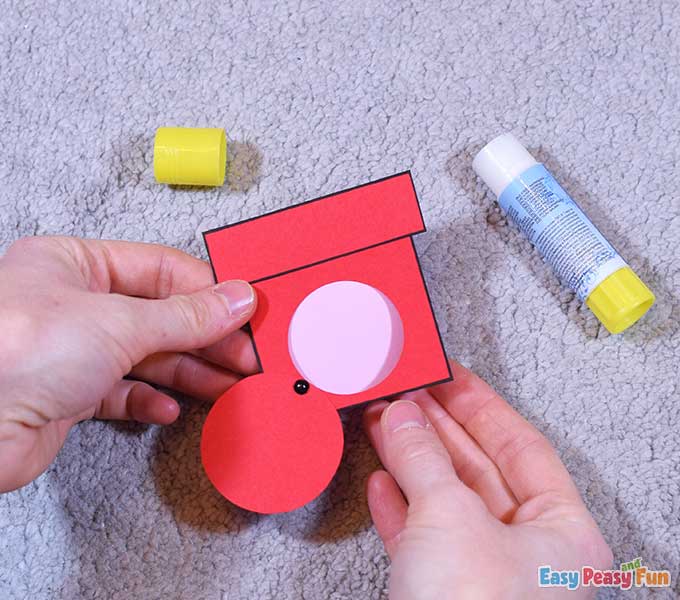
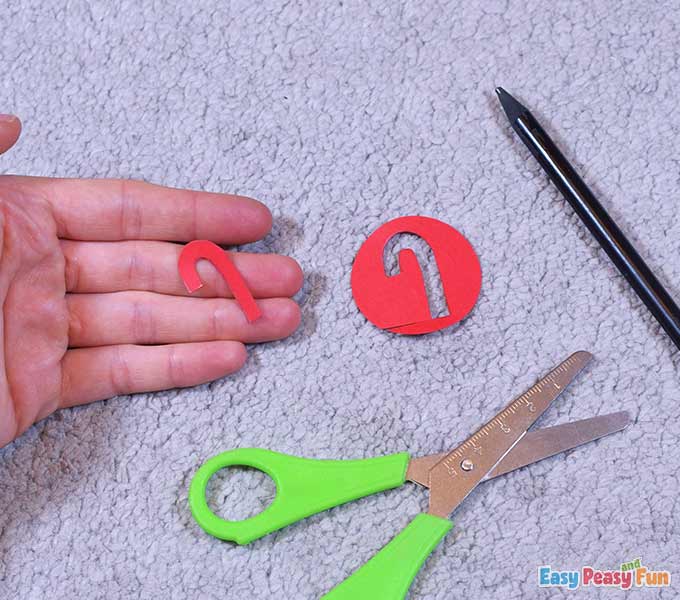
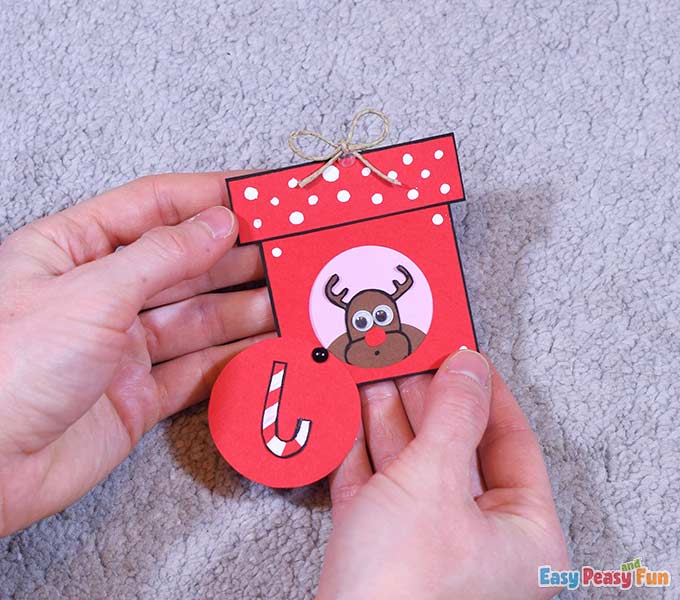
Take the circle puncher and punch out a circle (our puncher has a 3,8 cm diameter) in the middle of the box.
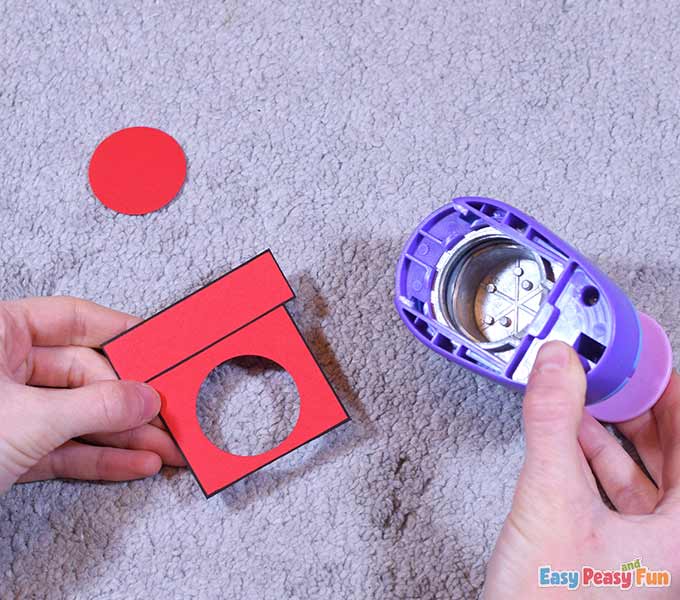
Take the compass and draw a circle with a 4,5 cm diameter.
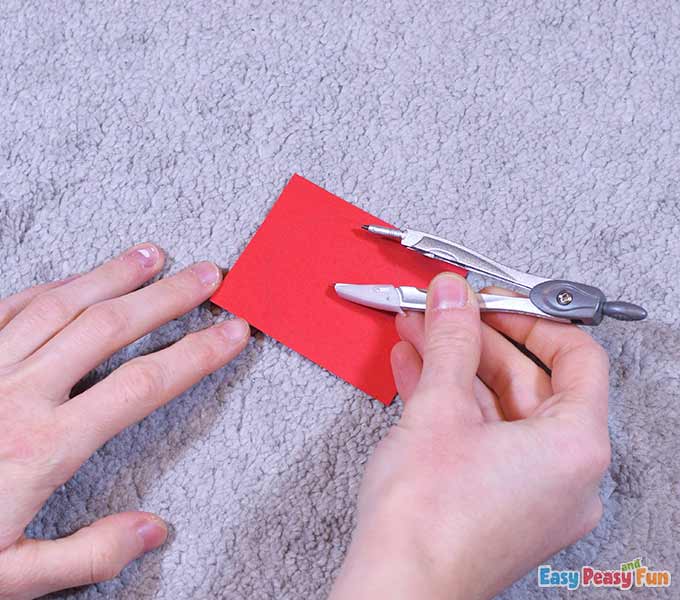
Cut the circle out using scissors.
Cover the box hole with the circle and connect them with a split pin on the left side.
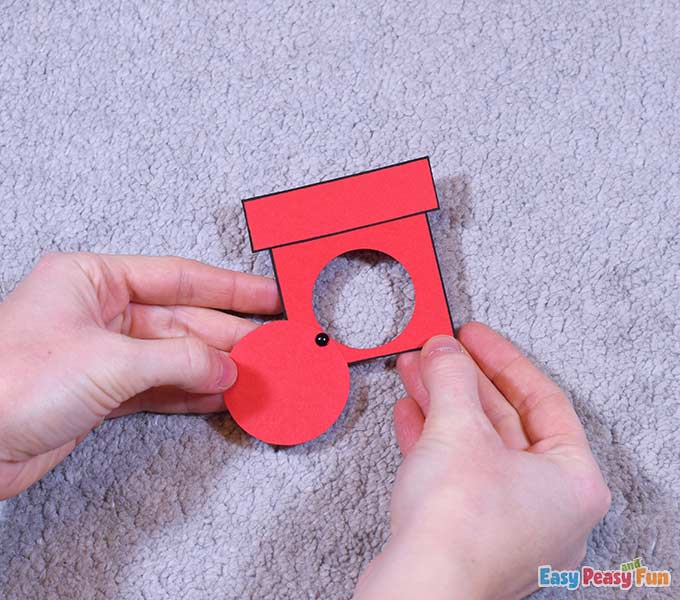
Check if the mechanism works correctly – the circle should cover the hole entirely and move freely.
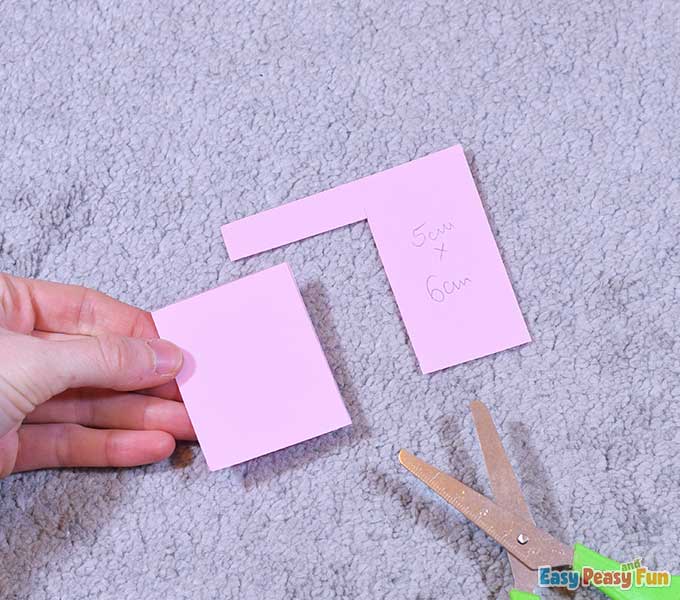
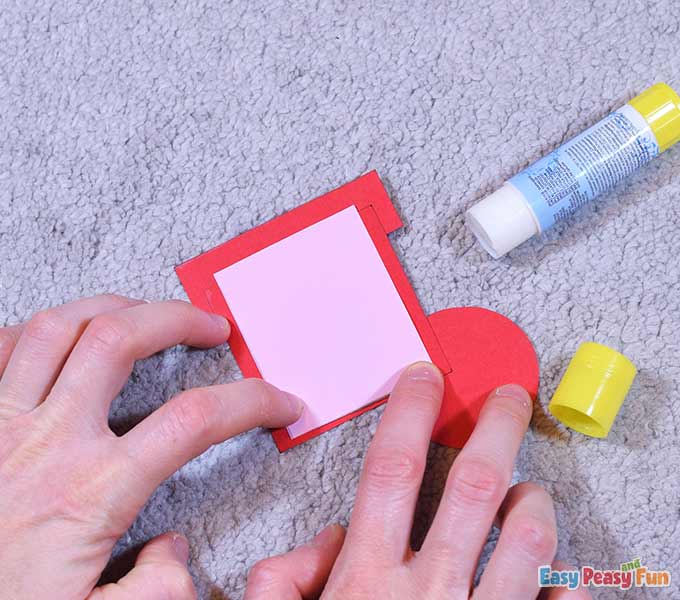
The Rudolph Background
On the pink cardstock, draw a 5 x 6 cm rectangle.

Cut it out.
Glue this rectangle on the back of the box as shown. Leave the bottom part of this rectangle glue-free.
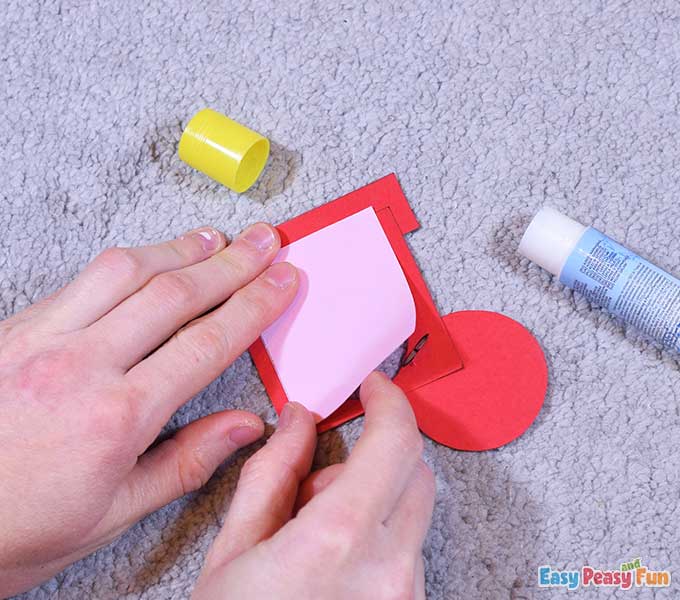
We will apply glue to it later; we need to place the reindeer in first.
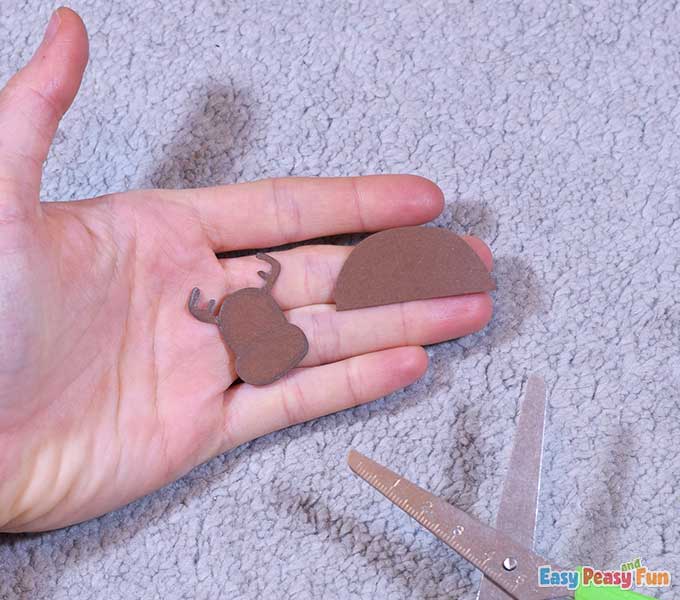
Rudolph the Reindeer
On the brown cardstock, draw a reindeer’s head and a reindeer’s body (in the form of the letter D).
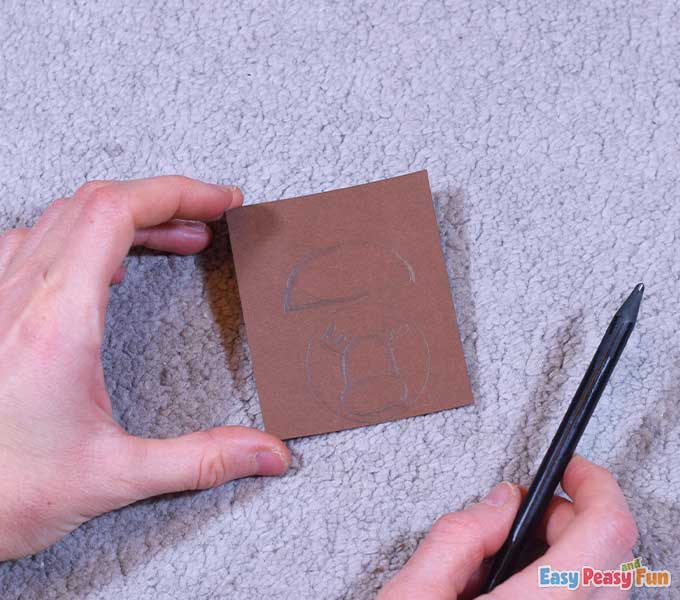
Cut them out using scissors.
Outline the head only with the black marker and add a tiny dot as a mouth.
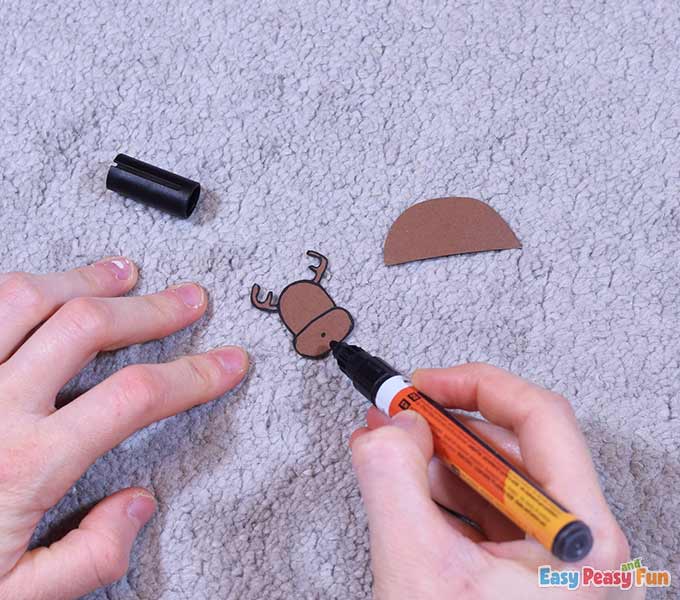
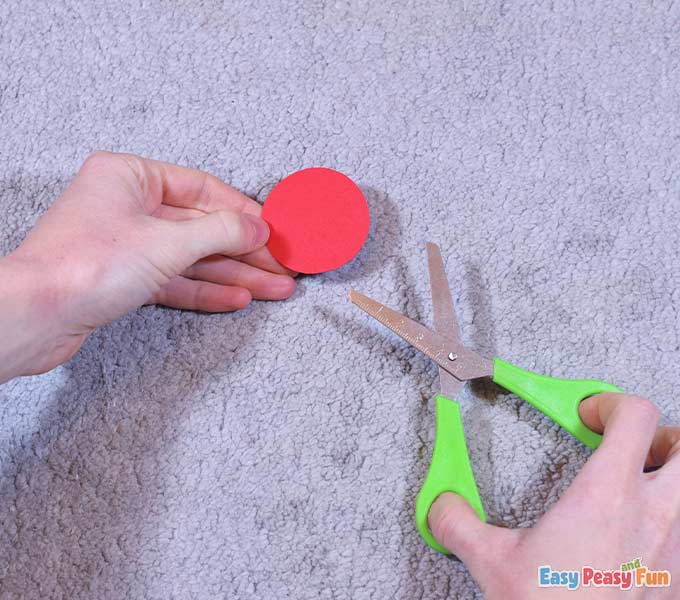
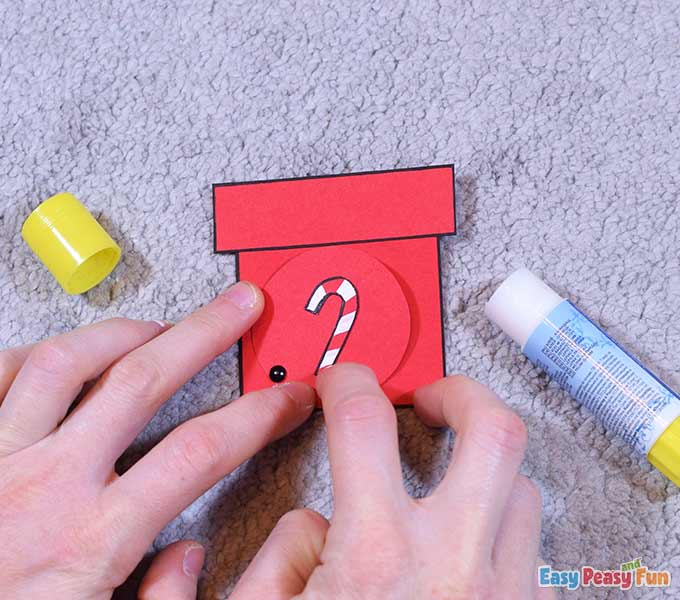
Cut out one small red circle and glue it on the reindeer as a nose.

Take the googly eyes and attach them to the reindeer’s head.
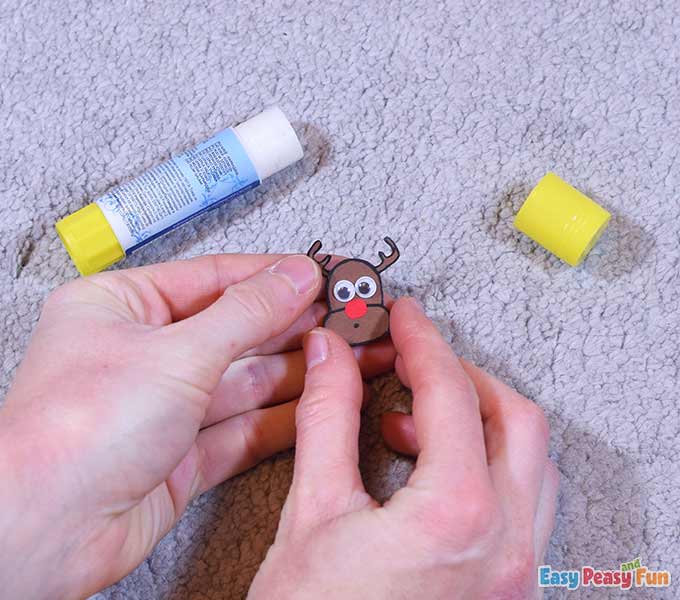
Glue the reindeer’s head on the reindeer’s body as shown.
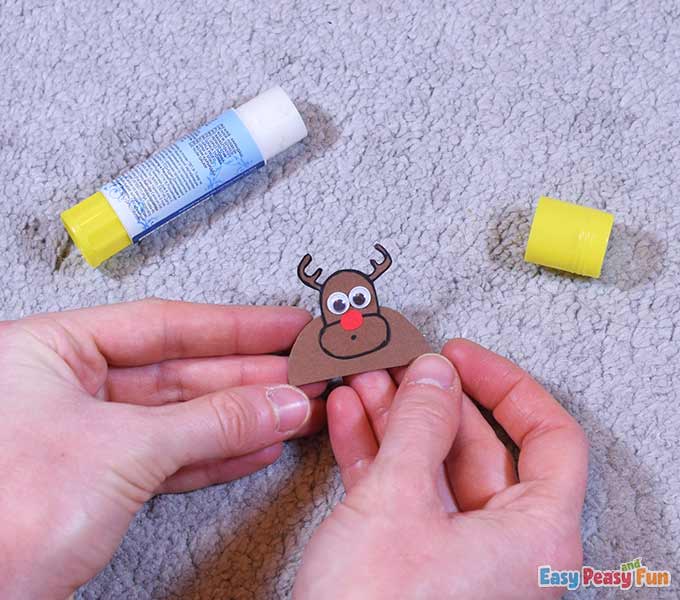
Glue the reindeer inside the box.
Now apply some glue on the bottom part of the pink cardstock and glue it to the box altogether.
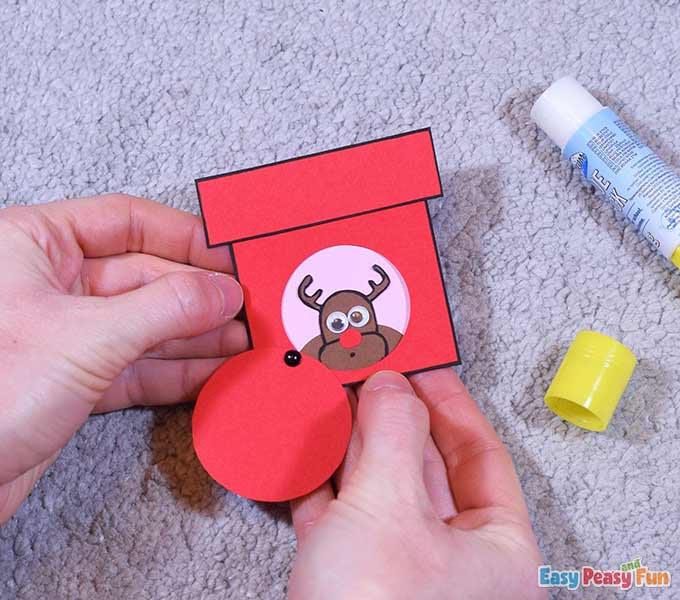
The Candy Cane
On the red cardstock, draw a Christmas candy cane shape and cut it out.
Draw white diagonal stripes on the candy cane.
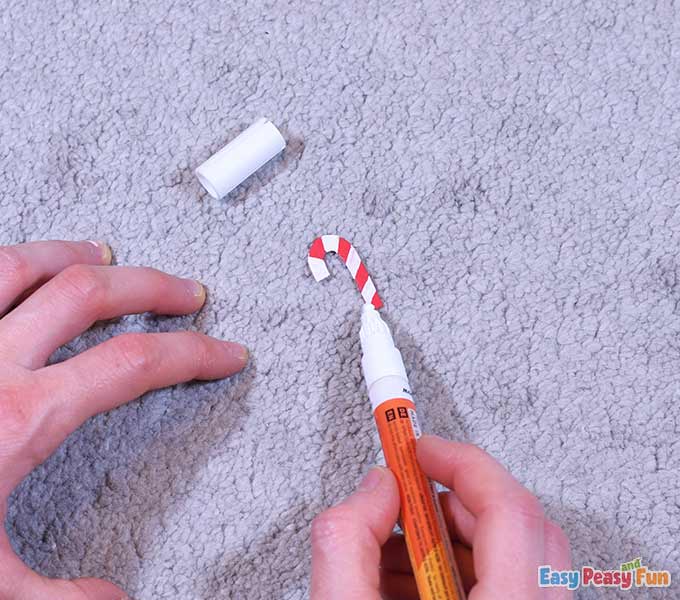
Then outline the candy with a black marker.

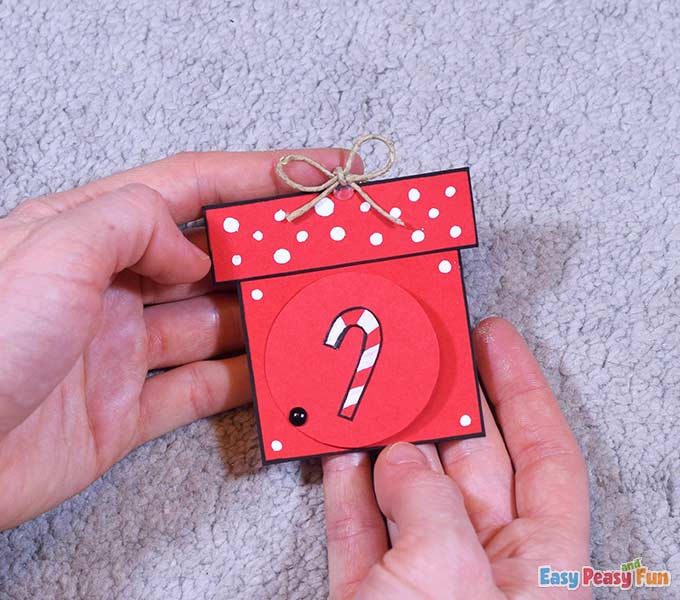
Glue the candy cane at the front of the box, in the center of the red circle.
The Gift Box Decoration
Take the white marker and decorate the Christmas box with dots.
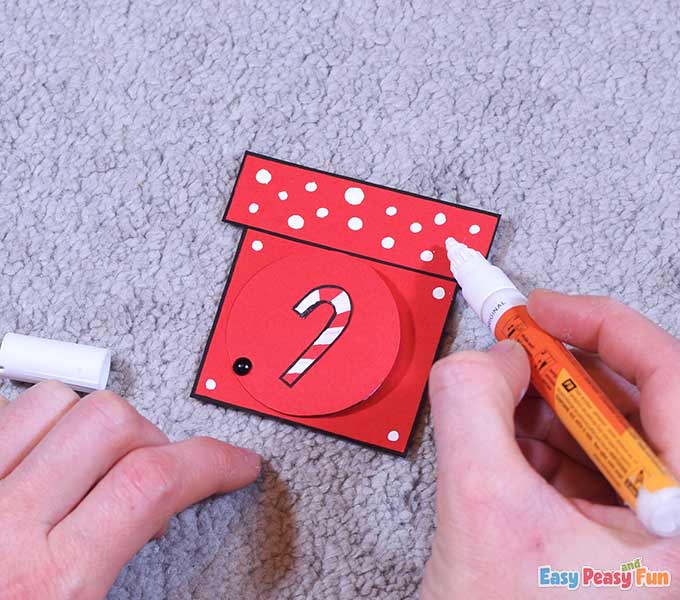
Take the yarn and make a tiny bow.
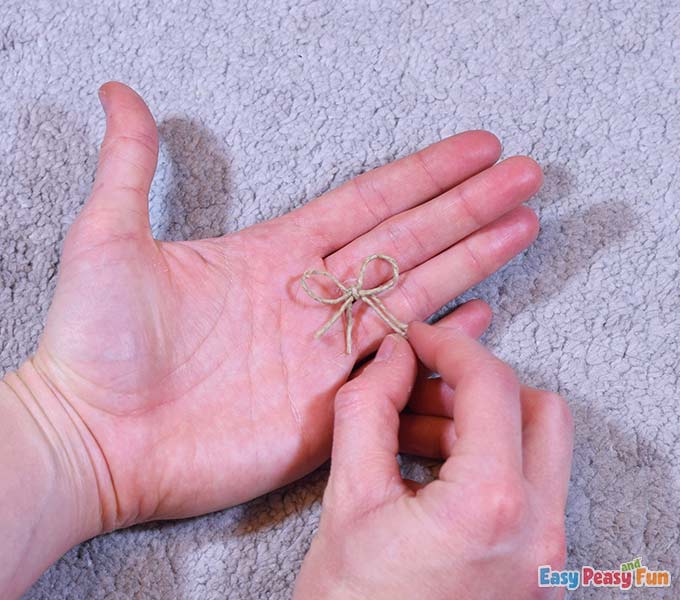
Glue the bow on top of the lid using some hot glue.
Wait a few seconds for the glue to set.
All done!
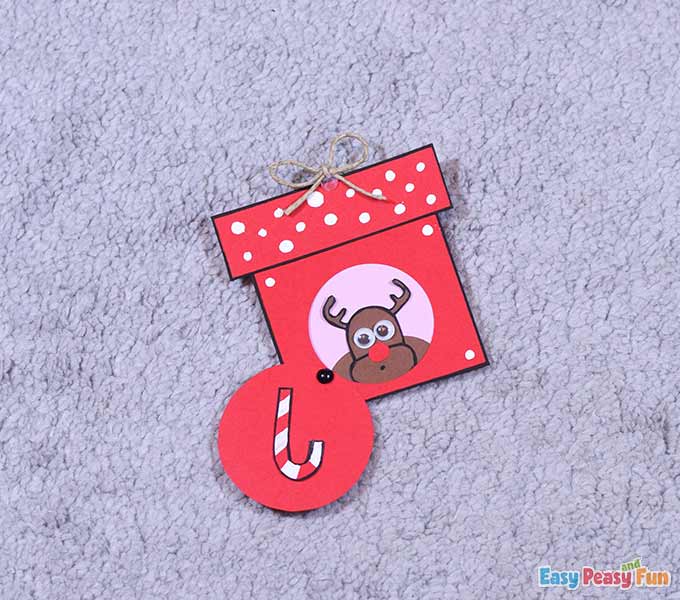
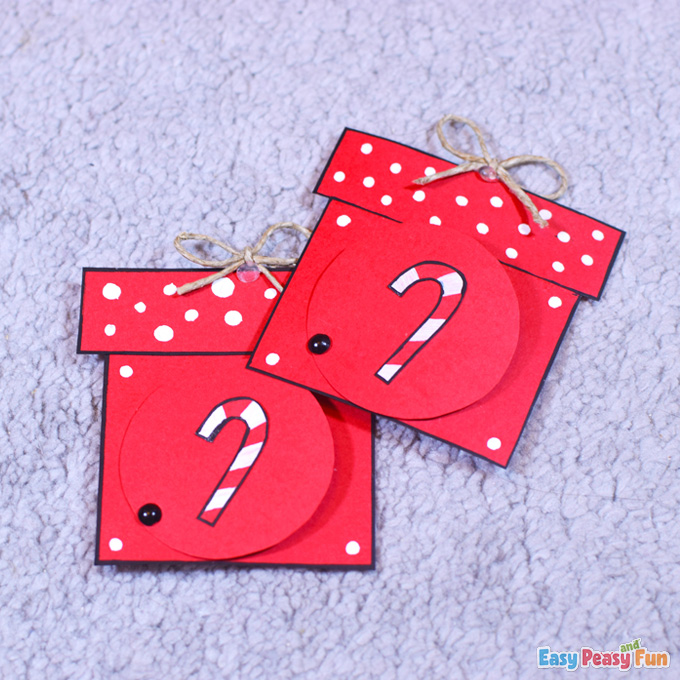
We love how our Rudolph the Reindeer gift craft turned out.
You can make as many as you want in different colors.
Have fun crafting.
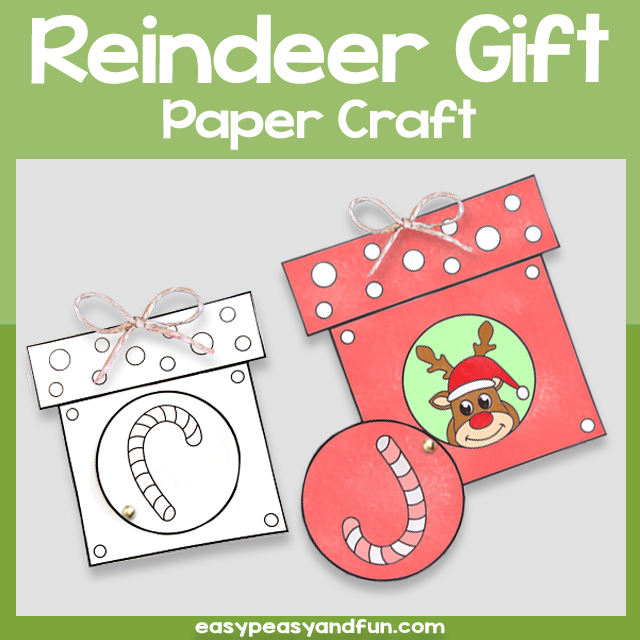
Get Your Rudolph Reindeer Gift Craft Template Here
Want instant access to all of our printable crafts, activities, and resources?

With thousands of crafts, activities, worksheets, coloring pages, and drawing tutorials to print, you will always have just the resource you need at your disposal. Perfect for parents and teachers alike!