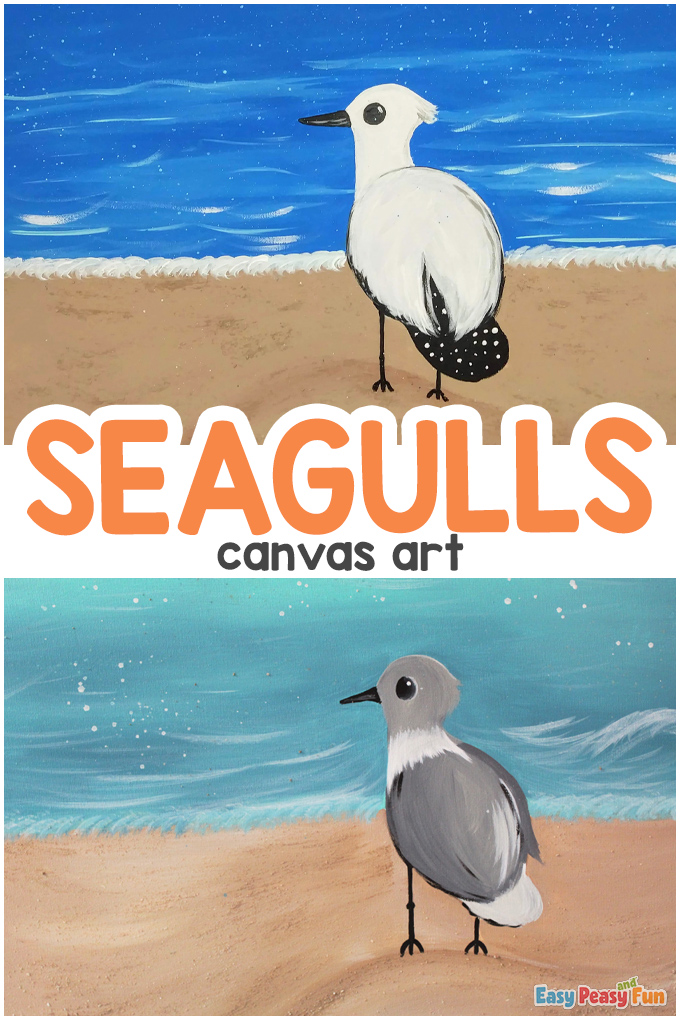
Canvas painting is a fun activity many people have taken on themselves at home. Join us in our Painting Seagulls Canvas Art Tutorial with your kids!
You can do one at your leisure with kids or have a group of friends over and paint together.
*This post contains affiliate links*
We love Summer Crafts for Kids. Indulge your love for canvas painting and spark your child’s creativity by letting them color our captivating Bird Coloring Pages collection.
Not only will they have a blast, but they’ll also gather inspiration for their canvas masterpieces!
Our tutorial will guide you through this painting, and the beauty of it is that you can take the instructions as a guide and then include your touches to make it yours.
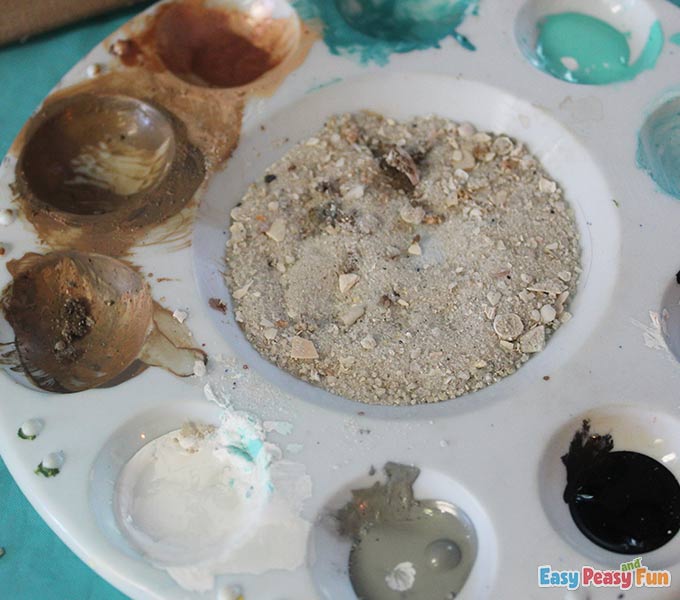
We added beach sand to make texture in the sand in painting, so it creates more interest and is something different.
You can do the same thing, or if you don’t like adding the texture, do all the steps and eliminate that one.
Painting Seagulls Canvas Art Tutorial
What you need:
- 1- 16” x 20” canvas
- water cup
- paper towels
- tablecloth or sheet (disposable party-type cloths)
- 1 tsp beach sand
- acrylic paint (blues, pink, tan, white, black, gray, and any other color you prefer)
- paintbrushes (various sizes, such as tiny for detailing the bird and water, up to a 1″ size)
- easel if you like
- pencil
- eraser
- transfer and tracing paper (optional – if you are making multiples of the same canvas)
Step by Step Tutorial
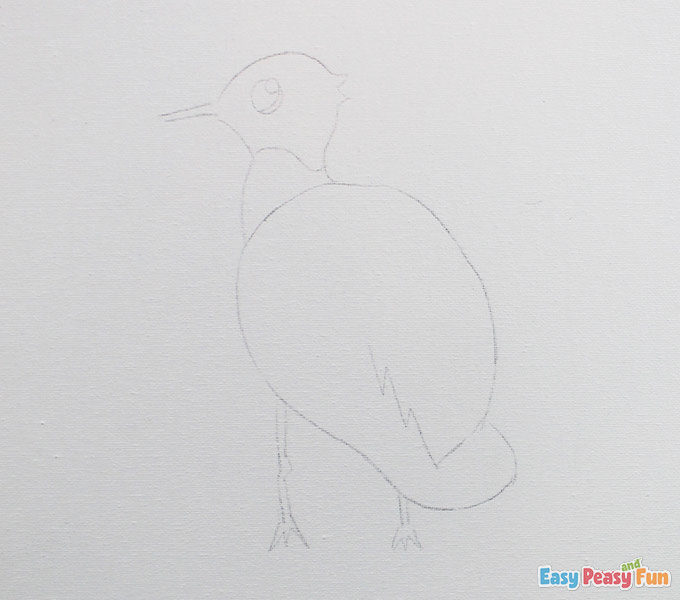
The Seagull Sketch
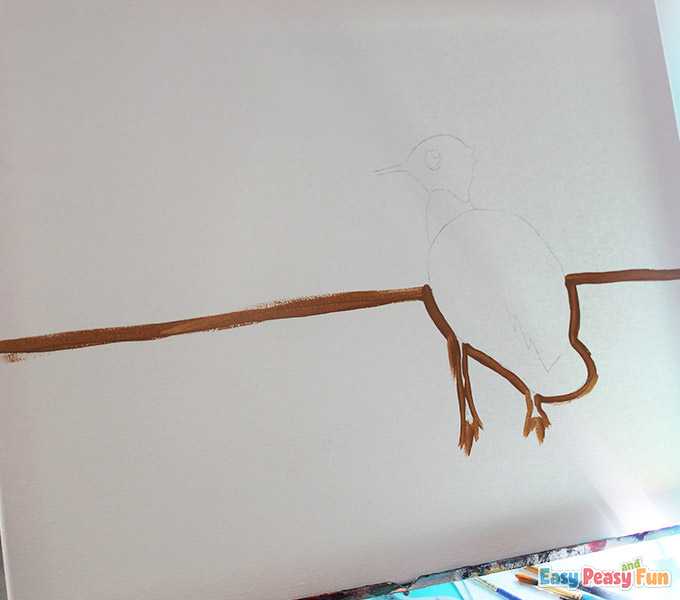
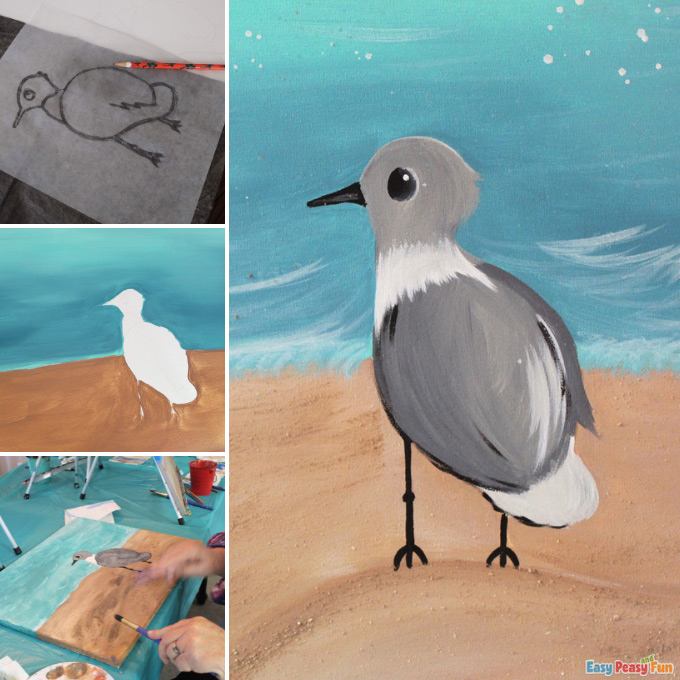
The first step is to draw the seagull on the canvas with a pencil in a rough form.
You want him to be off-center and not huge so that you have plenty of space for water and sand.
He is a long oval in the middle, angled to the right, then extend his tail out from that and add his head and beak.
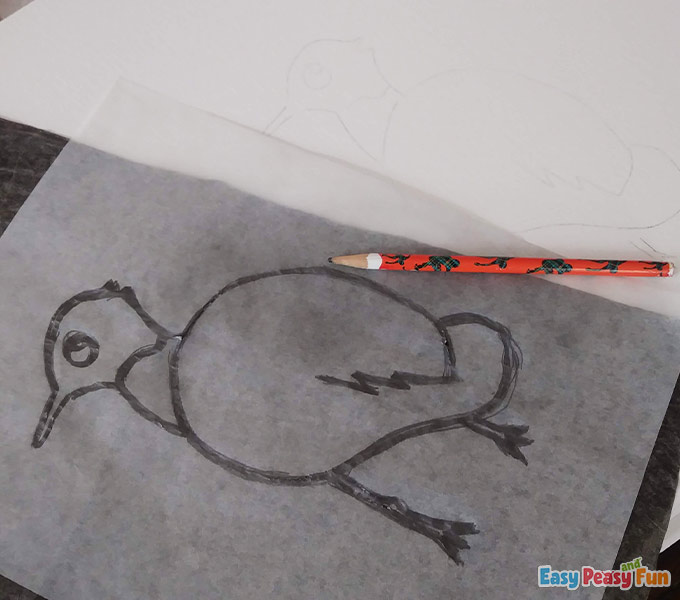
If you are doing this painting with more people, use tracing paper to trace your bird and then transfer paper to add him to their canvases if you don’t want to have everyone spending time drawing.
This keeps the group on the same steps for the most part.
The Sand Line
Once you have the bird all set on the canvas, you can start painting.
You want to begin with a good solid coat of tan on the sand because it takes more than one coat to fill in nicely; browns tend to soak in fast and need more paint.
Using a small to medium-thin brush, paint the horizon line where you prefer it.
You can do it lower or higher based on how much sand vs. how much water you want to paint.
If you prefer more blues in the canvas, lower the line. Paint across the line and extend it around the bottom edges of the seagull.
The line helps you stay in the right spots when filling in with a larger brush.
Once your line is done, move to a large brush, from about a half inch to an inch in size, whatever you’re comfortable using.
Then paint all the sand areas in tan.
Coat it well, but you don’t have to worry about perfecting it this round since you’ll do the coat with sand and paint on top of it later.
Paint in the bottom sides and bottom of the canvas in the tan as well.
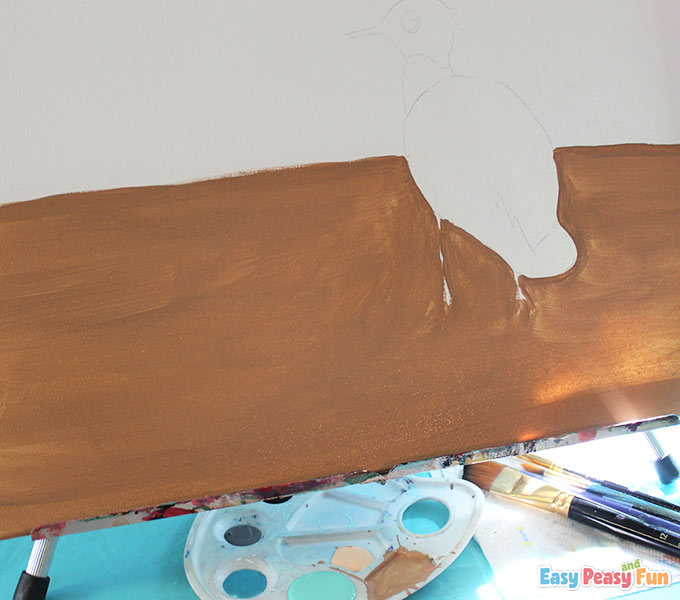
If you’re on an easel, flip the canvas upside down and let it dry for a few minutes before turning it back over.
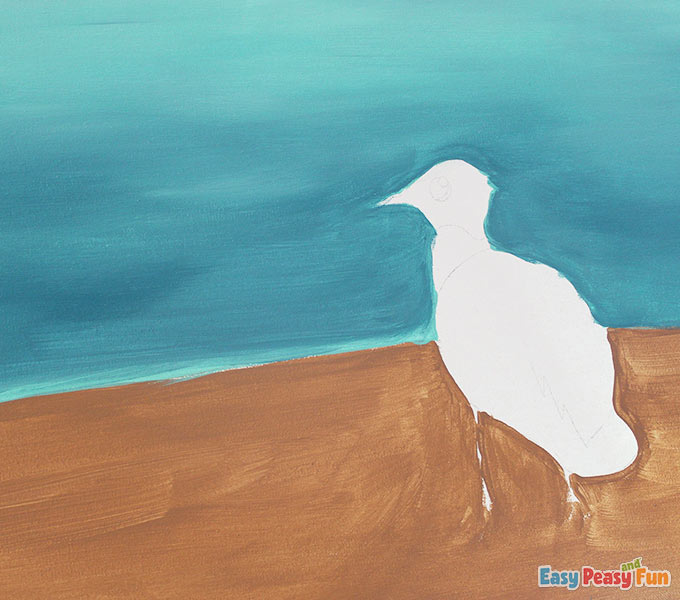
Next, repeat the steps for the sand with the watercolor you chose.
Paint a thin line right at the sand’s top in the blue, so it’s pretty straight and neat (it doesn’t have to be perfect, you will paint over it later), and paint around the bird’s body.
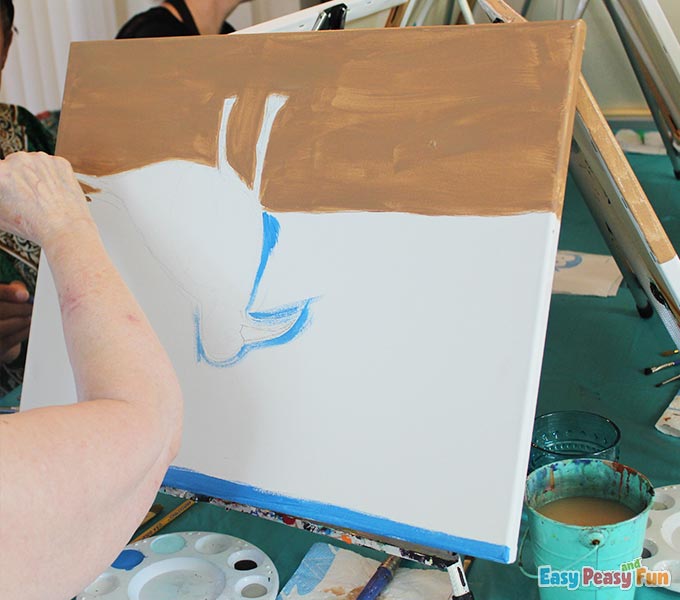
Next, fill in the rest with a large brush until the top half is watercolor.
Don’t forget to paint the sides and top of the canvas.
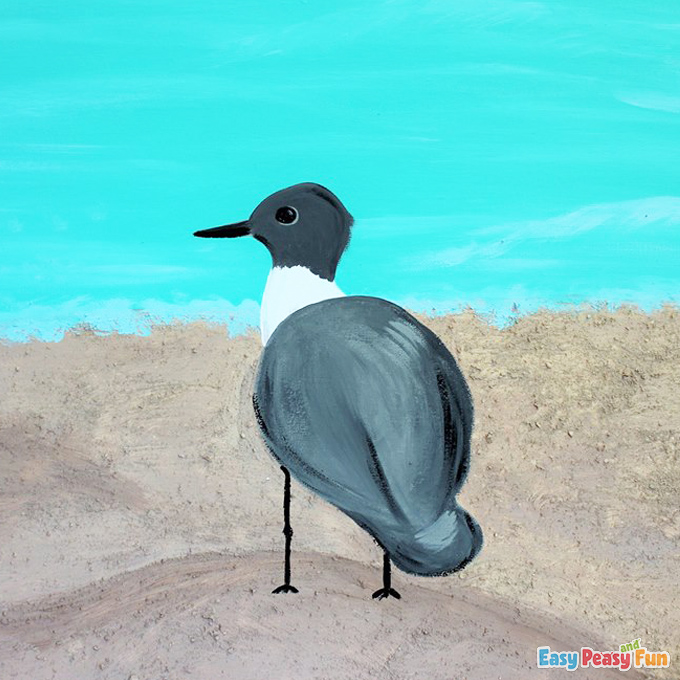
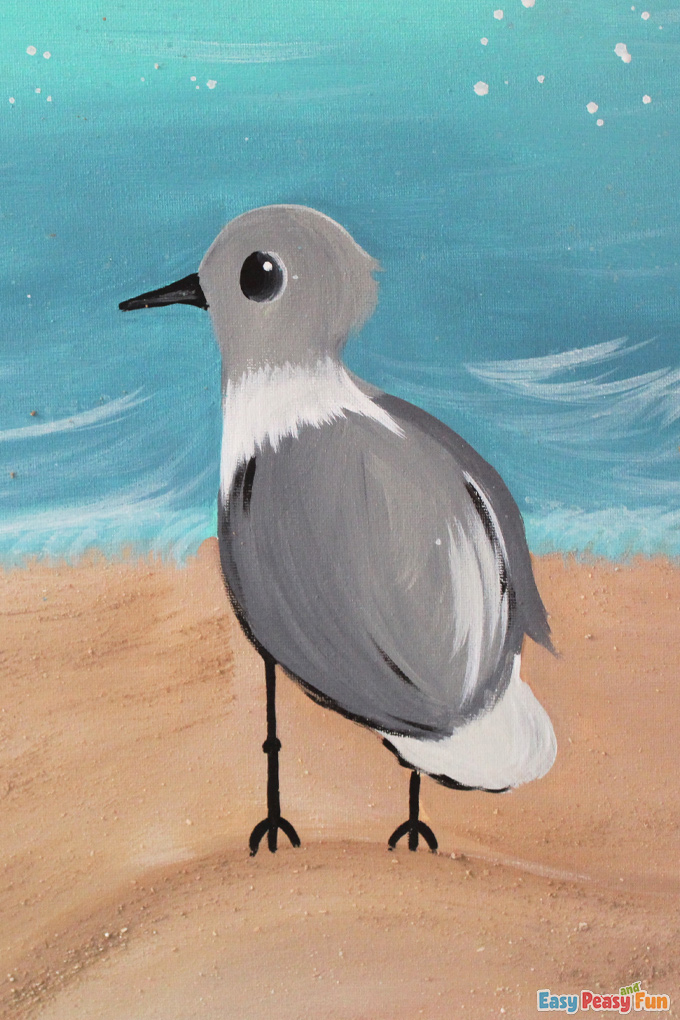
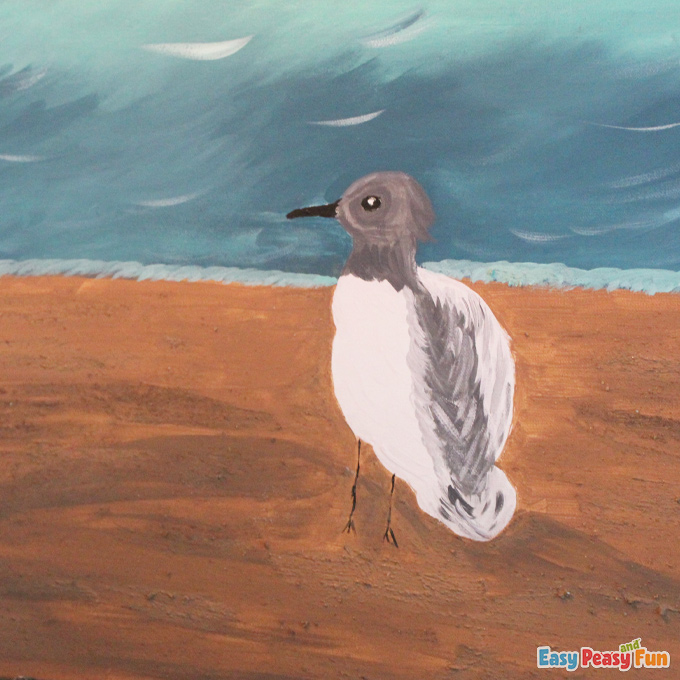
The Seagull
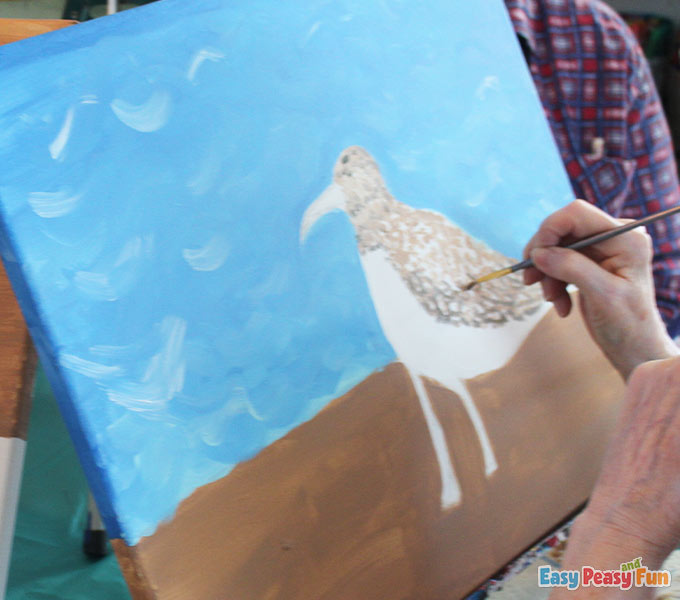
While the sand and water are drying, it’s a good time to start a coating on the bird.
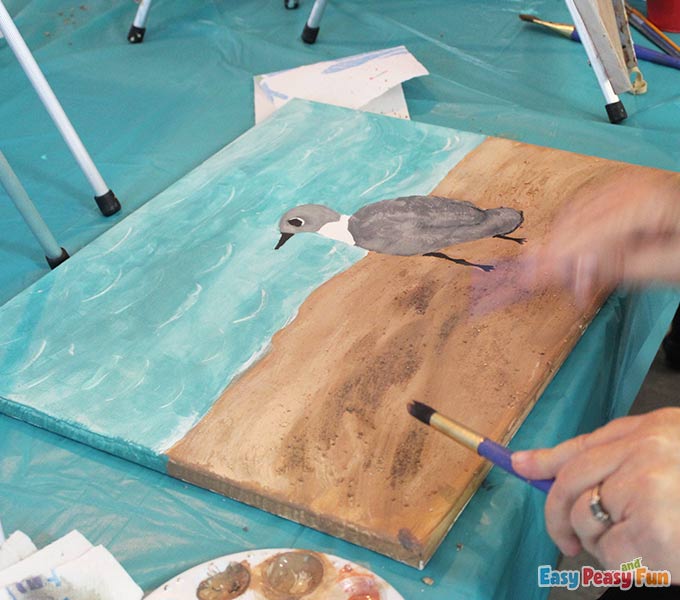
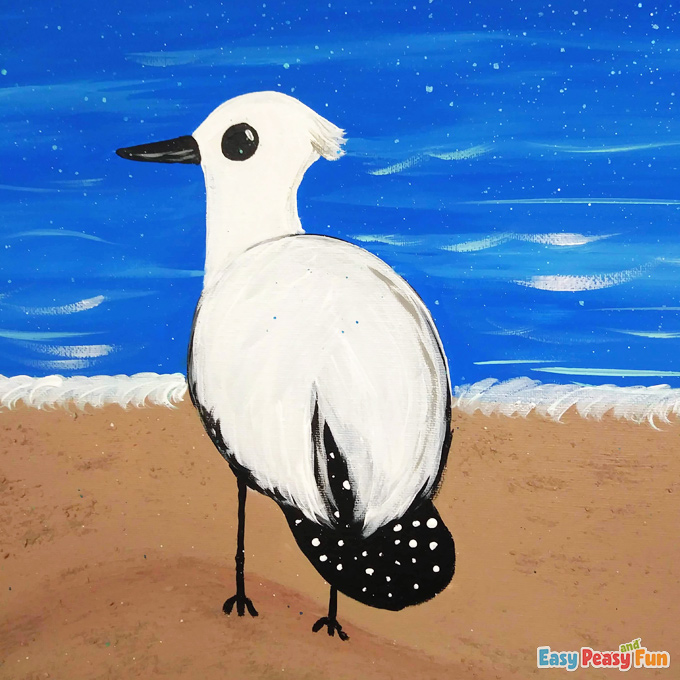
For the gray and white bird, paint his whole body other than his head in a solid gray.
You can use a dark or a light gray; part is your preference, but this is giving an under-coating to him, and you will add feathery layers later, so this helps give him dimension, so it’s ok if it’s darker than the outcome you want for the final color.
Black is too dark, so if you do a black tail, paint black on the tail and edges of his body and up the middle only.
Then paint the rest in white, which can blend with the black also, that will come out nicely.
Paint his head white (or whatever color your chose), leaving the eye and beak, and then paint those in black.
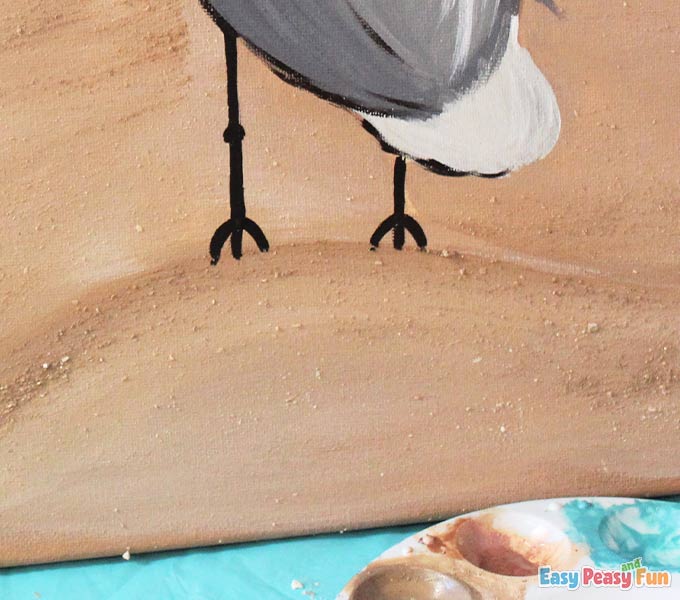
His legs are not getting painted in yet, so don’t worry about those.
The Sandy Beach
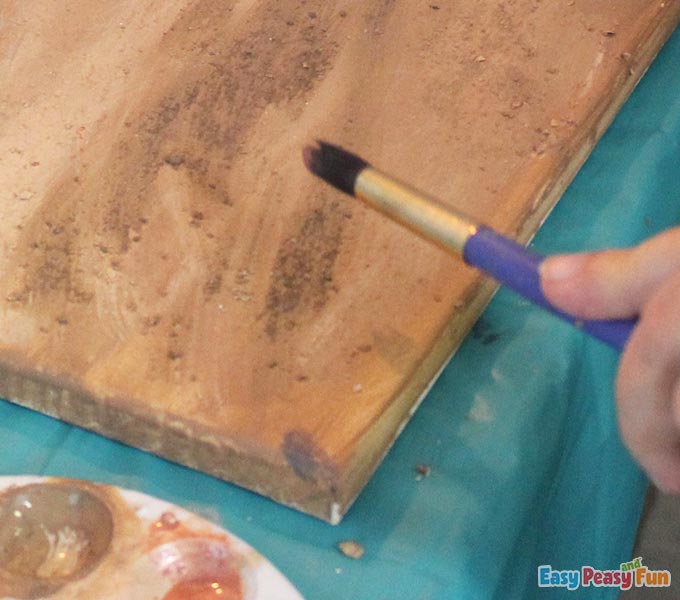
Now, we add the sand and a second coat of paint.
Take an empty spot on your palette or plate and add 1 tsp of sand.
Using a medium to large size brush, dip the brush in the tan paint and directly into the sand.
Follow the next steps of our painting seagulls canvas art tutorial.
Establish a little hill under the bird to give him a place to stand by making a half-circle shape there, and you can add more ridges or humps in the sand in other areas if you like.
You want the main one to be with him, so it brings the viewer’s attention.
Use the sand color and a tad of gray to make lighter and darker shades of sand as you go.
Add the darker shade to the hill he’s on, on one side and a bit under where he’s standing like a shadow.
The sand tone should be added in flat areas that would get more sun than others.
Keep dipping in the sand and paint and adding it until you feel satisfied with the amount you have.
You can coat it, or you can do a small, subtle amount.
The sand sticks pretty well and efficiently in the paint, and we have had no trouble with it not staying put.
Some people like to glue on a few little shells at the end, so if you like that idea and want to have some in your sand, save them to the side.
The Sea
You can do two tones of watercolor, one darker than the other, or do the one and use white to add accents.
Return to the blue you painted and see where it needs touching up.
You’ll want to blend the colors. Blending takes a lot of layering and patience at times.
Take a medium to large brush and dip one corner in one blue and the other in the other blue, then paint it horizontally, blending them in your chosen area.
You can keep the darker tone to the bottom half and the light towards the top.
If you find that it is not going smoothly or your brush is dragging, you probably don’t have enough paint on the brush.
Keep going back and forth with the dual colors on the brush until you feel like you have enough of the second color on. Then add the lighter tone, blending it all in until it’s smooth and you’re satisfied.
The Waves
The last step to finish off the water is to add accents of white to establish movement in the water.
You can use straight white or blend white with the blue you used if you prefer it to be more subtle.
Take a thin, small brush and put in some random lines to make the water look dimensional, and you can also add a wave or two if you like.
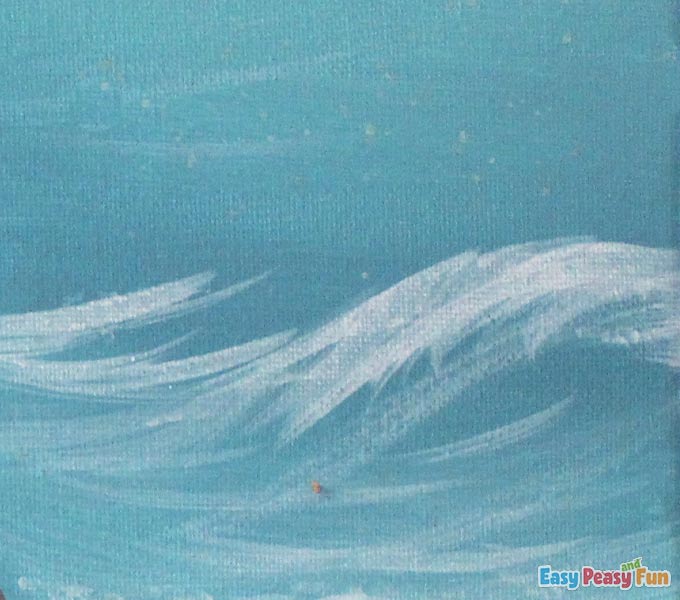
The Shoreline and Waves Painting
Make a line of water coming in by making half-circle shapes, one beside another, down the water line.
Step back from the painting, see where you think it may need more white, and add that in if needed.
You can also add a touch more to add a little more pop by splattering dots of white as well.
To do that, mix white paint with a brush full of water and thin the color out.
Then, hold the brush over the canvas while laying it flat on the table, and tap it with another brush to get small splatters.
This gives the idea of the water splashing. The higher you hold the brush, the smaller the splatter will be.

Once you like the water, you have to finish off the seagull.
The Seagull Details
Add any second coats he may need, using a smaller brush to do the outside lines of his body so they stay smooth and clean and to add in a feathery look.
Paint in some lines where his wings are on his back to give dimension, following the curve of the wing.
Shadow the underneath part of him by adding a darker tone, like gray or black.
On the beak and eyes, add a highlight to the eye, and along the center line of the beak add either gray or white, just lightly.
You can add a small outer circle along the eye in contrasting colors like white or gray.
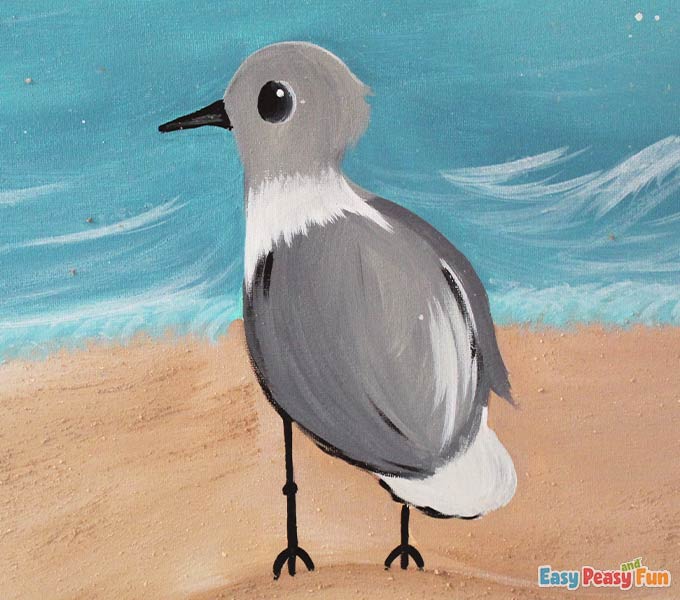
Take a tiny brush with black paint and paint on the legs and feet.
At this point, you should be all done – check out your sides and edges, and step back to see if you think anything needs more.
Let it dry for about 20 minutes, if possible, and you’re good to go!
Inspire children to unleash creativity and freely express themselves while crafting their seagulls.
Every painting holds its distinct beauty and uniqueness.

We hope our painting seagulls canvas art tutorial was fun!
Want instant access to all of our printable crafts, activities, and resources?

With thousands of crafts, activities, worksheets, coloring pages, and drawing tutorials to print, you will always have just the resource you need at your disposal. Perfect for parents and teachers alike!