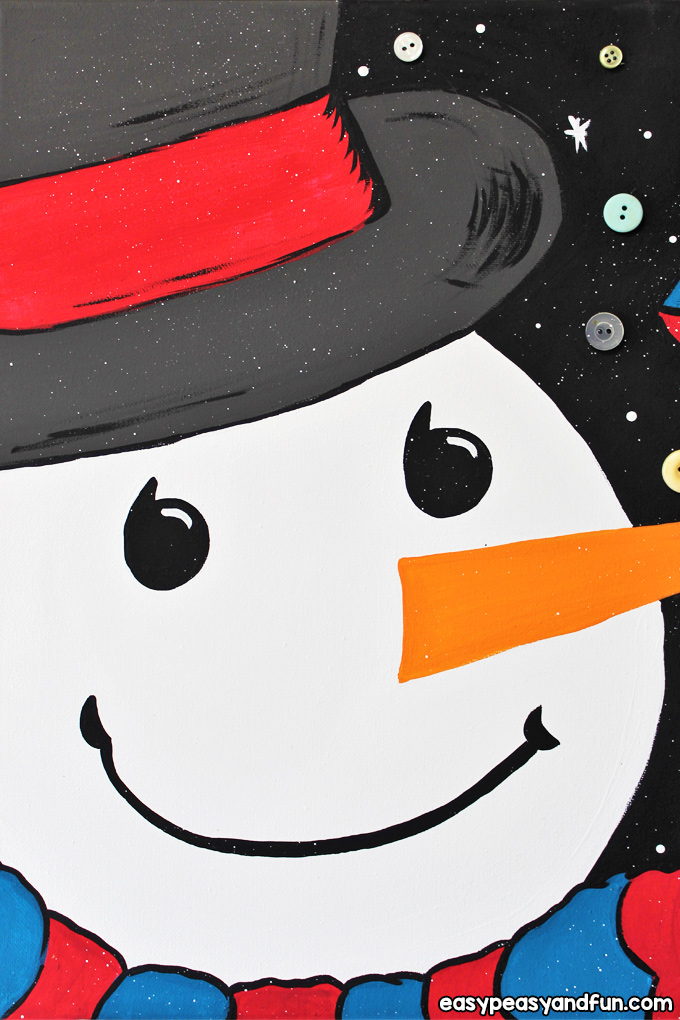
We are back with another acrylic painting tutorial for beginners – this time we are showing you how to paint a snowman.
This easy to follow step by step painting tutorial will teach you how to paint a festive and wonderful looking painting in no time.
*this post contains affiliate links*
Canvas painting is a very popular pastime at the holidays, and snowmen are easily one of the most popular things to paint.
They are festive, friendly, colorful and easy to paint, and everyone can create their own version since none really look the same anyway.
This canvas was designed to be a fairly simple one to paint with the scarf added so that it would be easy to customize and add a personal touch to by choosing your own color combination.
I will walk you through the directions from start to finish and you can change up any details of your own snowman that you may want to do differently.
The buttons are added last to just change up the standard painting project but they can easily be left off too.
You can also do multiples with your friends and make it a fun party, too!
How to Paint a Snowman
What you need:
- 16” x 20” canvas
- pencil and eraser
- large plate for outlining the circle for his head – around 10 to 12” is good
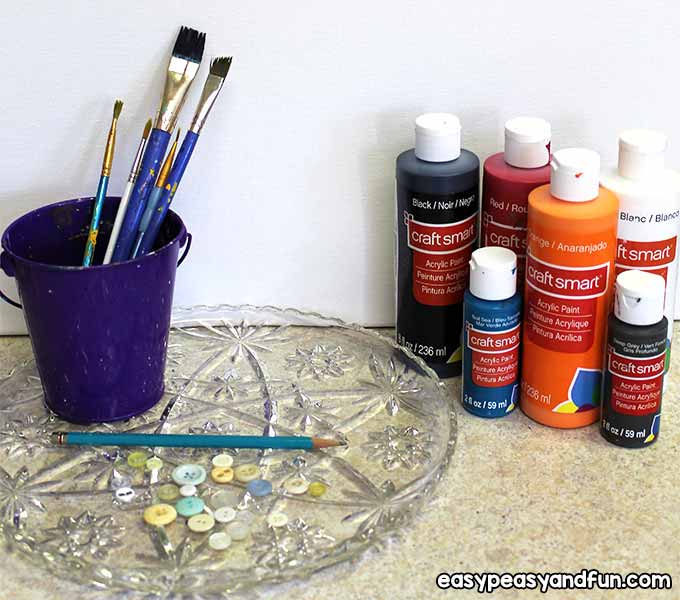
- acrylic paints in your color choices – I used white, black, dark gray, orange, deep teal, and red
- palette or paper plate and brushes ranging from tiny for detailing up to about 1” size
- paper towels and a disposable tablecloth or drop cloth
- easel if desired
- cup of water
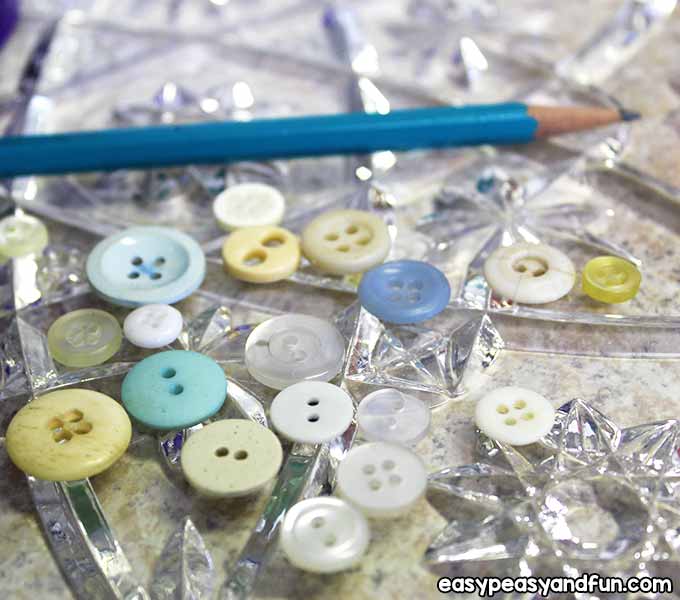
- hot glue gun and various sizes and shades of white/light blue buttons
Step by Step Instructions
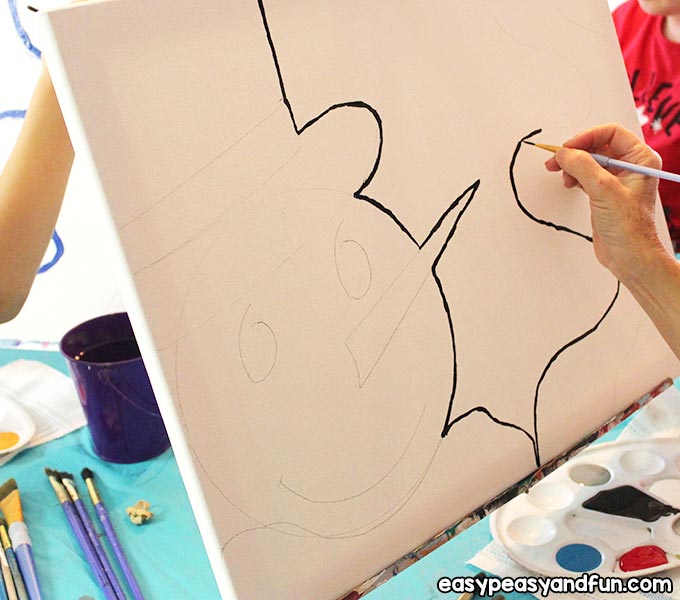
You want to begin by sketching out the snowman shape, starting with his head.
I used a clear glass plate because it’s easier to see where you’re tracing, but any large round plate will do.
Place the plate all the way to the far left of the canvas just above the bottom and let the edge hang off a bit.
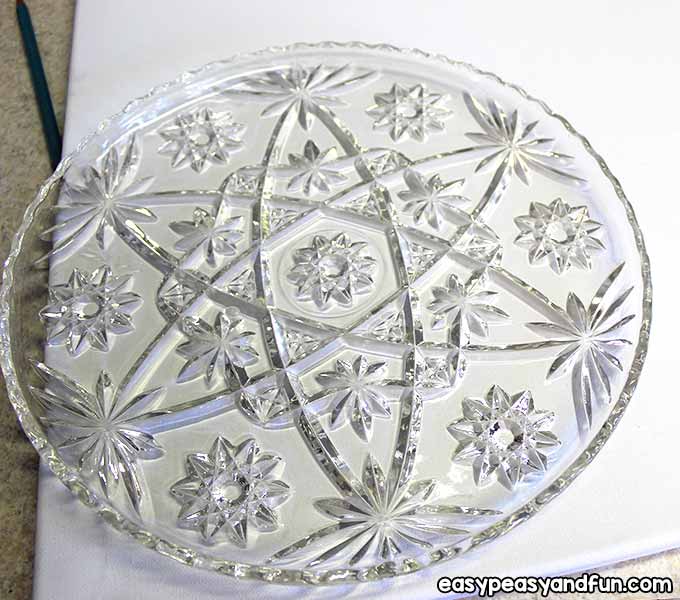
Then trace the circle.
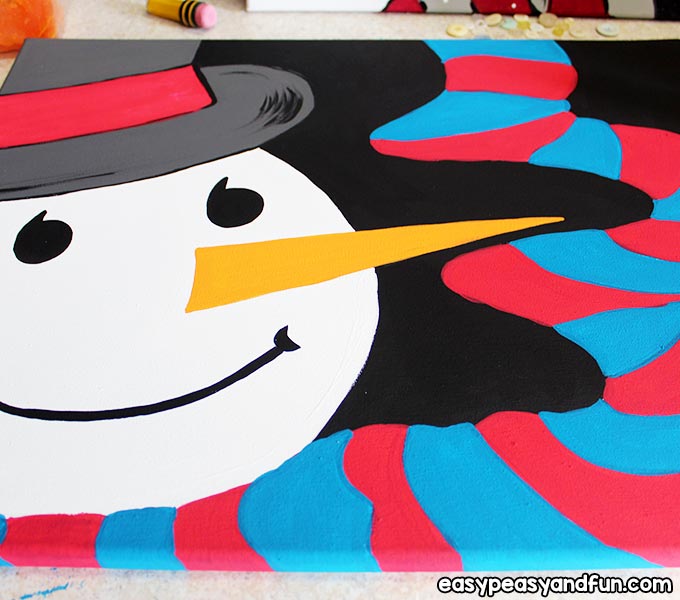
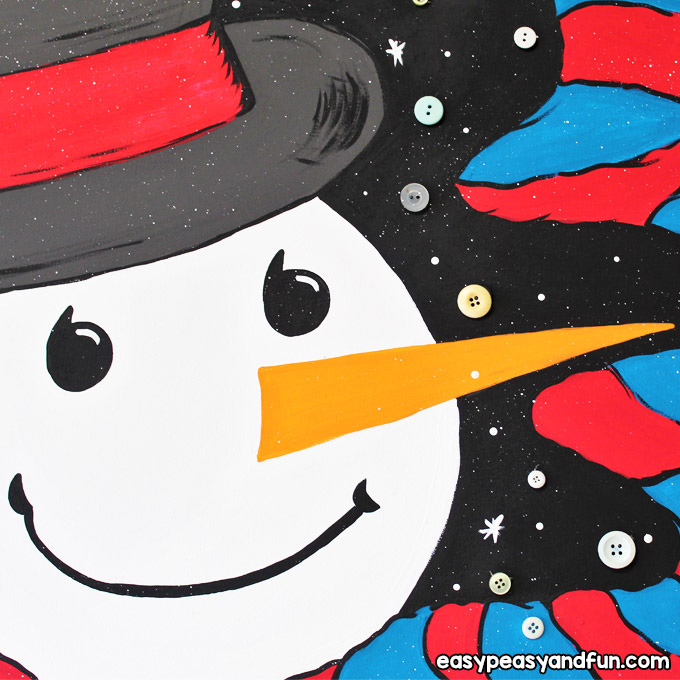
Next, sketch over the top part of the circle for the rim of the hat and then add in the hat band and sketch a line from there to the top of the canvas for the top of the hat.
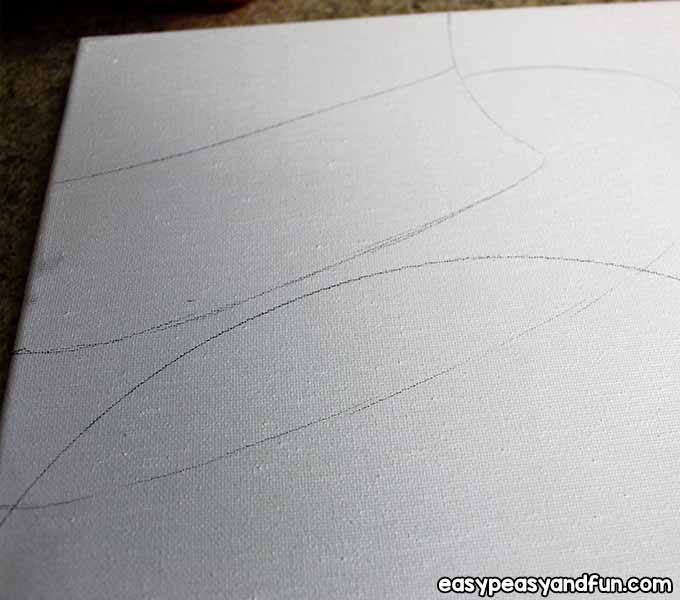
The hat should also overlap and run off the canvas to the side and off the top.
You can then erase the overlapping line where the hat hits the head if it helps you stay on track as far as where to paint later.
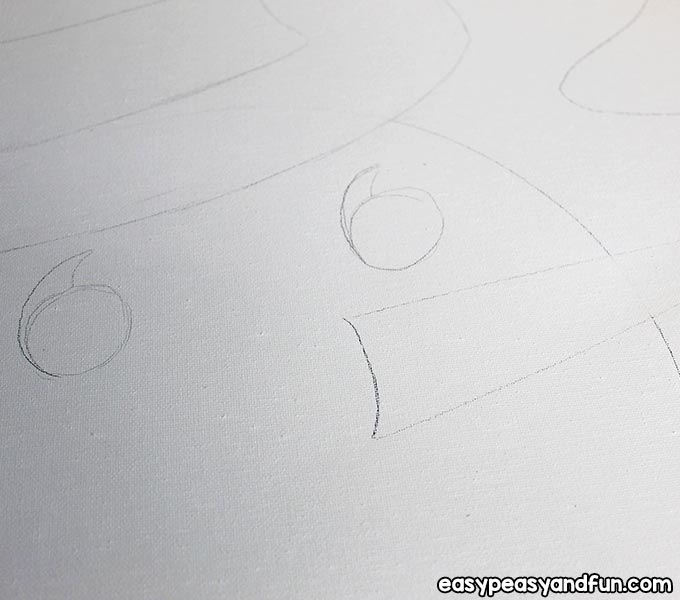
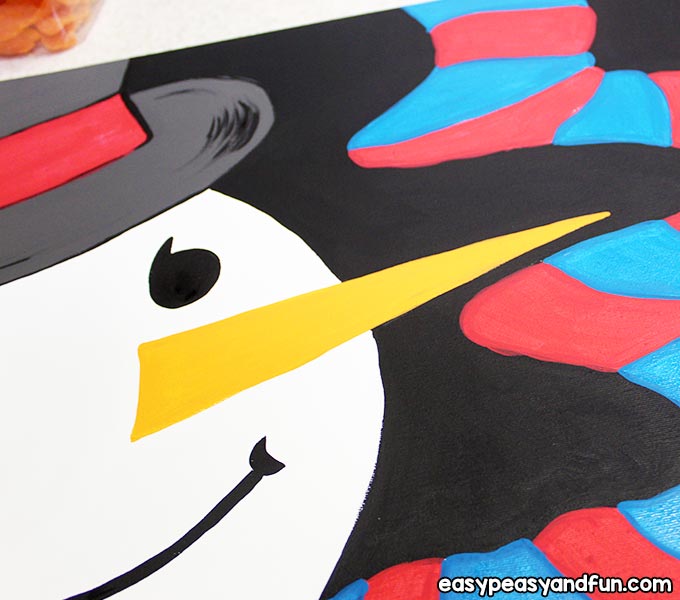
Now, draw in the scarf and face details.
You can use a ruler for the carrot if you want it to be straight, but carrots aren’t normally too straight so don’t stress that part too much.
The scarf should come along the bottom of his face, and it can overlap his chin area, then it should look like it’s flapping in the breeze and going back and forth some along the opposite side of the canvas.
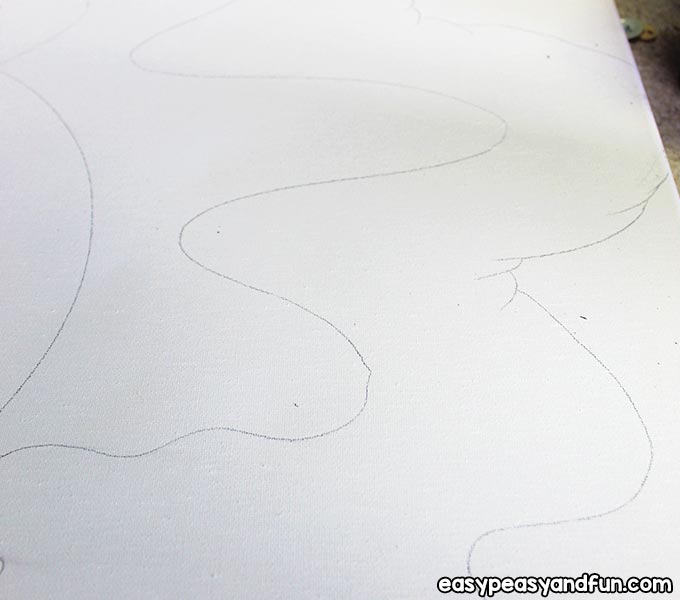
You can elect to draw in the stripes or you can paint it a solid color and add a pattern as well.
Lots of options with the scarf, and it is where your personality shows so choose colors that you love.
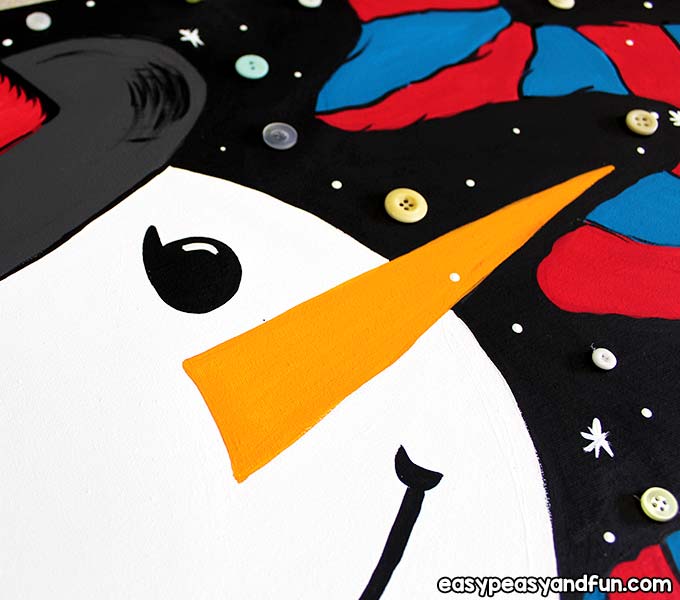
The face should have cute eyes, I like to draw mine like an upside down comma, but circles are fine too.
If you are planning to do the entire painting in one sitting or with a group, you will want to have the glue gun ready and buttons set out, even though it’s the last step, it arrives quickly and since people paint at different speeds, it is good to remember to plug the glue gun in when you get to about the point where the scarf is filled all in and you’re adding the last details so it warms up well.
Set up a station for that if you have a spot for it.
Now to start painting!
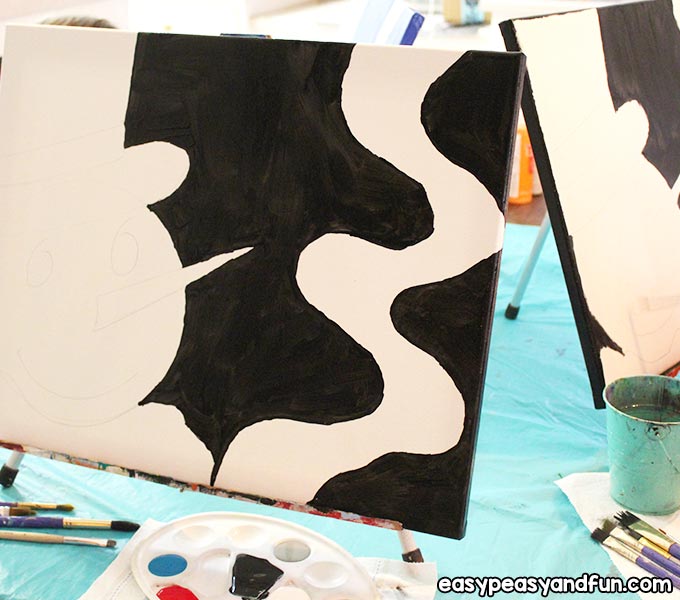
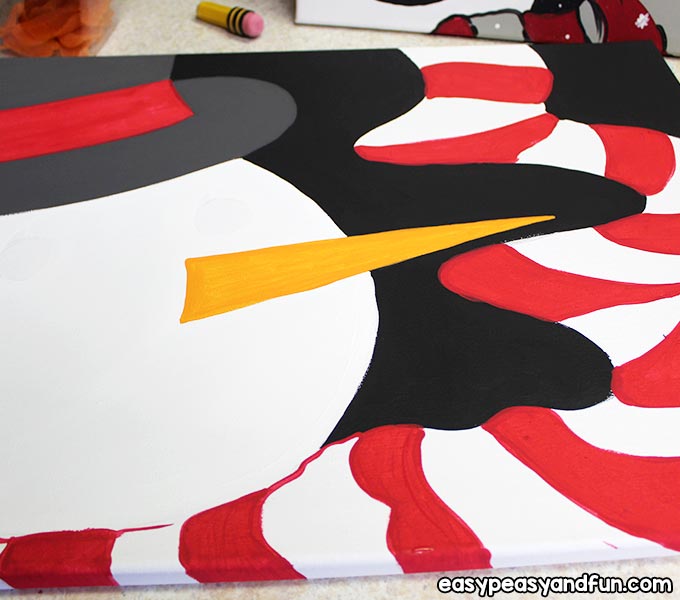
First, use a thin rounded brush and paint an outline around the snowman in the background color.
I always dip my brushes in water the first time I use them to loosen them up and help the paint flow.
Blot the excess water off on to a paper towel and then dip in your background color.
Mine was black.
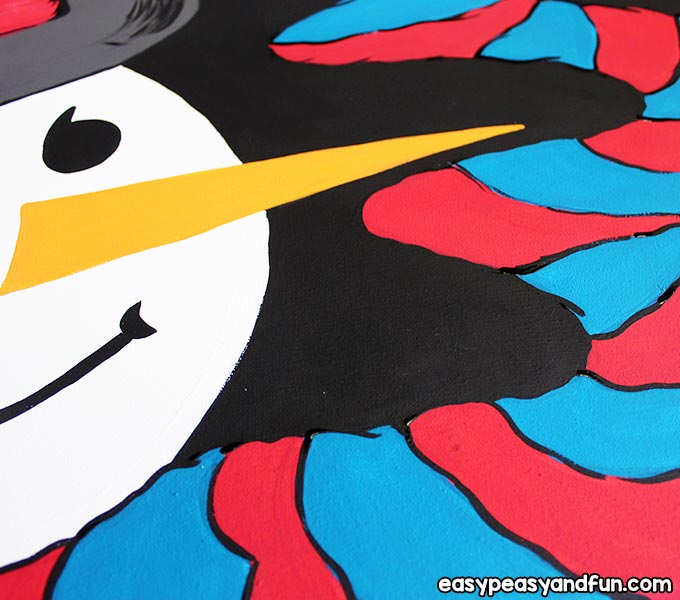
Paint around his hat, his face, nose, and scarf on both sides…
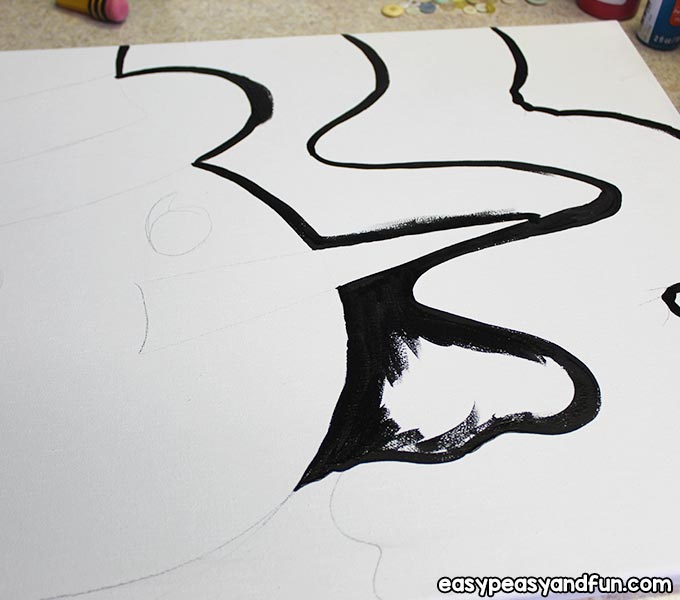
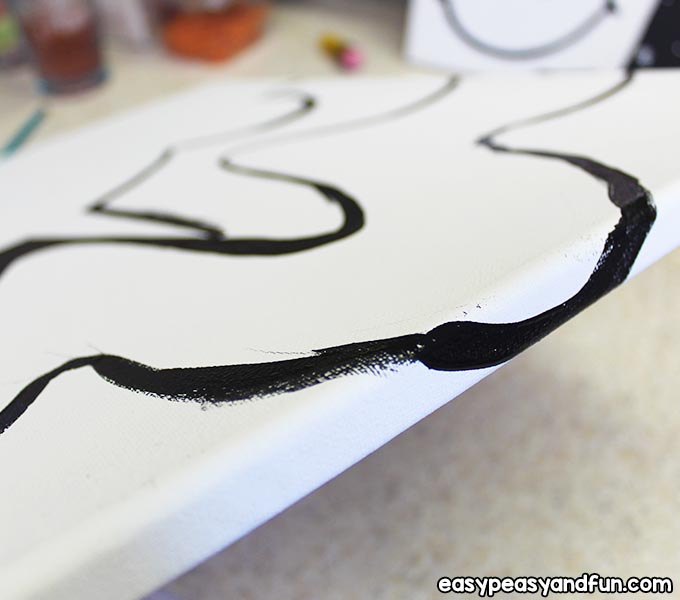
… and make sure to extend those lines around all the canvas edges too.
Then, go in with a larger brush and paint in the whole background well.
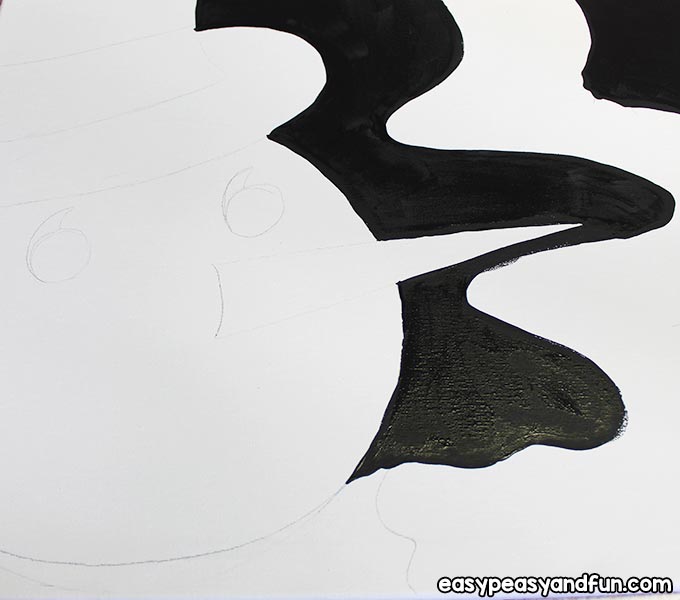
Depending on the color you chose, you may need a second coat, but let the first one dry a bit so you can tell where you really need it.
You may only need to just fill in a few places.
Next, repeat the steps of outlining on the hat in your color of choice and outline around the hat band too, leaving it white for now, and then paint in the top half and bottom rim of the hat.
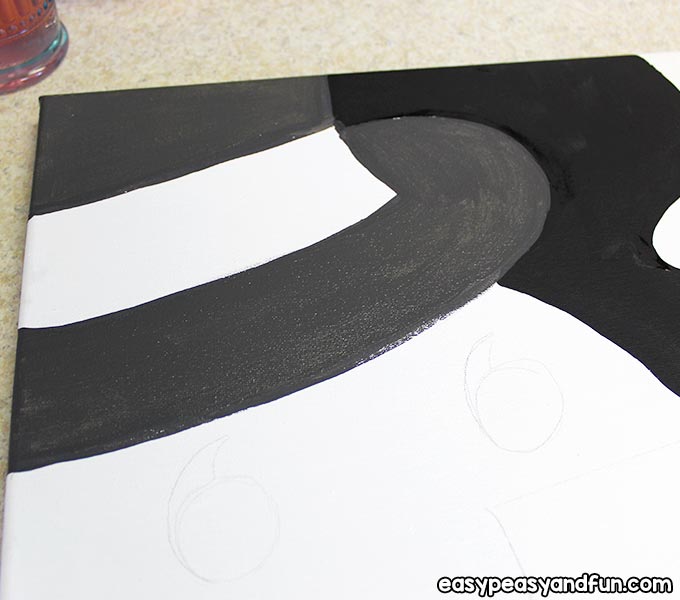
You can probably go back now and finish up the background painting.
Be sure to check out all your edges and if you’re using an easel, you can flip it upside down for a few minutes to paint it in if needed.
Let it dry for a few minutes. It is good to get up and give yourself a break for a few anyway, so this is a good time for that.
Choose your buttons now if you want to.
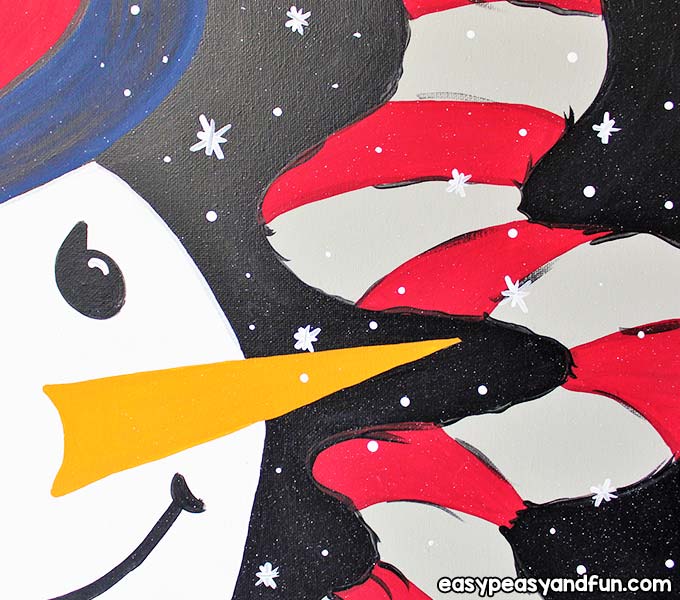
Once the background is pretty dry, go ahead and paint in his face in white. It may seem silly to paint it white when the canvas is white, but it helps the whole thing have the same finish and helps disguise pencil lines.
You can leave the carrot unpainted so that when you paint it in, it has an even finish overall.
Paint right over the pencil lines you drew for the face, they will still show through a bit, and if they don’t you can always draw them again, but I had no trouble seeing mine. It should just take one quick layer of paint.
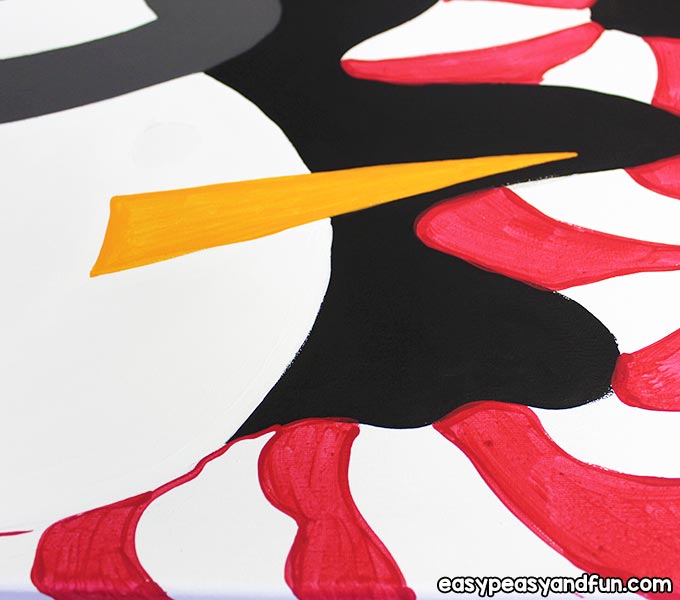
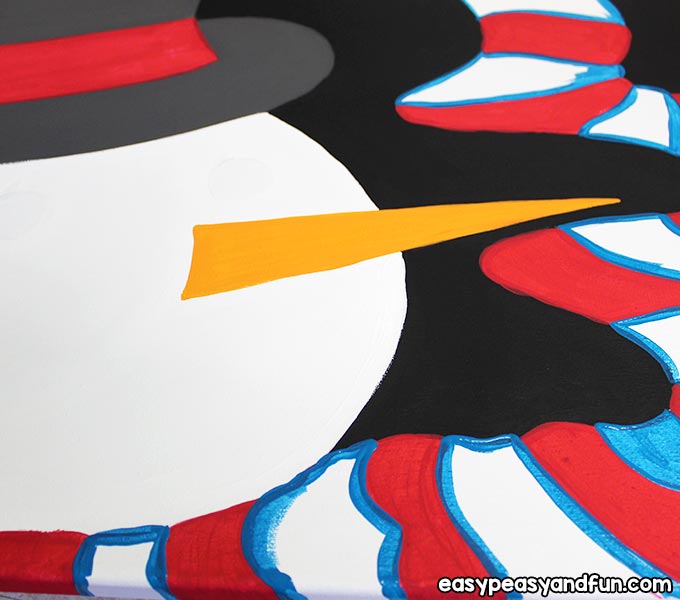
While the white is drying, paint in the hat band color and then the carrot.
Your next step is to start the scarf.
I suggest using one of the colors you plan to use on the scarf for continuity, but that’s totally your call.
Painting the carrot first may cause the orange to blend with the white, I learned that the hard way, so it helps to do the hat band first.
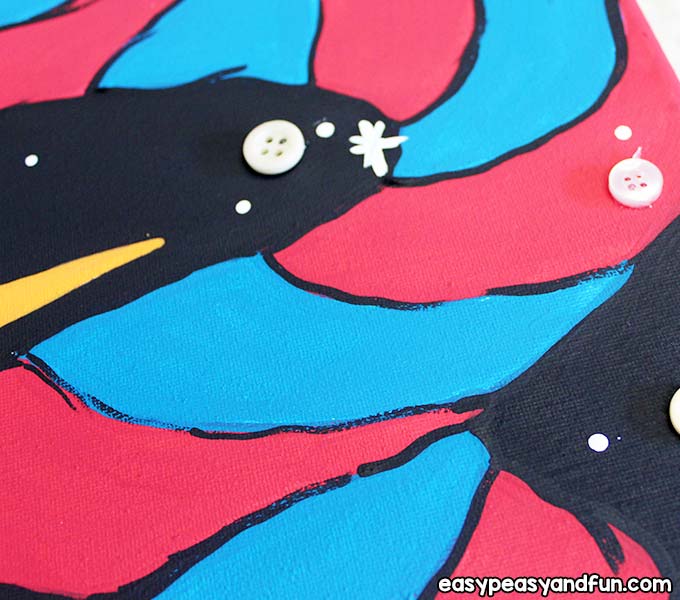
If you are using the same color as the hat band for one part, do that first since you were already using that color, and then alternate to the other color if you’re striping it.
If you’re doing a solid color, then paint the whole thing, let it dry, then do a second coat if needed and allow time to dry.
While the scarf is drying between layers of paint, you can work on the face.
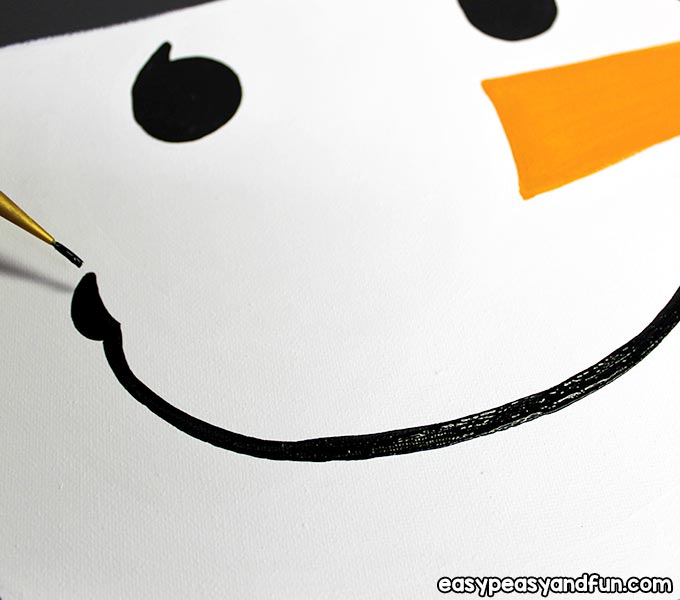
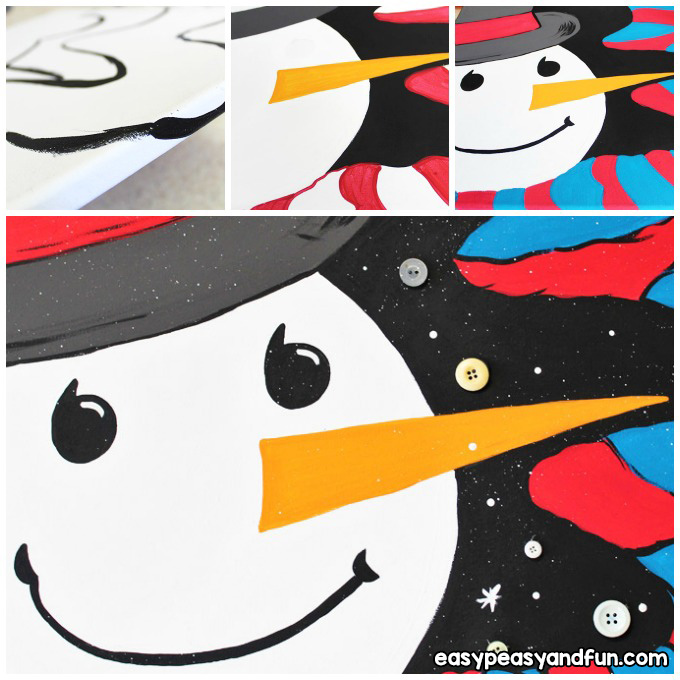
Use a fairly small brush and outline the eye shape first, then paint it in with a slightly larger brush.
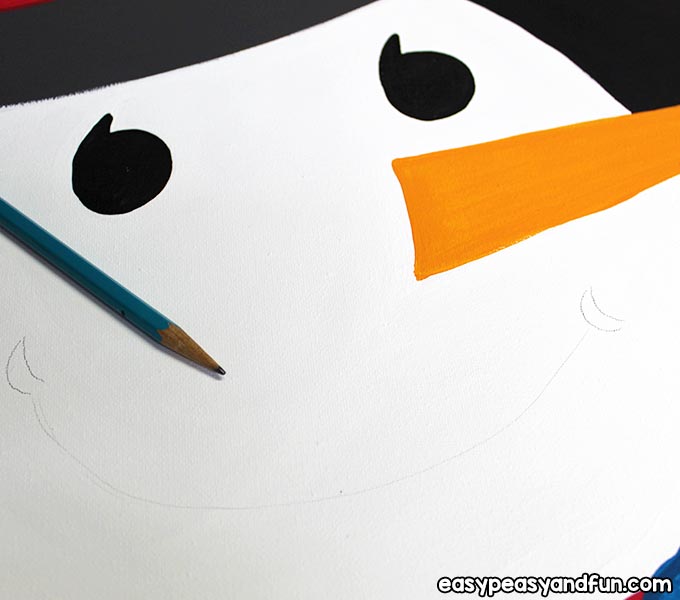
This helps keep you from going larger than intended with the size.
For the mouth, paint a thin line first, then go back and thicken if you like. I also added little circular shapes to each end of the smile.
Keep working on your scarf until you get good solid coats of paint.
You don’t want any canvas to show through or brush strokes, so if you still have some, keep working at it. Add any patterns you like if you did a solid color.
Now, let’s add finishing details. (This is a good time to plug in the glue gun if you haven’t done so!) Taking a very thin brush, add in some light outlines to the hat and the scarf.
On the scarf, outline the stripes or along the edges, but don’t make the lines totally solid. It is to help give it the look of floating and moving.
Then add some motion lines here and there and a few that look like fabric folds, small curves are best. With the hat, the color will depend on the hat color. If your hat is black, use gray or white. If it’s gray, use black.
Add some half-circle lines to the curve of the rim, and to the edge of the hat band, to give it some round shape.
Also, a few light lines along the edge of the top helps too.
This makes the hat look less flat in the painting.
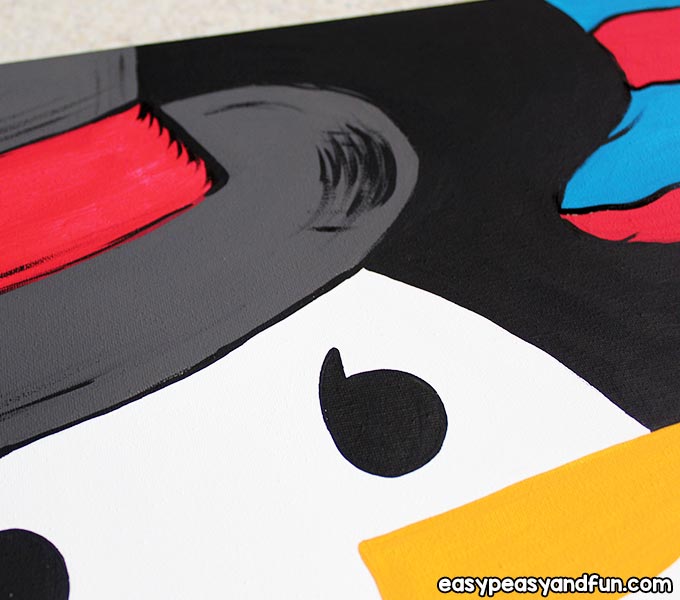
Also, add a highlight in white to the eyes. Make a small, half circle or dot to the same spot in each eye. This brings him to life.
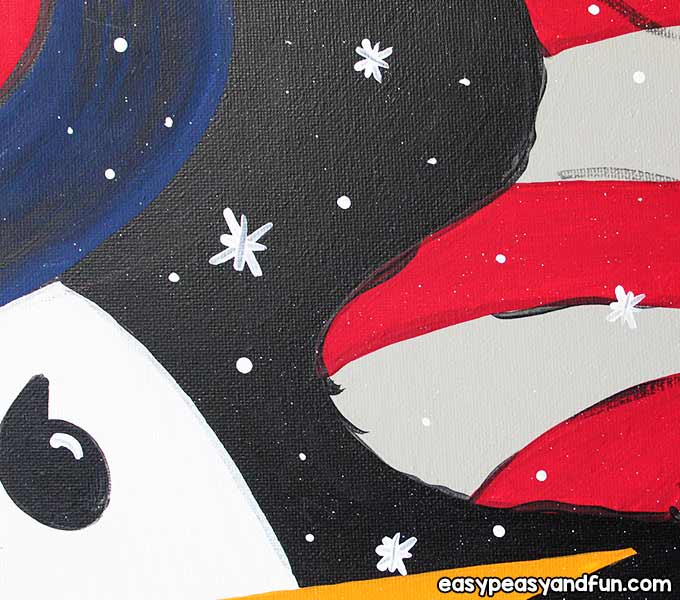
The last step in painting is the sky. I added a few twinkling star shapes and some dots to the background using a small brush…
…and using the back of the brush handle for the dot.
Then, to add the splattered stars, take one of your larger brushes and dip it in water. Then take a small amount of white paint and mix it together on the plate.
You need a thin layer of white that is wet, but not soaking.
Hold the brush out over the canvas after laying it flat on the table and tap it gently with another brush of about the same size.
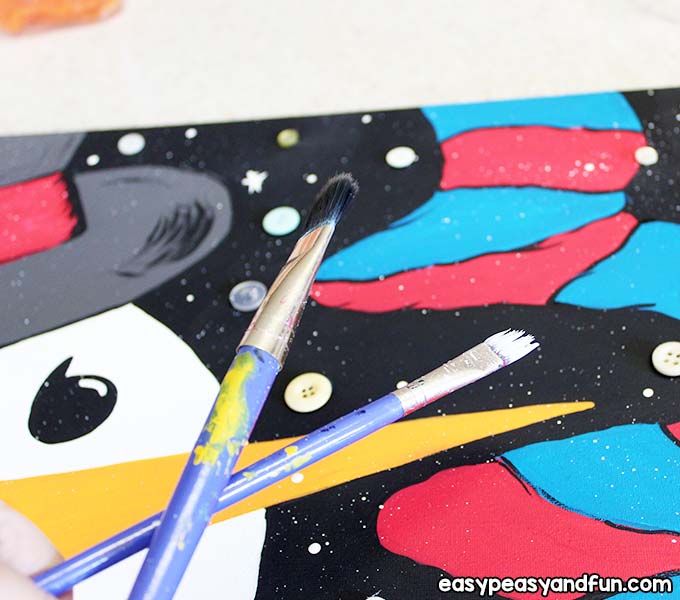
Move across the canvas and keep going until you get the amount of splatter you want. The higher up you hold the brush, the lighter and smaller the dots will be. If it’s not working, it may be too dry, and if it’s too much or too big, it’s probably too wet.
Once you have the amount you like, you’re all set! You can sign the painting if you like, and then give it a few minutes to dry.
The last step of the process is gluing on the buttons. How many you use is up to you. I tried to use a variety of shades of white and a few sizes.
Place the buttons on first, without gluing to get them just right, as it may take some playing with them first. Carefully add a drop of glue to the canvas where you want each button to go and lightly press down.
Let the canvas sit for a minute and the glue should be dry. Once its dry you can pull any glue strings off.
Now you are all done!
Enjoy your snowman and have a great holiday season!
Want instant access to all of our printable crafts, activities, and resources?

With thousands of crafts, activities, worksheets, coloring pages, and drawing tutorials to print, you will always have just the resource you need at your disposal. Perfect for parents and teachers alike!