If you are looking for a brilliant, screen-free activity that gets the kids outside, burns some creative energy, and practices those all-important fine motor skills, you are going to love this.
This Cardboard Vase Flower Threading Craft takes a simple piece of recycled cardboard and turns it into a living, breathing, 3D work of art. It’s part scavenger hunt, part drawing lesson, and part nature play!
Whether you’re looking for a sunny backyard afternoon project, a unique preschool nature activity, or a beautiful homemade gift, this cardboard flower board is pure joy from start to finish. Did I say it looks absolutely gorgeous already?
Let’s dive into how to make it!
What You’ll Need
- A large piece of cardboard (Upcycle an old delivery box!)
- A black marker (A thick acrylic paint marker works beautifully for bold lines, but a classic permanent marker works just as well)
- A sharp pencil (Or something similarly pointy, like a pen or a small screwdriver, to poke the holes)
- Freshly picked flowers or leaves (Or fake flowers for a permanent display!)
A Note on Mindful Flower Picking
While hunting for the perfect blooms is incredibly exciting, it’s a wonderful opportunity to teach little ones about our tiny garden friends!
When picking wild or garden flowers, please be mindful of bees, butterflies, and other essential pollinators. Bees rely on these flowers for their daily food source.
To keep the ecosystem happy, teach kids to follow the “one for the bees, one for me” rule. Never strip a single plant or patch completely bare. Spread your picking out, leave plenty of open blossoms behind for the pollinators.
Step-by-Step Tutorial: How to Make a Cardboard Flower Board
Step 1: Draw Your Vase
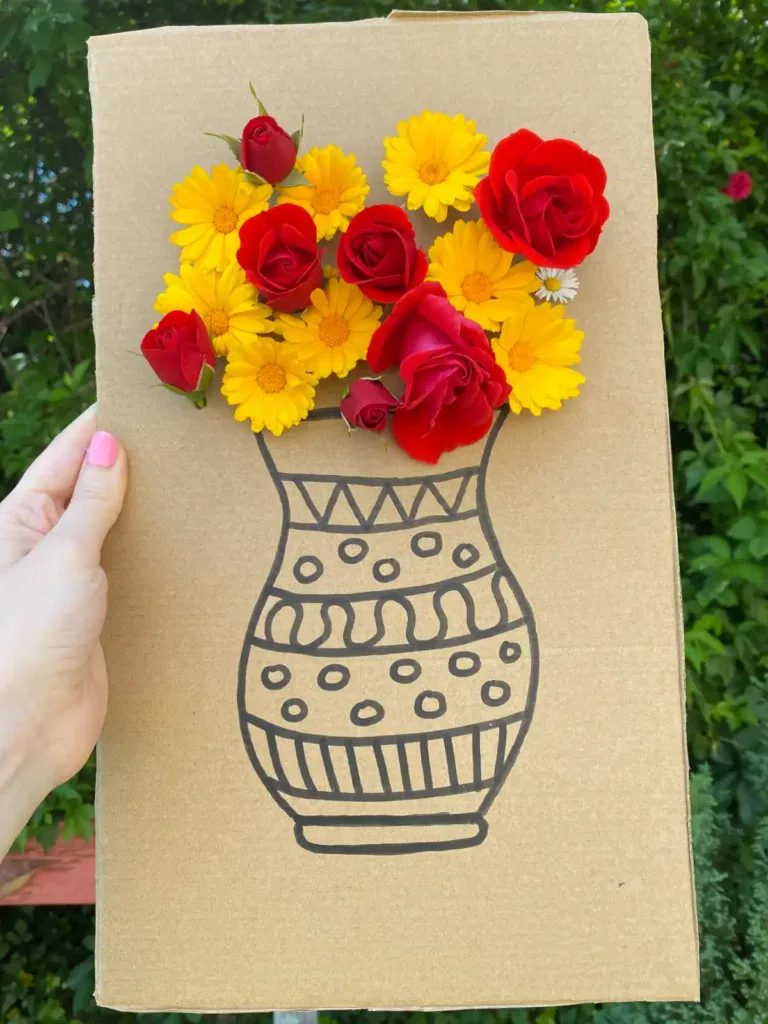
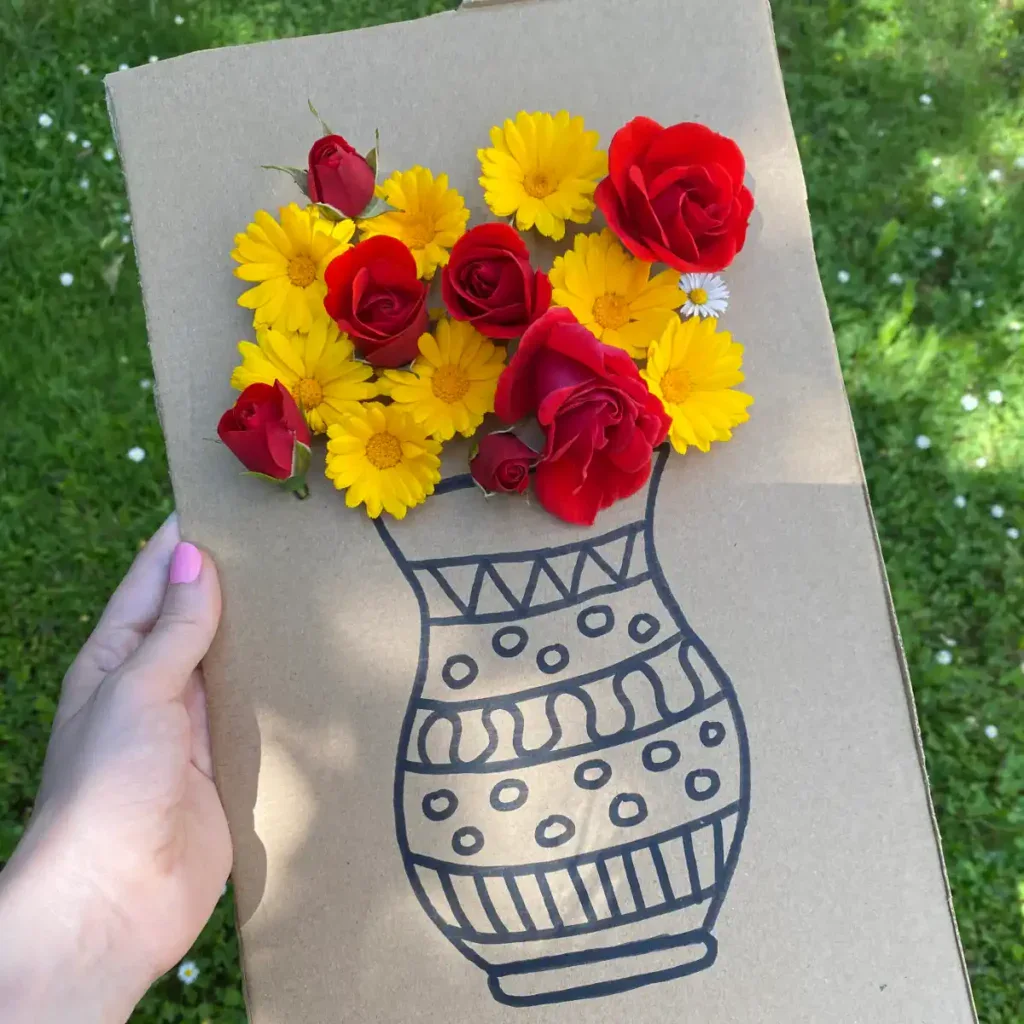
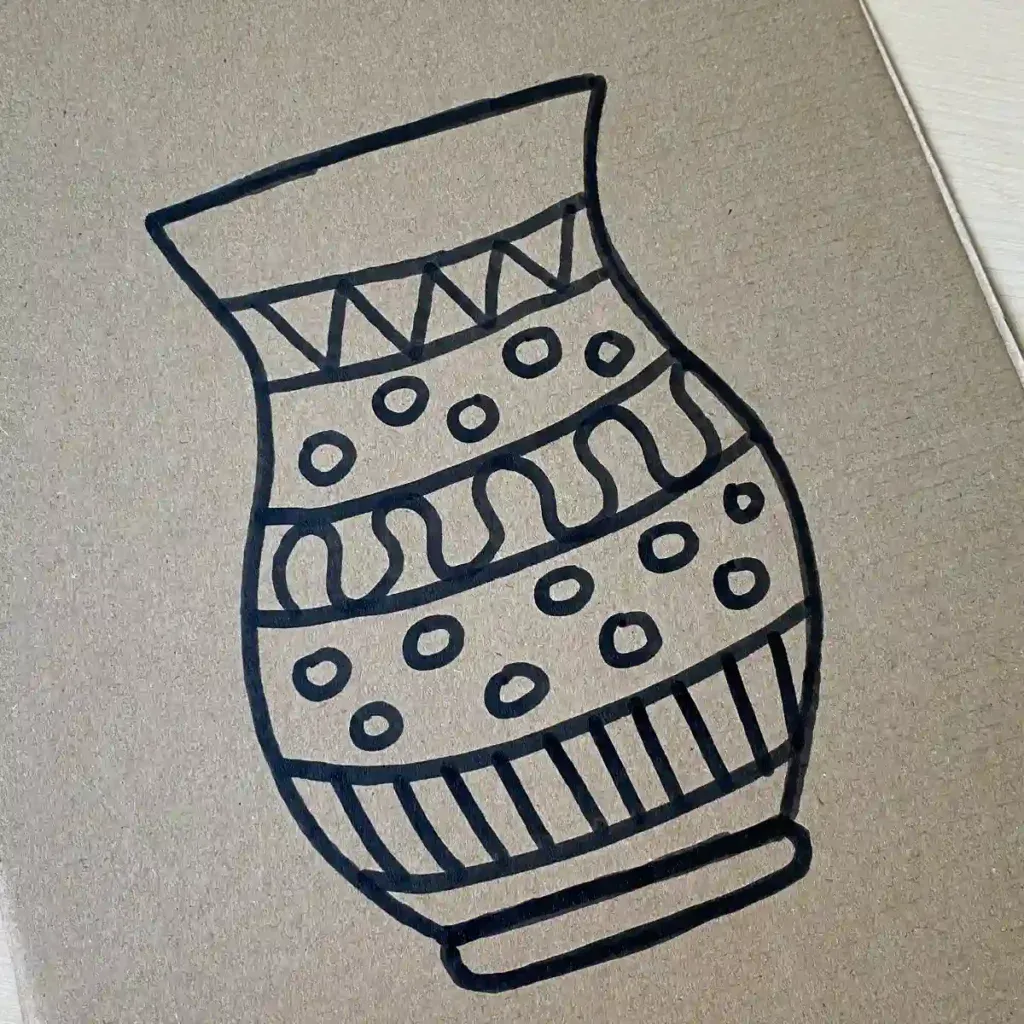
Grab your large sheet of cardboard and your black marker. On the lower half of the cardboard, draw a large, simple outline of a vase.
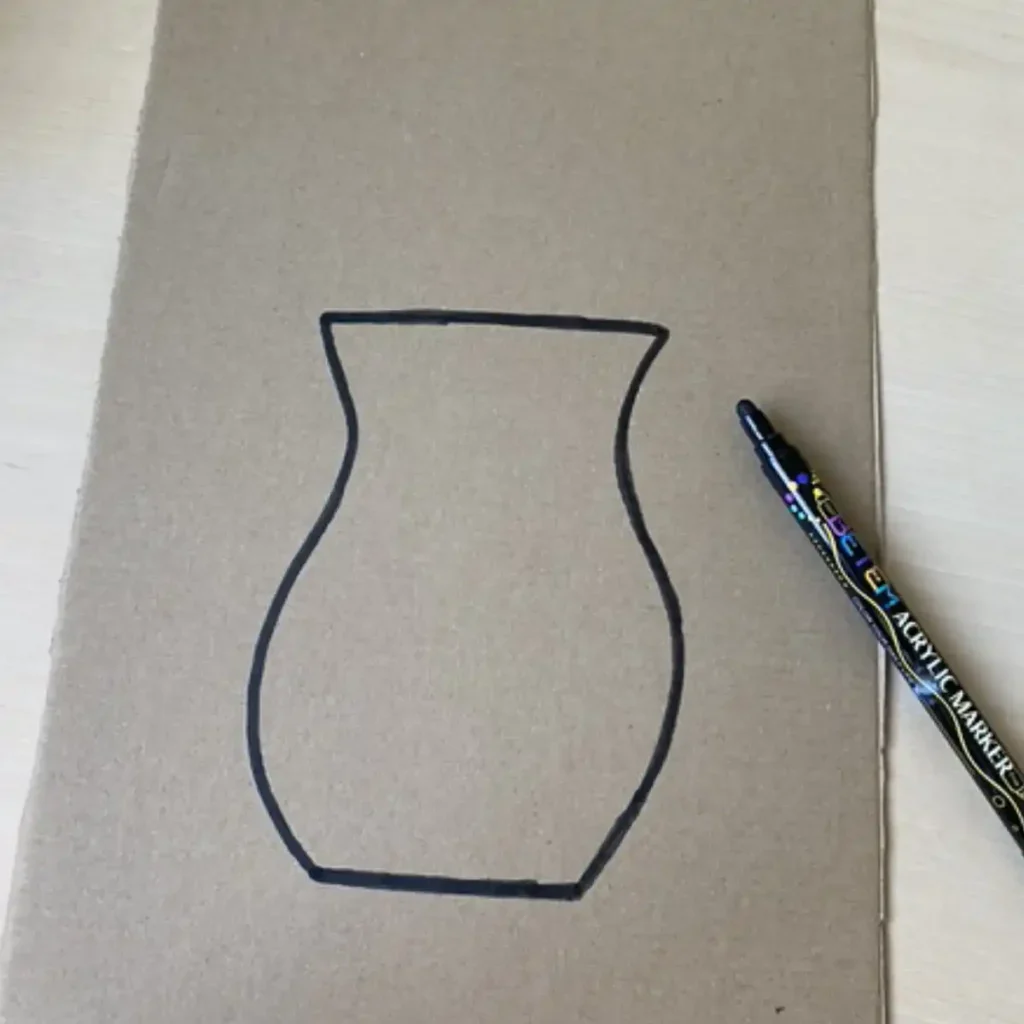
Don’t worry about making it perfect; funky shapes, classic jars, or geometric modern vases all look incredible! You can leave the vase as a clean outline or add fun patterns, stripes, or polka dots to customize it.
Tip: Make sure to leave plenty of blank space above the vase. That’s where your glorious flower bouquet is going to live!
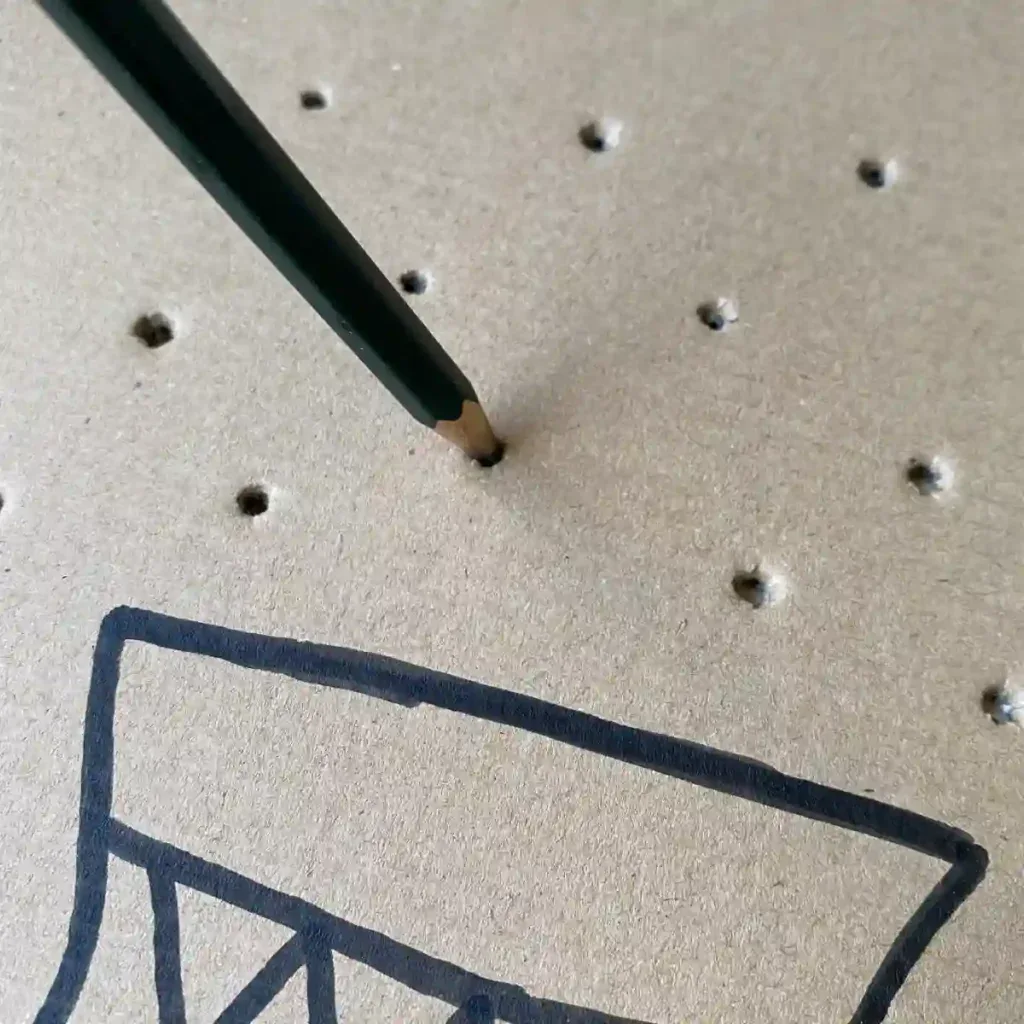
Step 2: Punch the Flower Holes
Now it’s time to create the “stems” for your bouquet. Take your sharpened pencil or pointy object and carefully press holes into the cardboard just above the rim of your drawn vase.
Wiggle the pencil around slightly to ensure the holes are wide enough for a flower stem to fit through easily. You can add as many or as few holes as you’d like. The more holes you punch, the fuller your flower arrangement will look!
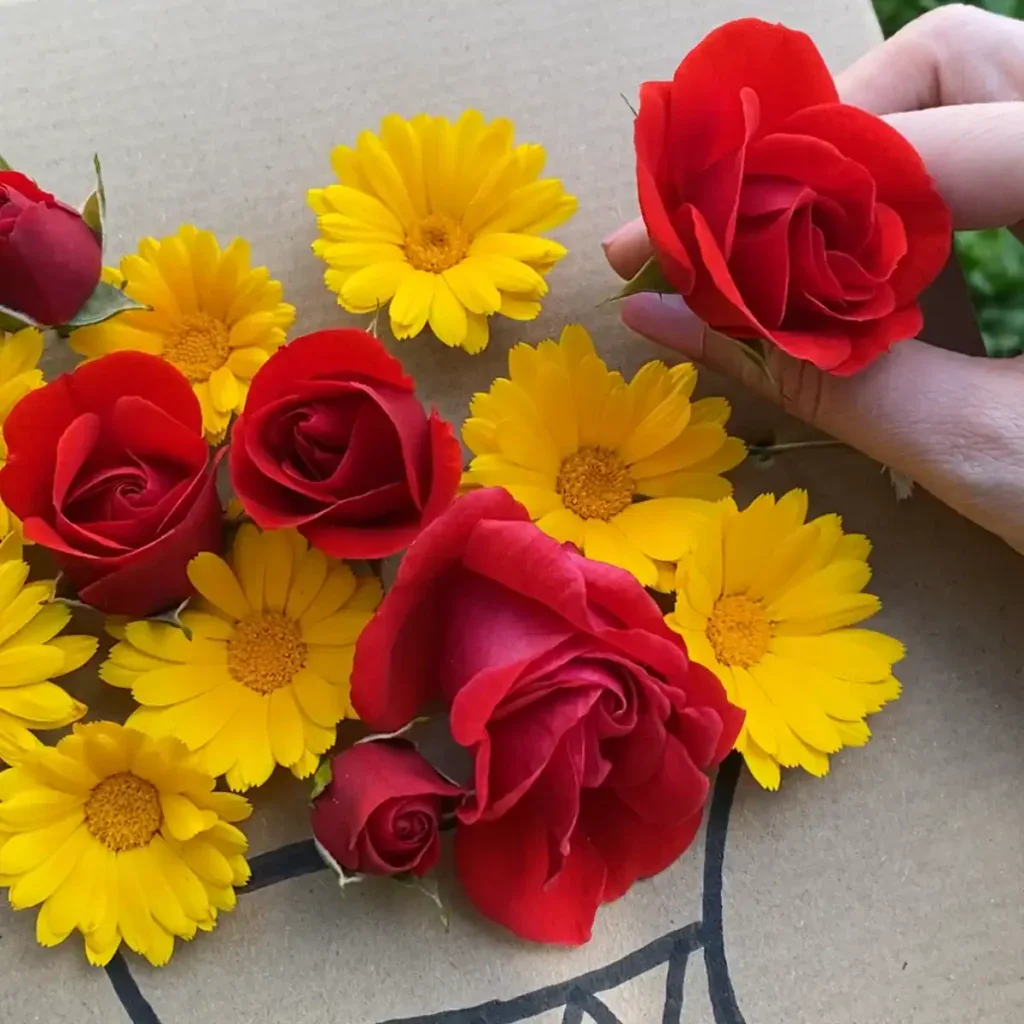
Step 3: Go on a Flower Hunt!
This is the absolute best part of the project. Head out into the backyard or go for a lovely nature walk to harvest your bouquet elements. Look for a mix of bright colors, different textures, and even unique green leaves or long grass to add depth to your arrangement.
Step 4: Thread and Arrange Your Bouquet
Once you’ve collected your nature treasures, it’s time to assemble your 3D art piece!
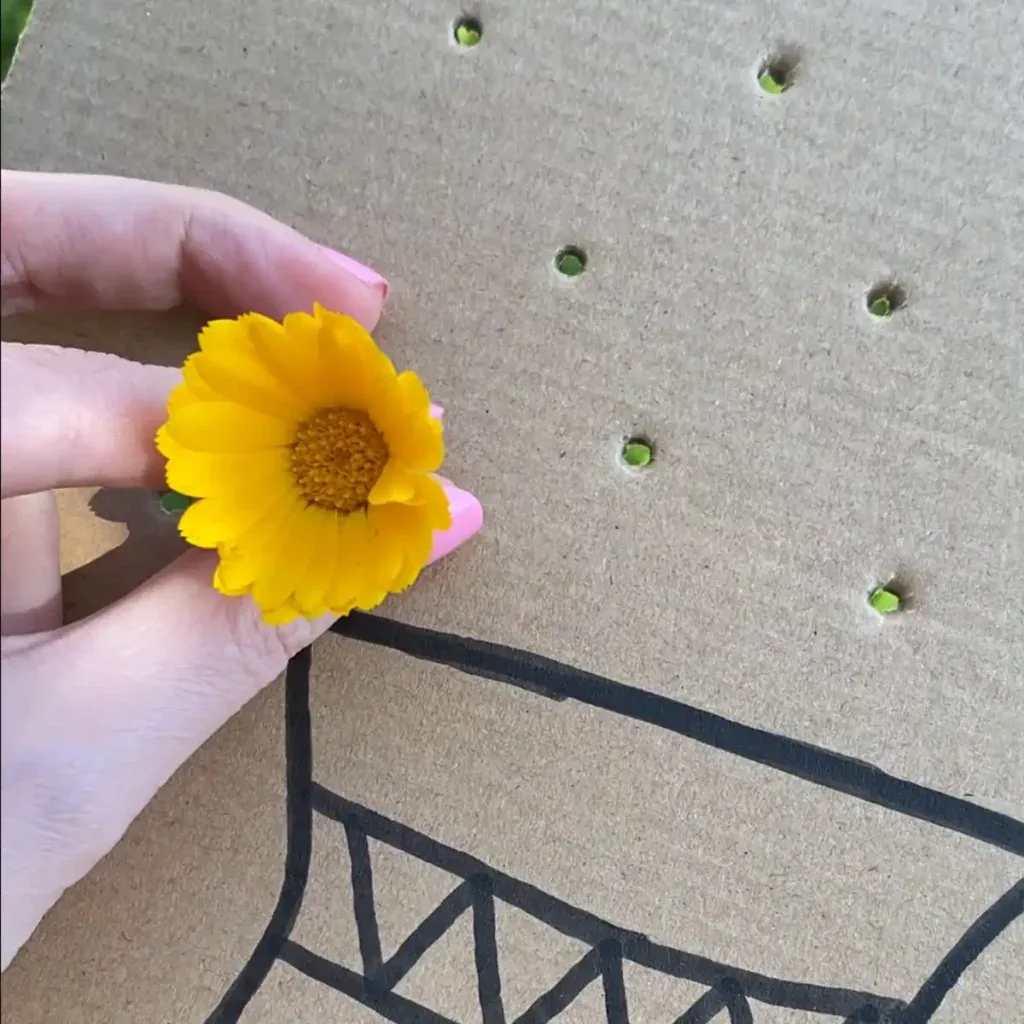
Have your child take a flower stem and thread it through one of the holes from the front to the back of the cardboard.
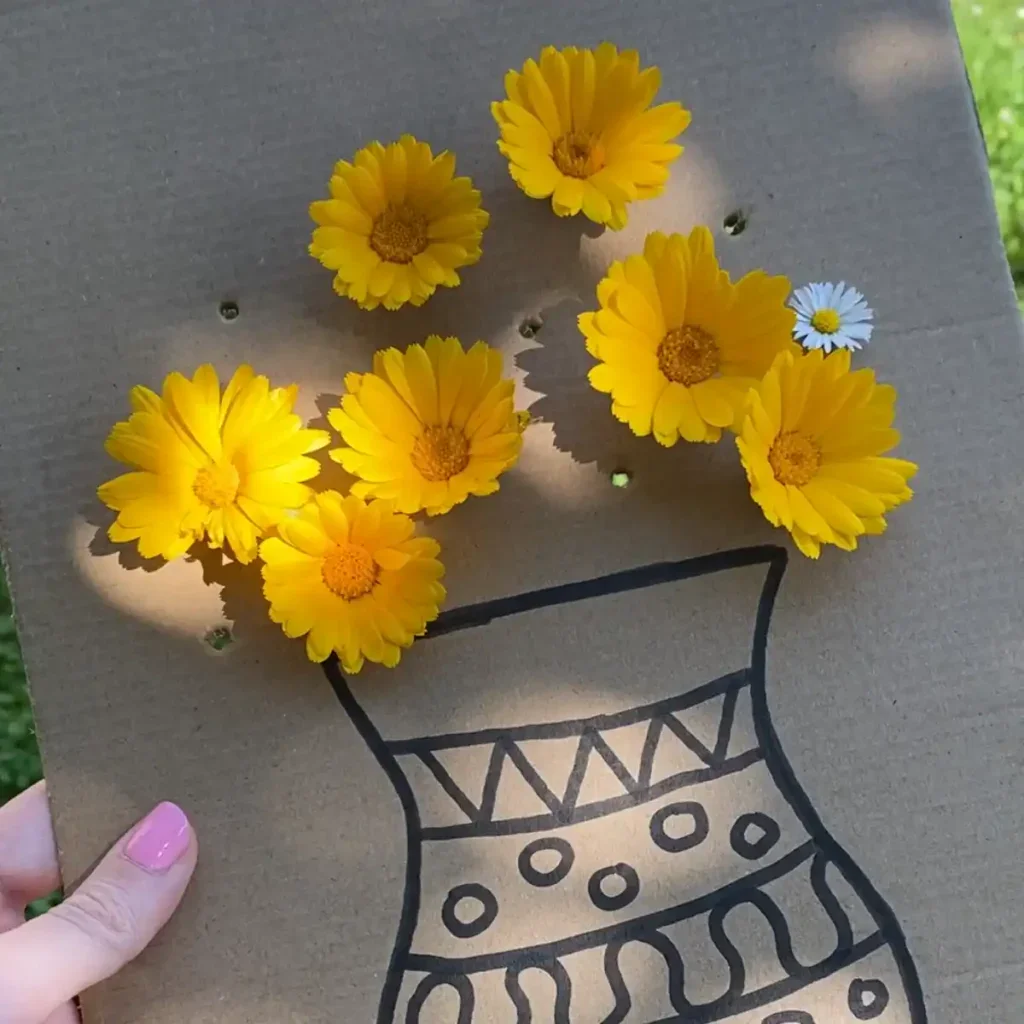
The flower head will sit against the board, making it look exactly like it’s bursting right out of the hand-drawn vase. Repeat the process until all the holes are filled and your vase is overflowing with beautiful colors!
Want to Make It Permanent? Use Fake Flowers!
Because this craft uses real elements from nature, the flowers will eventually wilt and dry out over a few days (be sure to take plenty of photos). If you love the look of this project and want to turn it into a permanent piece of playroom decor, a classroom display, or a lasting gift, simply swap the real flowers for faux ones!
You can grab a few inexpensive bunches of fake silk flowers from the craft store, snip the stems to size, and let your kids thread them into the cardboard vase over and over again. It makes for a fantastic reusable fine-motor threading board that you can pull out on rainy days!
Why We Love This Fine Motor Craft
Not only is this project incredibly cute, but it’s also a great for early childhood development. Pushing the delicate flower stems through the targeted pencil holes builds hand-eye coordination, strengthens finger muscles (great for future pencil grips!), and encourages spatial awareness.
Want instant access to all of our printable crafts, activities, and resources?

With thousands of crafts, activities, worksheets, coloring pages, and drawing tutorials to print, you will always have just the resource you need at your disposal. Perfect for parents and teachers alike!