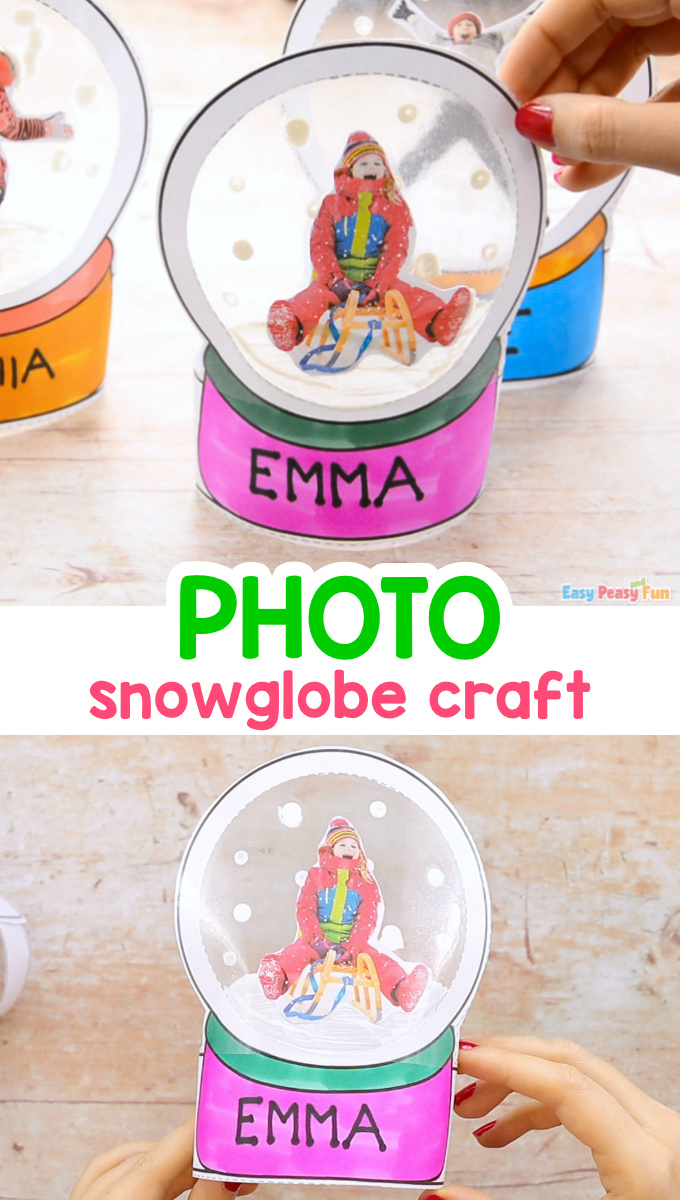
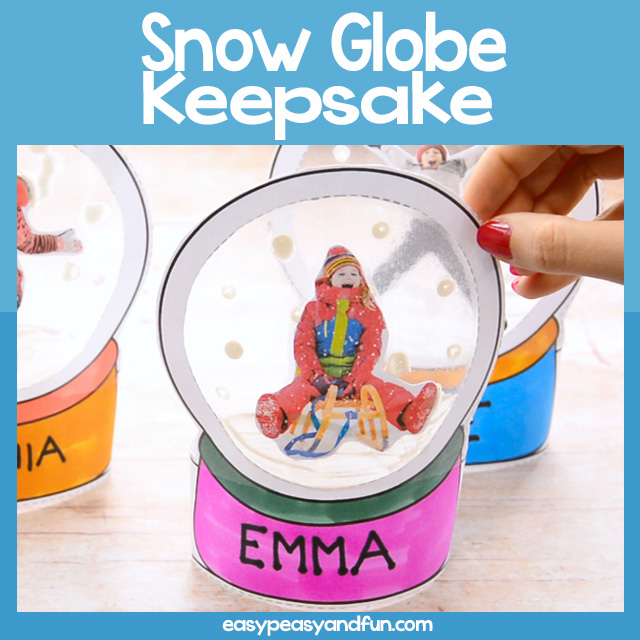
Make this photo snowglobe craft, an easy to make keepsake or snowglobe ornament that kids can make all by themselves.
Photo Christmas ornaments are the best – they make a wonderful classroom craft and a great DIY kid made gift to give to family members.
*this post contains affiliate links*
50 paper crafts your kids can actually do themselves

No fancy supplies — just paper, scissors, and a little imagination.
Be the first to get it on release day — and lock in the lowest price guaranteed.
We make a lot of laminated ornaments in our home, they are really personal and you can create many cool things – add a Santa hat to your child’s photo (or your dogs and cat’s), make a laminated snowglobe ornament to hang on your tree, add antlers and so much more. However the laminated ones are usually more “adult” oriented. There is a limit to how the young ones can be involved, so for this project we thought contact paper would be a better choice – decorating this one is just easier for little hands.
How to Make Photo Snowglobe Craft
What you need:
- our snowglobe ornament template
- Contact paper / self adhesive clear foil
- glue
- scissors
- photo
- white craft paint
- brush
- optional: coloring suplies
Step by Step Tutorial
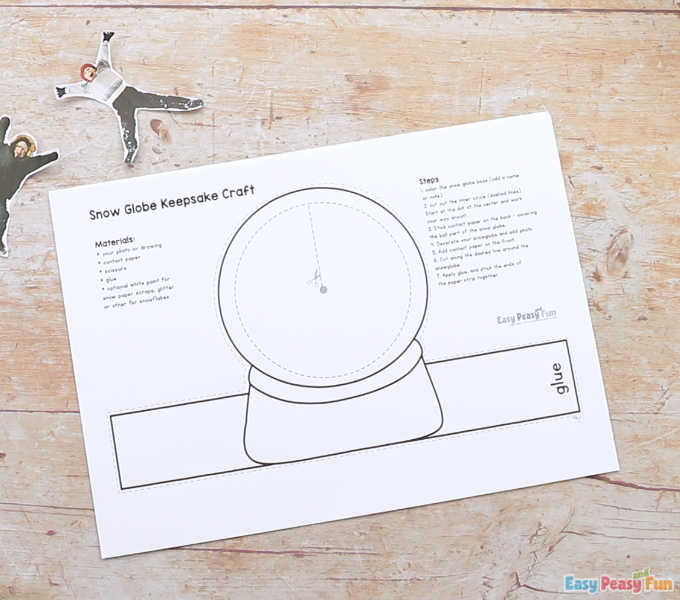
Print out the template on cardstock / heavier print paper.
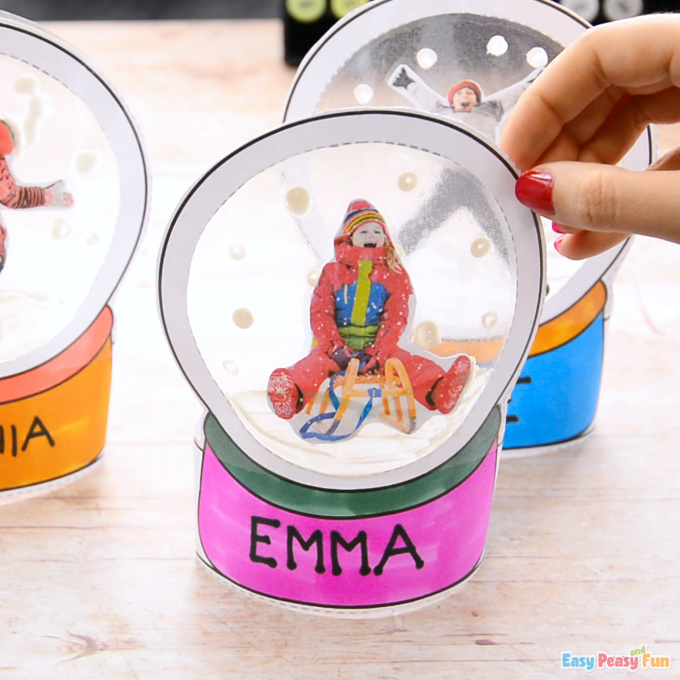
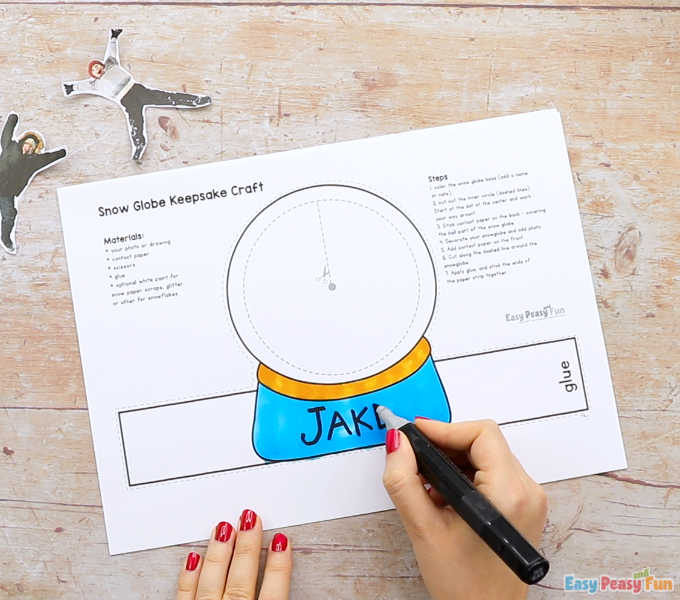
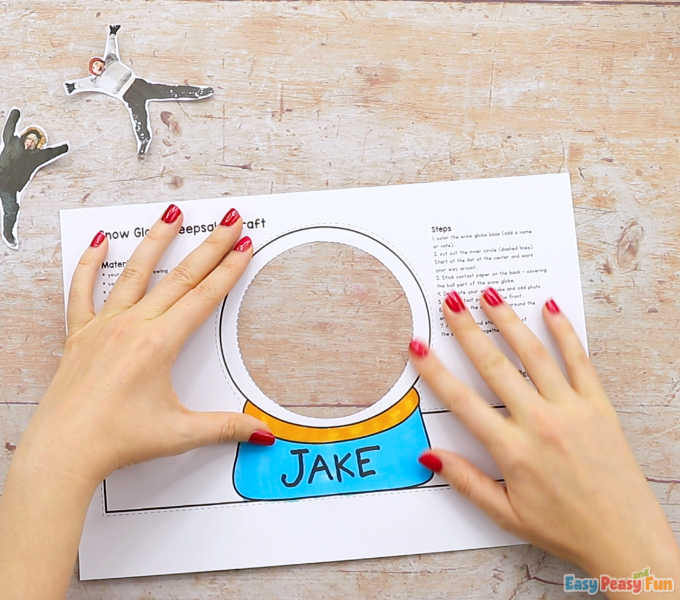
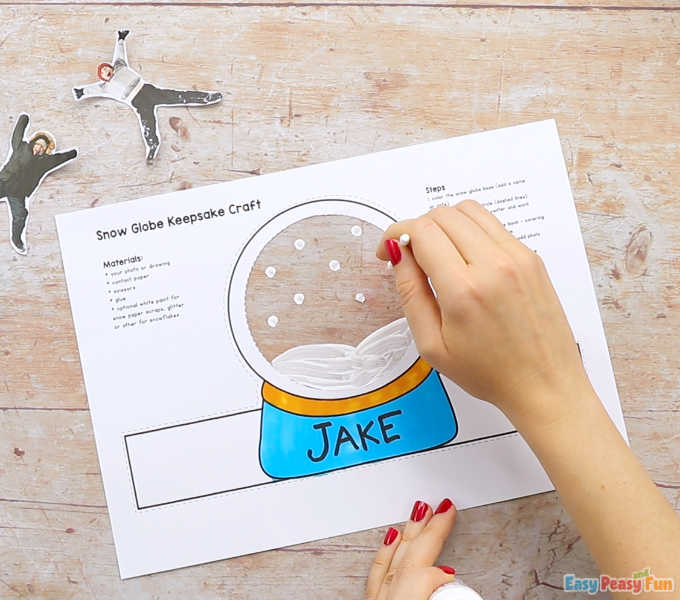
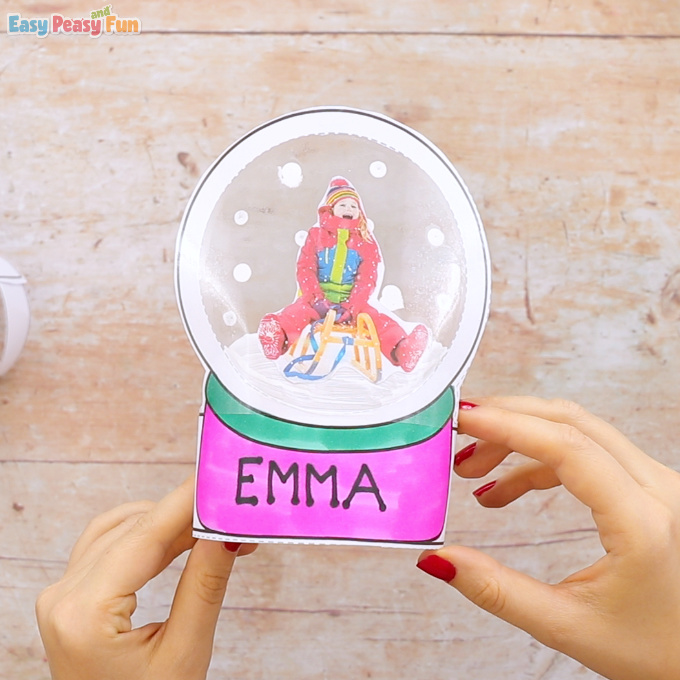
If you want to make your snow globe photo craft more colorful, color in the globe base.
Once it’s colored, you or your child can also write a name or a note on the globe.
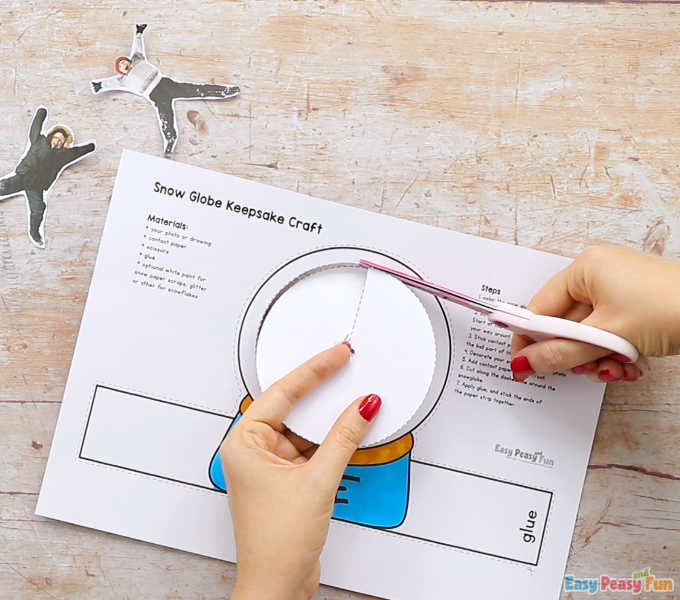
Cut out the inner circle, follow the dashed line.
The easiest way to do this is to first punch a hole in the middle (marked by a gray dot) and start your cutting from there.
Cut contact paper rectangle, just a bit large than the circle part of the globe.
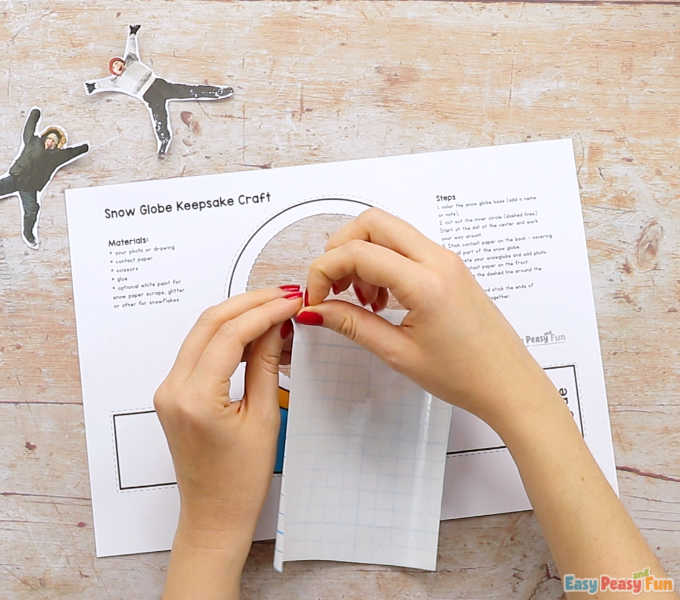
Place it on your work surface, sticky side up…
…and place the template on top of it, with contact paper covering the hole.
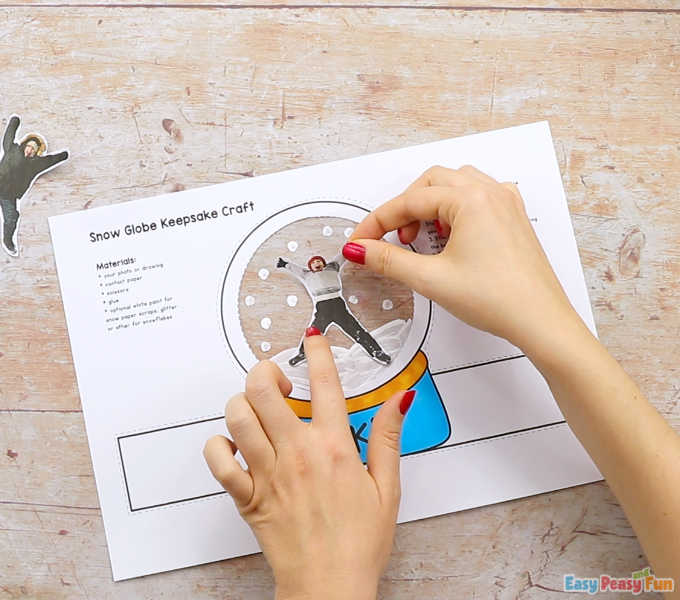
Make some snow. Paint a snow hill and add a couple of snowflakes – your fingers or a q-tip make nice snowflakes.
You can also draw other things – Christmas trees for example.
Next comes the photo.
If you are making this project with the kids in your class, have a picture day a couple days before. Kids jumping in air (in winter clothes) is a great pose for this one, but having them pose any different way works out great too.
Cut around the body and press the cut out photo on the contact paper.
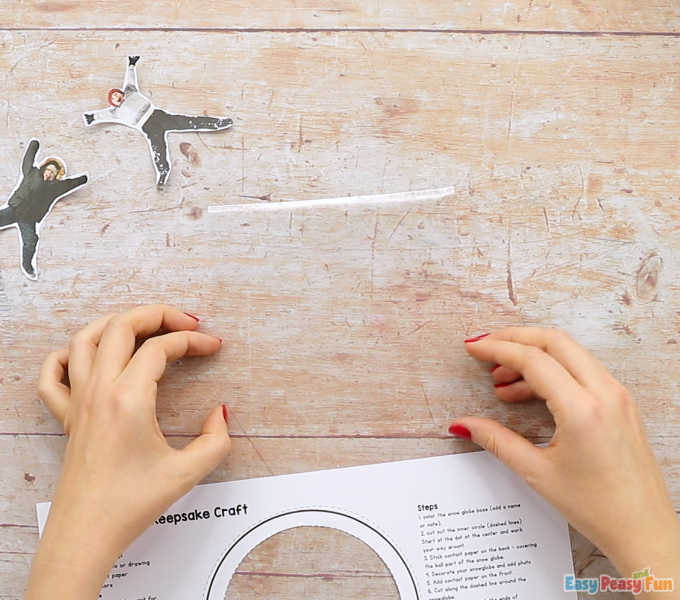
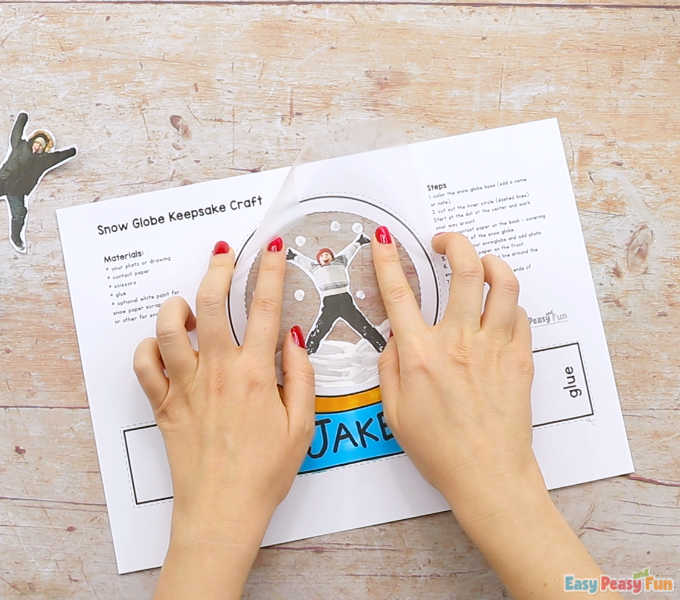
Stick another sheet of contact paper on the front side of your snow globe, covering the photo and other wintery / Christmasy details.
Next comes some cutting. Cut along the dashed line, all around the template.

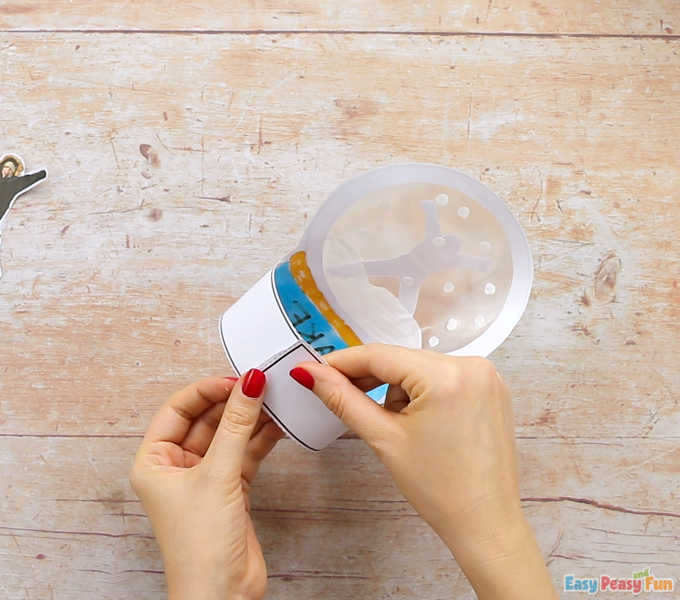
Lastly, apply glue on the area designated for glue, conveniently marked with the word glue.
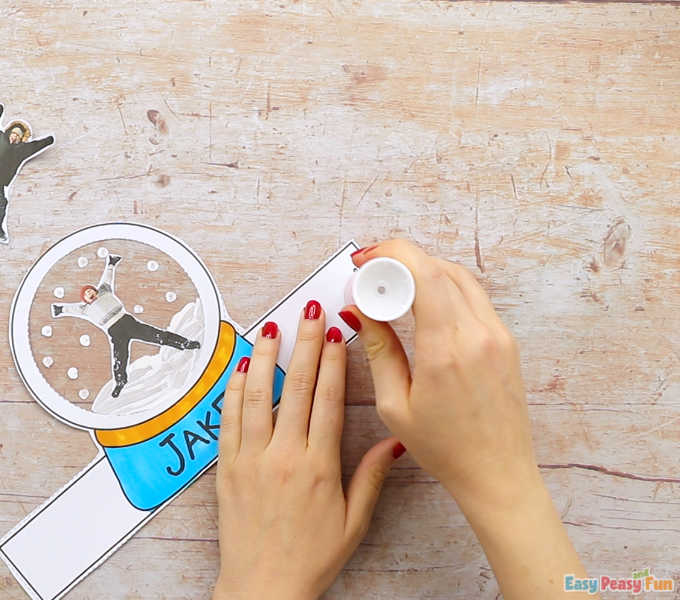
Glue the ends together, hold them still for a while for the glue to set.
All done! Your Photo Snowglobe Craft is complete and ready for display.
Get the Photo Snowglobe Craft Template
Want instant access to all of our printable crafts, activities, and resources?

With thousands of crafts, activities, worksheets, coloring pages, and drawing tutorials to print, you will always have just the resource you need at your disposal. Perfect for parents and teachers alike!