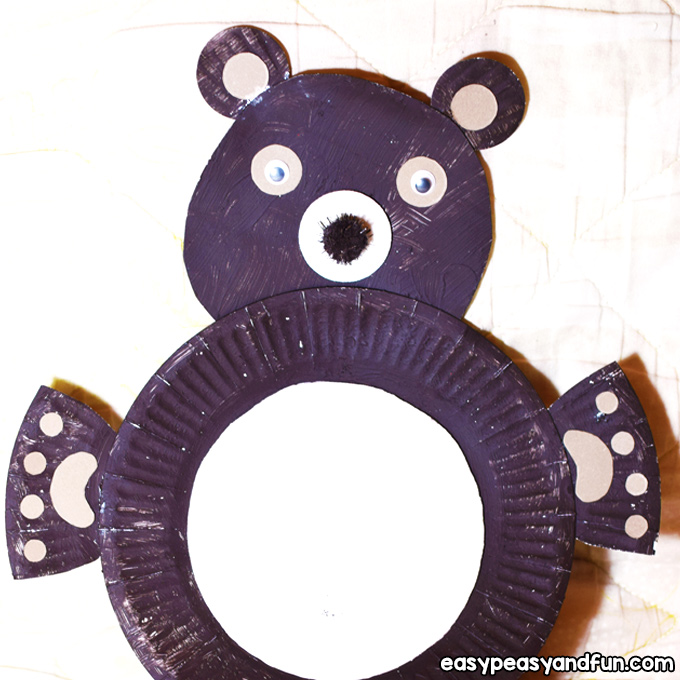
You are just 3 paper plates away from making a cool looking and extra large paper plate bear craft.
This one is great if you are looking for a fun craft project to do at home as a whole family.

*this post contains affiliate links*
50 paper crafts your kids can actually do themselves

No fancy supplies — just paper, scissors, and a little imagination.
Be the first to get it on release day — and lock in the lowest price guaranteed.
What kinds of bears have you seen with your own eyes? We have seen a panda bear and a brown forest bear. Are you familiar with them? They are extremely big, fuzzy and furry animals that can often be found to be smiling and playing around.
When you think about bears I am sure you also think about honey!
The bears scratch their noses and get grumpy.
You probably know Winnie the Pooh. What about Mishka, from Masha and the bear cartoon?
Nonetheless, they are very friendly and kind, right?
That is the kind of bear we are going to make today, a brown friendly bear that steals honey.
How to Make a Paper Plate Bear Craft
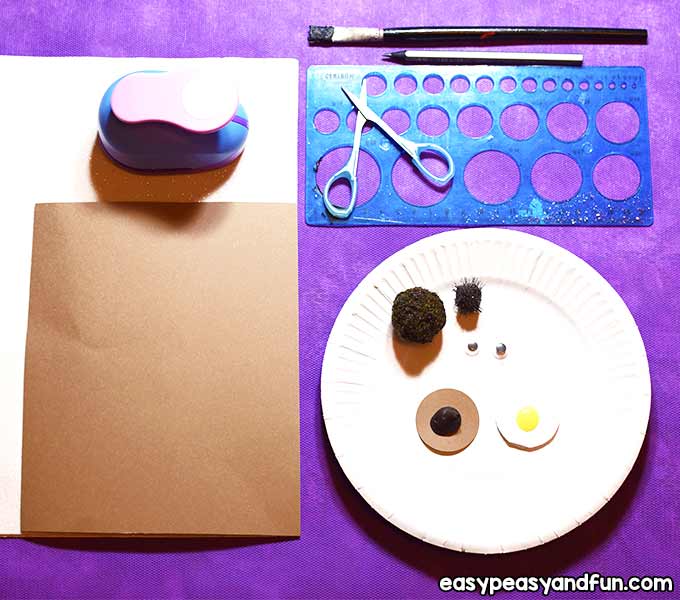
What you need:
- three paper plates (one small and two big ones)
- two googly eyes
- ruler with circle shapes
- a dark brown acrylic paint
- a white self-adhesive foam sheet
- two brown pom poms (a small and a big one)
- one circle perforator
- light brown cardstock
- glue
- brush
- pencil
- scissors
Step by Step Instructions
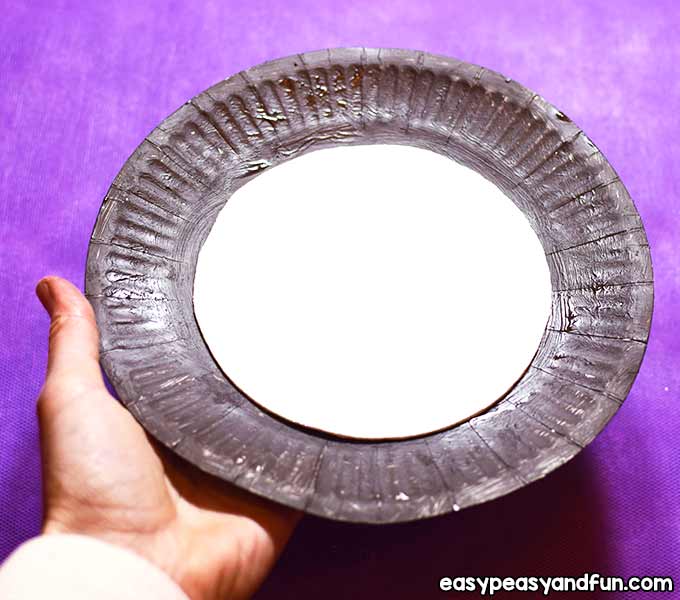
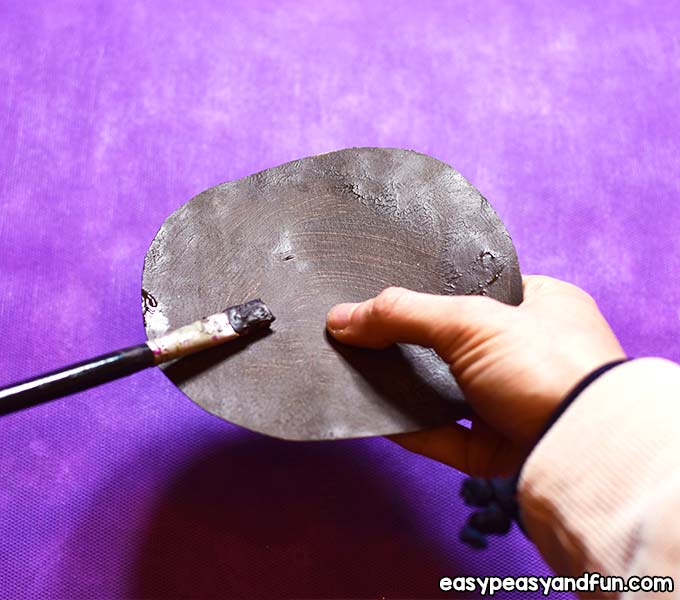
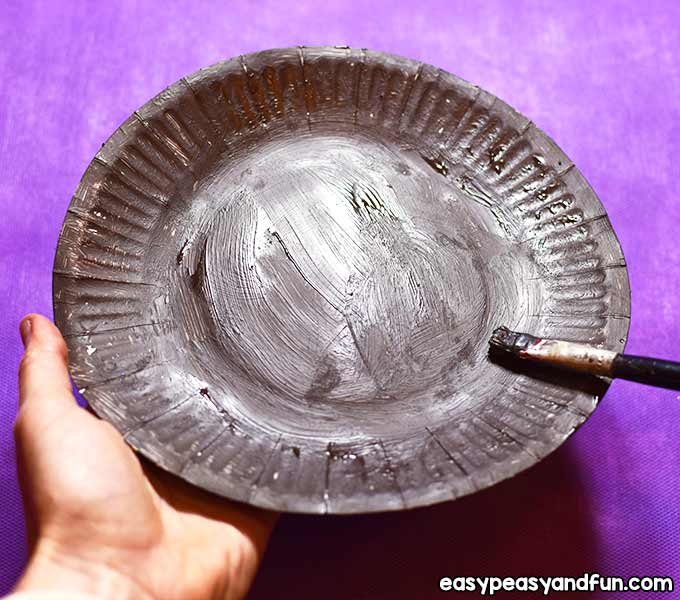
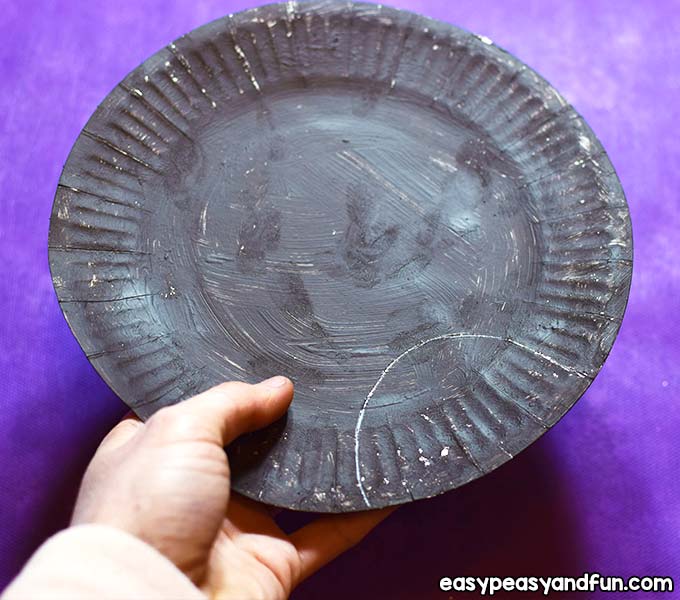
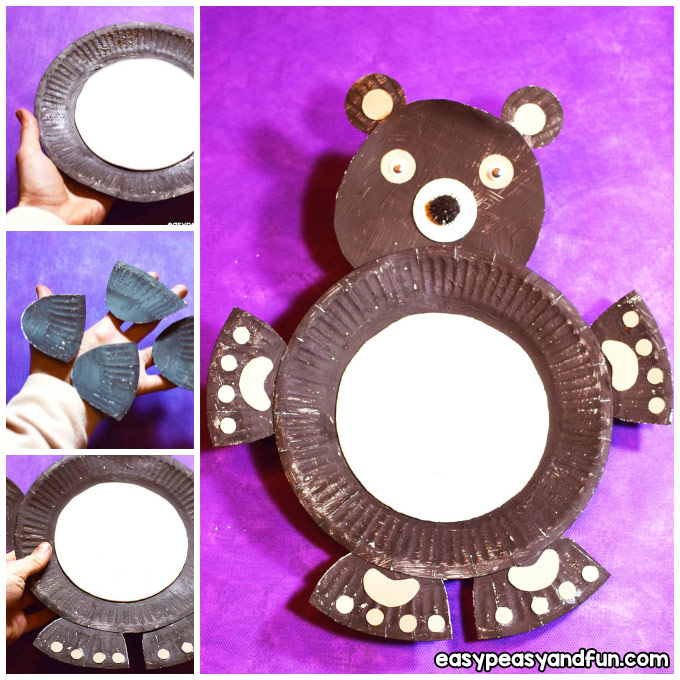
Take one big paper plate and cover it with brown acrylic color on both sides.

Cut out a big circle from the white self-adhesive foam sheet …
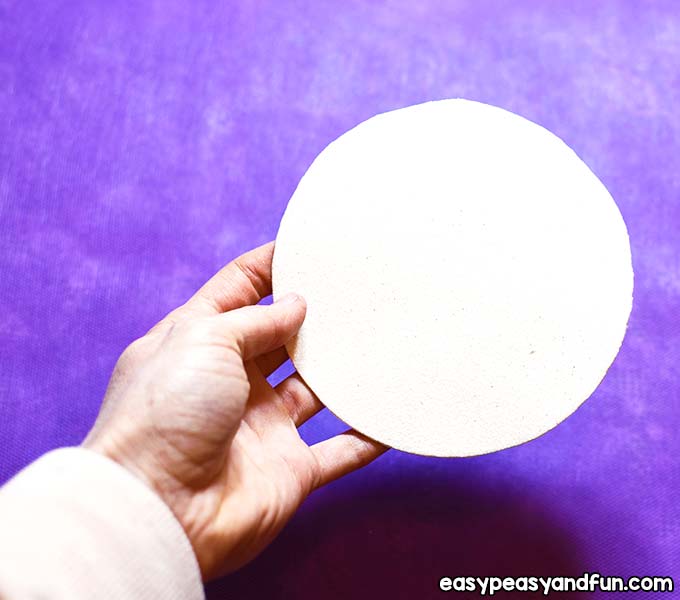
… and glue it in the middle of the paper plate.
Tail
Apply some glue on the big brown pom and put it on the back of the paper plate.
That will be our bear’s tail.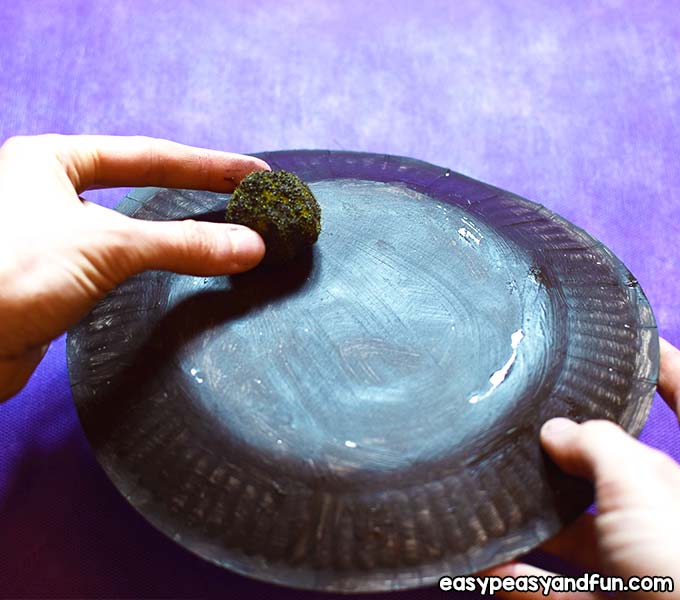
Head
Take the smaller paper plate and cover it with brown acrylic paint on both sides …
… then glue it to the bigger one as shown in the picture.

Paws
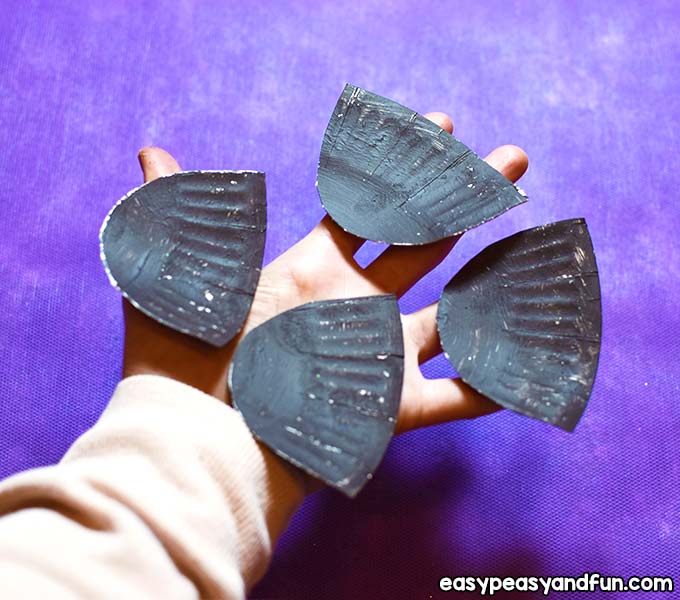
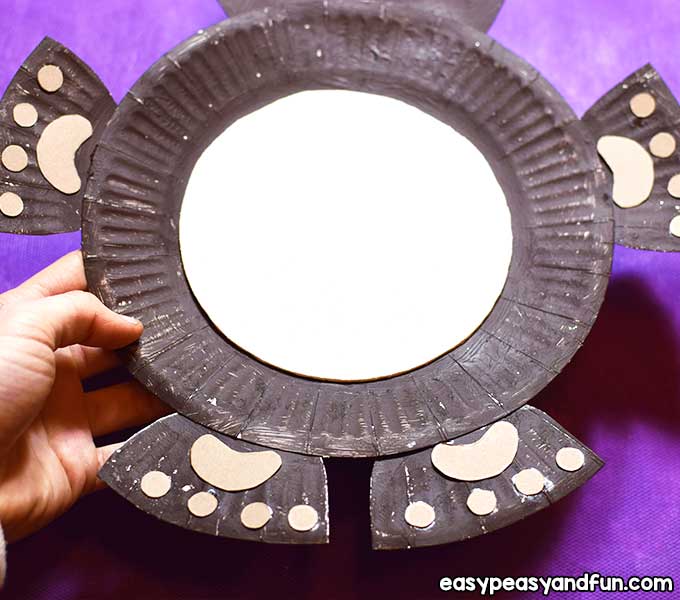
Take the other big paper plate and cover it with brown acrylic paint on both sides …
… then with a pencil draw four paw shapes.
Cut them out…
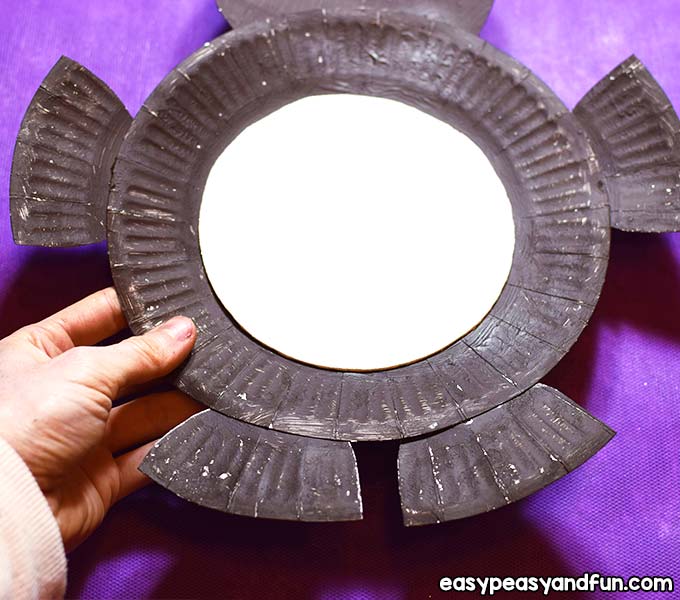
… and glue them on the body as shown in the picture.
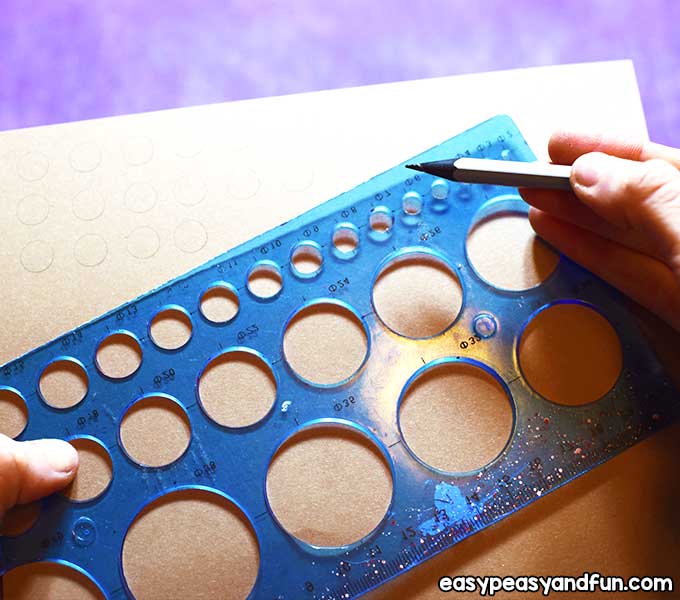
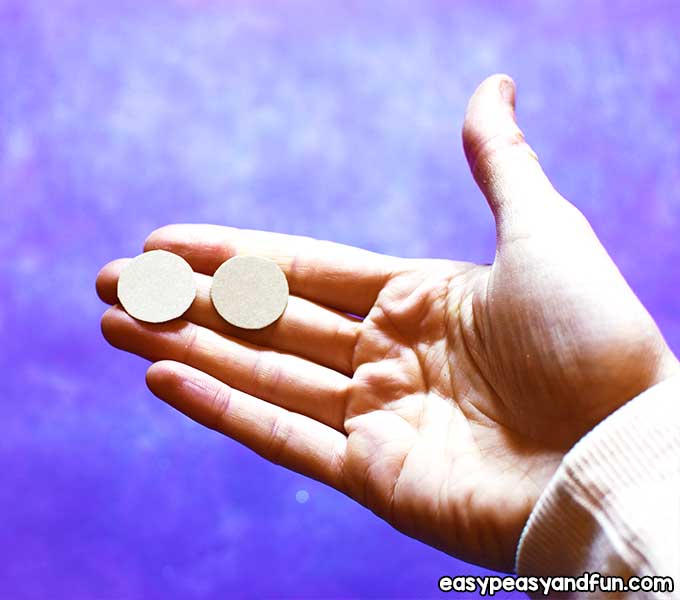
On the light brown cardstock draw sixteen small circles (use the ruler with circle shapes).
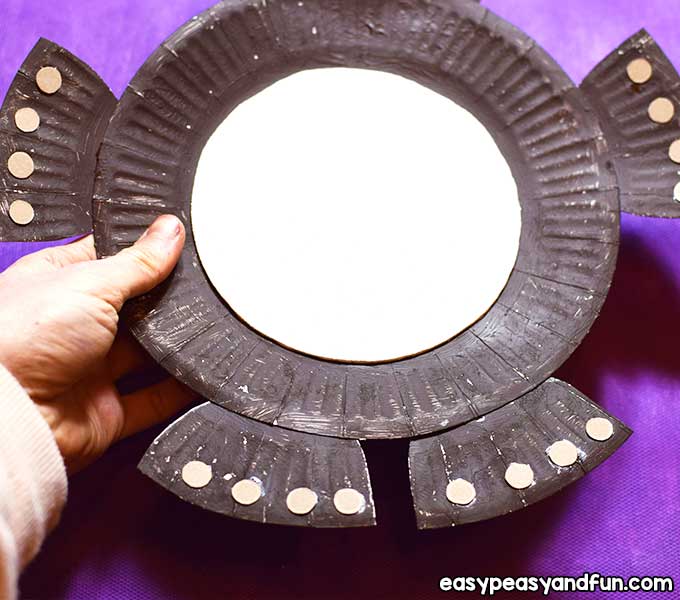
Put some glue on them and place them on the paws (four on each paw).
On the light brown cardstock draw four paw pads as shown in the picture …
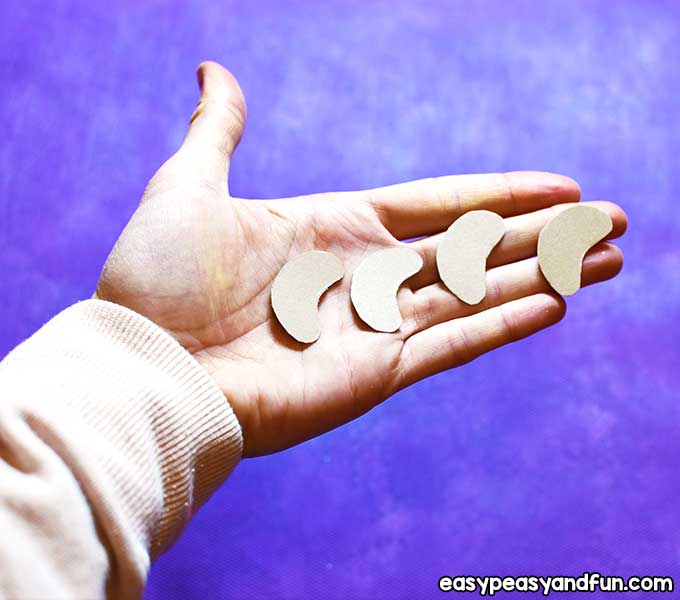
… and glue them on the paws.
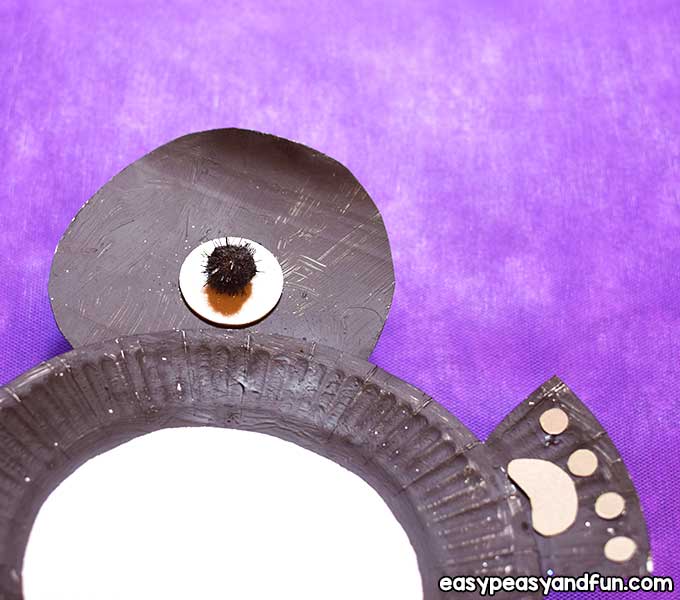
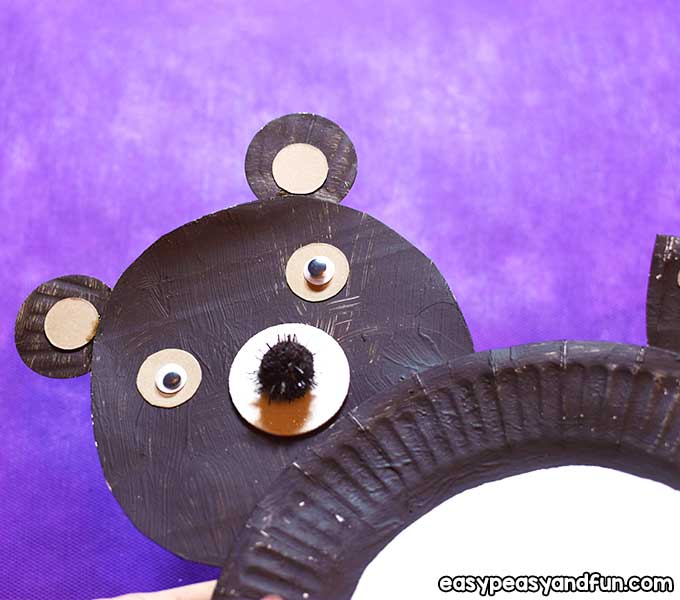
Snout
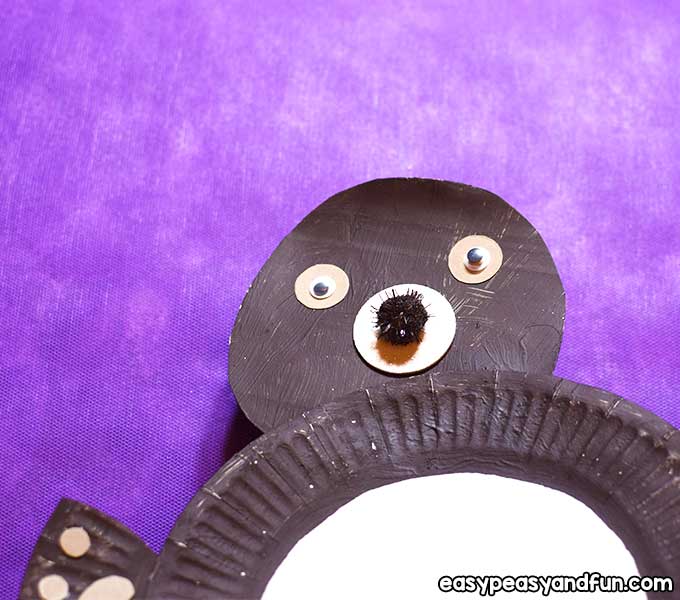
With the circle perforator, make one circle shape from the white self-adhesive foam sheet and glue it to the face.
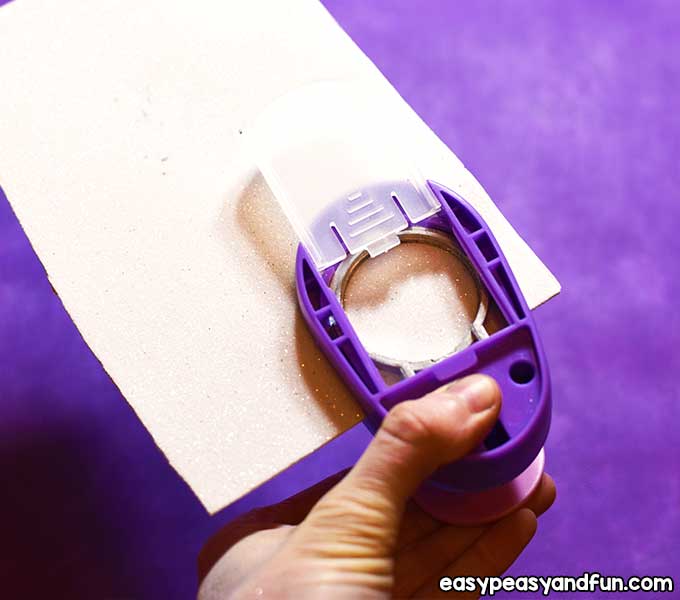
That will be the bear`s snout.
Take the smaller pom-pom and glue it on the bear`s snout.
Eyes
Draw two circles on the light brown cardstock (use your ruler with circle shapes), cut them out and glue them to the face.
Then place the googly eyes on.
Ears
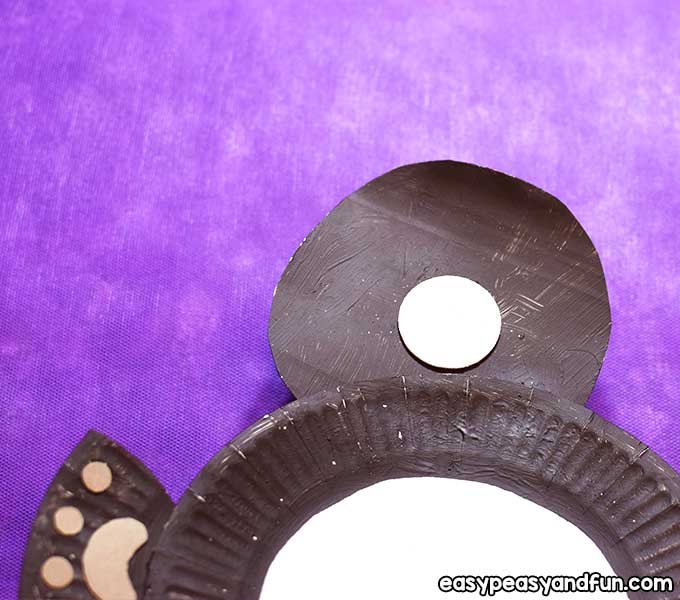
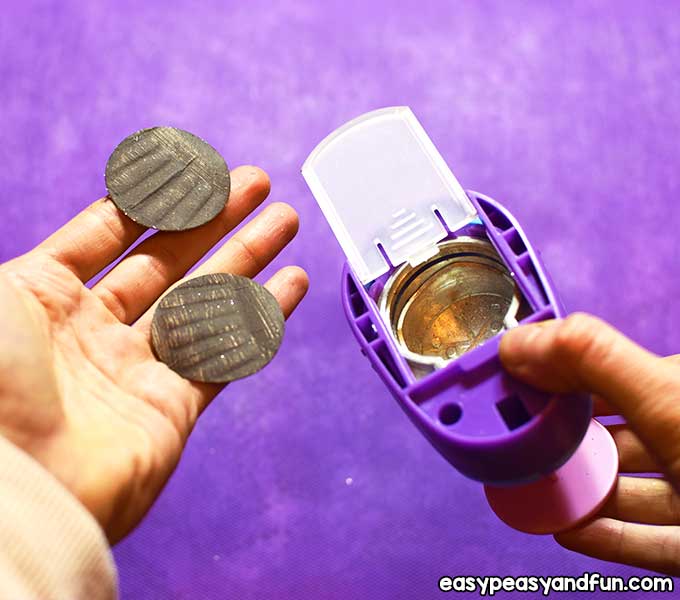
Use your circle perforator and cut two circle shapes from the third paper plate.
Those will be the ears.
Draw two circles on the light brown cardstock (use your ruler with circle shapes), cut them out and glue them on the ears.
Put some glue on the ears as shown in the picture and glue them on the back of the head.
Done!
Hope you like today`s project!

Stay tuned for more fun crafts!
Want instant access to all of our printable crafts, activities, and resources?

With thousands of crafts, activities, worksheets, coloring pages, and drawing tutorials to print, you will always have just the resource you need at your disposal. Perfect for parents and teachers alike!