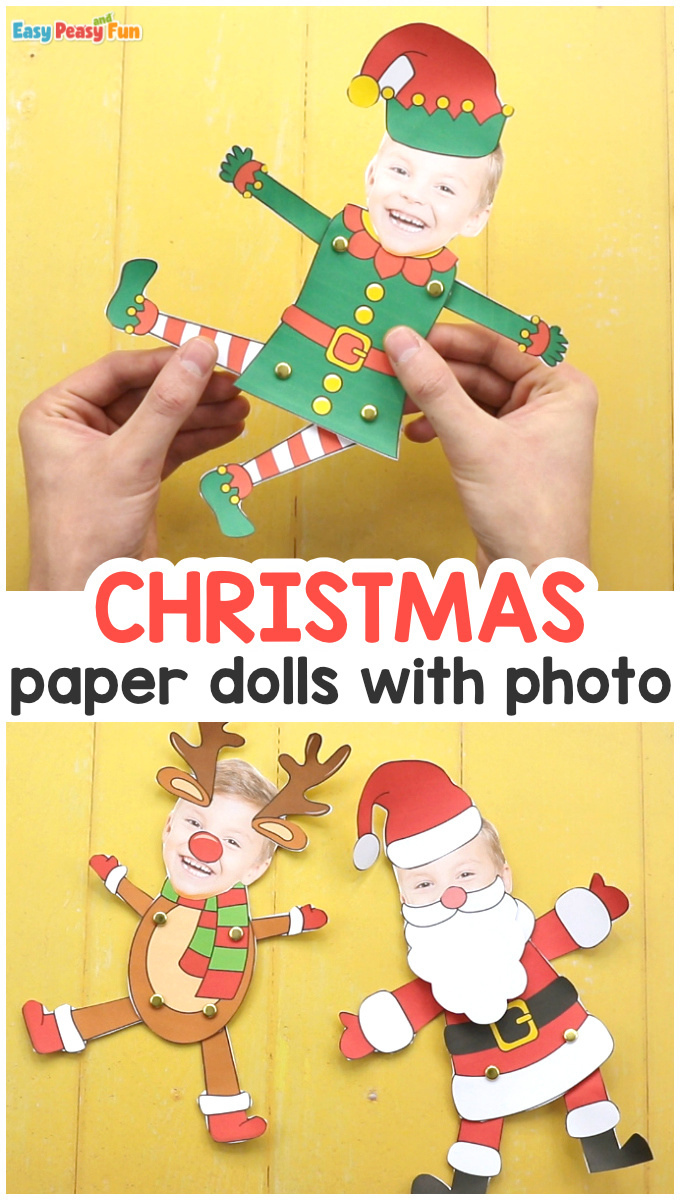
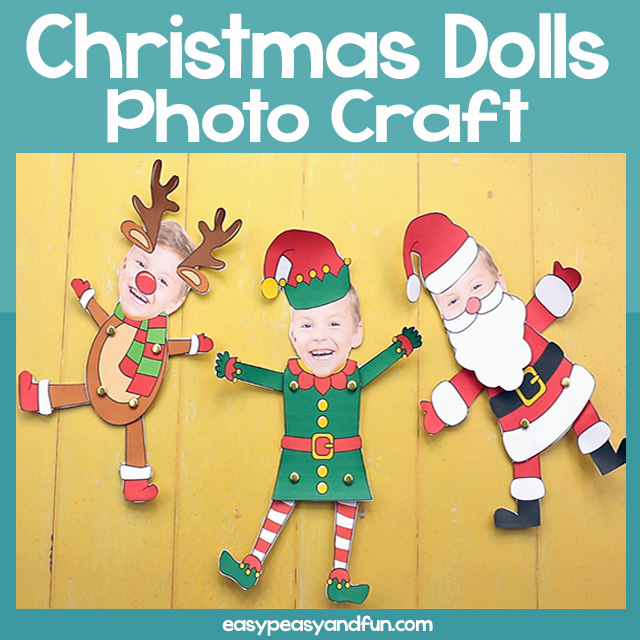
Are you ready for the cutest craft of the year? Well lets make this Movable Paper Doll Christmas Photo Craft!
You can have your kids choose to “Elf Yourself”, “Santa Yourself” or “Reindeer Yourself”, either way this craft will transform them into a wonderful Christmas character.
*this post contains affiliate links*
50 paper crafts your kids can actually do themselves

No fancy supplies — just paper, scissors, and a little imagination.
Be the first to get it on release day — and lock in the lowest price guaranteed.
Christmas is the most magical time of the year, and it’s a great time to make magical memories. It’s a time to craft keepsakes for the whole family to appreciate, and this photo Christmas keepsake is one of those that will be cherished for a long time. Print out one of our templates (or all), snap a photo of your child and together you can transform them into a festive looking elf, happy reindeer or even Santa himself.
How to Make a Movable Paper Doll Christmas Photo Craft
What you need:
- one or more of our doll templates
- scissors
- split pins / paper fasteners or glue (you can get paper fasteners in most office and craft stores)
- glue
- coloring supplies if printing the black and white version
- head photo of your child
Step by Step Tutorial
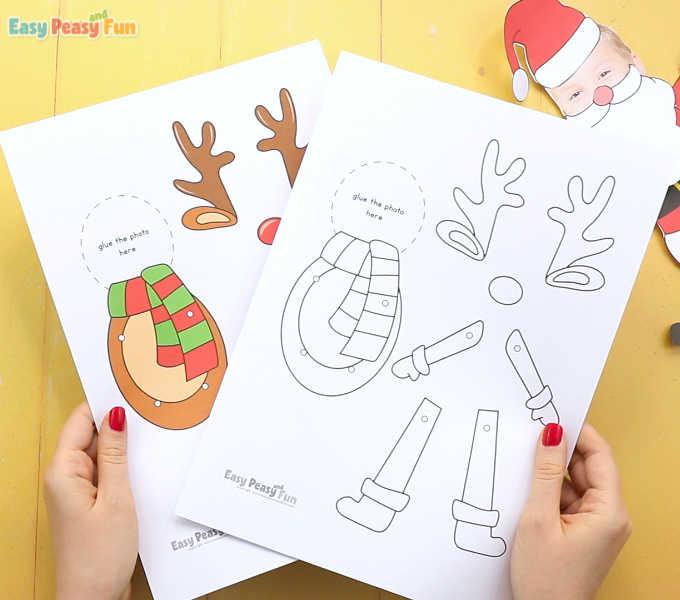
Start by printng the template sheet. We have 3 festive characters to choose from and all of them come in black and white and full color, as well as in two sizes. So pick the one (or all) that fit your needs best.
Regular paper doesn’t work well for this one, unless you plan to laminate the paper doll once it’s done (or laminate pieces if making the doll movable).
Start by cuting all of the template parts. While Santa and Elf are pretty easy, the reindeer (although super cute) is the hardest to cut, so if you are working with younger kids you will probably need to assist them. Great for a parent child crafting session of building memories though.
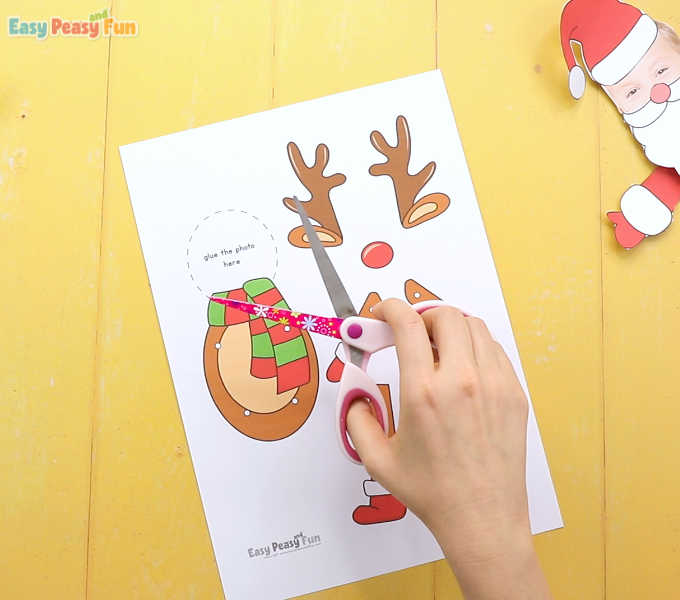
When all the pieces are cut, we can move to the next step.
Assemble The Christmas Paper Doll
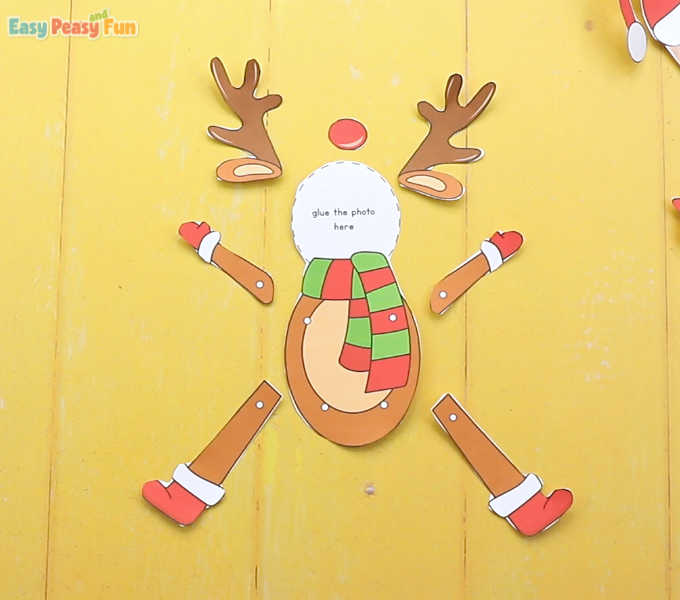
All the dolls assemble in the same way, with the reindeer having the most “extra parts”.
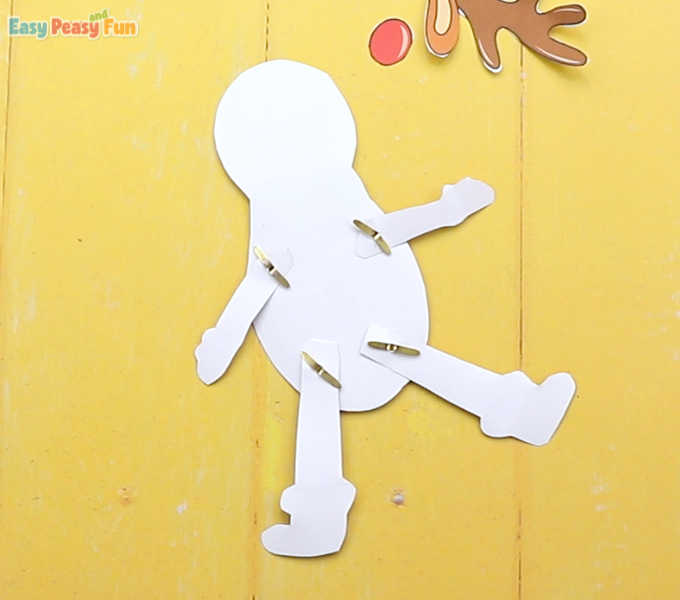
If making the movable doll, the first thing you need to do is to punch holes on the arms, legs and the body (through the small designated spots).
Older kids can use split pins to make the holes, while for younger kids we recommend a tool that is easier to operate, such as a skewer (under adult supervision). If you have large split pins, a single hole puncher can do the job too.
You can also skip the split pins altogether and just glue the arms and legs on the body.
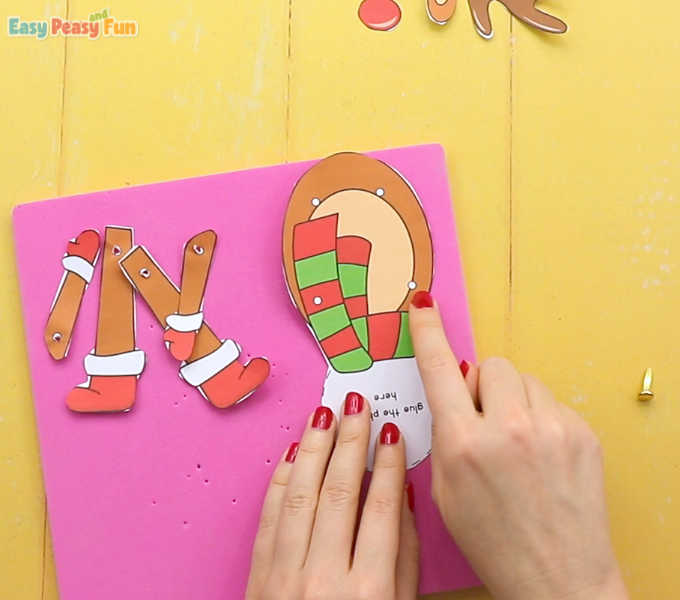
You will need 4 split pins per doll. Push the first split pin through one of the holes on the body.
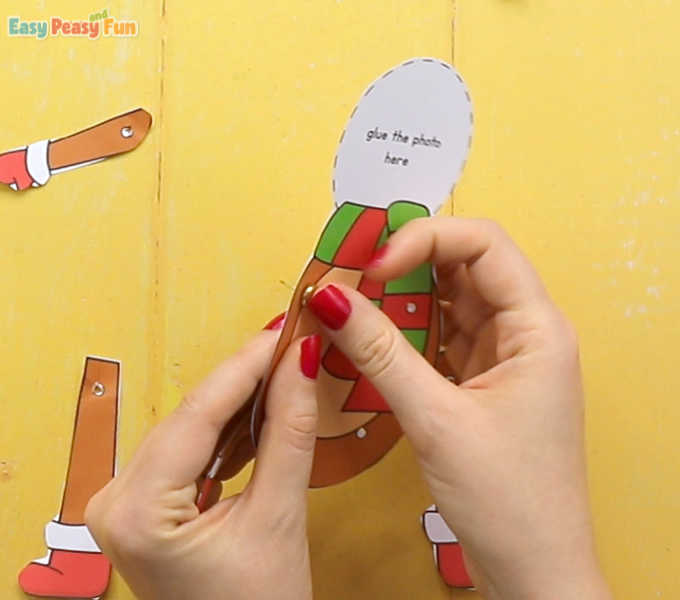
Flip the doll around, and push the split pin through the hole of the relevant body part (arm or leg).
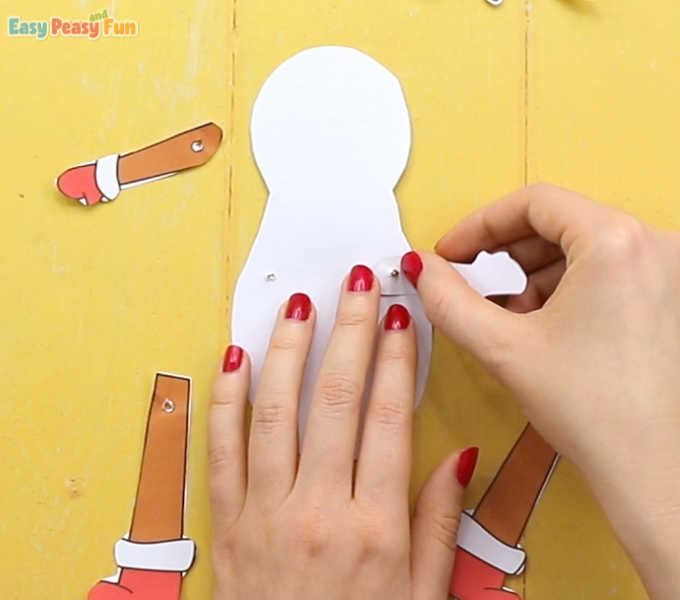
Spread the split pin to secure it.
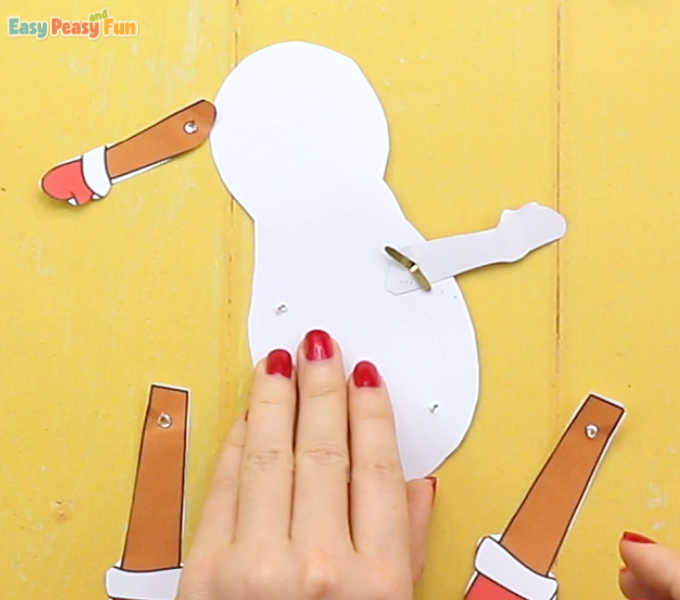
Do the same with the remaining 3 body parts.
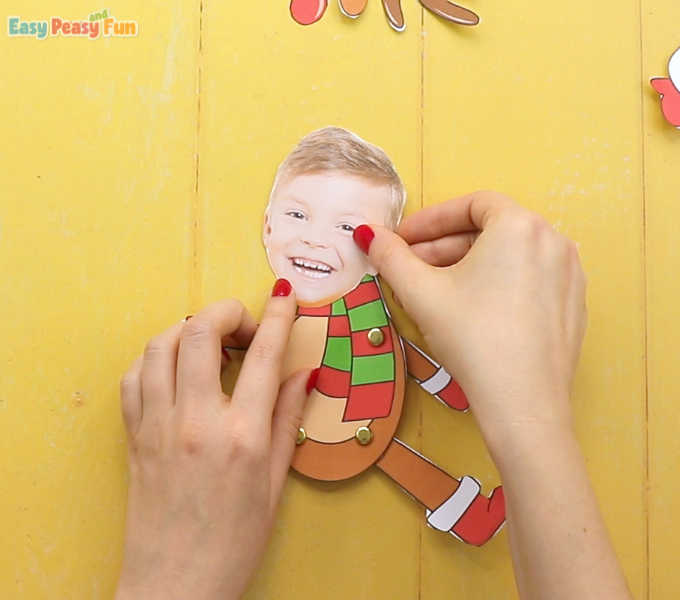
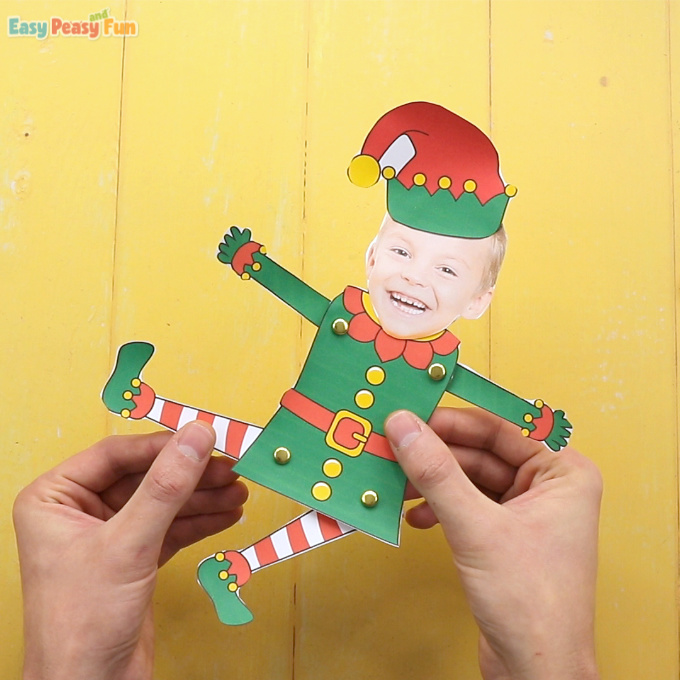
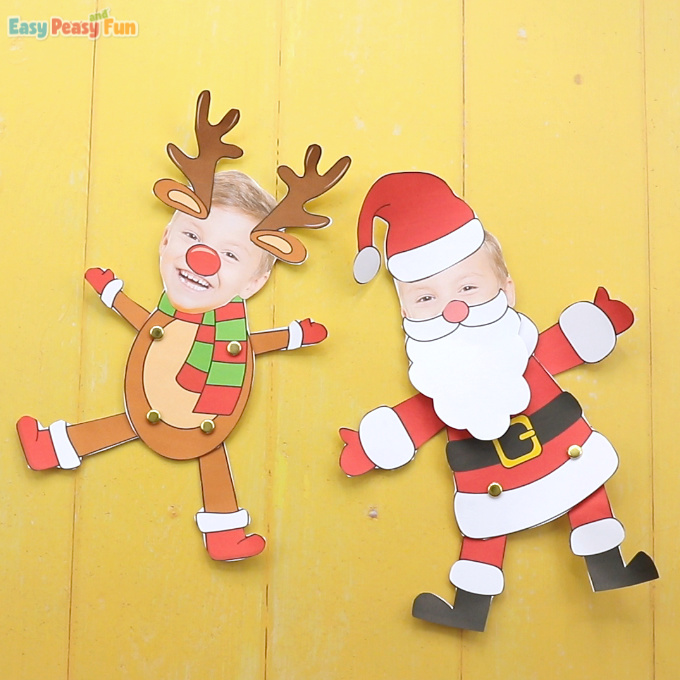
Apply glue either on the photo or the area within the dashed lines and stick the photo on the body.
For Santa, stick the Santa head and optionally beard on the photo.
For Elf, stick the hat on the photo.
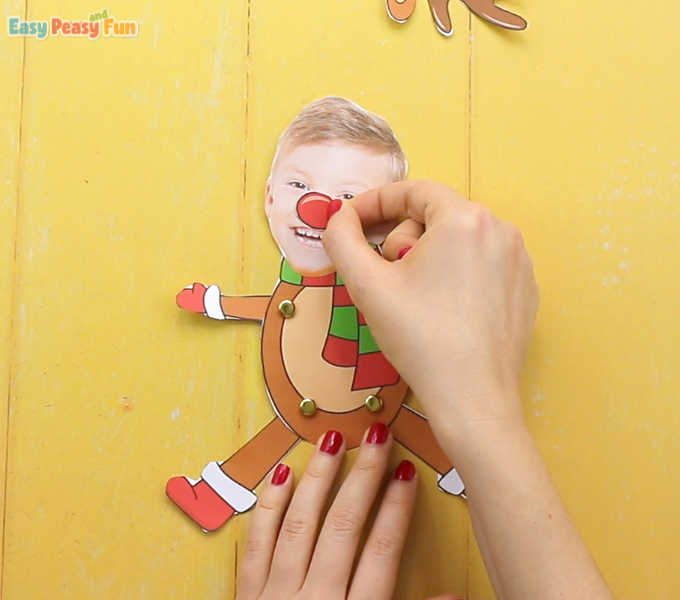
And for reindeer, stick the red nose on the nose…
And antlers with ears on the head.
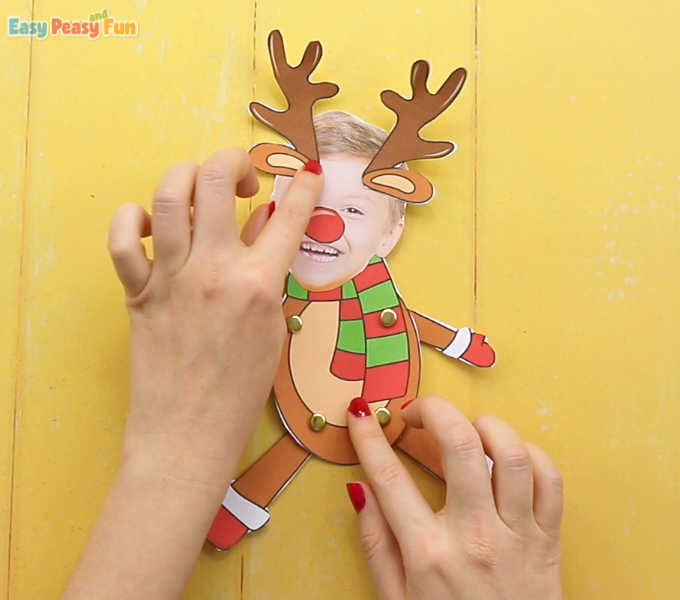
All done.
You can Elf Yourself
Or Santa Yourself too
Get the Movable Paper Doll Christmas Photo Craft Template
Want instant access to all of our printable crafts, activities, and resources?

With thousands of crafts, activities, worksheets, coloring pages, and drawing tutorials to print, you will always have just the resource you need at your disposal. Perfect for parents and teachers alike!