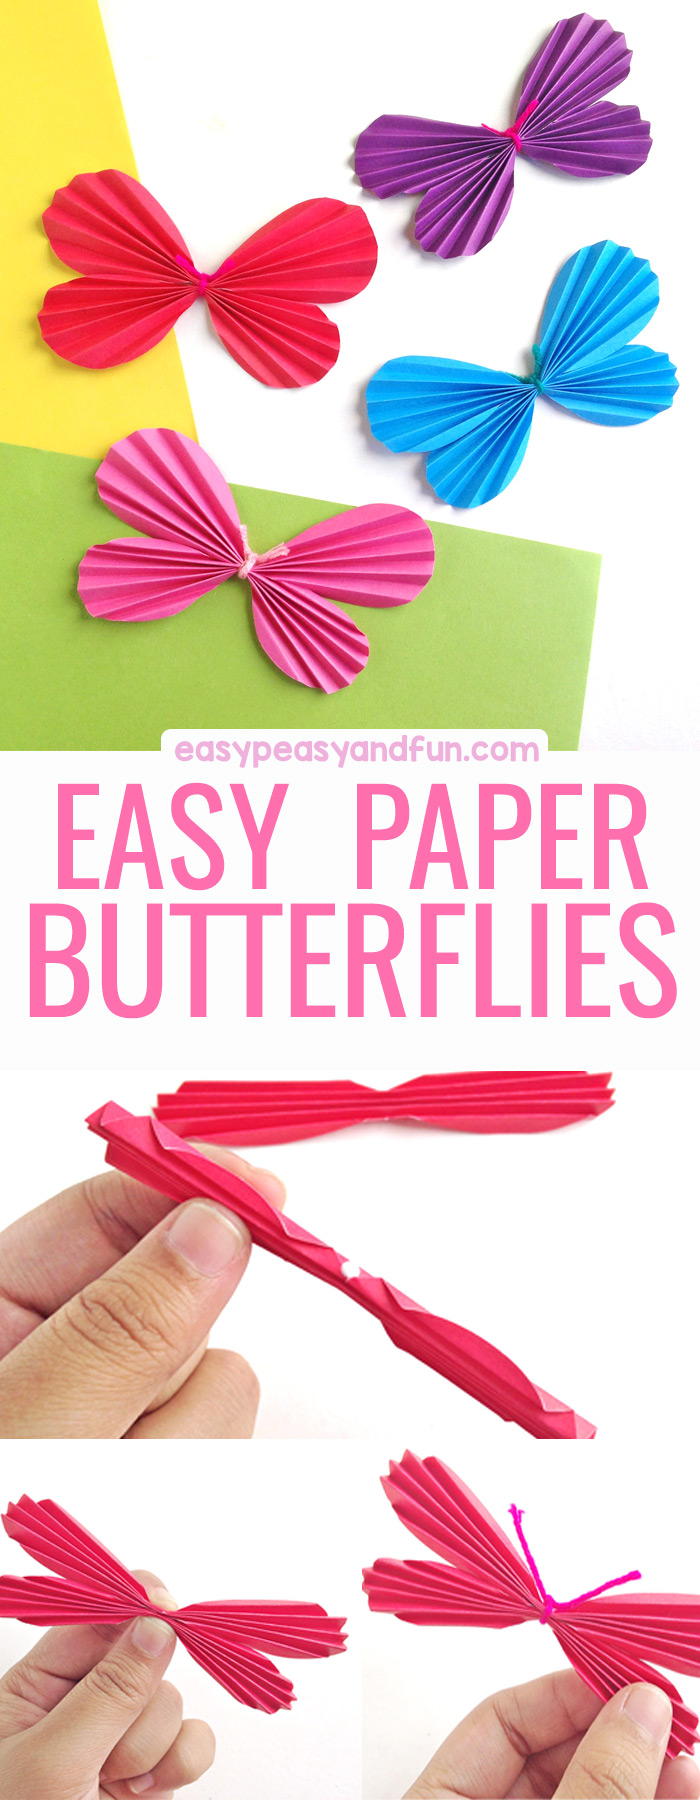
It’s really easy to learn how to make a paper butterfly and once you’ll make one you won’t be able to stop.
This project is fun both for kids and kids and heart as it’s quick and simple. It’s perfect for spring time or any time really when you just wish to make something simple and pretty.
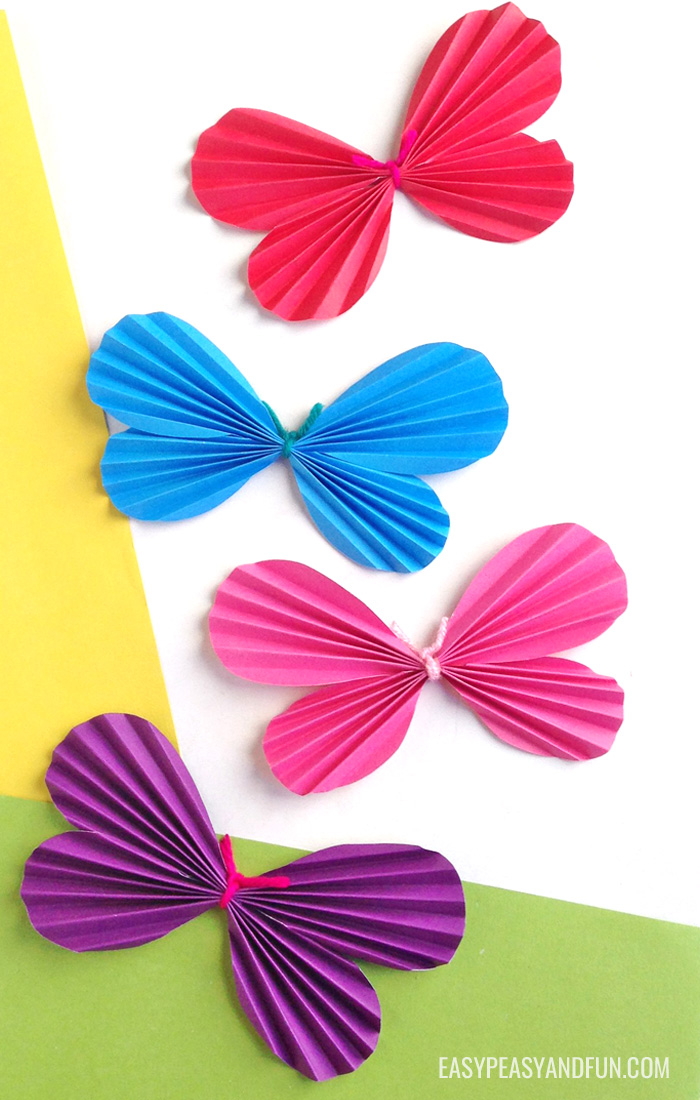
Can’t you just see these as a hanging decoration?
*this post contains affiliate links*
50 paper crafts your kids can actually do themselves

No fancy supplies — just paper, scissors, and a little imagination.
Be the first to get it on release day — and lock in the lowest price guaranteed.
Making a paper butterfly is one of the easiest crafts for kids to make and still pretty enough to entertain all ages.
They make the most wonderful spring decoration and will look great on a spring bulletin board (you can have each student make their own butterfly).
You can make this one with or without our printable template (which you can grab at the end of this tutorial) and the end result will always be stunning.

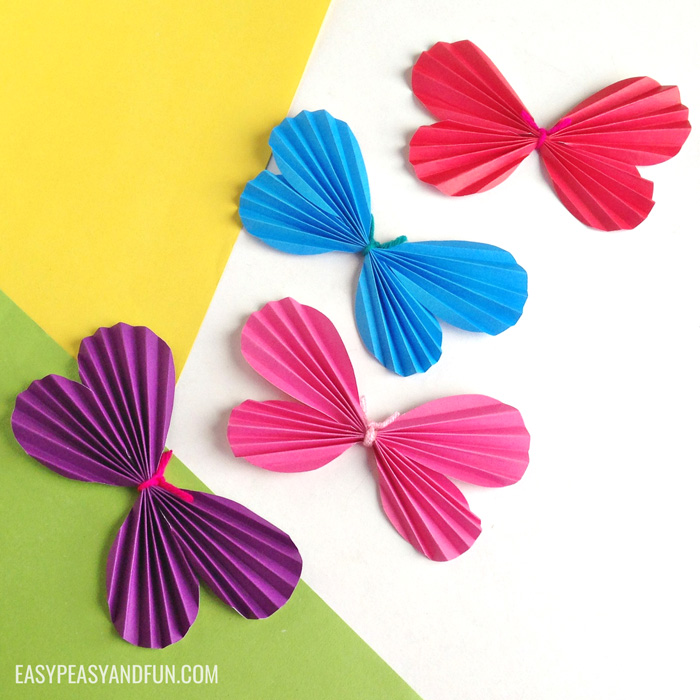
You can make the paper butterflies in one color, or you can use two different colors to make them even more interesting.
How to Make a Paper Butterfly
What you need
- paper butterfly printable template – optional (you can grab it at the end of the tutorial)
- color construction paper or regular paper
- scissors
- glue
- yarn or pipe cleaners (pipe cleaners are great for younger kids and are easy to manipulate into the desired shape)
Step by Step Paper Butterfly Tutorial
If working with template, either print it on regular paper and use as a stencil or print directly on color paper.
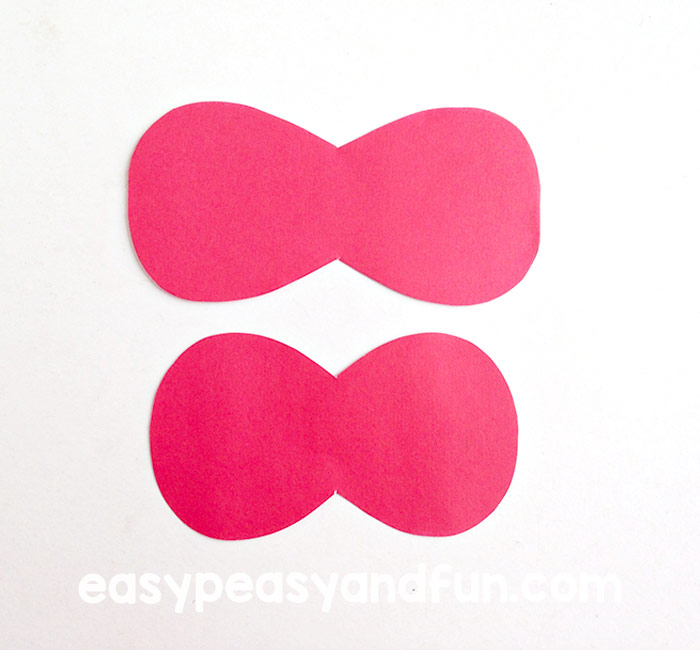
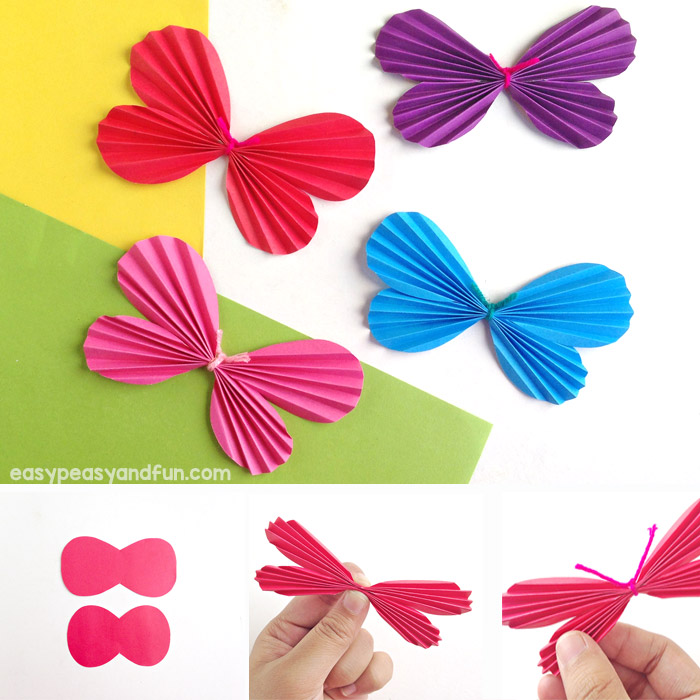
Trace the shapes onto a colored paper and cut. If you printed the paper butterfly template on colored paper, cut along the lines.
This paper butterfly is made from two parts.
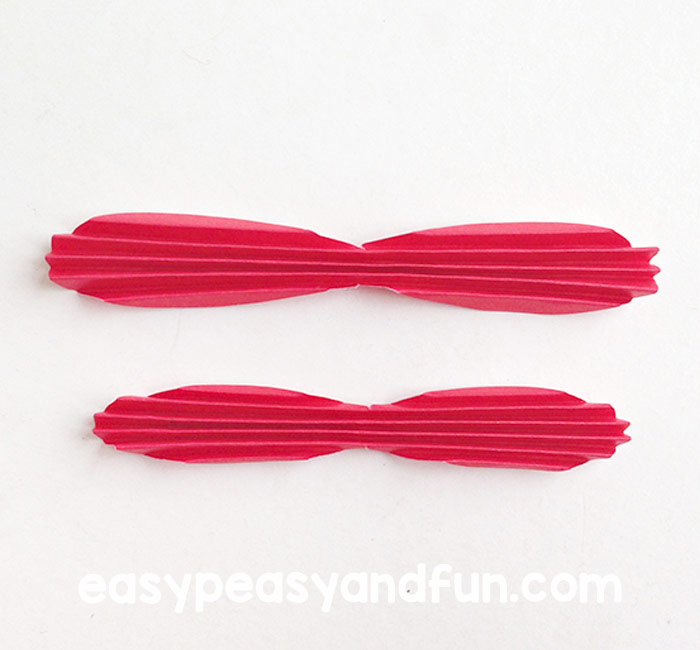
Fold both shapes – make accordion folds from top to bottom.
Try to make them small and even thr
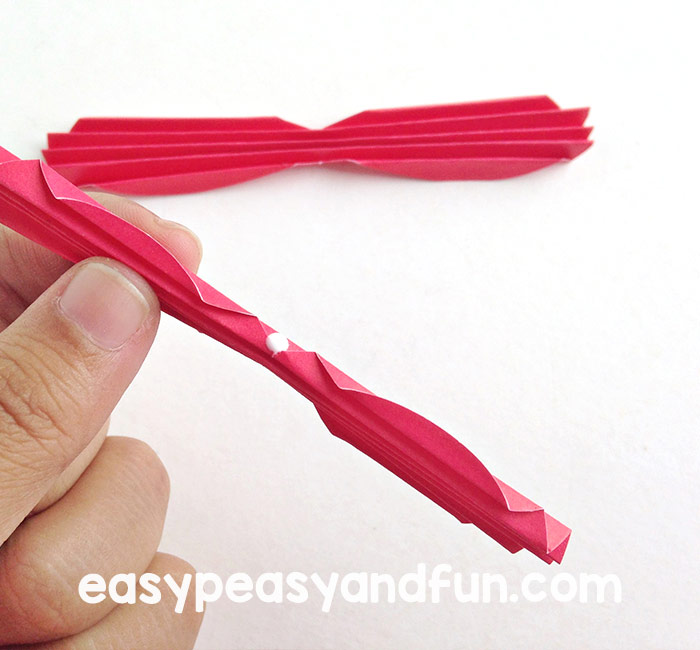 Take one folded shape and apply a small amount of glue on the top middle part.
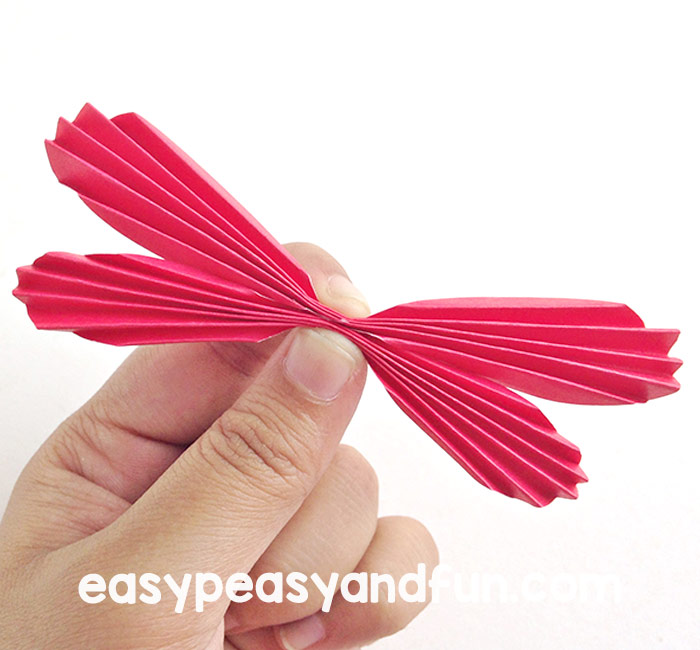 Take the other folded shape and press it on top of the first one, pinch them together in the middle for the glue to set.
It’s best to hold them together for a while to give the glue enough time to set. You could also use a clothespin instead of your fingers, especially if you are making more butterflies.
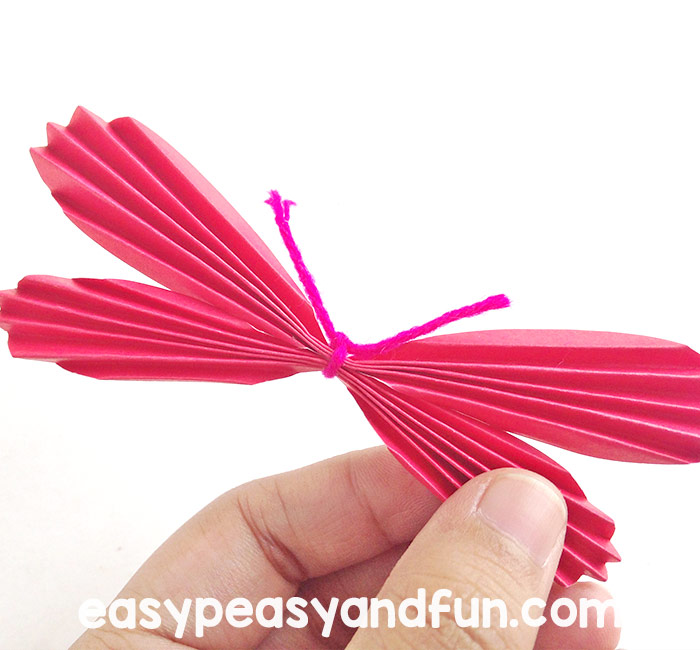
And you are done with the wings of your DIY paper butterfly, so it’s time to move on to the body. You can either cut a small piece of yarn and wrap it around and tie in the middle.
After you have tied the knots, leave enough yarn to make the antennae. Cut off excess yarn.
Alternatively you can make the body and antennae with pipe cleaners.
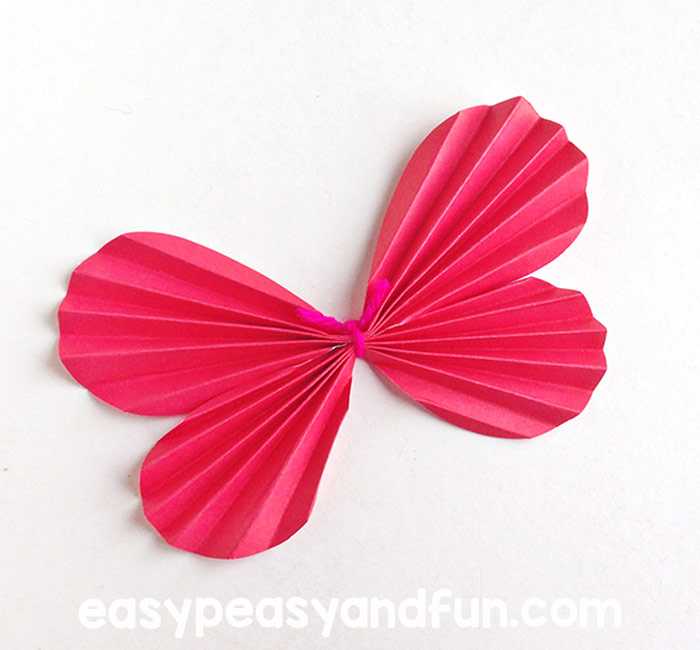
Almost there! Last thing to do is to spread the folds a bit, so the shape of the butterfly really shines through.
Now make as many as you like!
Want instant access to all of our printable crafts, activities, and resources?

With thousands of crafts, activities, worksheets, coloring pages, and drawing tutorials to print, you will always have just the resource you need at your disposal. Perfect for parents and teachers alike!