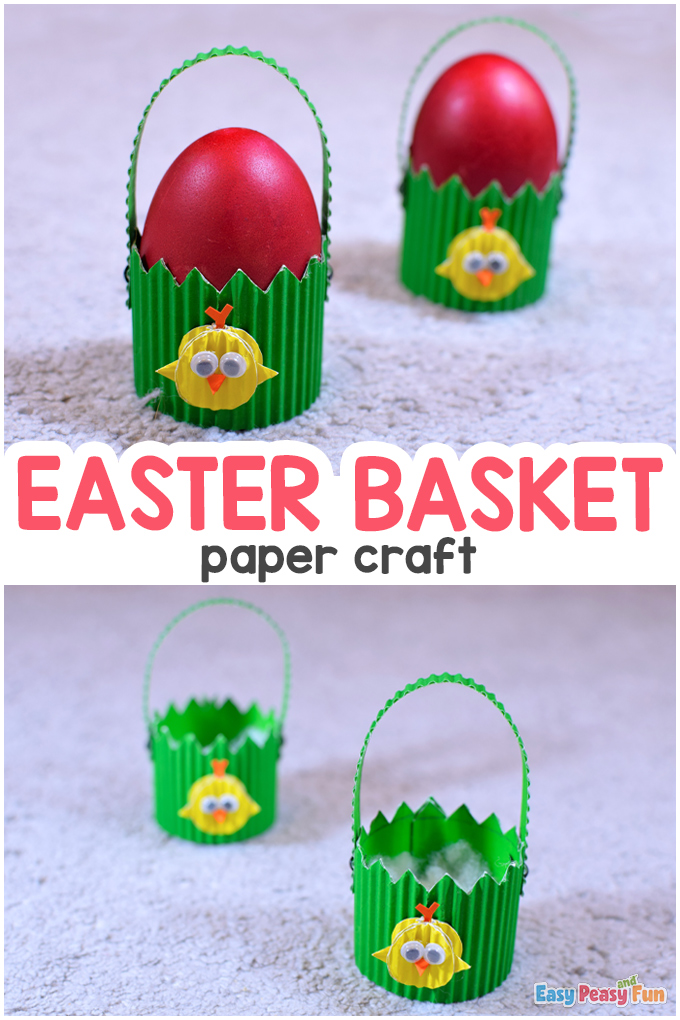
Get ready for the holidays and make a neat Easter Paper Basket Craft for your colorful eggs.
The new egg holders will look amazing on your Easter table.
*This post contains affiliate links*
50 paper crafts your kids can actually do themselves

No fancy supplies — just paper, scissors, and a little imagination.
Be the first to get it on release day — and lock in the lowest price guaranteed.
Easter is just around the corner, and guess what? We have a bunch of Easter Crafts for Kids (check out our Surprise Easter Egg Cards or make your own Easter Egg Paper Toys).
Now it is time to get ready and make our very own Easter baskets!
It is a super easy project to do, and it will add an authentic touch to our holiday tables.
So, if you guys want to craft with us today, grab your tools, and let’s go!
How to Make the Easter Paper Basket Craft
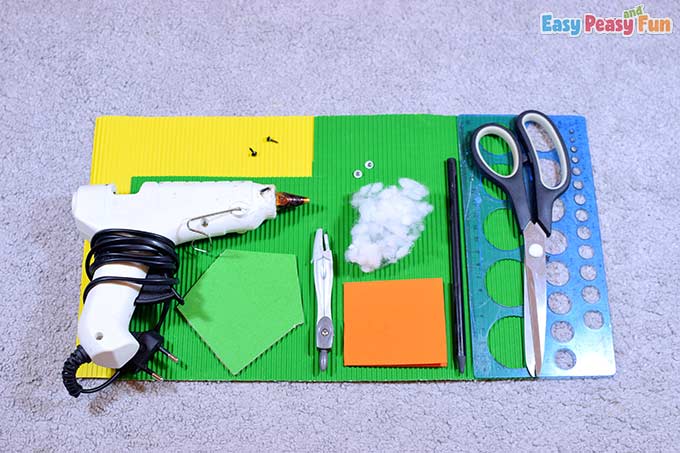
What you need:
- ribbed green color paper
- ribbed yellow color paper
- two split pins
- green cardboard
- pillow stuffing (cotton balls or polyester balls)
- hot glue
- orange paper
- two googly eyes
- scissors
- pencil
- ruler with circle shapes
- compass
Step by Step Tutorial
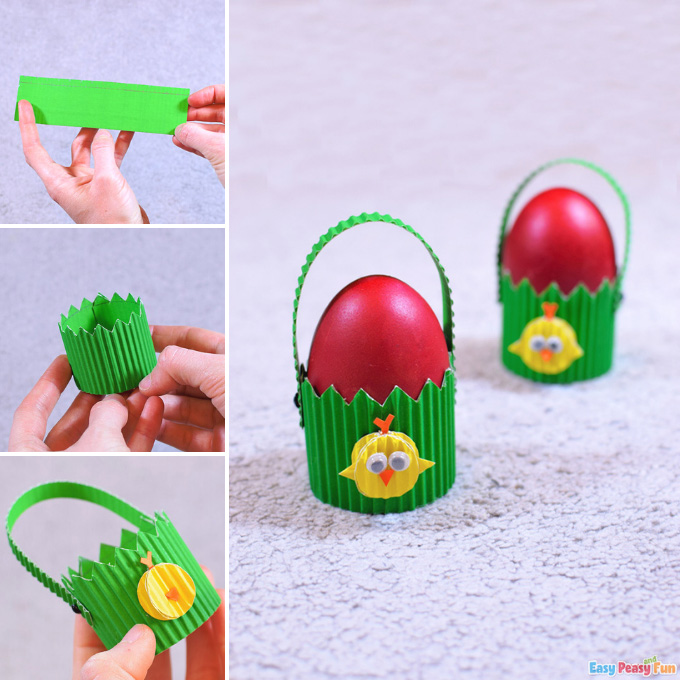
The Egg Basket
Take the compass and draw a circle with 4 cm diameter on the cardboard.
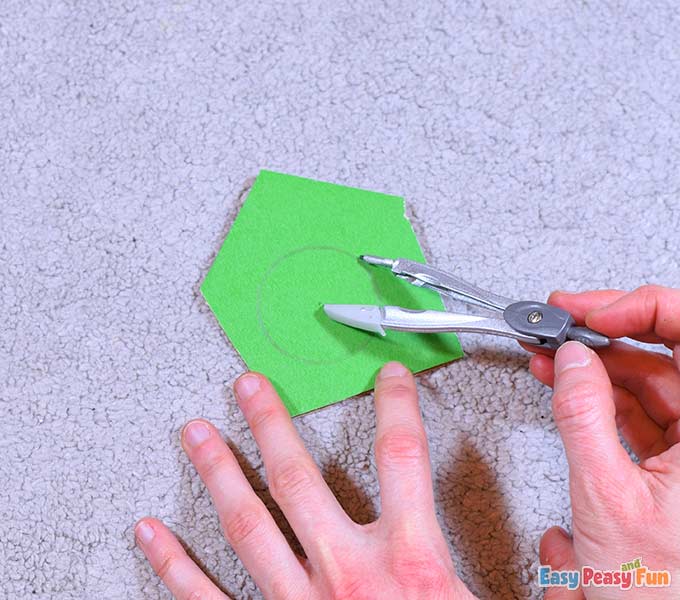
Cut the circle out.

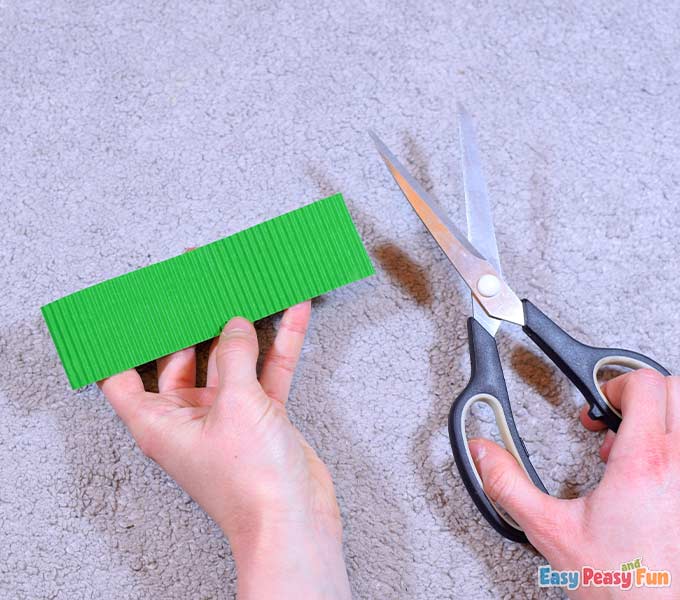
Draw a 4 cm x 5 cm rectangle on the ribbed green paper.
Cut it out.
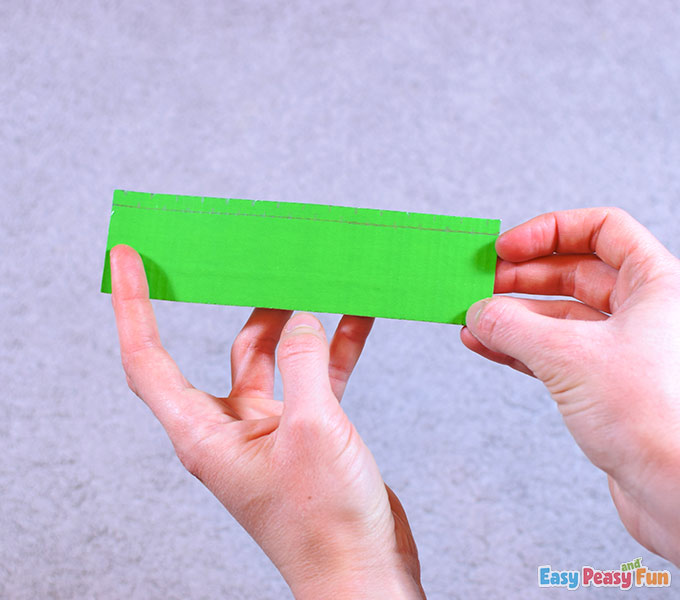
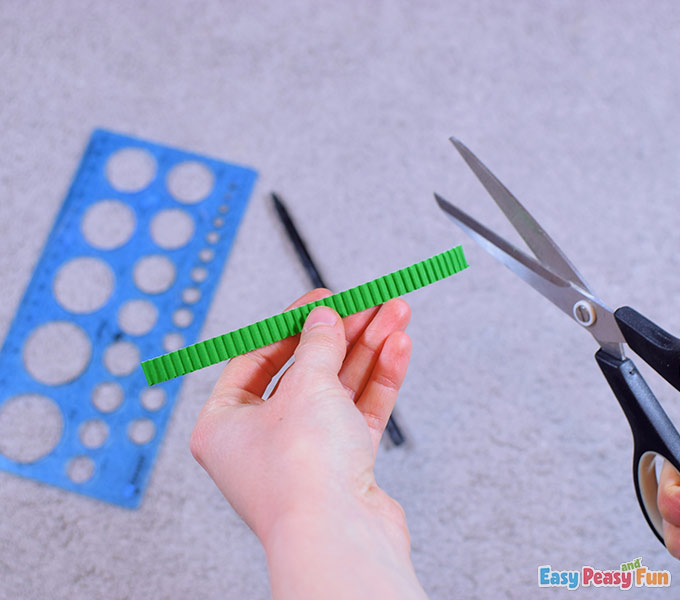
Now draw a 0,5 cm wide and 15 cm long strip.
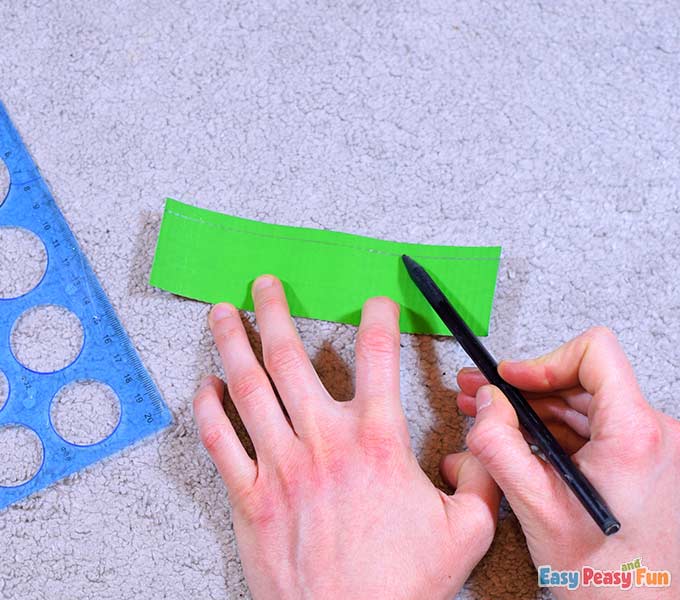
Mark fifteen 1 cm parts on the bottom part of the stripe as shown.
Then mark fourteen 1 cm parts on the upper part of the strip – each of the marks should come in between the bottomed 1 cm parts.
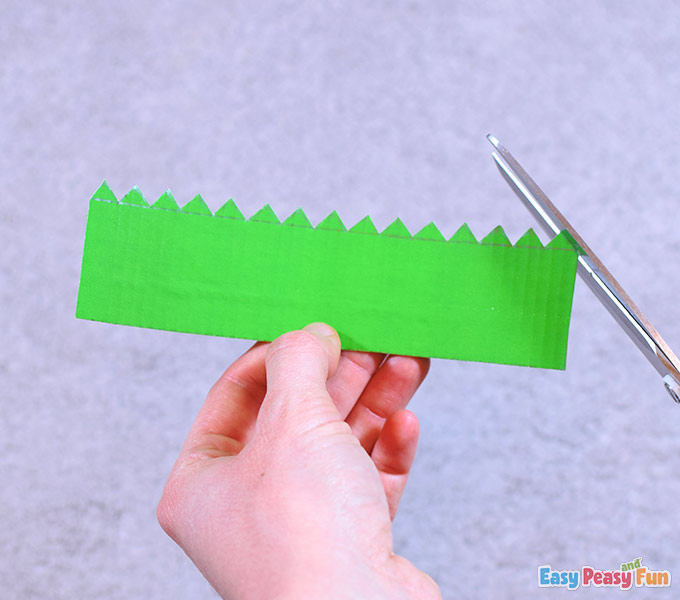
Now draw some triangles following the marks. Make them equal in size.

Take your scissors and make some cuts following the triangles.
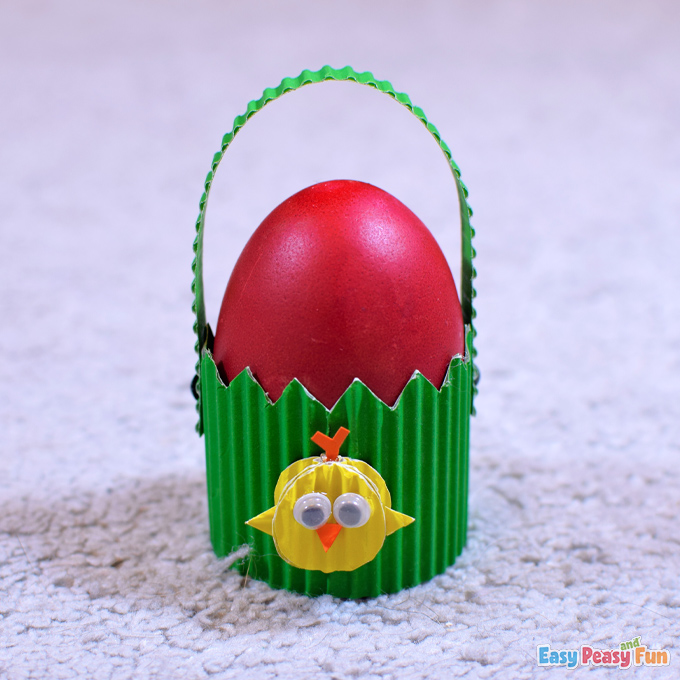
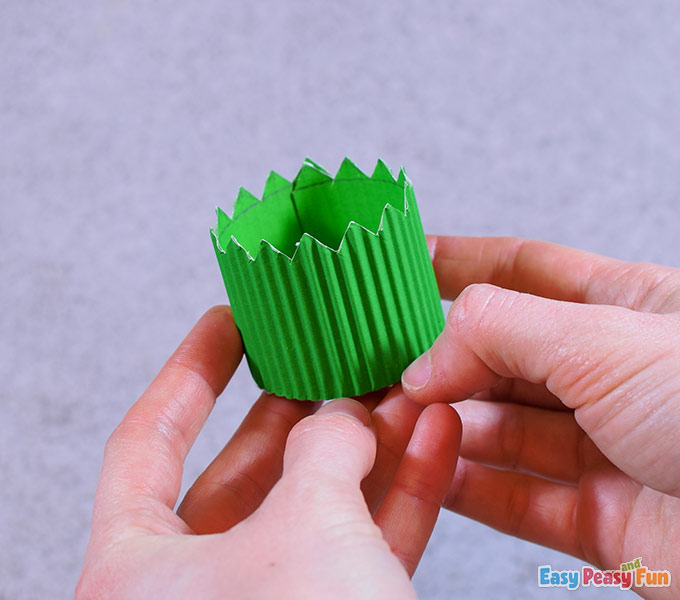
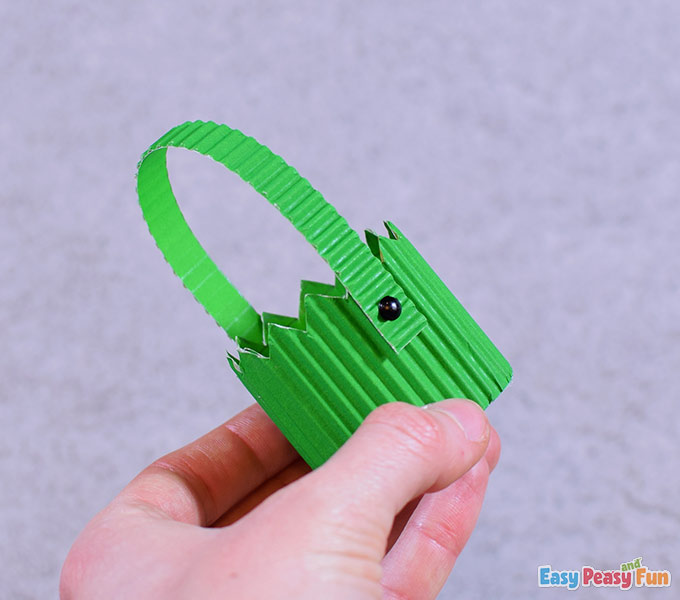
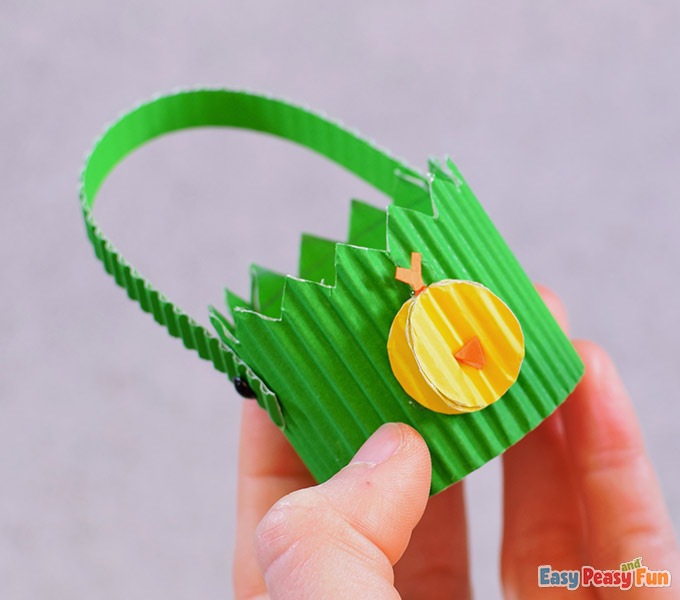
This green piece will serve as a bottom for our Easter basket.
Apply some glue around the cardboard circle and attach the green piece on and around the circle.
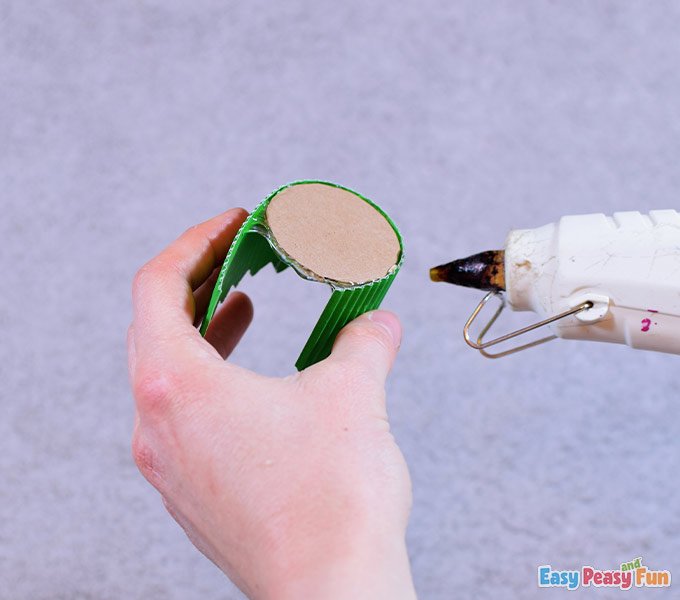
Glue the ends and attach them.
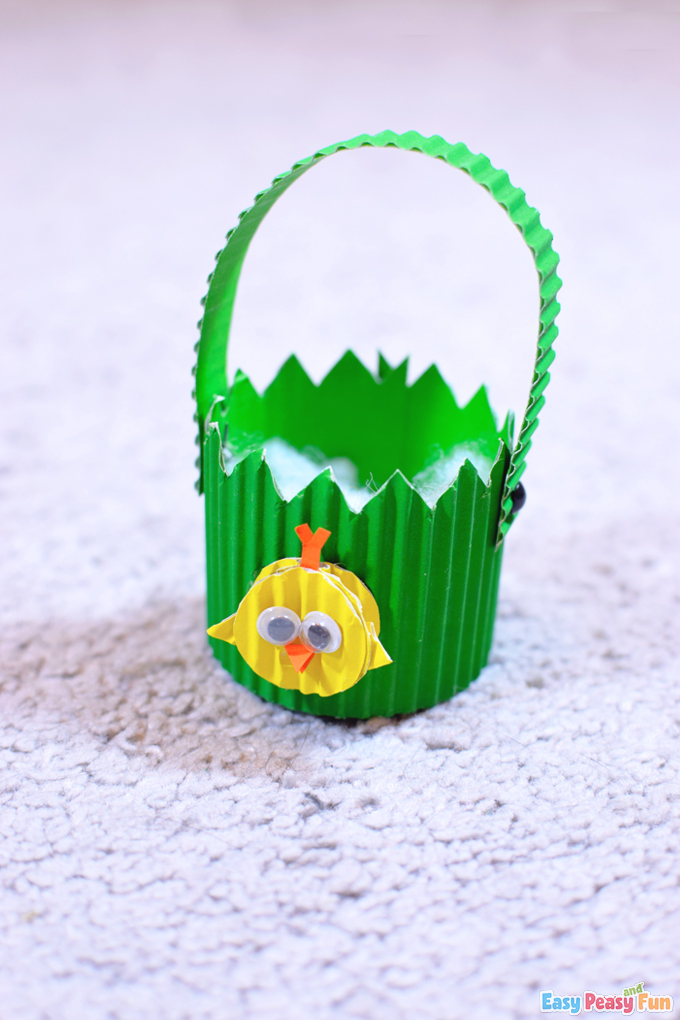
We just made the bottom part of our basket.
The Basket’s Handle
Now cut out 1 cm x 14,5 cm ribbed green strip.
It will serve as a basket handle.
Attach one end of the strip on the basket with a split pin. Then attach the other end of it on the opposite side with a split pin.
Split the ends of the pins, so our handle stays in place.
Also, check if the handle moves freely.
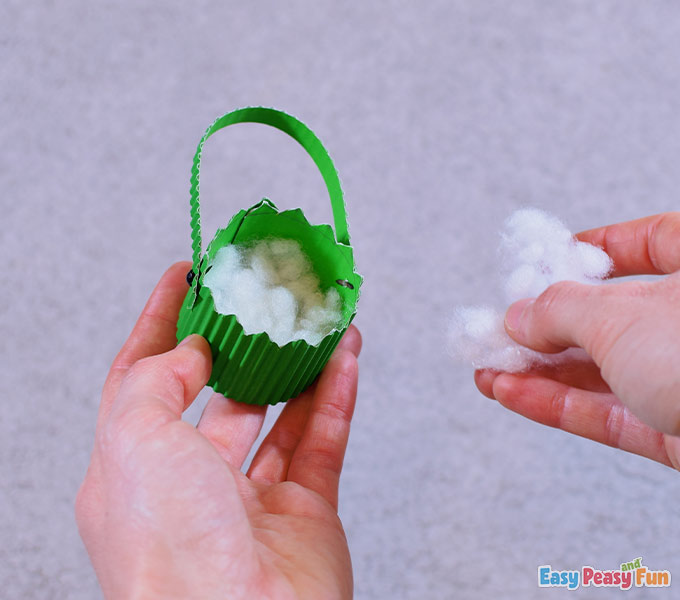
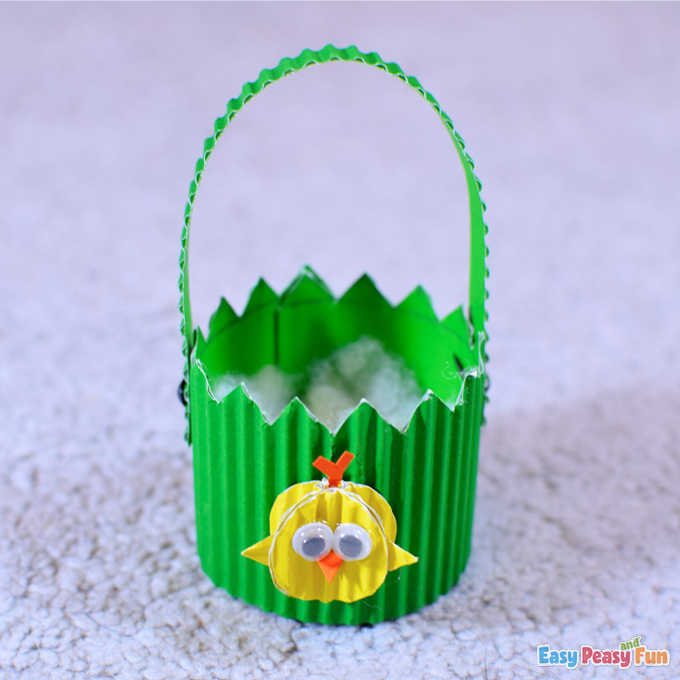
Take some pillow stuffing and place it inside the basket.
We used polyester balls.
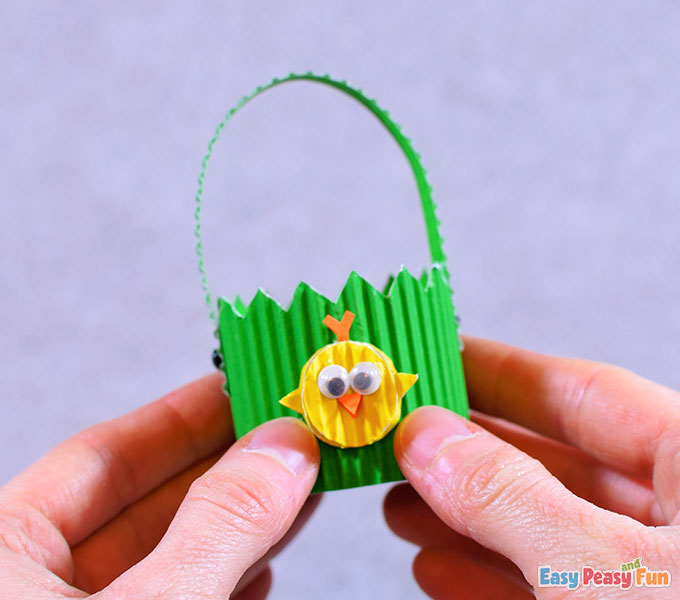
The Chick
Draw three small circles on the ribbed yellow paper, then cut them out with your scissors.
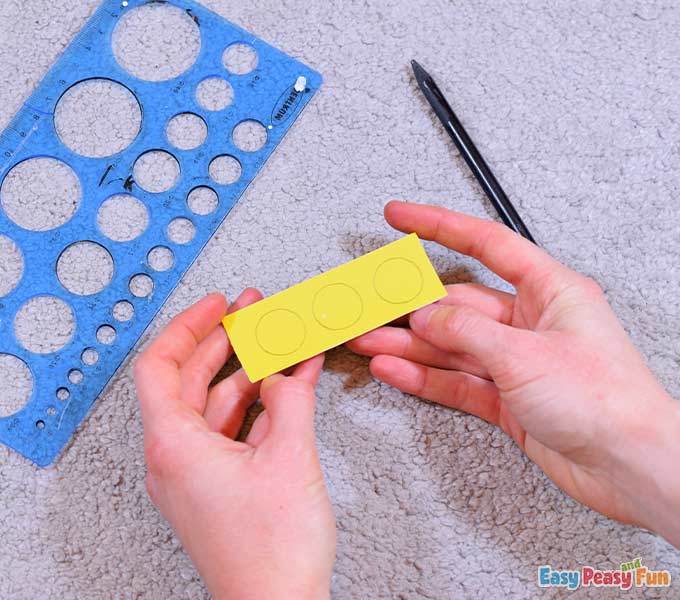
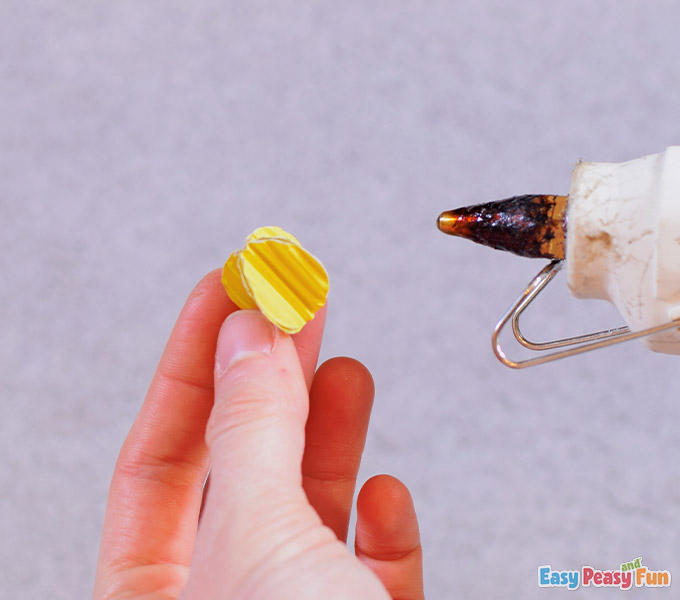
Fold each of the circles in half.
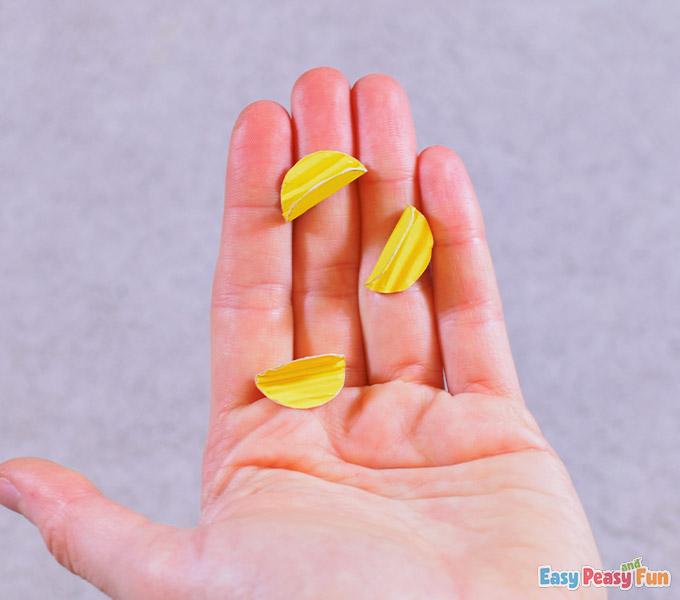
Glue them together as shown.
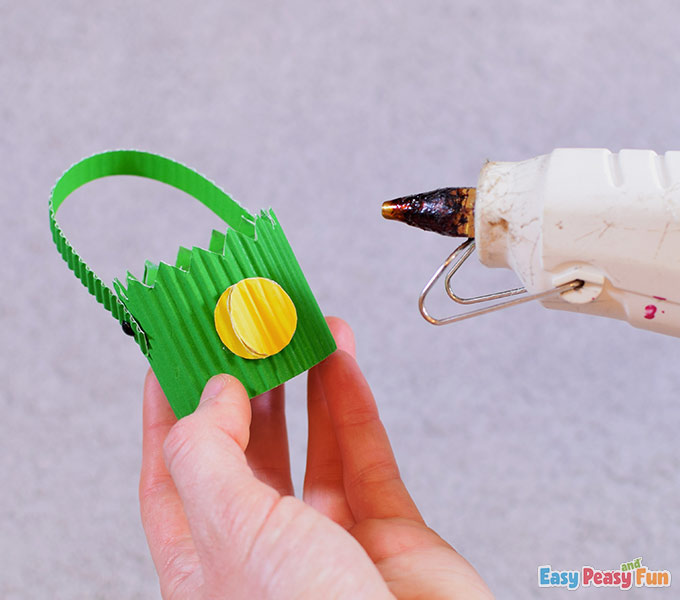
Our chick will serve as décor for our basket.
Glue the chick’s body on the basket.
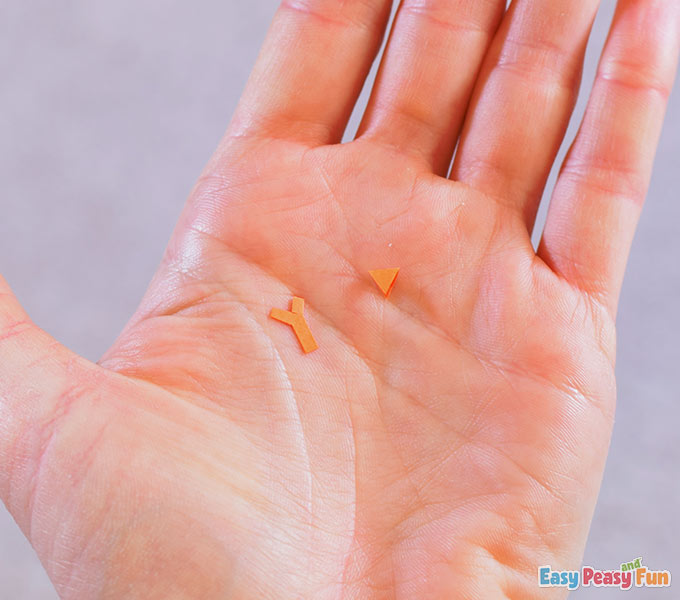
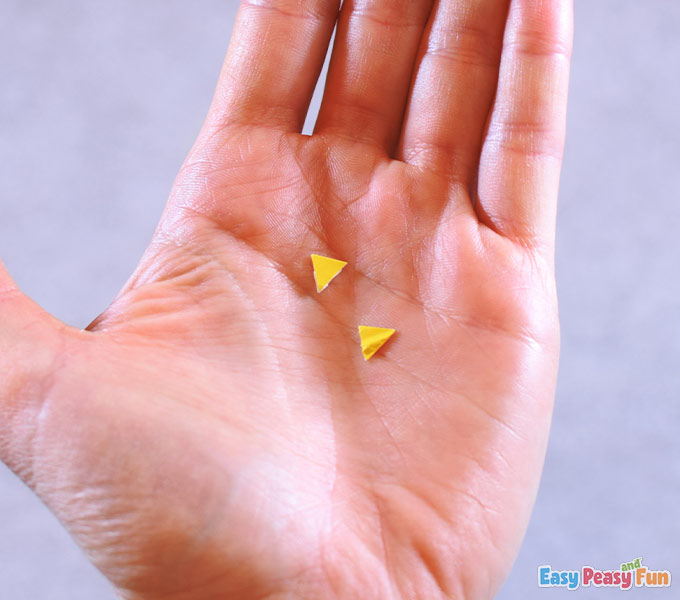
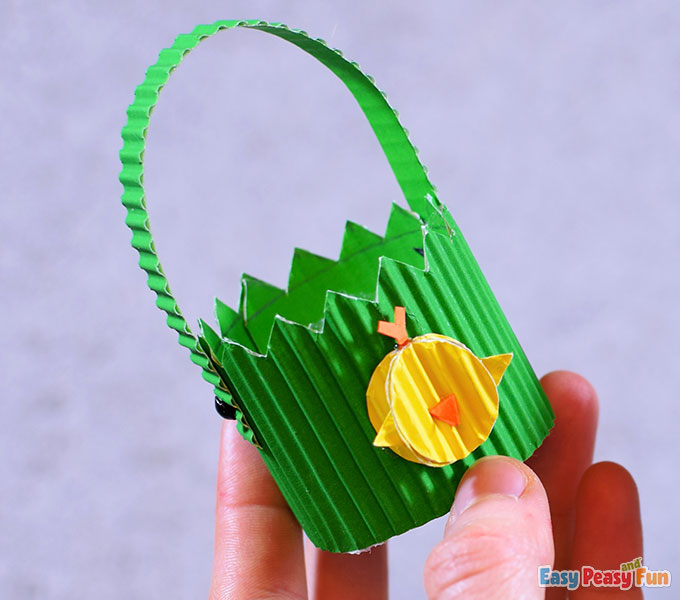
Draw a beak and chick’s hair on the orange paper.
Cut them out.
Glue the beak and the hair on the chick.
Draw and cut out two tiny wings on the ribbed yellow paper.
Put some glue on the wings and attach them to the chick.
Take the googly eyes, and glue them above the chick’s beak.
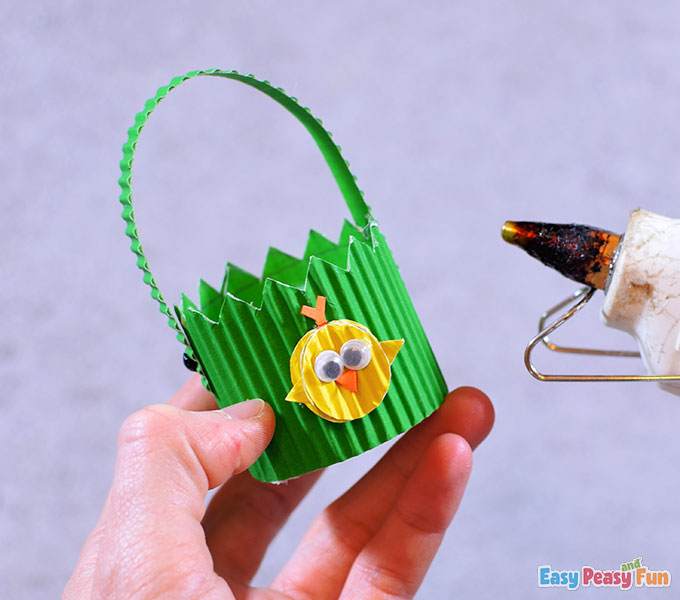
All done!
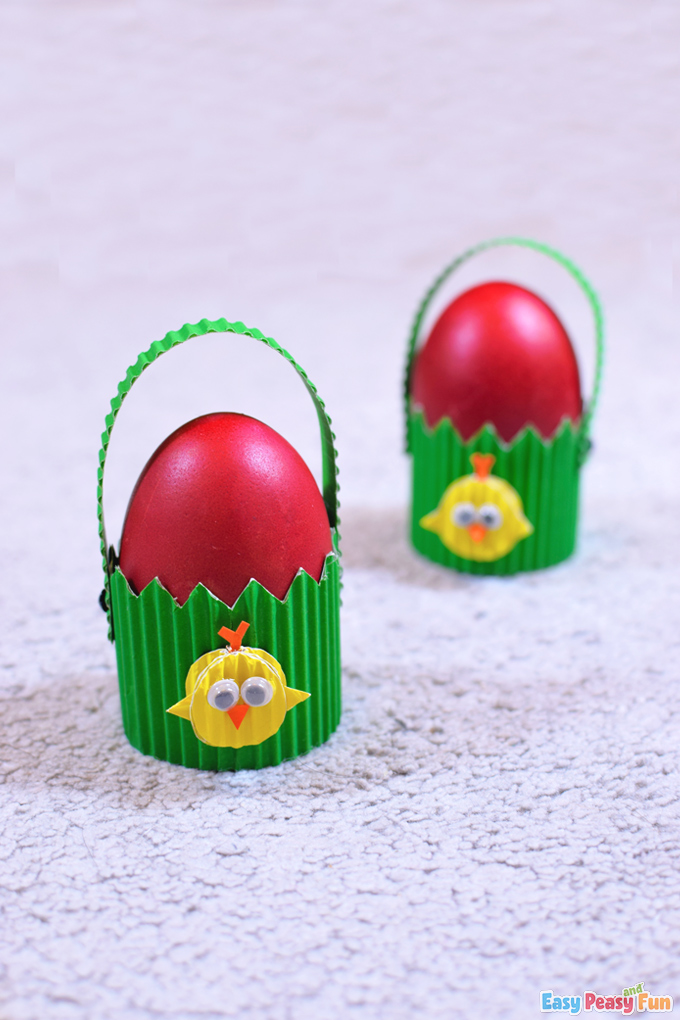
Now you can place your favorite Easter egg inside the basket.
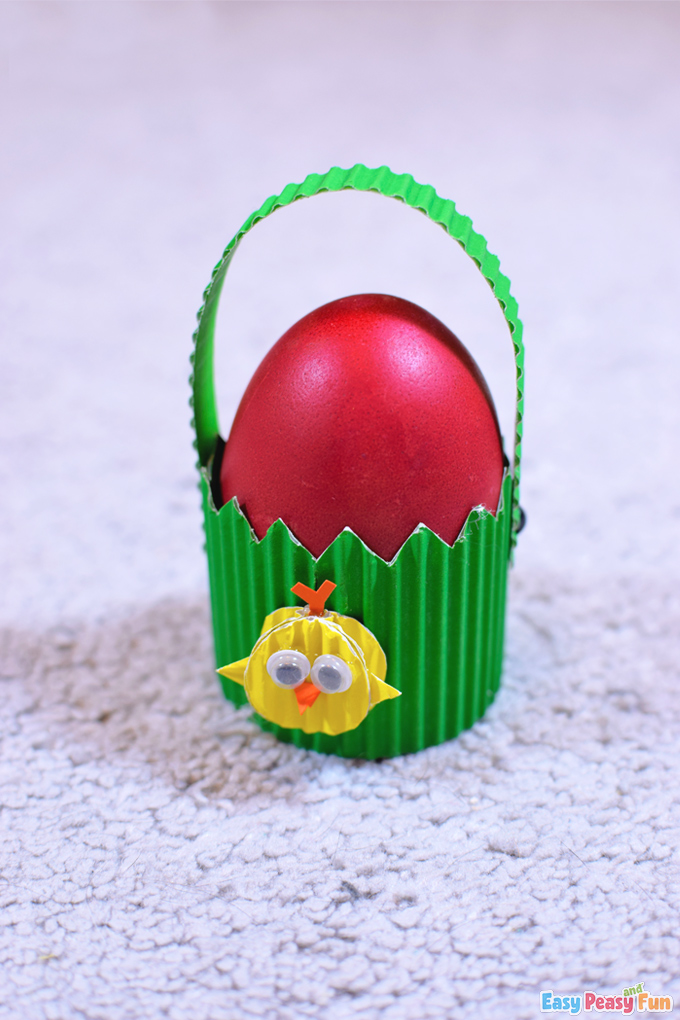
You can also put some Easter treats inside it; it doesn’t have to be an egg.
Whoo-hoo!
We like how this Easter basket turned out.
How about you?
Want instant access to all of our printable crafts, activities, and resources?

With thousands of crafts, activities, worksheets, coloring pages, and drawing tutorials to print, you will always have just the resource you need at your disposal. Perfect for parents and teachers alike!