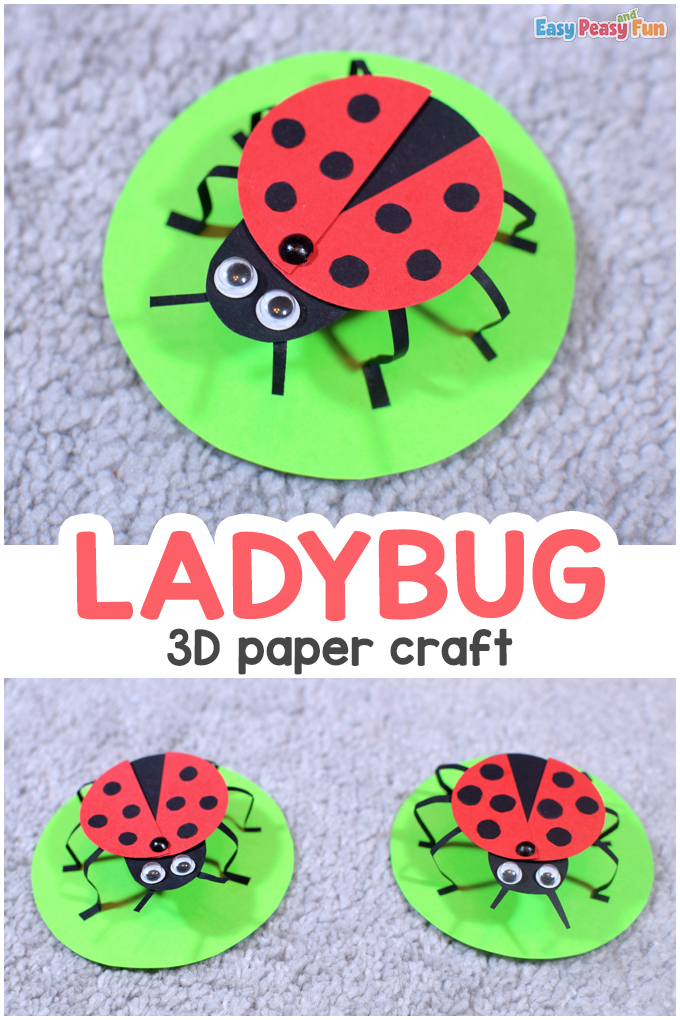
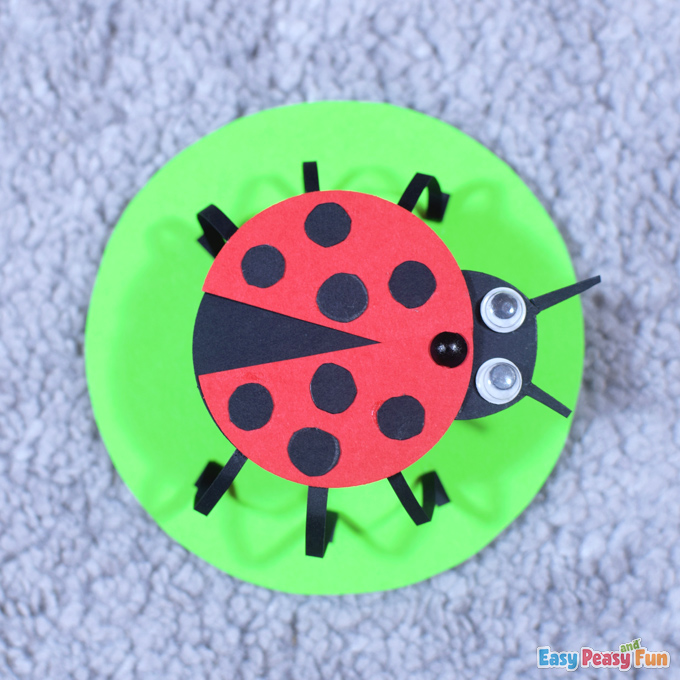
Ready for spring crafting? We’re inviting you to make make a lovely 3D Paper Ladybug Craft with us.
This unique ladybug has movable wings and is easy to assemble.
 *This post contains affiliate links*
50 paper crafts your kids can actually do themselves

No fancy supplies — just paper, scissors, and a little imagination.
Be the first to get it on release day — and lock in the lowest price guaranteed.
We love making Spring Crafts and everything related to the season. Get your kids to learn How to Draw a Ladybug on their own in 6 simple steps by following our tutorial.
After they finish, they can color a set of Little Bugs Coloring Pages as well.
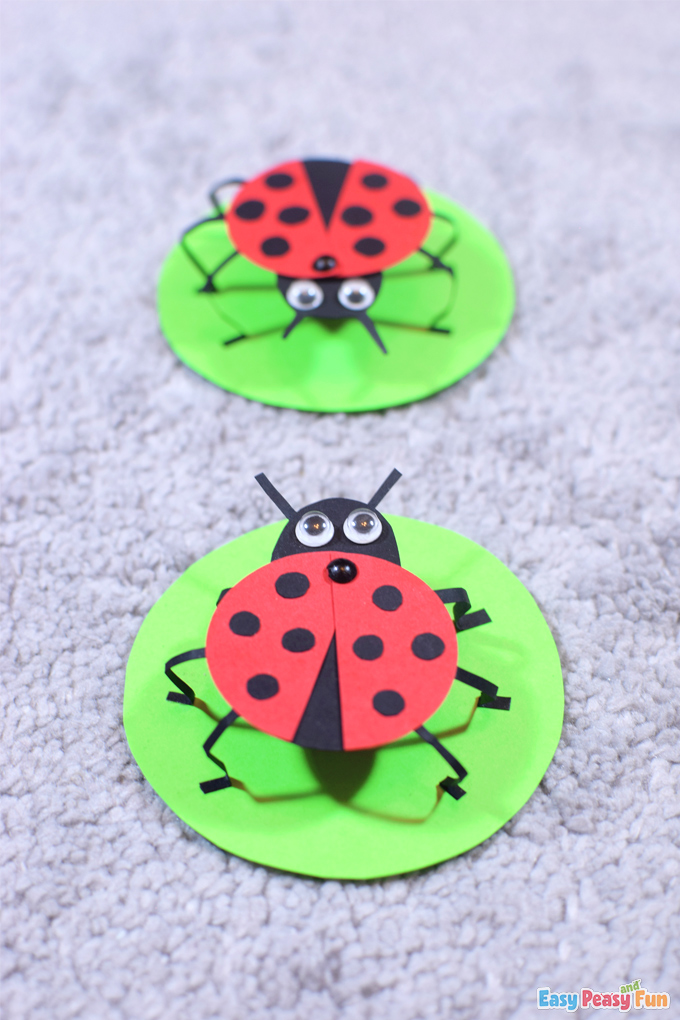
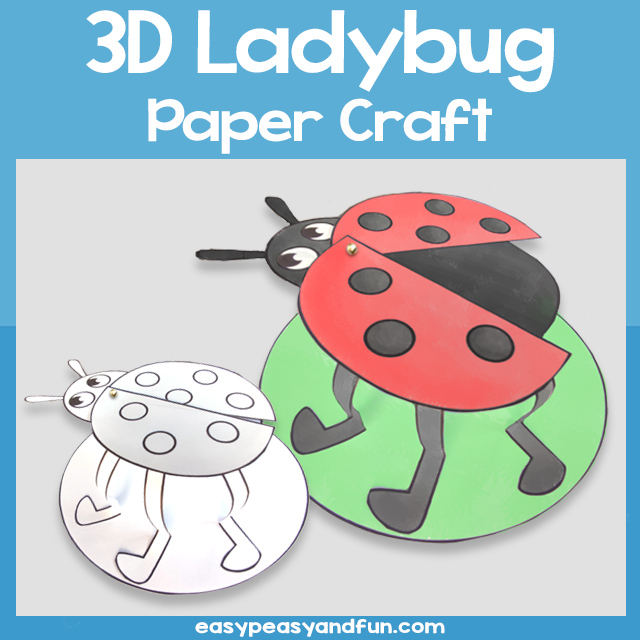
Join us making this sweet ladybug today. It is a simple one with movable wings; the bug is ready to take off the green leaf.
Usually, we don’t notice ladybugs outside unless they land on our windows or t-shirts; they’re tiny like pearls, and they hide inside flowers and on the backside of leaves.
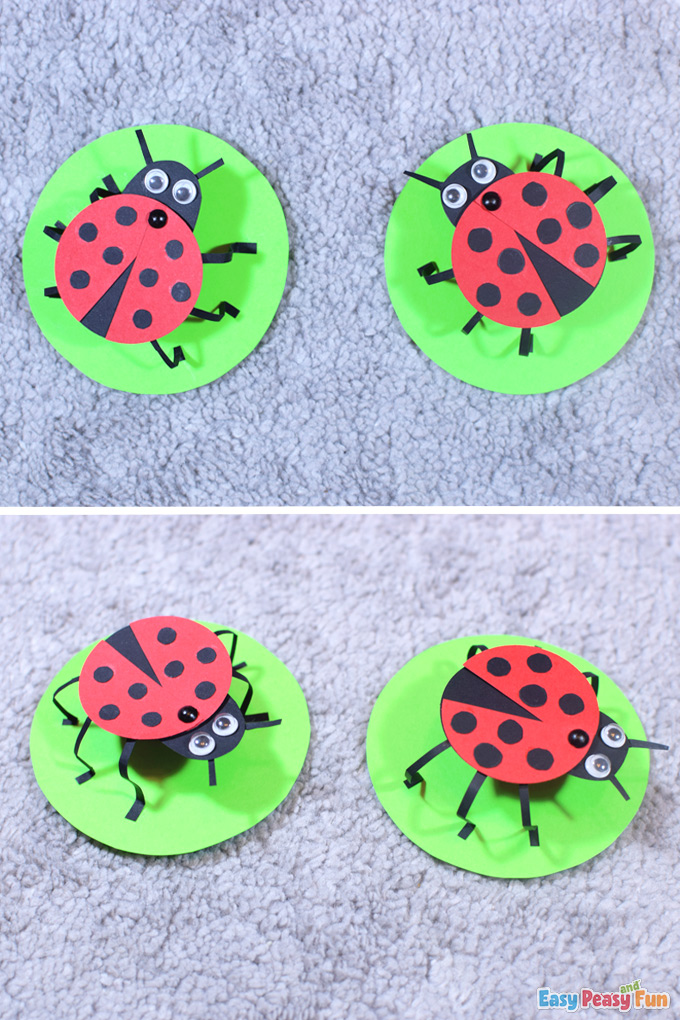
And this time, we can craft them in any size we want to (we can make even giant ones, and you can’t find those in nature, right?).
We can also animate them so they look natural and craft tons of different personalities for them and enjoy the beauty of it all.
So guys, anytime you want to have a ladybug around your home, grab your papers and craft your favorite one.
We have plenty of them waiting for you on our website!
How to Make a 3D Paper Ladybug Craft
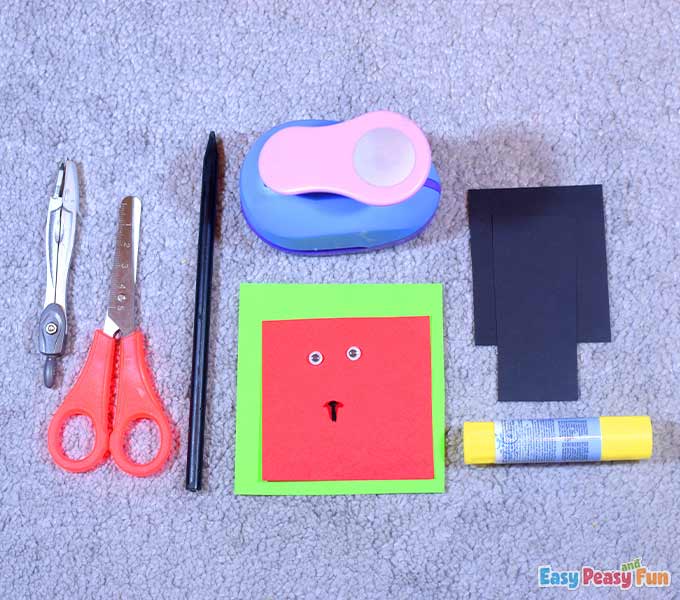
What you need:
- green cardstock
- red cardstock
- black cardstock
- split pin
- scissors
- glue
- googly eyes
- compass
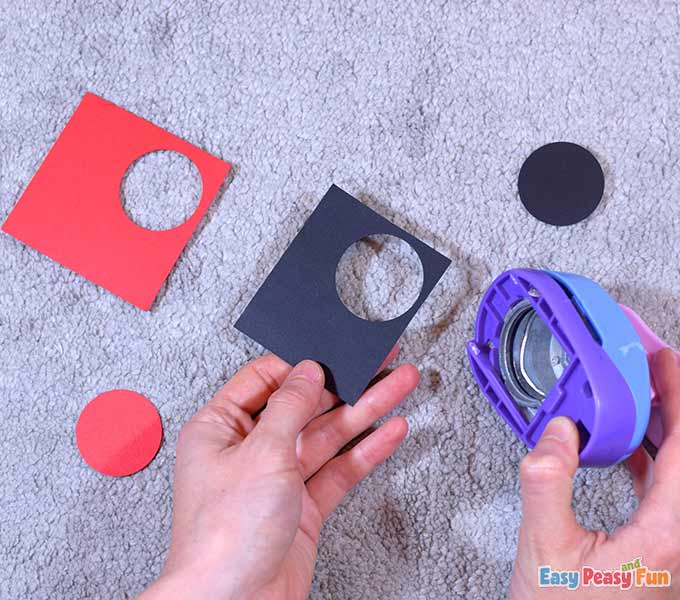
- circle puncher
- pencil
Let’s start!
Step by Step Tutorial
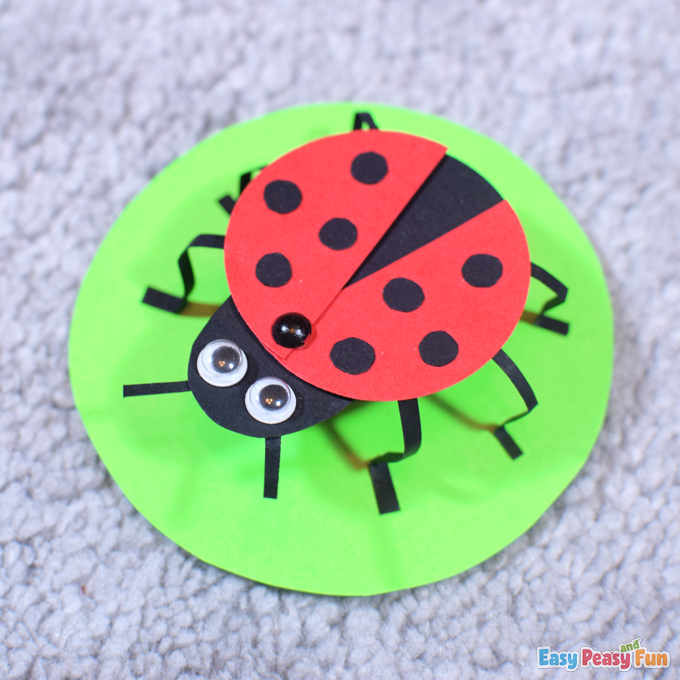
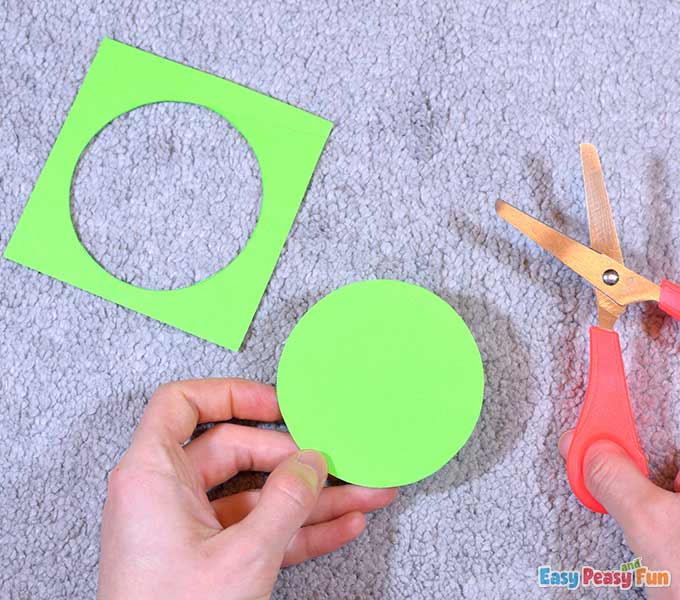
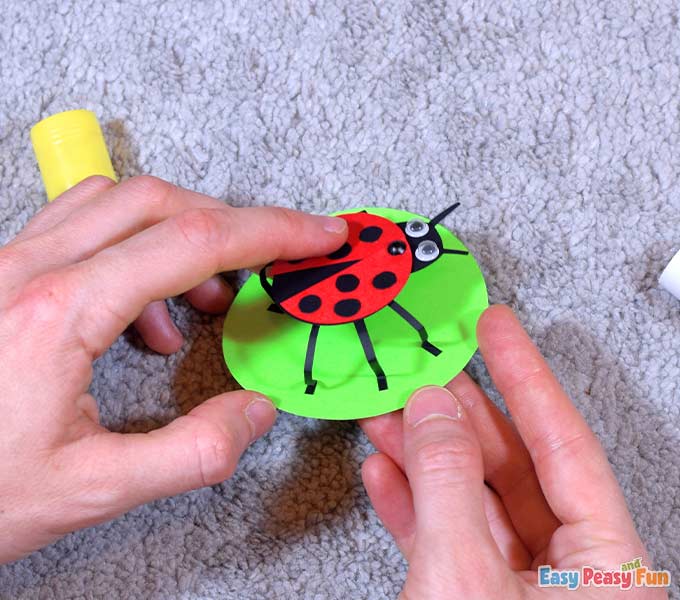
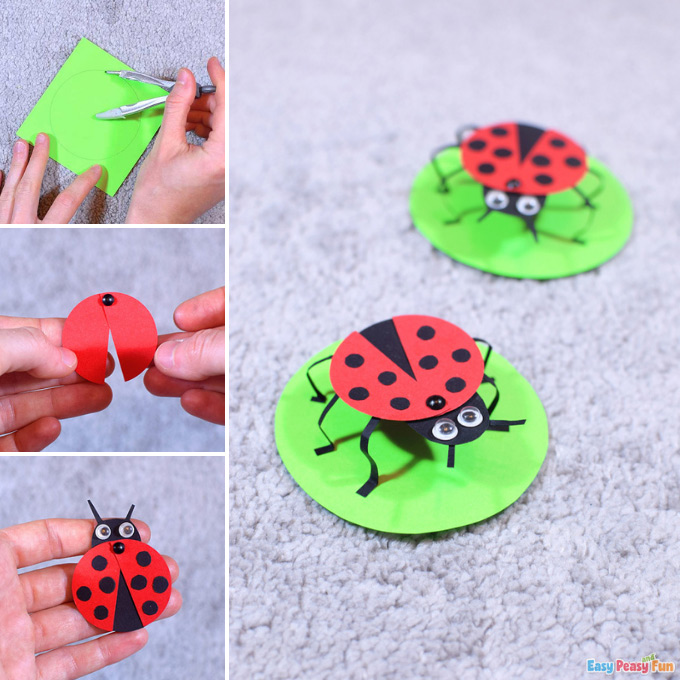
Take the compass and draw a circle on the green cardstock.
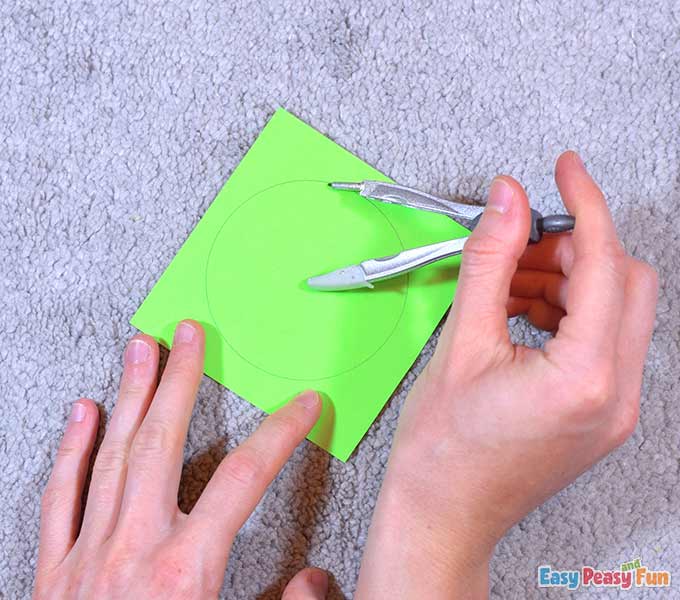
Cut out the circle. Our circle has a 4 cm diameter.
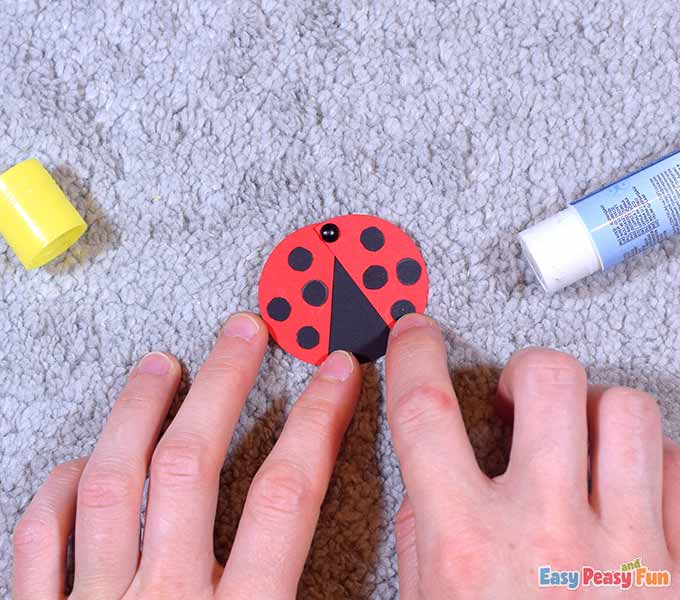
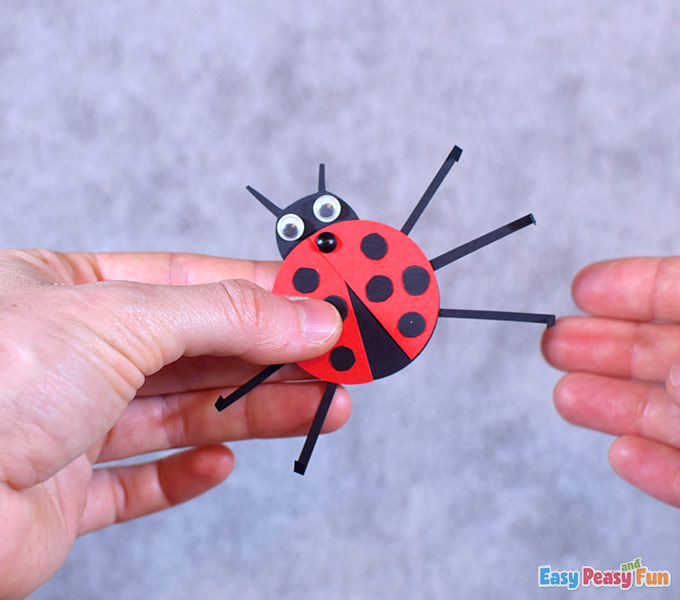
Punch out two circles, a red one and a black one.
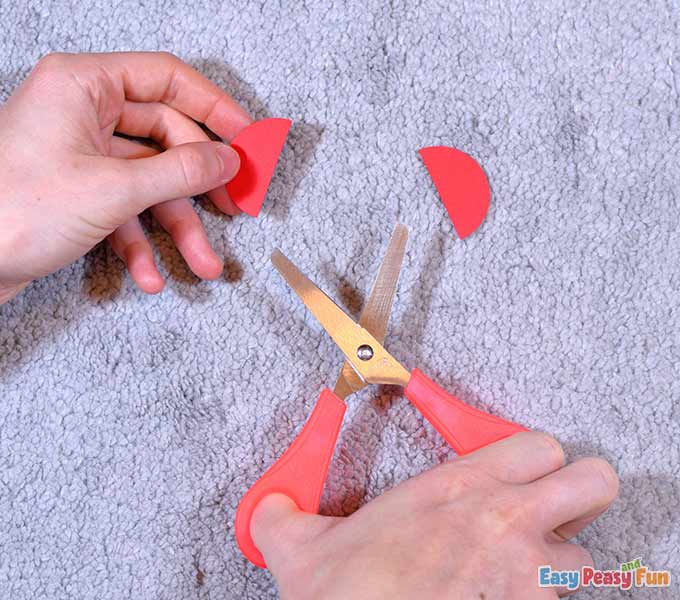
Divide the red circle into two equal parts. They are the wings.
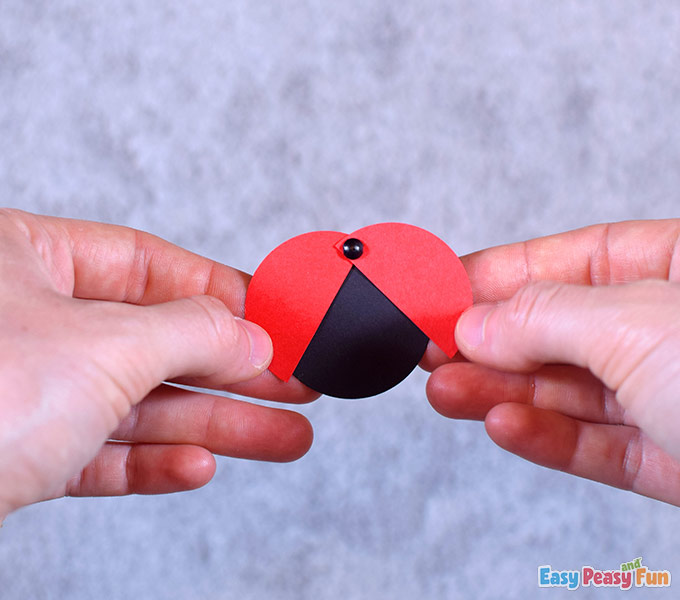
Connect the wings with a split pin at the top, and then push the split pin through the black circle and split its ends …
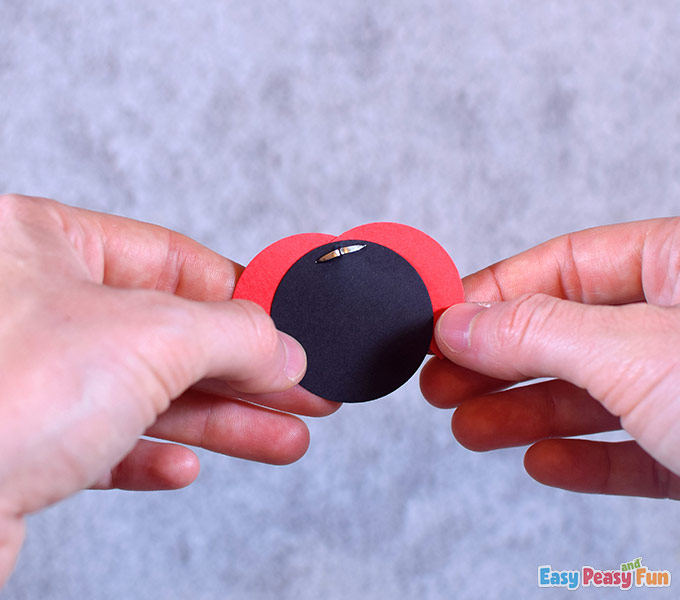
… so the wings stay attached to the body.
Draw and cut out some tiny black circles.
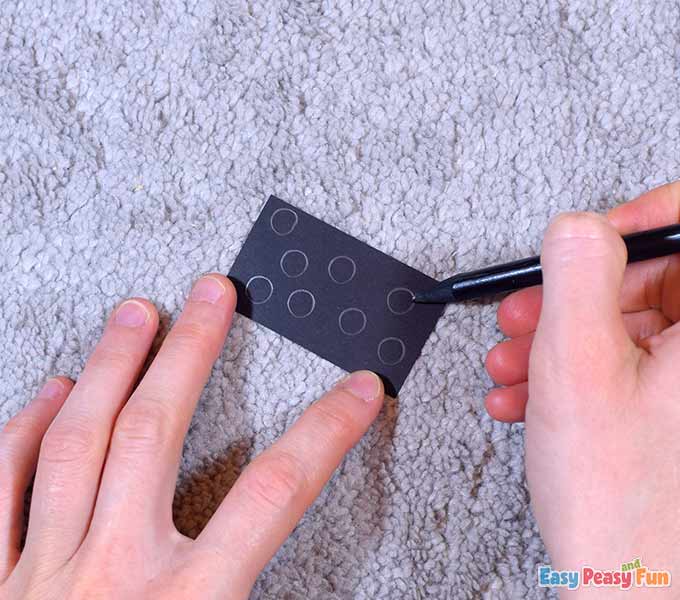
Glue these circles on the wings.
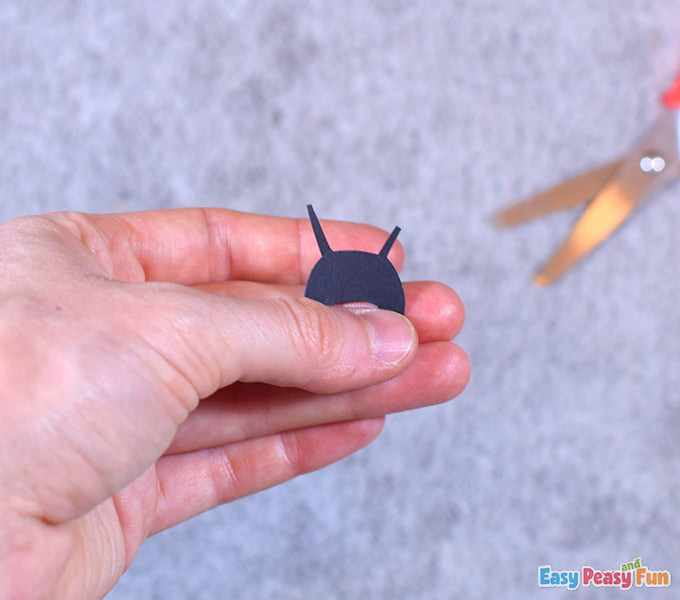
On the black cardstock, draw and cut out the head with two antennae.
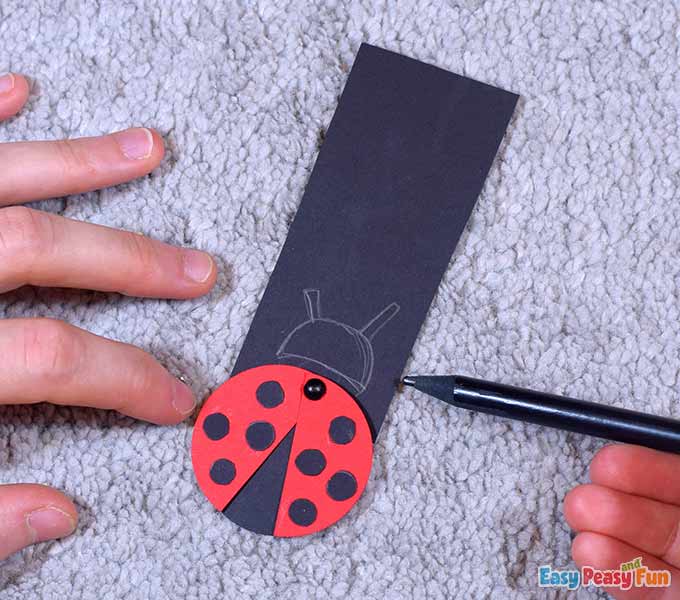
Glue the head to the ladybug’s body.
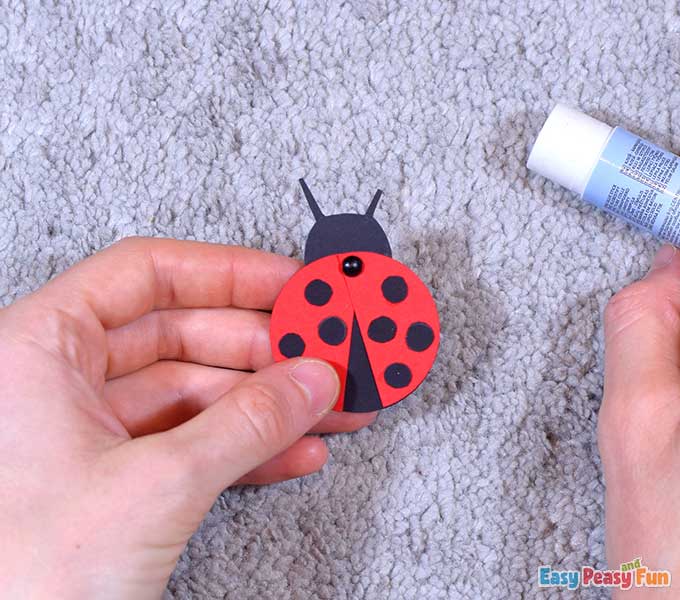
Attach the googly eyes on the head.
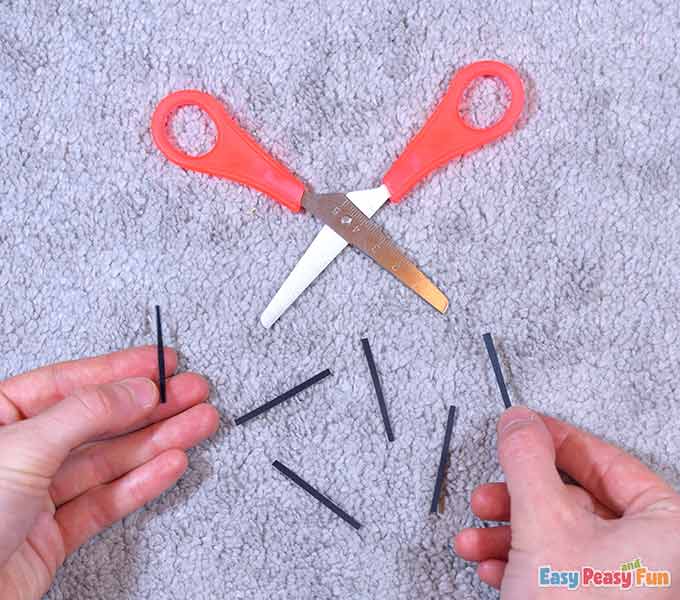
Cut out six thin strips. All of them are approximately 3,5 cm long. These are the legs.
Glue them on the ladybug, three on the left side, and three on the right side of the body.
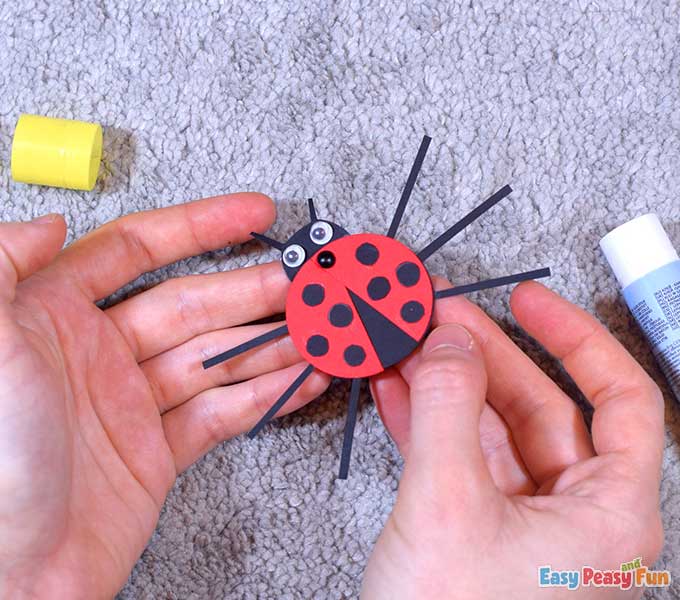
Fold the bottom parts of the legs as shown.
Glue the ladybug on the green circle. (Notice how we bent the legs a bit so we can glue them on the paper).
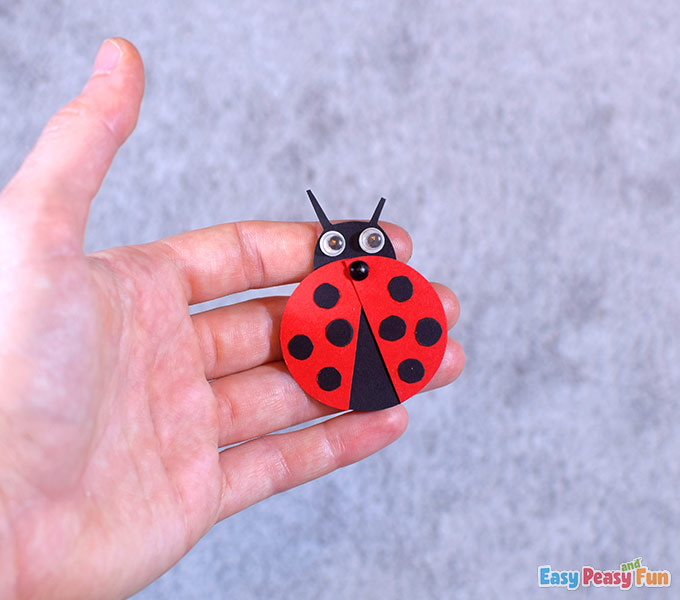
Your 3D paper ladybug is all done.
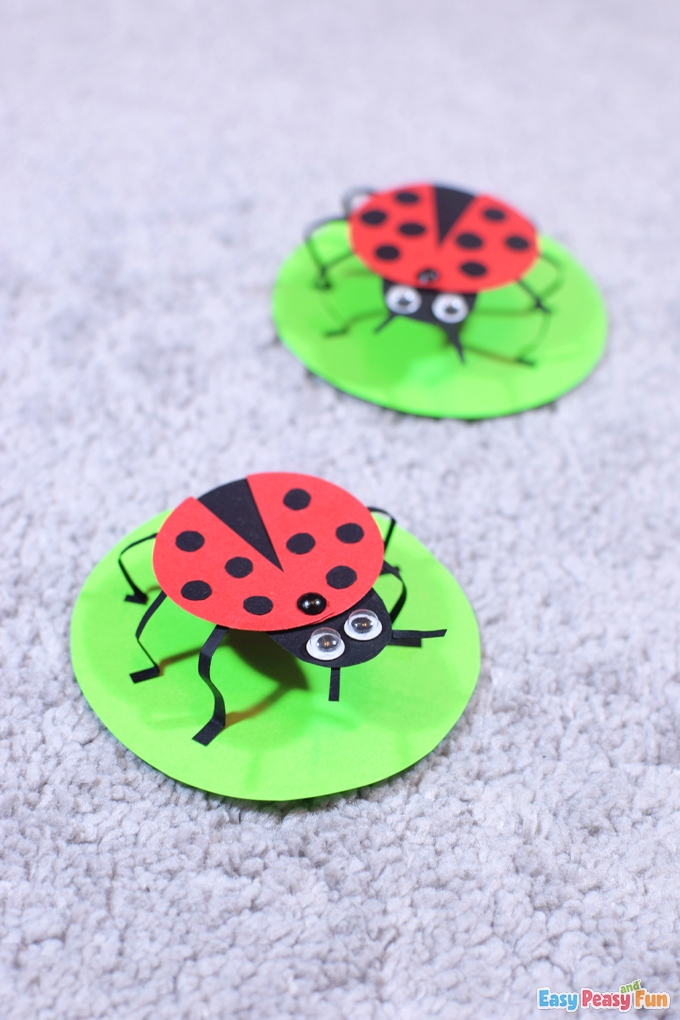
Happy spring!
Get your 3D Paper Ladybug Craft Template Here
Want instant access to all of our printable crafts, activities, and resources?

With thousands of crafts, activities, worksheets, coloring pages, and drawing tutorials to print, you will always have just the resource you need at your disposal. Perfect for parents and teachers alike!