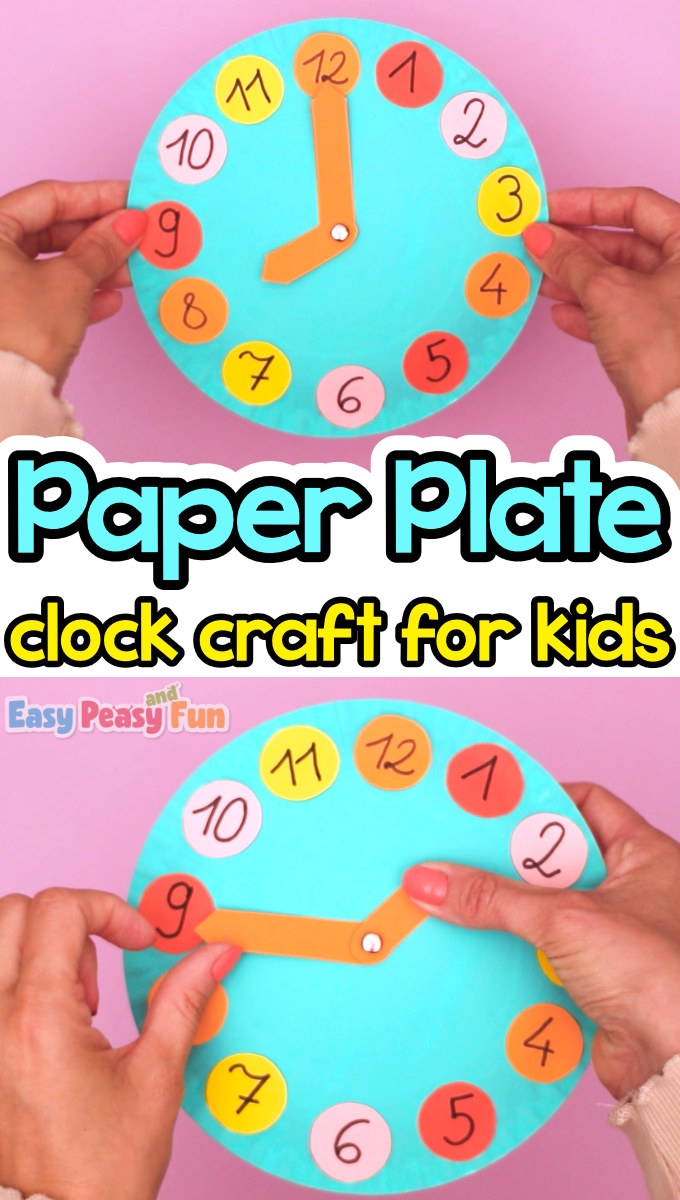
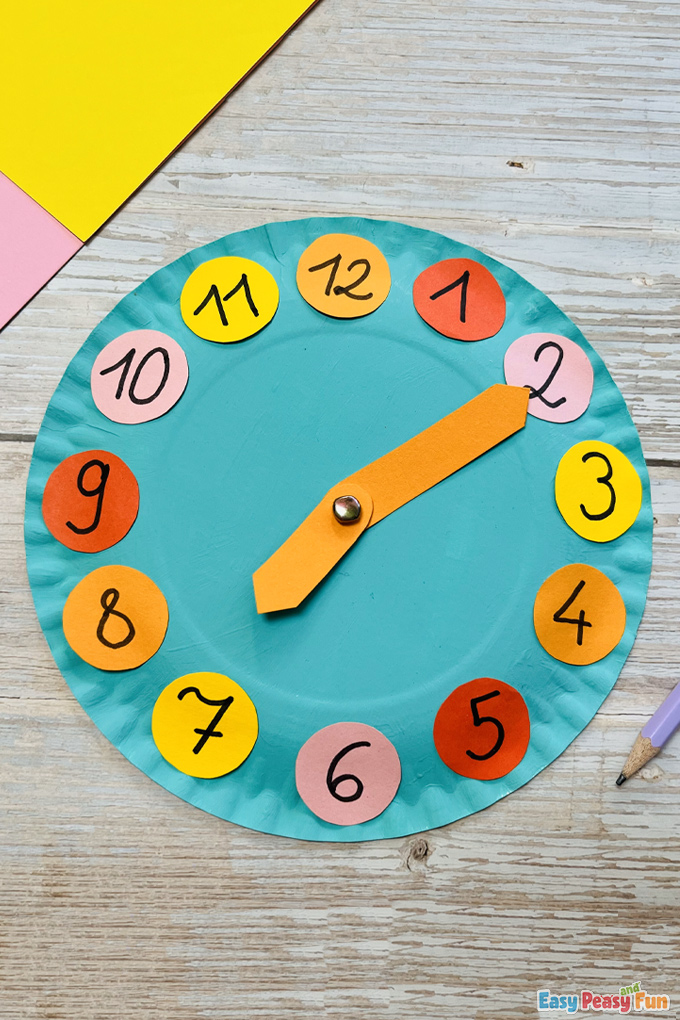
Time flies when you’re having fun, and what better way to make learning to tell time an exciting adventure than with a hands-on craft that’s as enjoyable as it is educational? Make this paper plate clock craft together with your kids and transform simple materials into a fun educational aid.
This craft combines creativity and learning in a unique way. Watch as your little ones engage in the mesmerizing process of crafting their very own paper plate clocks, and then move the clock hands and tell time.
This is a great time-telling activity to make in the classroom as each child can personalize their clock.
*This post contains affiliate links*
Telling time can be a tough skill to master, so whatever makes it more fun is a great idea. Paper plate crafts are very versatile, and the shape of paper plates just calls for transforming one into a clock.
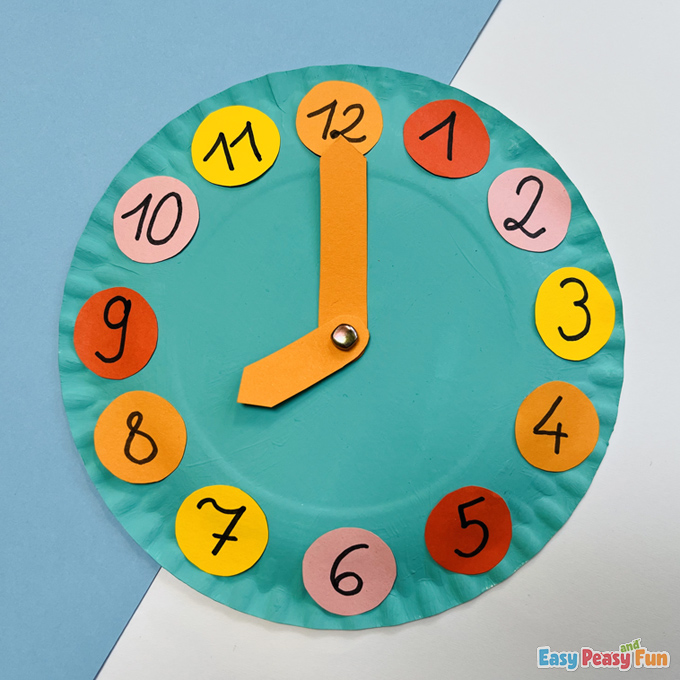
We kept it simple with this clock, but your kids can go wild with their clocks. They can even make different characters instead of sticking with one color.
How to Make the Paper Plate Clock
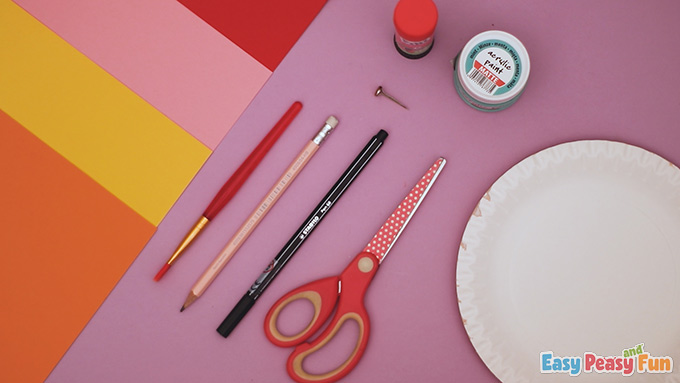
What you need:
- pencil
- scissors
- glue stick
- paper plate
- black marker
- paintbrush
- green acrylic paint
- color paper (orange, yellow, pink, and red)
- large split pin
Step by Step Tutorial
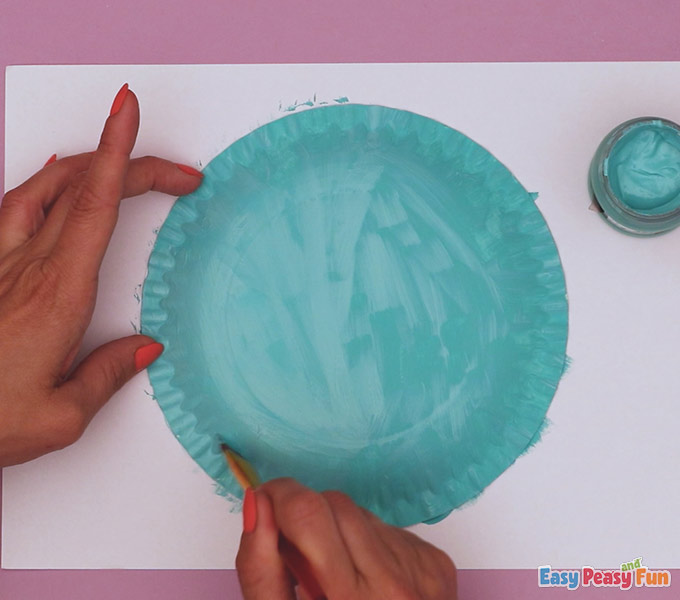
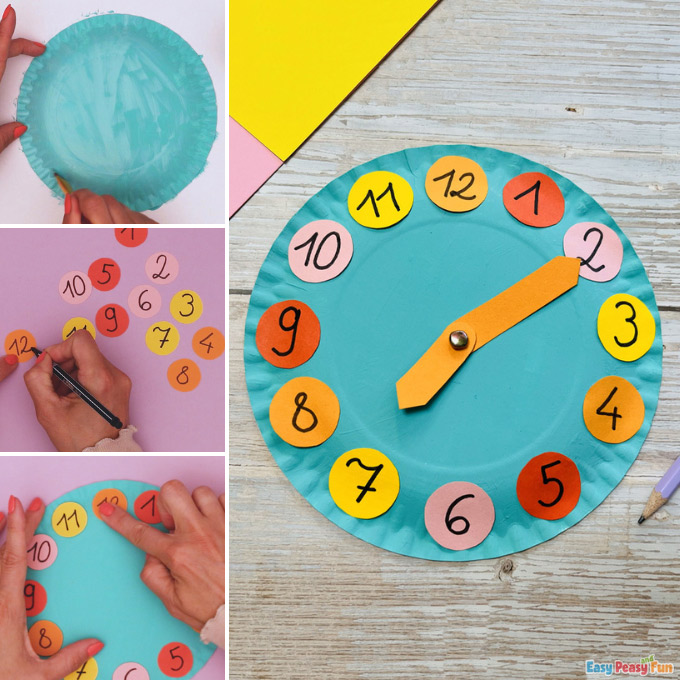
Have the kids paint their paper plate. This is a chance for them to make their clocks personal; have them pick their favorite colors or even paint their favorite characters or animals on the paper plate.
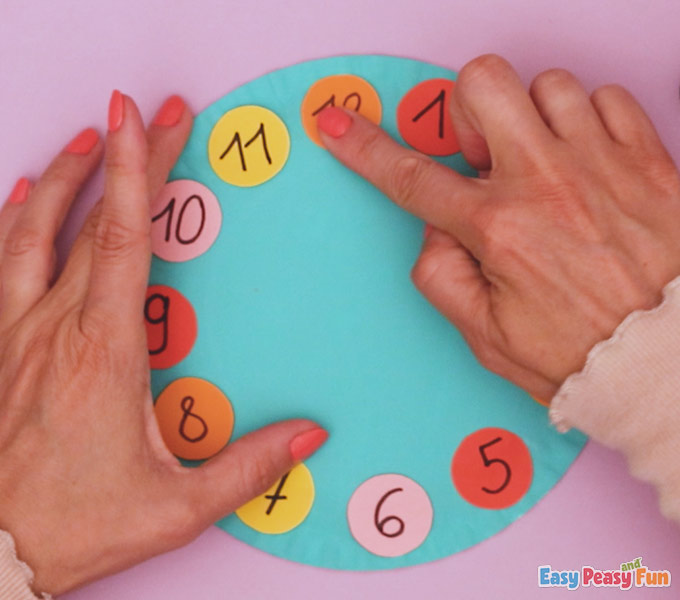
Prepare circles for the numbers on the clock. You can also have kids write down the numbers directly on the paper plate.
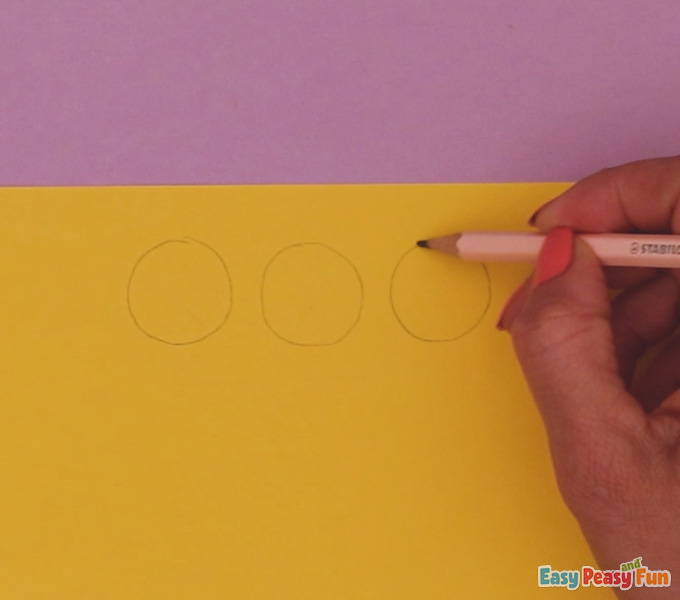
Write the numbers in bold.
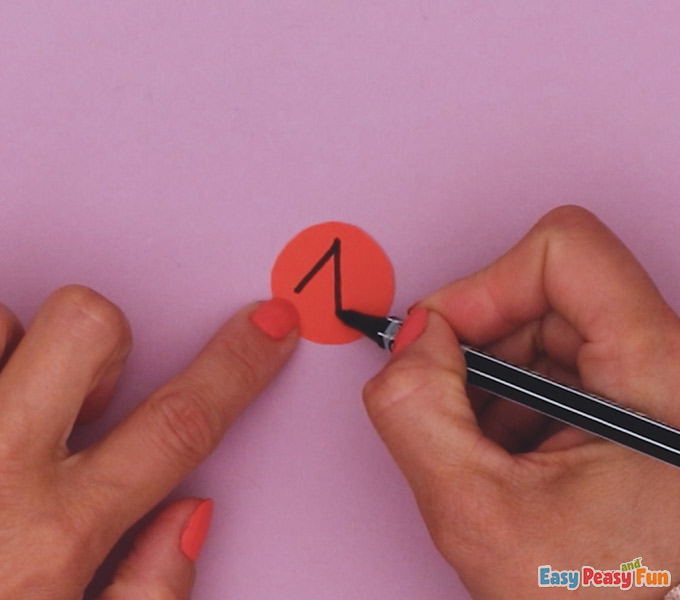
You can also use stickers and foam stickers to make the numbers.

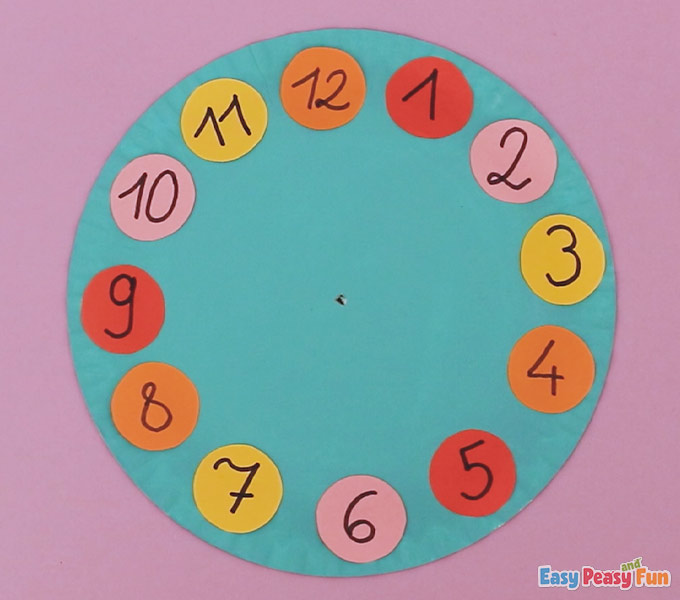
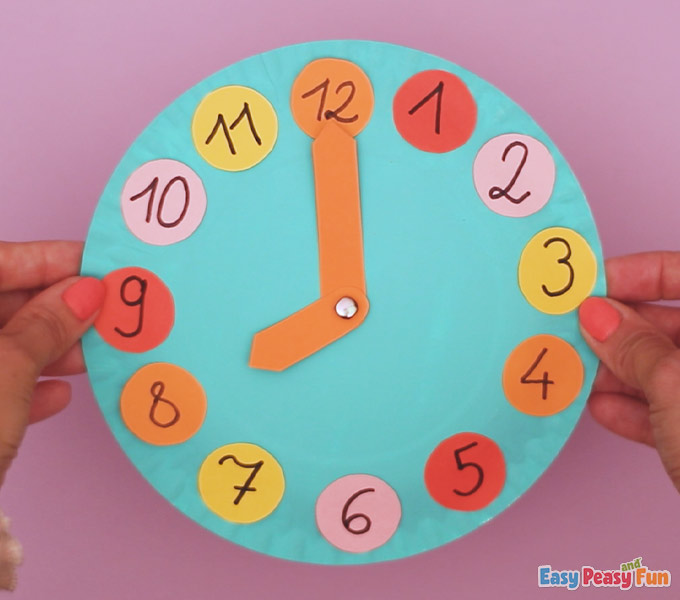
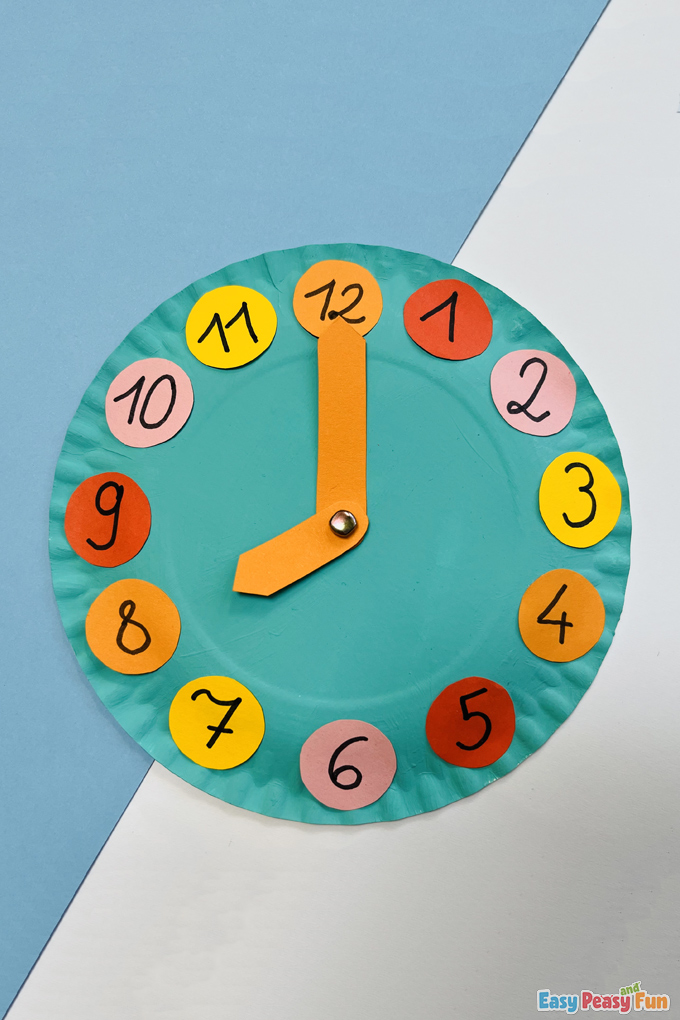
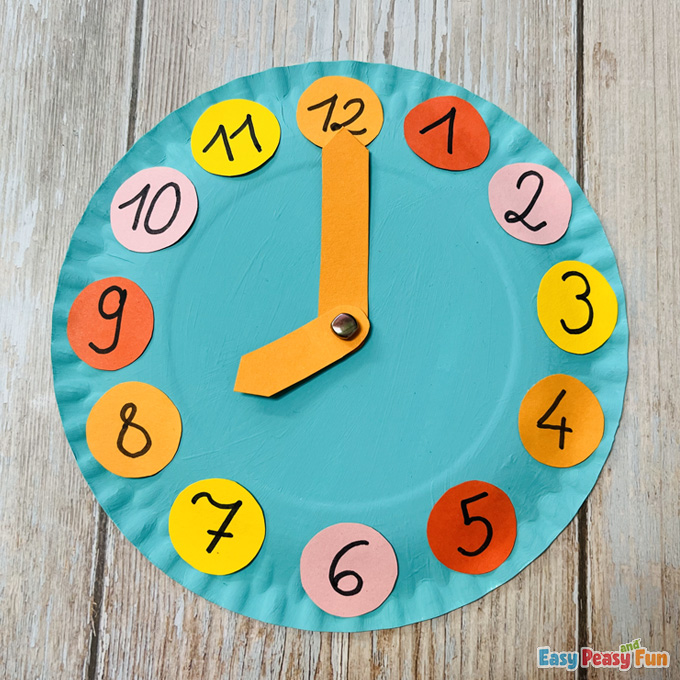
Add the numbers to the paper plate clock.
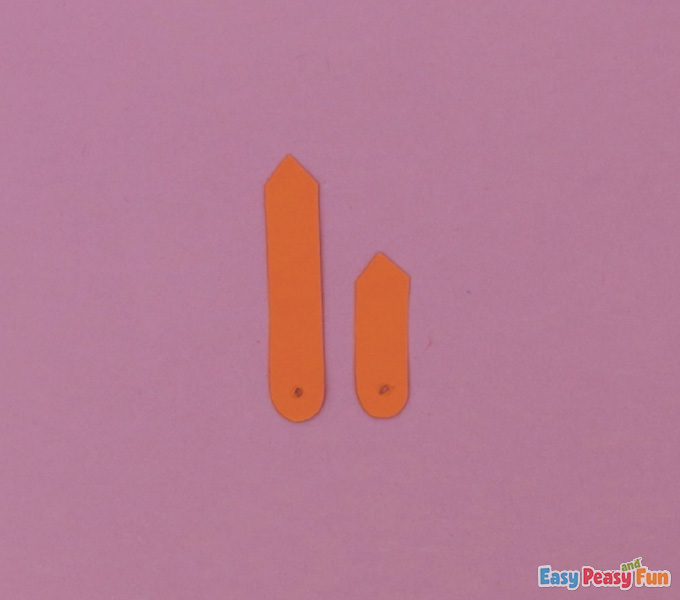
Draw a small hand and a large clock hand on cardstock.

Cut them out. You can even laminate them. Punch holes through the hands (adults).
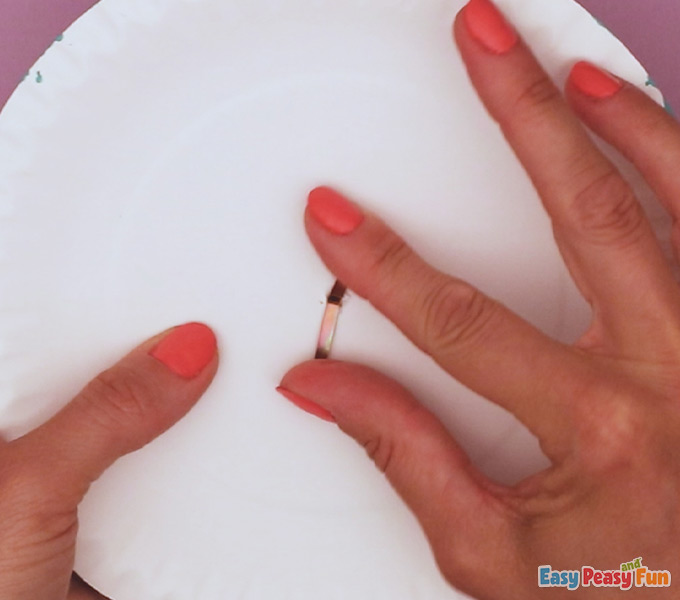
Punch a hole in the middle of the paper plate (adult help).
Push the split pin through the hands and through the paper plate.

Secure the split pin.
All done, your paper plate clock craft is complete and it’s ready to help your kids with telling time.
Want instant access to all of our printable crafts, activities, and resources?

With thousands of crafts, activities, worksheets, coloring pages, and drawing tutorials to print, you will always have just the resource you need at your disposal. Perfect for parents and teachers alike!