Whether you are helping with a school volcano, building a piñata, or creating home decor, the success of your project depends on your adhesive. Most people use the terms “paper mache glue” and “paper mache paste” interchangeably, but they actually serve different purposes.
In this guide, we will cover the three essential recipes every parent needs: a quick no-cook glue, a strong cooked paste, and a thick pulp paste for smoothing out imperfections.
Why We Love Flour & Water Paste

- Kid-Safe & Non-Toxic: Since it’s made from food ingredients, it’s perfectly safe for little hands.
- Super Cheap: It costs pennies to make compared to store-bought white glue.
- Eco-Friendly: It’s biodegradable and better for the environment than synthetic adhesives.
- Traditional Strength: This recipe is the classic method used for generations to create durable art.
1. The Easy Paper Mache Glue (No-Cook Method)
This is the “go-to” for parents. It’s fast, requires no heat, and is ideal for lightweight crafts like balloon-based piggy banks.
Ingredients:
- 1 cup All-Purpose Flour
- 2 cups Water
- Optional: 1 tablespoon of salt (helps prevent mold in humid areas).
Quick Instructions:
- Whisk: Place the flour in a bowl and gradually pour in the water.
- Smooth it out: Whisk vigorously until the mixture is the consistency of smooth pancake batter.
- Use: You’re ready to dip your newspaper strips and start crafting!
Tip: An electric mixer can be your best friend here.
2. The Heavy-Duty Paper Mache Paste (Cooked Method)
When your project needs extra “muscle”—like a large sculpture or a structural base—you want a paste. By heating the flour, you release the natural starches, which creates a much stronger bond than the raw mixture.
Microwave Method (The Fastest Way):
- Mix 1 part flour with 2 parts water in a microwave-safe bowl.
- Microwave on high for 30–40 seconds, then remove and stir.
- Repeat this 2–4 times until the mixture thickens into a “thick soup” or custard consistency.
- Let it cool completely; it will thicken even more as it rests.
Stovetop Method:
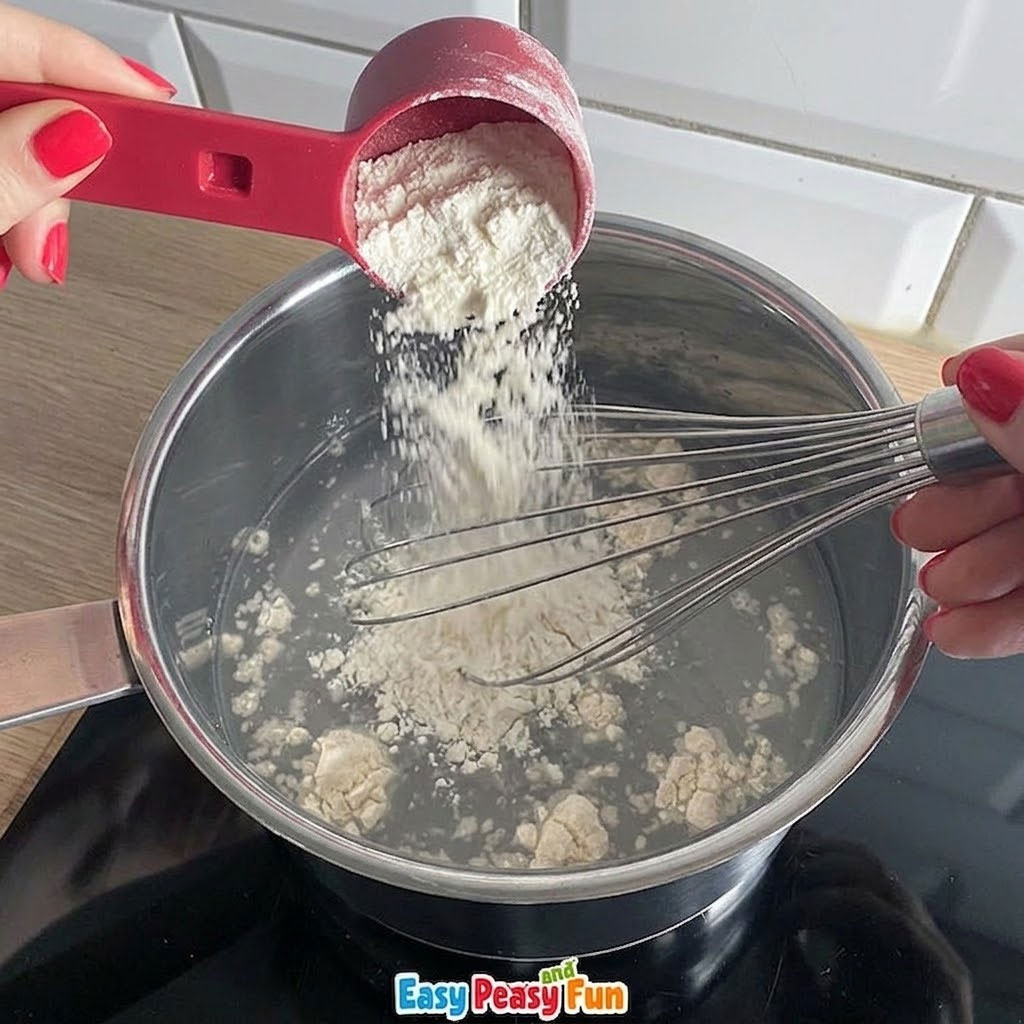
- Whisk your flour and water in a saucepan over low heat.
- Stir continuously to prevent burning until it reaches a thick, smooth consistency.
3. Thick Paper Mache Paste/Pulp (For Smoothing & Details)
Standard paper mache can often look lumpy. To get a professional, smooth finish, you can create a thick paper mache paste (pulp) to fill in gaps and imperfections. This is where those old egg cartons come in handy! Newspaper and paper work as well, but with egg cartons, half of the job is already done.
Instructions:
- Soak: Tear egg cartons or scrap paper into tiny pieces and soak them in hot water until mushy.
- Blend: Use an old blender to pulse the soggy paper into a grey “mash.”
- Strain: Squeeze out the excess water until you have a damp paper ball.
- Mix: Combine this paper fiber with your Cooked Paste (Recipe #2) until it reaches a “spackle” or “putty” consistency.
- Smooth: Use this thick paste to fill in the “steps” between your newspaper strips or to mold 3D details like noses or ridges.
Pro-Tips for Success
Common Mistakes to Avoid (Crafter-to-Crafter!)
To keep your kitchen from becoming a sticky disaster zone, keep these three tips in mind:
- Don’t Over-Saturate: Don’t let the paper strips get “soggy.” Dip them in, then use your fingers to “squeegee” off the extra paste so they are just damp.
- The “Cold” Test: Your project might look dry, but if it feels cold to the touch, there is still moisture inside. Let it dry fully before painting, or it might collapse!
- Watch for Mold: If you live in a damp climate, the organic flour can grow mold. Always add salt to your recipe and use a fan to speed up the drying process.
Storage Tips
You can make your paste ahead of time! Store it in an airtight container in the fridge for up to 7 days. If it separates, just give it a quick whisk before your next crafting session.
The Paper Mache Troubleshooting Guide: 5 Common Fixes
Even with the best recipe for paper mache, things can sometimes go sideways. If your project is leaning, smelling, or just won’t dry, here is how to fix it like a pro.
1. “My project is growing mold!”
The Cause: If you live in a humid climate or used too many layers at once, the flour (which is organic) can stay damp for too long and begin to sprout mold.
- The Fix: If the mold is just starting (small black dots), you can wipe it with a 50/50 mix of water and white vinegar.
- The Prevention: Always add a tablespoon of salt to your paper mache paste. Salt acts as a natural preservative. Also, use a floor fan to keep air circulating while it dries.
2. “Why is my paper mache soft or soggy?”
The Cause: You likely skipped the “Squeegee” step! Too much liquid in the paper prevents the fibers from hardening.
- The Fix: Stop adding layers immediately. Place the project in a sunny window or near a dehumidifier.
- The Prevention: When dipping your newspaper, run the strip between your index and middle fingers to wipe off all the excess glue. The paper should be damp and tacky, not dripping wet.
3. “The surface is really lumpy and uneven.”
The Cause: Using large, cut strips of paper or not overlapping them correctly.
- The Fix: Use the Thick Paper Mache Paste (Pulp) recipe we discussed earlier. Smear it over the “dips” like wood filler or spackle. Once it’s bone dry, you can actually use fine-grit sandpaper to sand it smooth before painting.
- The Prevention: Always tear your paper by hand rather than cutting with scissors. Torn edges lay much flatter than sharp, cut edges.
4. “My balloon base popped and the project imploded!”
The Cause: If the paper mache is still slightly damp when the balloon loses air (or if you pop it too early), the structure will collapse inward.
- The Fix: If it’s only a small dent, you can sometimes push it back out from the inside using a wooden spoon. If it’s a total collapse, you may need to start over.
- The Prevention: Perform the “Knock Test.” Gently rap your knuckles on the project. If it sounds hollow and “woody,” it’s ready. If it feels soft or sounds like a dull thud, it needs another 24 hours.
5. “The paint is peeling or the newsprint is showing through.”
The Cause: Newspaper is very absorbent and can “drink” your paint, leaving it looking dull.
- The Fix: Apply a layer of white acrylic primer (or Gesso) before your final colors.
- The Prevention: For the very last layer of your project, use white paper towels or plain white printer paper with your paper mache glue. This creates a blank white canvas that makes your colors pop!
Want instant access to all of our printable crafts, activities, and resources?
With thousands of crafts, activities, worksheets, coloring pages, and drawing tutorials to print, you will always have just the resource you need at your disposal. Perfect for parents and teachers alike!