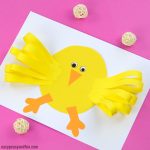
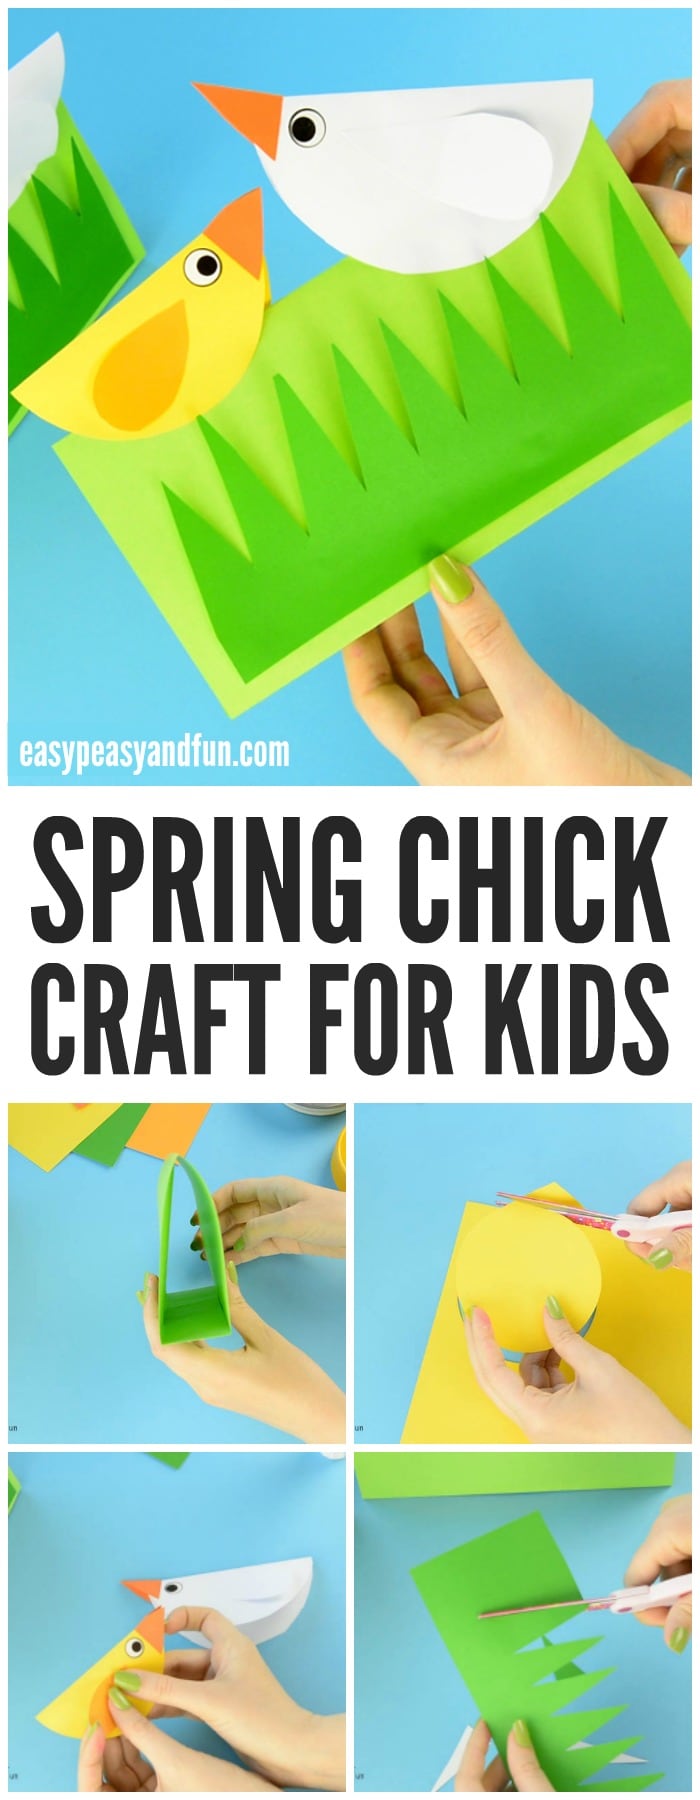
This spring chick craft will make a wonderful Easter display!
We love making easy paper crafts, especially the 3D kind, and this craft idea is a nice open ended project that kids can make in their own way!
*this post contains affiliate links*
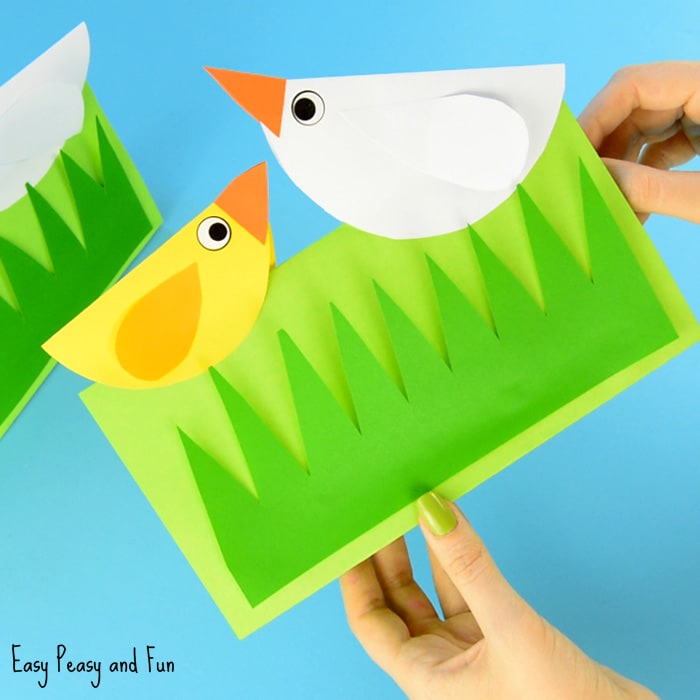
Making a baby chick and a mama chicken display is great for Easter time.
We hope this simple craft idea will inspire a whole lot of different designs your kids will be making (we also plan to share a few more ideas). We really think this is the “essence” of crafts, to see how a project is made, to make it and then to apply the technique on your own creations.
This craft can be easily made by preschoolers (some help with folding the base might be needed), kindergarten and older kids. As with all craft ideas, some modifications are needed to make the craft fit a specific age range (using larger circles, omitting the grass, only making one chick…). Older kids can even add more details such as flowers, Easter eggs in the grass…
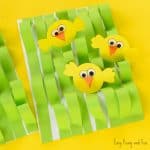
This project is fun for the classroom, you can have each kid create their own Spring Chick Craft and then you can place them one next to the other and in rows to make one large and gorgeous chick filled meadow.
Ready to make your own display? Let’s make it!
Also if you would love to see a printable template for this craft do let me know in the comments section!
Let’s craft!
Spring Chick Craft
What you need to make this spring chick craft
- sheet of green paper (we used plain printer paper)
- dark green paper
- white paper
- orange paper
- yellow paper
- marker for the eyes or wiggle eyes stickers
- glue
- scissors
- something to make a circle shape with
- pencil
We have prepared both a video tutorial for your convenience and a step by step instructions with photos, where we also share more tips and tricks to make this craft.
Watch the Video Tutorial
Or Follow These Step by Step Instructions
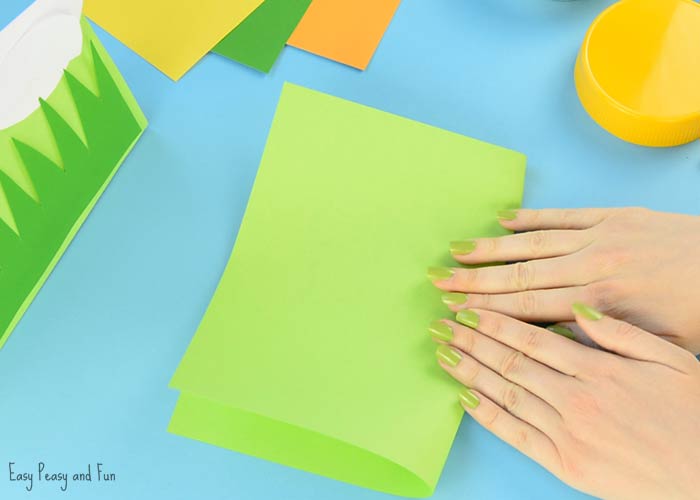
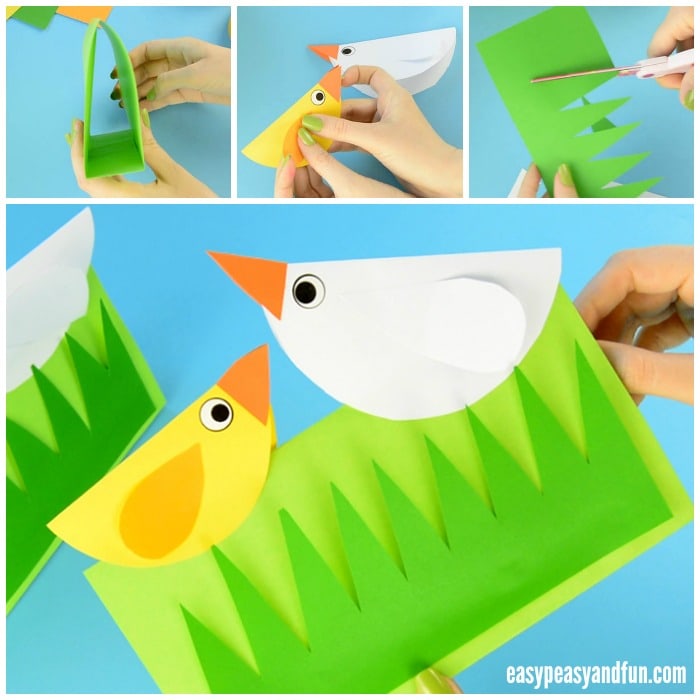
Take a sheet of green paper and fold it in half.
Run your fingers along the fold to make a crease.
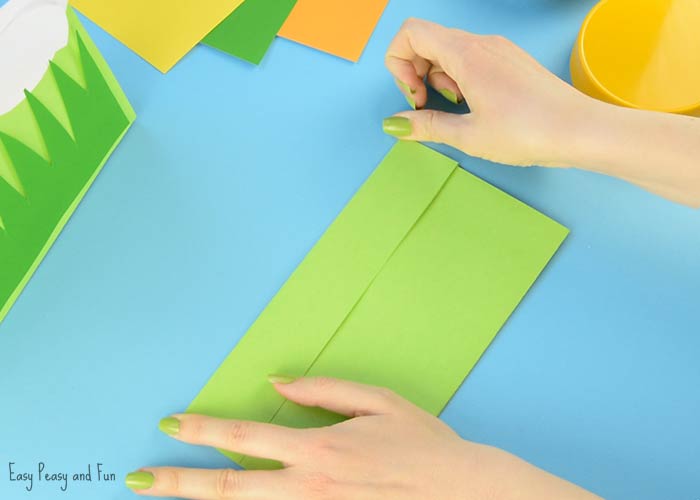
While the paper is folded in half, fold again at the bottom – one the open side (about 3 fingers wide).
Unfold the paper.
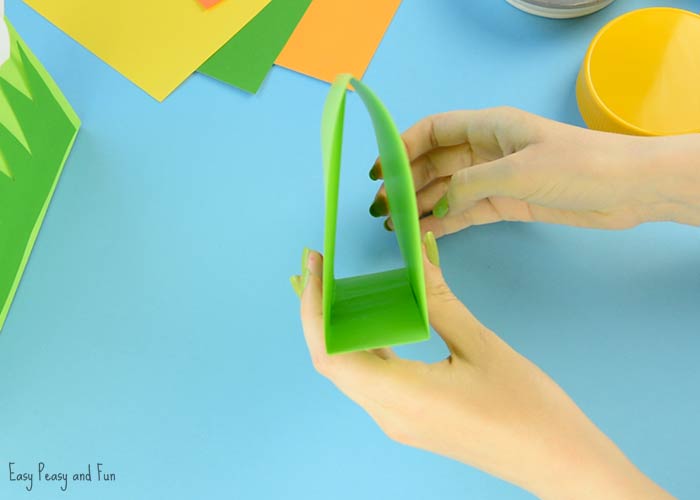
Glue into a triangle tunnel.
Apply glue along one of the “flaps” you folded in the previous step and glue on the other one. You should get a shape as shown on the picture bellow-.
This makes our spring chick craft base.
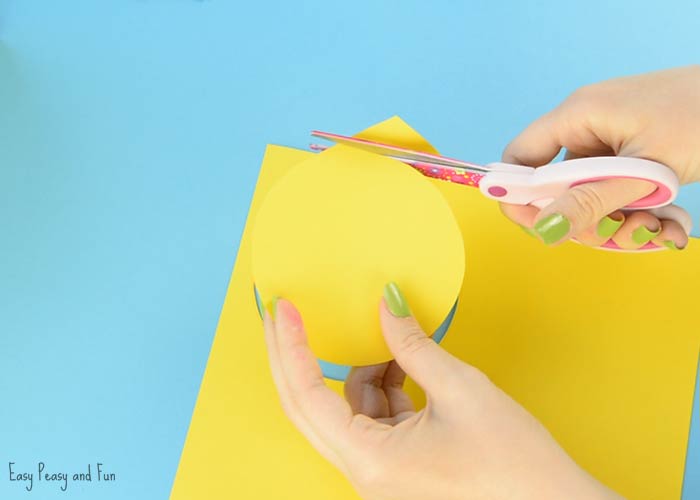
Now it’s time to make a yellow circle.
This circle should be smaller than the white one, as well chicks are smaller than chickens.
We used a jar lid for this one.
Trace it on the paper and cut the circle out.
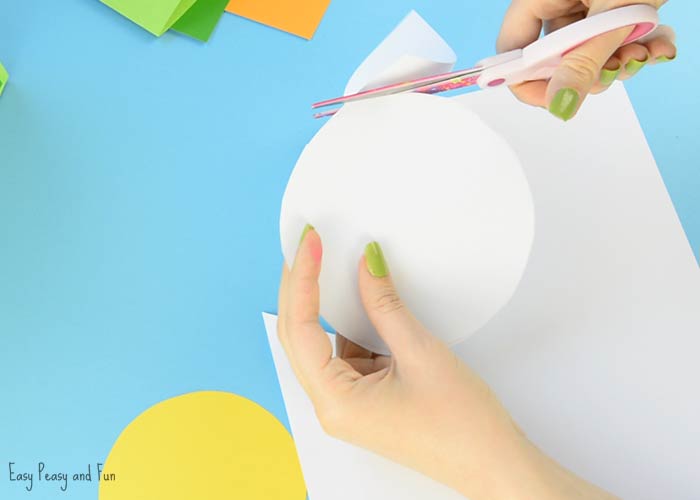
Use a bigger round object to trace the white circle.
We used a cookie jar lid.
Cut it out.
Other objects that can come in handy are: glasses, plates, cream containers, bottles…
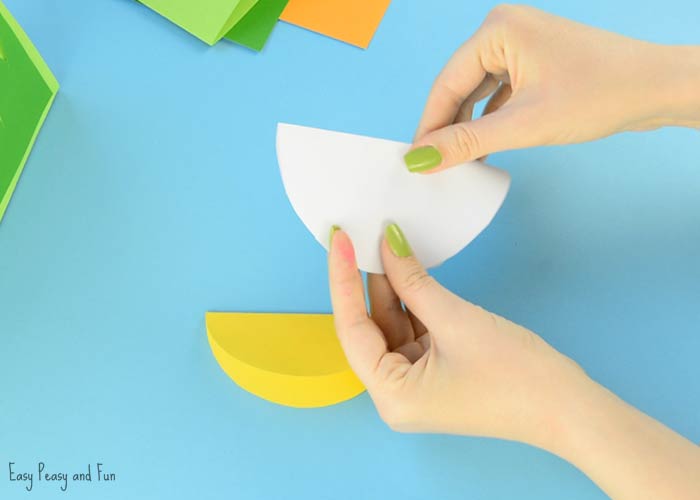
Fold the circles in half.
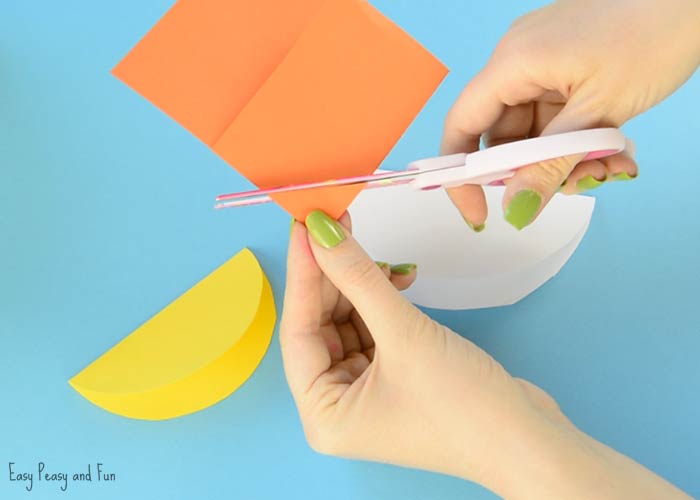
Cut a beak out of orange paper and glue it onto the chick.
Do the same with the chicken.
Cut the wings and glue them on the chick and chicken too.
Make the eyes!
We love using stickers for those but drawing your own or using goggle eyes is certainly fun too!

Apply a bit of glue on the top of the green base (or on the chicken) and glue the chick to the base.
Do the same with the chicken.

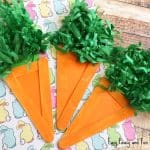
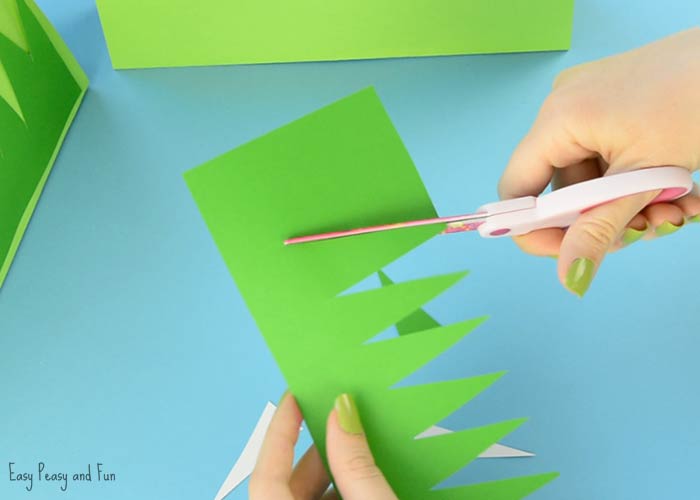
Take darker green paper, cut a strip that’s thinner than the height of the green base.
Cut out long triangles to get the grass look.
Glue on the green base.
Your Spring Chick Craft is done and ready to be displayed!
Want instant access to all of our printable crafts, activities, and resources?

With thousands of crafts, activities, worksheets, coloring pages, and drawing tutorials to print, you will always have just the resource you need at your disposal. Perfect for parents and teachers alike!