Why not make on of the loveliest (probably loudest to ha) animals in the world? Making this pom pom peacock craft is really easy, the instructions might seem really long but you’ll have this beauty made in no time!
We love making peacock crafts, I mean what’s not to love about them?

*this post contains affiliate links*
Pom Pom Peacock Craft
Materials:
- Turquoise/Teal Yarn (Bernat in Peacock color used in this tutorial)
- Colorful Yarn (Bernat in Whirlpool color used in this tutorial)
- google eyes
- orange, teal, dark blue and green felt
- Feathers
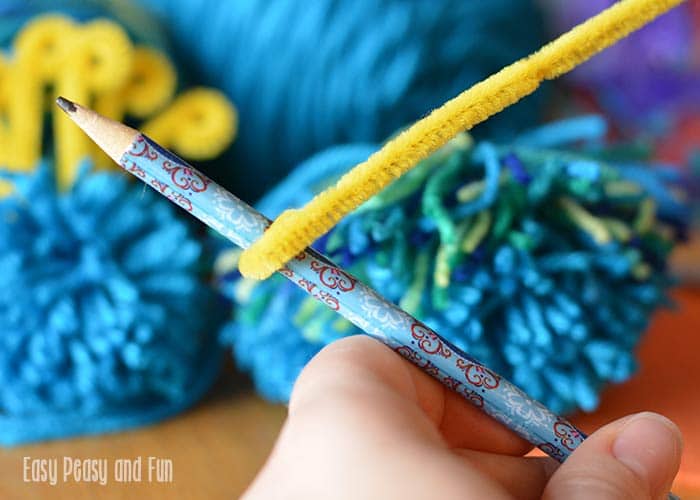
- 2 yellow chenille stems (12″ long)
- hot glue
- Pencils
- Cardboard
- Scissors
- Circle Template, such as a bowl, mine was 4.5″ in diameter
Pom Pom Notes:
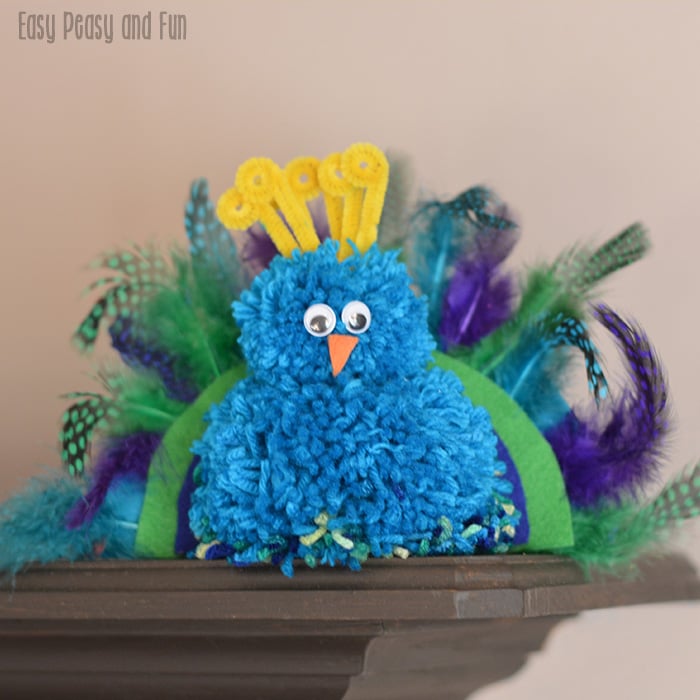
Body: 7″ book used. Wrapped 50 times with the multicolor. Covered with 100 wraps of the teal yarn. Cut off book. Cut in half, Stack, keeping multi color yarn together (if you wish). Tie in center,hold onto tail and trim (you can see this more in depth in our pom pom snowman tutorial).
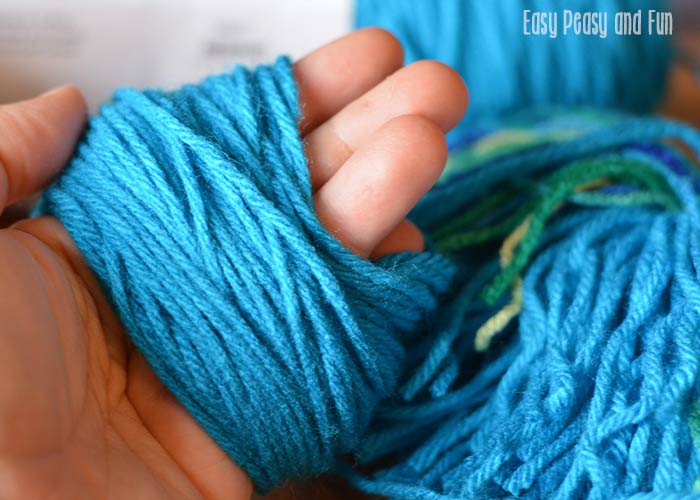
Head: Wrap teal yarn around 4 fingers (as shown), 100 times. Remove from hand, cut in half, and stack two piles together. Tie in center and hold onto tail and trim.
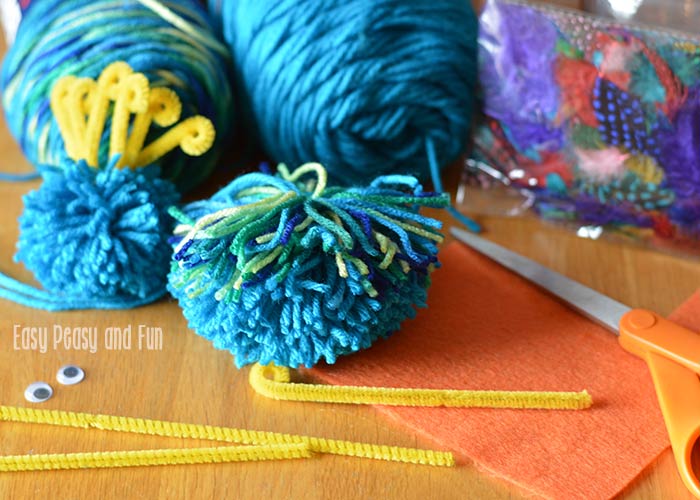
To make Head Thingie (I don’t even know what this is called!)
Cut two yellow chenille stems in half. Fold the half in the center and using a pencil, roll down the ends. Repeat so you have three folded pieces.Stack together and tie onto the head with the tail yarn.
Feathers:
Trace a half circle onto a piece of cardboard using a bowl or glass. My circle was a little bigger than the body of the peacock. Cut out. Place the cardboard onto the dark blue felt and cut out a piece the same size.
Place the blue felt onto the green and cut a half circle about 1/2″ bigger all the way around.
Place the green felt onto the teal and cut a teal piece about 1/2″ bigger than the green.
You should be able to stack up your felt pieces and create somewhat of a “rainbow.” Place the cardboard in between the teal and green piece. Attach with hot glue.
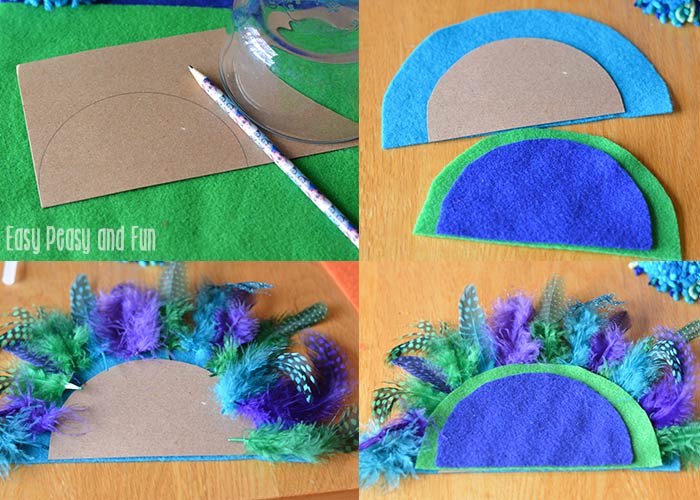
Lay your feathers around the cardboard and glue with hot glue. Affix the green and blue pieces onto the cardboard. You now have the feather back. The cardboard will create stability in the feathers.

Attach the head to the body. The easiest way is to set your body on the edge of the table, fluff the yarn and set your head on top. Affix the head to the body with hot glue.
Now that your body is standing up, attach the feathers. Put hot glue on the back of the body and attach feathers. It works best if your peacock is sitting up so you can get your feathers even with the table/flat surface.
Cut a tiny triangle beak out of yellow felt. Attach two google eyes and the beak and you’re all done with your pom pom peacock craft!
Want instant access to all of our printable crafts, activities, and resources?

With thousands of crafts, activities, worksheets, coloring pages, and drawing tutorials to print, you will always have just the resource you need at your disposal. Perfect for parents and teachers alike!